
Key Takeaways: The 30-Second Brief
Difficulty: 5/9 (Major Climb). Not technical, but endurance-heavy.
Route: Traverse (Entry: Kayapa, N. Vizcaya | Exit: Itogon, Benguet).
Budget: Approx. ₱3,500 – ₱4,000 (Safe Budget per pax for group of 10).
Best Time: Nov–Feb (Pine ridge weather) or Feb–Apr (Dry season).
Warning: The descent to Itogon is 16km long. Prepare your knees.
1. Introduction: More Than Just a Pine Forest
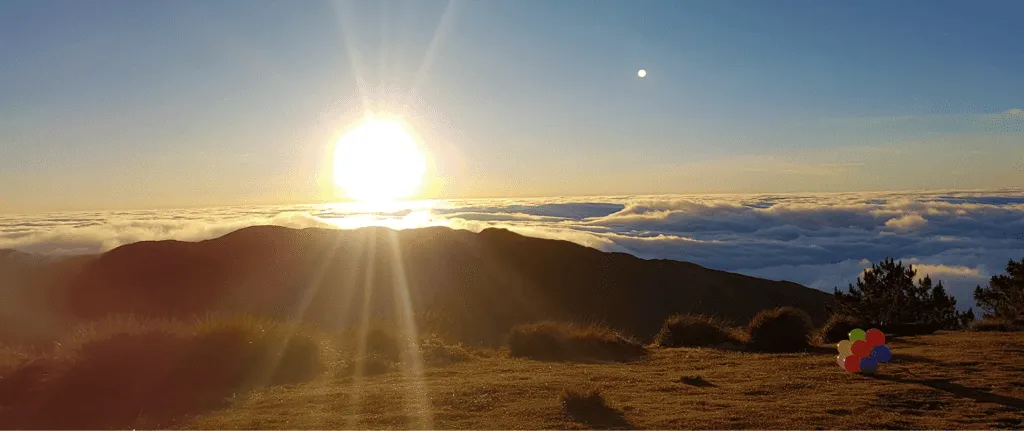
Mt. Ugo is not simply a leisure hike; it is a 2,150 MASL historical landmark and a 32-kilometer traverse that physically bridges the humid plains of Nueva Vizcaya and the frigid peaks of Benguet.
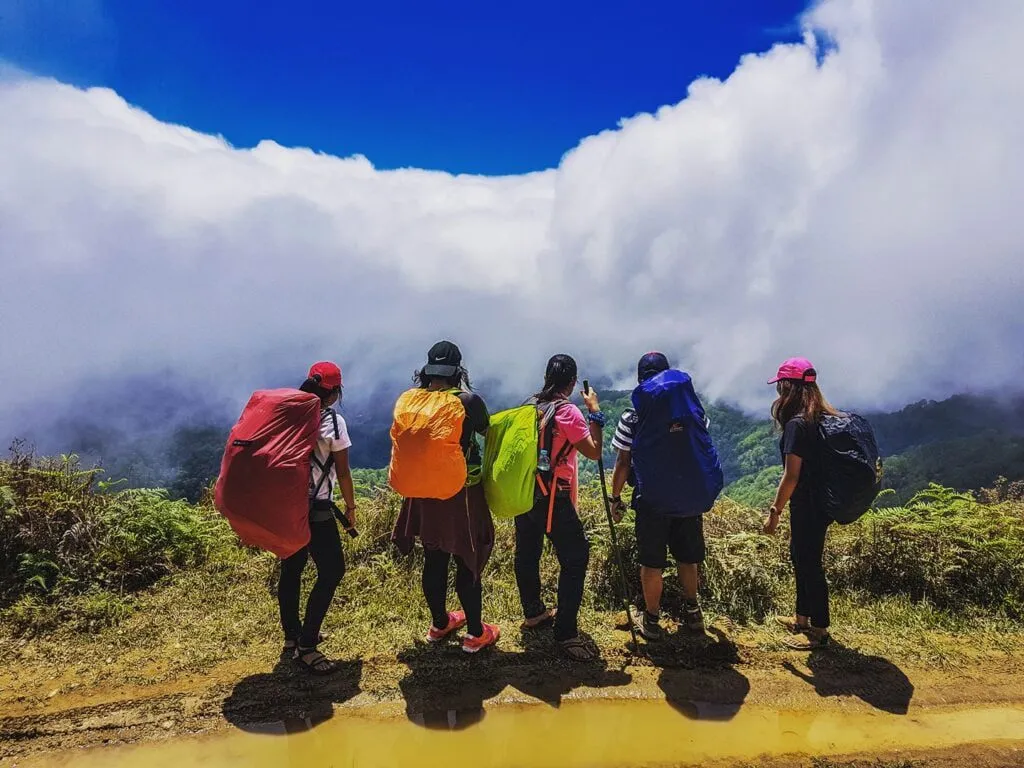
For most mountaineers, the journey begins with a sensory shock. You start your trek in the warm, sticky humidity of Kayapa (1,100 MASL), where the air feels thick with the heat of the Cagayan Valley. But as you ascend past Indupit Village, the atmosphere shifts entirely. The humidity evaporates, replaced by the crisp, pine-scented air characteristic of the Cordillera Central. By the time you reach the Domolpos Saddle campsite, you aren’t just cooling down—you are bracing against a “wind tunnel” effect so powerful it has been known to snap the poles of ultralight tents.
A Beauty Born from Tragedy
While today’s hikers come for the “sea of clouds,” Mt. Ugo’s entry into the Philippine mountaineering map is rooted in sorrow. The trails we walk on were largely popularized during the search and rescue operations for Philippine Airlines Flight 206, which crashed into the mountainside in 1987. A concrete marker at the summit now stands as a quiet memorial to the 50 lives lost, transforming the peak into a place of remembrance.
The “Ugoan” Legacy
The mountain’s name itself commands respect. Etymologically derived from the Ibaloi word Ugoan—meaning “the act of cutting the neck”—oral history suggests this was once a strategic ground where indigenous defenders beheaded intruders to protect their ancestral domain.
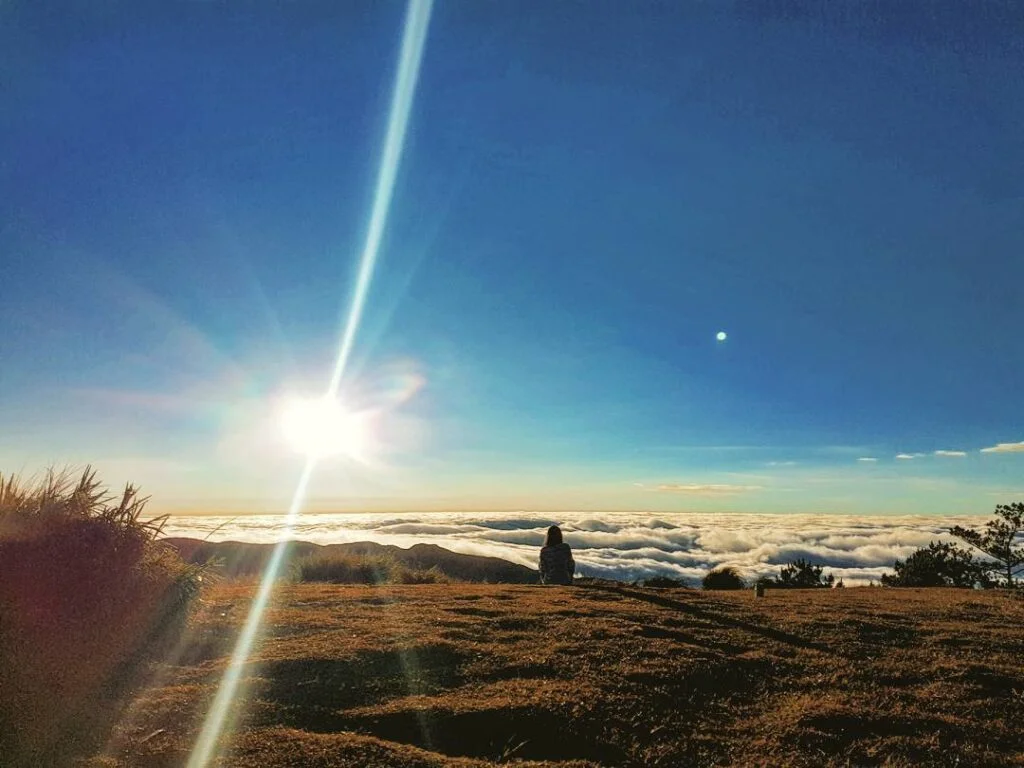
The Reality Check: This duality defines the Mt. Ugo experience. It is a place of serene, sweeping pine forests that rival Mt. Pulag, yet it possesses a somber, formidable history that demands a solemn respect from every visitor. Whether you are here for the physical challenge of the traverse or the haunting beauty of its history, Ugo leaves a mark.
Table of Contents
2. Pre-Climb Essentials: Is This Hike For You?
How difficult is the Mt. Ugo Traverse?
The Mt. Ugo Traverse is officially rated a 5/9 difficulty (“Major Climb”) not because of technical terrain, but due to the sheer physical endurance required to cover 30–33 kilometers over two days.
While you won’t need ropes or harnesses to navigate the trails of Kayapa and Itogon, you must be prepared for a “marathon-like” effort. The trail profile is deceptive: Day 1 involves a relentless ascent gaining over 1,000 meters in elevation, while Day 2 demands a punishing 16-kilometer descent. This makes Ugo accessible to beginners, but only those with above-average fitness and mental fortitude. If you struggle with knee issues, this mountain will expose them.
Physical Preparation: Train for the Downhill
Success on Mt. Ugo relies less on lung capacity and more on “eccentric loading”—conditioning your leg muscles to handle the braking force of a long, steep descent.
Most hikers make the mistake of only training their cardio (running or stair climbing up). However, the primary cause of injury on Ugo is ITBS (Iliotibial Band Syndrome) or “hiker’s knee” during the descent to Barangay Tinongdan.
The “Knee Killer” Reality: The descent on the Benguet side is rocky, dry, and unrelenting. Your quadriceps act as brakes for thousands of steps.
The Workout Fix: Incorporate weighted lunges, squats, and step-downs into your routine 2–3 weeks before the climb. Do not rely solely on jogging.
Gear Requirements (The Wind Factor)
The micro-climate at the Domolpos Saddle requires a “3-Season” gear setup specifically designed to withstand gale-force winds and near-freezing temperatures.
The campsite at Domolpos sits on an exposed ridge that acts as a natural wind tunnel. I have personally witnessed ultralight tarps and budget pop-up tents collapse under the strain of the evening gusts here.
Shelter System: A free-standing, double-wall tent with sturdy aluminum poles is highly recommended. If you are using a trekking pole tent, ensure you stake it down aggressively with extra guy lines.
The Layering Paradox: You will need to manage two extremes. The open pine ridges during the day expose you to high UV levels (bring a wide-brim hat and arm sleeves), while night temps can drop to 6°C–10°C. A reliable fleece or down jacket is non-negotiable for the campsite.
Pro Tip: Pack a thermal emergency blanket even if you have a sleeping bag. The wind chill at the saddle often penetrates standard tent walls, making the ambient temperature feel much colder than the forecast.
How to Get There: DIY Logistics (Manila to Kayapa)
Step-by-Step Transport Guide (2026 Update)
To reach the Mt. Ugo jump-off, take a Victory Liner bus (Cagayan Valley route) from Manila to Aritao, Nueva Vizcaya, alight specifically at the “CCQ Bus Stop,” and transfer to a jeepney bound for the Kayapa Municipal Hall.
Navigating to the starting point requires synchronizing a long-haul bus ride with a rural jeepney schedule. Unlike hikes closer to Manila, you cannot simply “Show up and Go.” The transition from the highway in Nueva Vizcaya to the mountain town of Kayapa is the logistical bottleneck that makes or breaks your itinerary.
The Bus (Manila to Aritao)
The most reliable option is the Victory Liner fleet (Kamias, Sampaloc, or Pasay terminals) plying the Santiago, Isabela, or Tuguegarao routes.
You are not going all the way to Banaue or Baguio for this leg. You need to secure a ticket for any bus passing through the province of Nueva Vizcaya.
The “CCQ” Rule: Do not tell the conductor to drop you off at “Aritao Common Terminal.” Explicitly ask to be dropped off at CCQ (a well-known 24/7 restaurant and bus stop). This is the hiker’s junction where jeeps to Kayapa wait. If you get dropped at the town proper, you will have to take a tricycle back to CCQ.
The 3:00 AM Sweet Spot: Aim to depart Metro Manila between 9:00 PM and 10:00 PM.
Too Early (8 PM Departure): You arrive at 2:00 AM. CCQ is open, but you will be waiting 4+ hours for the first jeep, burning energy.
Too Late (12 MN Departure): You arrive past 6:00 AM. You risk missing the first public jeep and starting your hike under the midday sun.
Insider Tip: The air-conditioning on Victory Liner buses is notoriously frigid (“ref on wheels”). Pack your windbreaker in your hand-carry, not in the luggage compartment.
The Jump-off (Aritao to Kayapa)
From CCQ, you must secure a ride on a jeepney that traverses the winding Benguet-Nueva Vizcaya Road to reach the registration area.
Once you’ve had your early breakfast of mami or lugaw at CCQ, you have two choices depending on your group size:
Option A: Chartered Jeep (Highly Recommended):
Cost: Approx. ₱2,500 – ₱3,000 per jeep (One Way).
Why: You leave immediately upon arrival. The driver can stop at the Aritao Public Market so you can buy fresh produce for camp meals. You get dropped off directly at the Kayapa Police Station.
Option B: Public Passenger Jeep:
Cost: Approx. ₱150 – ₱200 per head.
Why: Cheap for solo/duo hikers.
The Catch: The jeep waits to fill to capacity (top-load included). You operate on “Filipino Time,” which can delay your trek start to 9:00 AM.
The Reality Check: The road from Aritao to Kayapa is paved but incredibly zigzagged. If you are prone to motion sickness, take your Bonamine before the jeep leaves CCQ. The hour-long ride is scenic but stomach-churning.


4. Detailed Itinerary: The Traverse (Kayapa to Itogon)
Day 1: The Ascent to the Clouds
The first day is a 14-kilometer continuous ascent starting from the humid valleys of Kayapa, transitioning through pine ridges, and ending at the wind-swept Domolpos Saddle.
06:00 AM: Registration & The “Endless” Stairs After finalizing permits at the Kayapa Police Station and doing a final gear check, the hike begins not with a trail, but with concrete stairs winding through the local neighborhood.
The Reality Check: Don’t be fooled by the cool morning air. The first hour passes through subtropical scrubland (dense vegetation), and the humidity is stifling. You will sweat through your base layer before you even see a pine tree. Pace yourself here to avoid early burnout.
11:00 AM: Indupit Village (The Transition) By mid-morning, the trail grade softens, and the first Benguet Pines appear. This marks your arrival at Indupit Village, a small community of Ibaloi cattle herders.
Cultural Note: You will share the trail with cows and local residents. Always yield the right of way to locals and keep noise levels down.
Lunch: This is the standard lunch spot. There are small sari-sari stores, but supplies are limited to soft drinks and biscuits.
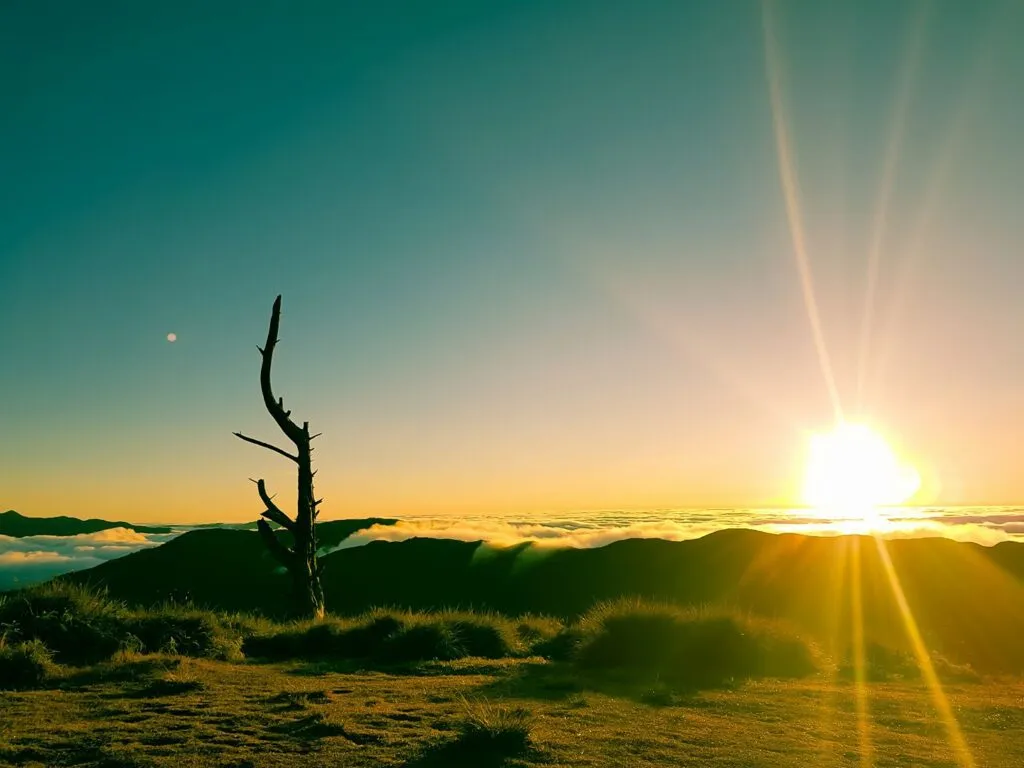
02:00 PM: The Old Spanish Trail Leaving Indupit, you enter the most scenic leg of Day 1. The trail widens into what is historically known as the “Old Spanish Trail,” offering panoramic views of Mt. Ugo’s ridges and, on clear days, the distant peak of Mt. Pulag.
04:00 PM: Camp Domolpos & The Critical Water Run Crucial Logistics: About 30 minutes before you reach the campsite, you will pass the Domolpos Elementary School or a nearby natural spring.
The “Information Gain” Rule: FILL UP EVERYTHING HERE. There is no reliable water source at the saddle itself. You need enough water for:
Dinner.
Breakfast.
The first 7km of the descent tomorrow.
Day 2: The Summit and The Long Descent
Day 2 is defined by a sunrise summit assault followed by a grueling 16-kilometer descent that tests knee stability and mental endurance.
05:30 AM: Summit Assault Wake up at 4:00 AM to break camp. The trek from the saddle to the summit (2,150 MASL) takes only 30–45 minutes.
The Memorial: The summit is marked by a concrete monument commemorating Philippine Airlines Flight 206. It’s a sobering reminder of the mountain’s history amidst the spectacular 360-degree sunrise.
07:00 AM: The Mossy Forest & Limatik Immediately after the summit, the biome shifts dramatically from dry pine to damp Mossy Forest.
Pest Alert: If it rained the night before, this section is prime territory for Limatik (blood leeches). Check your ankles and waistline frequently until you exit the forest canopy.
09:00 AM: Lusod Village (KM 7) The trail opens up again as you reach Lusod Village. This is your last major rest stop.
Insider Tip: Locals here often sell fresh, strong native coffee and boiled eggs. It’s the perfect energy booster before the “Knee Killer.”
10:30 AM: The Descent to Tinongdan (The “Knee Killer”) The final 7 kilometers to the jump-off point are notoriously punishing. The trail becomes rocky, exposed to the midday sun, and steep.
2026 Update: Be aware that road construction is actively extending from Tinongdan up towards Lusod. You may encounter widened dirt roads instead of single-track trails for parts of this leg. While it reduces the “wilderness” vibe, follow the guide’s lead to avoid active heavy machinery.
02:00 PM: The Finish Line The traverse concludes at the Agno River. Crossing the iconic Hanging Bridge signals the end of the trek. From here, it’s a short walk to the barangay hall to wash up and catch your chartered jeep.

5. Budget Breakdown (2026 Estimates)
How much does a DIY Mt. Ugo climb cost?
For a comfortable DIY expedition in 2026, allocate a safe budget of ₱3,500 to ₱4,000 per person, assuming a shared group size of 10 hikers.
While it is possible to survive on less, this budget buffers against inflation on Victory Liner fares and ensures you aren’t stranded without wash-up money in Itogon. The financial architecture of a Mt. Ugo traverse relies heavily on “economies of scale”—the more hikers in your team (up to the standard limit of 10–12), the cheaper the fixed costs like guides and chartered jeeps become.
Consolidated Expense Table (Per Person)
The following breakdown assumes a standard group of 10 hikers sharing common costs.
| Expense Item | Est. Cost (PHP) | Notes |
| Bus (Manila – Aritao) | ₱1,000 | One-way (Regular Aircon). Add ~₱400 for Deluxe. |
| Jeep Share (Aritao – Kayapa) | ₱250 | Based on ₱2,500 charter / 10 pax. |
| Jeep Share (Itogon – Baguio) | ₱300 | Based on ₱3,000 “Monster Jeep” / 10 pax. |
| Guide Fees (2 Days) | ₱400 | Standard ₱1,000/day for 2 guides / 10 pax. |
| Reg & Green Fees | ₱300 | Covers Kayapa entry + Itogon exit fees. |
| Bus (Baguio – Manila) | ₱600 | One-way (Regular Aircon) to Pasay/Cubao. |
| Food & Supplies | ₱500 | Shared “palengke” budget for 3 camp meals. |
| Wash-Up & Tipping | ₱150 | Shower fee in Tinongdan + Guide tip. |
| TOTAL | ~₱3,500 | Safe Pocket Money: ₱5,000 |
The “Group Share” Logic
Your biggest variable is the chartered transport; going solo or in a small group will nearly double your transport costs.
The Guide Ratio: The local tourism office strictly enforces a ratio (usually 1 guide per 7–10 hikers). If you are a group of 3, you still pay the full daily rate for the guide (approx. ₱500–₱800/day depending on updated ordinances).
The “Monster Jeep”: The 4×4 jeep from Tinongdan to Baguio has a fixed charter rate (approx. ₱3,000). Whether you are 1 passenger or 15, the price is the same.
Insider Tip: If your group is small, try to merge with another group at the Tinongdan Barangay Hall to split the cost of the Monster Jeep back to Baguio.
Hidden Costs & Cash Management
There are absolutely no ATMs in Kayapa or Indupit; you must withdraw all necessary cash in Manila or at the CCQ stop in Aritao.
The “Green Fee” Surprise: Itogon often charges a separate environmental fee from Kayapa. Hikers often forget this because they paid at the entry. Keep an extra ₱100 bill accessible in your pocket for the exit registration.
Shower Fees: The wash-up facilities in Tinongdan are privately owned or Barangay-run. Expect to pay ₱20–₱50 per bucket/shower.
Pasalubong: Don’t forget the obligatory purchase of walis tambo (soft brooms) or strawberry jam in Baguio, which isn’t included in the chart above.


6. Important Tips & Safety Protocols
Mistakes to Avoid
The most critical errors hikers make on Mt. Ugo are underestimating the logistics of the exit point in Itogon and failing to secure return transport from Baguio.
A smooth climb can turn into a logistical nightmare in the final hours if you assume standard city transport rules apply to the remote Cordilleras.
Ignoring the “Monster Jeep” Necessity
Do not attempt to haggle for a standard jeepney or van at the exit; you specifically need a “Monster Jeep” to navigate the rocky riverbeds of the Agno River.
The road from Brgy. Tinongdan to the main highway is not merely unpaved; parts of it often involve crossing shallow river tributaries or navigating deep ruts that would destroy a commuter vehicle’s suspension.
The “Monster” Definition: These are stripped-down jeepneys with lifted suspensions, oversized aggressive-tread tires, and modified engines.
The Risk: If you try to coordinate a pick-up with a standard van driver from Baguio who doesn’t know the terrain, they will likely refuse to enter Tinongdan, leaving you stranded 16km away from the highway. Stick to the local charter units arranged by the Barangay.
Water Management (The Lusod Gap)
The most dangerous dehydration zone is the 7-kilometer exposed stretch between Lusod Village and the Agno River.
Many hikers make the mistake of emptying their bladders at Lusod (thinking “it’s all downhill from here”).
The Reality: The descent is open, rocky, and faces the afternoon sun directly. The heat index spikes significantly as you lose elevation.
The Protocol: Treat Lusod Village as a mandatory refill station. Top up at least 1–1.5 liters per person here. There are no reliable springs between Lusod and the hanging bridge.
The Weekend Crowd (The “Sunday Exodus”)
Booking your bus ticket from Baguio to Manila online at least 3 days in advance is non-negotiable for Sunday returns.
Baguio City is the “Summer Capital,” and Sunday evening traffic at the Victory Liner and JoyBus terminals is chaotic.
The “Chance Passenger” Trap: If you walk in without a ticket on a Sunday night, expect to wait in the “Chance Passenger” line for 3–5 hours. You might not get a seat until 2:00 AM Monday.
The Fix: Book a trip scheduled for 10:00 PM or 11:00 PM. This gives you a buffer for a celebratory dinner at Good Taste or Oh My Gulay without the stress of missing your ride.
7. Conclusion
The Mt. Ugo Traverse offers a complete mountaineering narrative—stitching together the history of a tragic crash, the culture of the Ibaloi people, and the biomes of two distinct provinces into one definitive expedition.
It is a journey that demands respect—not just for the steep ascent from Kayapa, but for the history etched into the summit and the knees-shaking descent into Itogon. It is arguably the best “Major Climb” for those looking to graduate from minor day hikes, offering a taste of high-altitude camping without the technical perils of more advanced peaks.
Ready to traverse? Secure your Victory Liner ticket to Aritao (CCQ) today, break in your trail runners, and don’t forget your knee support—the descent is waiting.
Frequently Asked Questions (FAQ)
Here are the definitive answers to the most common queries regarding safety, connectivity, and amenities on the Mt. Ugo Traverse.
Is Mt. Ugo beginner-friendly or safe for solo travelers?
Yes, Mt. Ugo is considered beginner-friendly for those with active lifestyles, and solo travelers are welcome provided they hire a mandatory local guide.
The Solo Protocol: You cannot hike the trail entirely alone. The Kayapa Tourism Office strictly enforces a “No Guide, No Hike” policy. Solo hikers must either hire a private guide (shoulder the full ~₱1,000 fee) or wait at the registration area to be merged with another group to split costs.
The Fitness Gauge: While non-technical, the 32-kilometer distance is the real challenge. If you can run 5K or hike Mt. Ulap without windedness, you can survive Ugo.
Is there mobile signal on the mountain?
Mobile connectivity is intermittent; expect strong 4G/LTE signals at the jump-off and summit, but prepare for a complete “digital detox” (Dead Spot) at the campsite.
The Network Split:
Kayapa Town: Strong signal for both Smart and Globe.
Indupit Village: Weak to moderate signal.
Domolpos Saddle (Campsite): Zero signal. Messages will not send.
The Summit: Strong signal returns. This is where most hikers upload their “My Day” updates.
Safety Tip: Inform your emergency contacts that you will be unreachable from roughly 4:00 PM on Day 1 until 7:00 AM on Day 2.
Are there toilets and water sources at the campsite?
Yes, rudimentary comfort rooms (CRs) are available near Domolpos Elementary School, but they are basic and require you to fetch your own water.
The “CR” Reality: Do not expect tiled bathrooms. These are often concrete structures with water-sealed bowls or “antipara” (open pit) styles.
Hygiene Hack: Bring a portable tabo (dipper) or a collapsible bucket. The water source is a piped spring about 50–100 meters away from the toilet block.
LNT Reminder: If nature calls while on the trail (away from the village), follow Leave No Trace principles: dig a cat hole at least 6 inches deep and pack out all used toilet paper and wet wipes.
Mt. Pulag vs. Mt. Ugo: Which is better?
Mt. Pulag offers higher elevation and the famous “sea of clouds,” but Mt. Ugo offers a quieter, less commercialized pine forest experience with a significantly harder descent.
The Crowd Factor: Mt. Pulag (Ambangeg Trail) can feel like a pilgrimage with hundreds of hikers on weekends. Mt. Ugo retains a sense of solitude; you might walk for hours on the Old Spanish Trail without seeing another group.
The Terrain: Pulag is largely rolling grassland. Ugo is a mix of subtropical scrub, heavy pine forest, and rocky riverbeds.
[Practical Takeaway]: If you want bragging rights, choose Pulag. If you want a peaceful, physical challenge that tests your knees and spirit, choose Ugo.


thanks