The Crown of Cebu
Why trust this guide? This guide is written based on firsthand experience from recent visits, combined with comprehensive research from official local government sources and verified traveler reports up to August 2025. We cut through the outdated information to give you the most accurate, practical, and trustworthy advice for your adventure.
Table of Contents
First Impressions: What is Osmeña Peak and Why Should You Visit?
Before you even begin the short hike, you’ll realize that Osmeña Peak is more than just a viewpoint; it’s an entire ecosystem of culture, agriculture, and breathtaking geology. It’s the cool mountain air that first hits you, a welcome contrast to the coastal heat.
This is the heart of Cebu’s rugged interior, a place that offers a perspective far different from the island’s famous beaches. My goal here is to give you a true first impression, cutting through the hype to show you why this peak is an essential part of any Cebu itinerary.
Why Is Osmeña Peak Called the “Chocolate Hills of Cebu”? A First-Hand Comparison
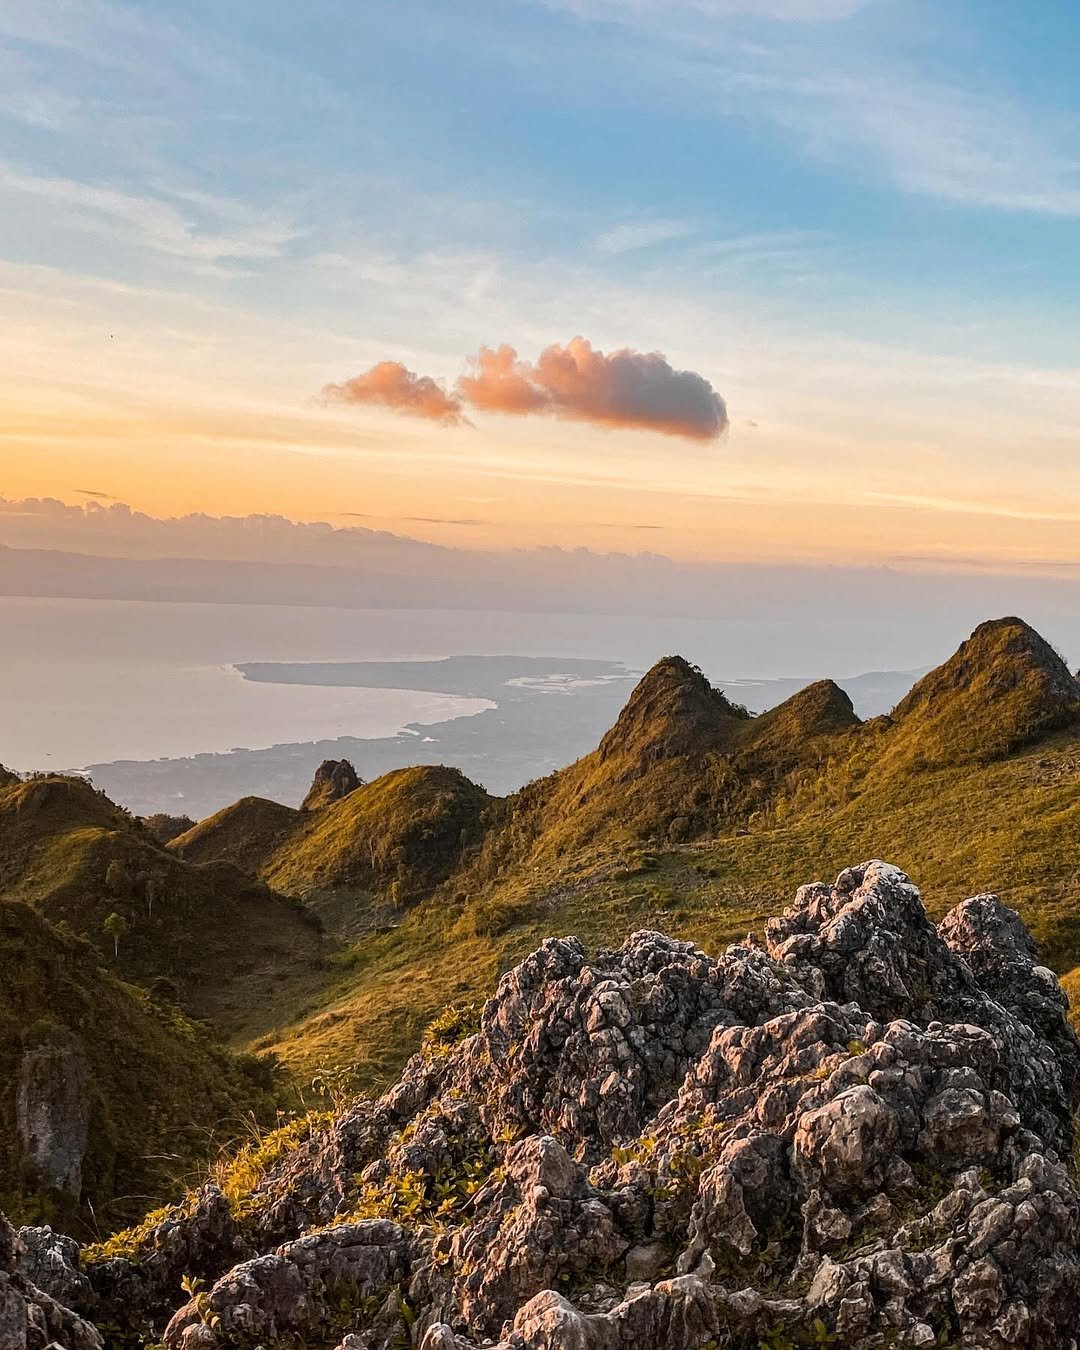
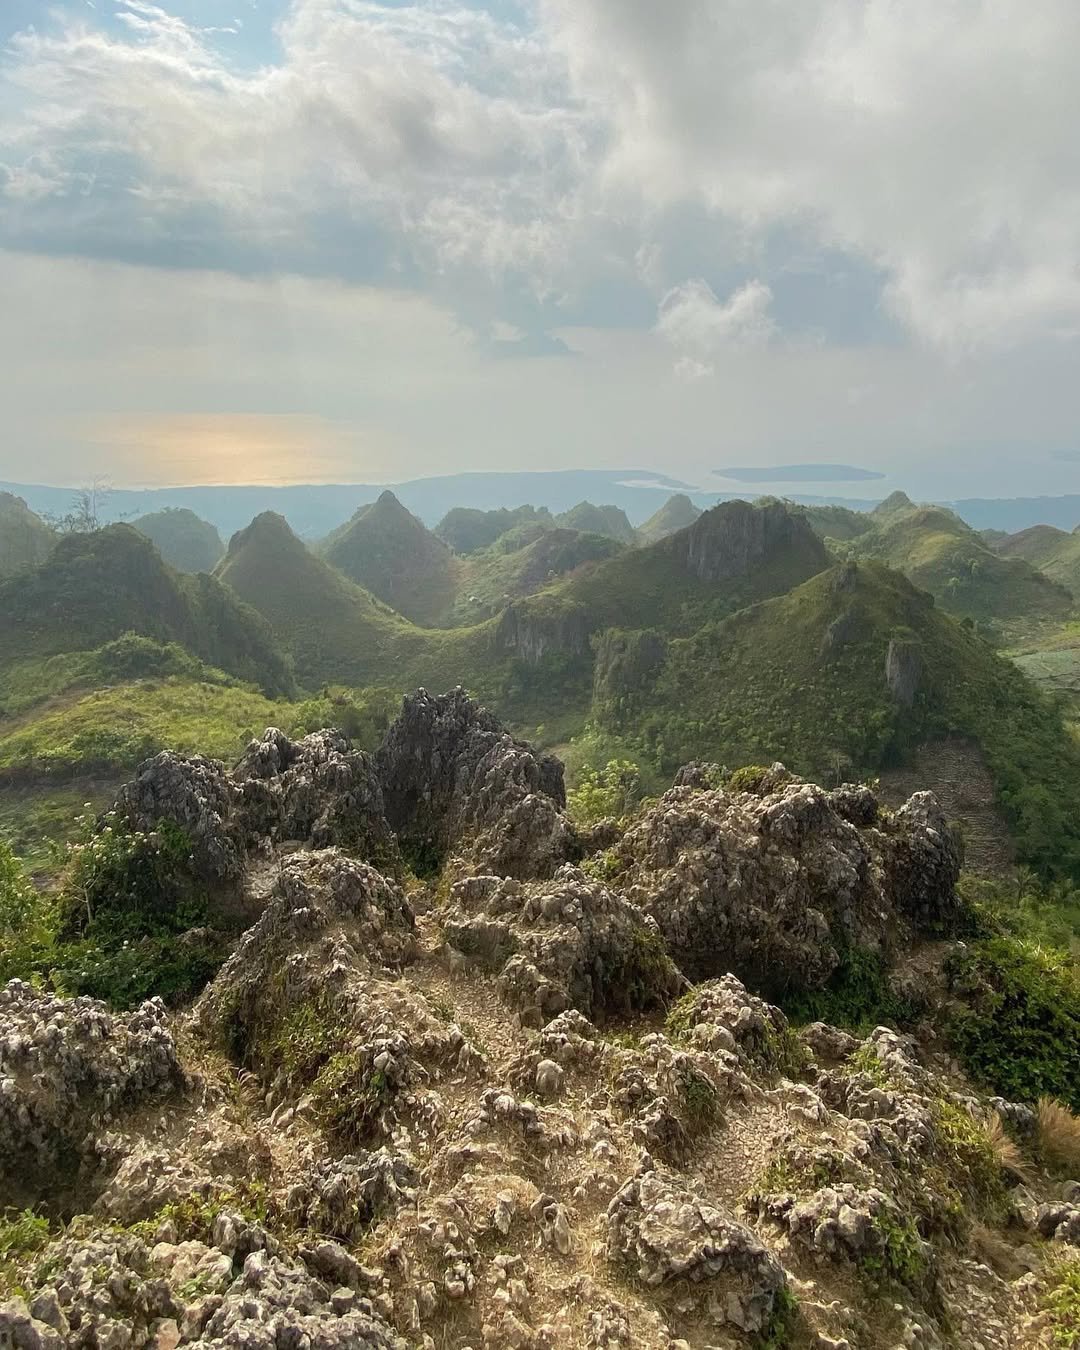
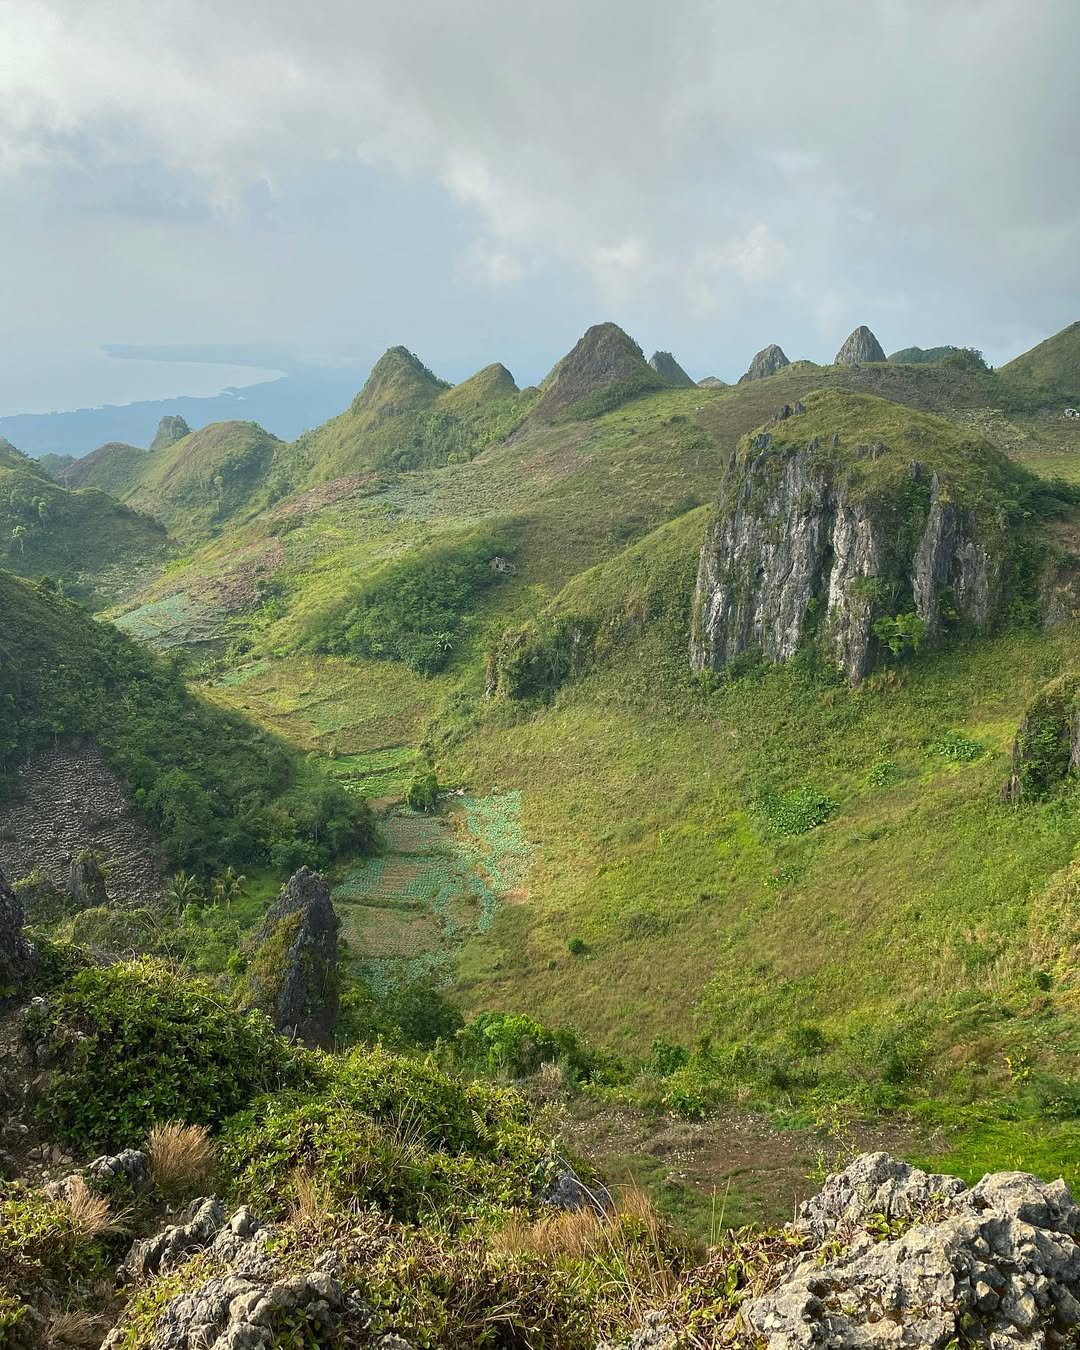
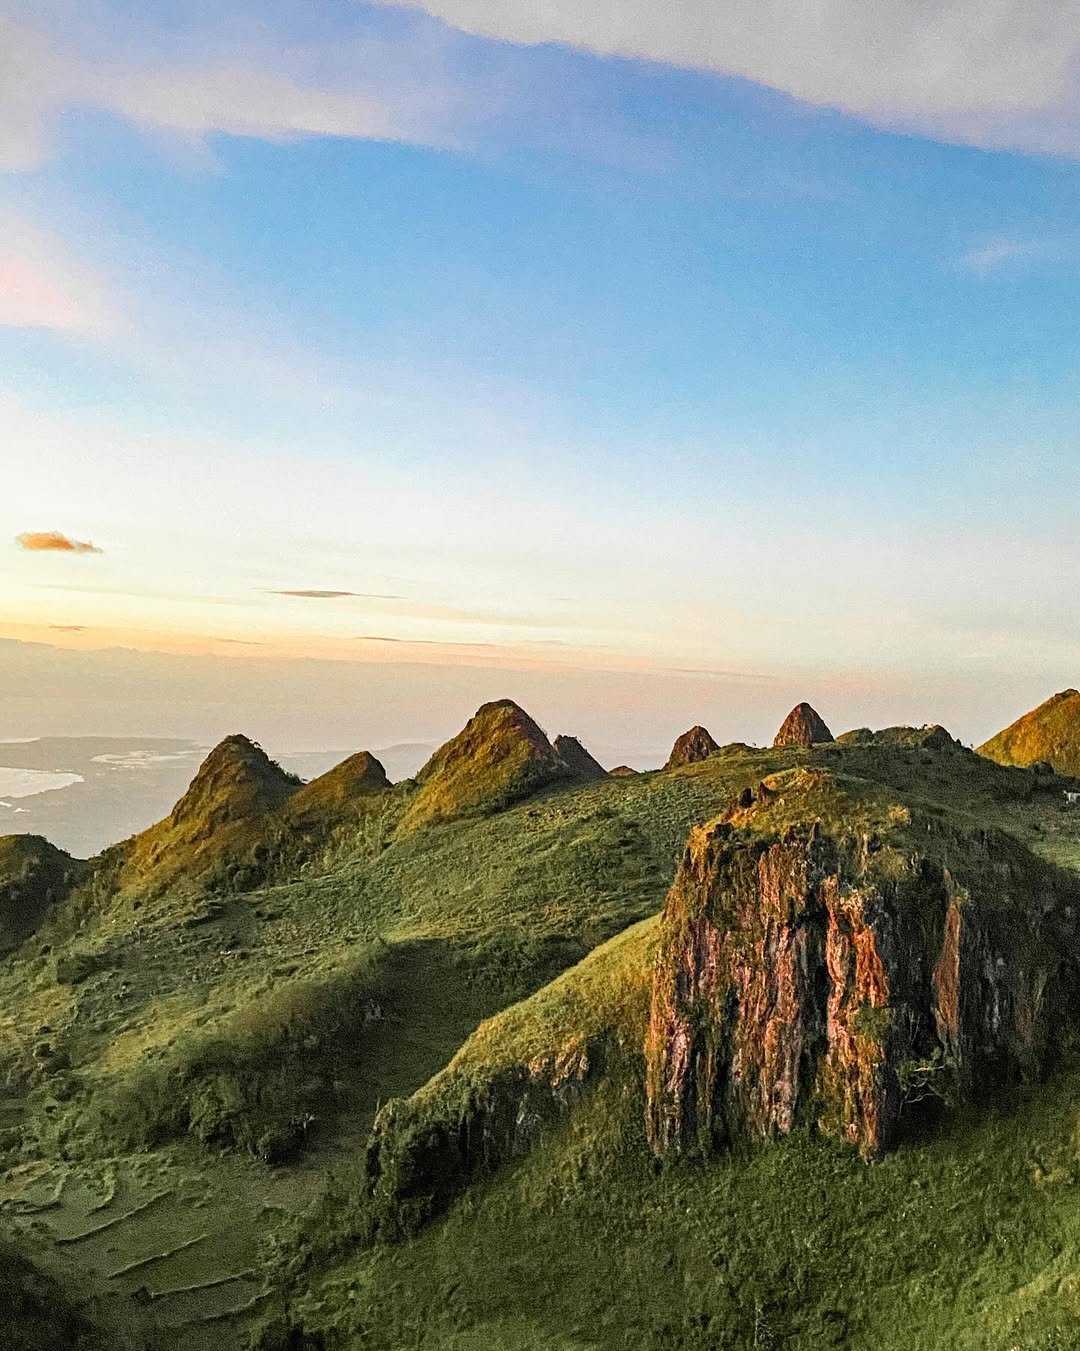
The first time I saw the landscape unfold from the trail, the nickname “Chocolate Hills of Cebu” instantly made sense, yet it also felt incomplete. The comparison comes from the sheer number of conical hills that ripple across the horizon. But my experience, and what sets this place apart, is in the details.
Unlike the smooth, rounded mounds of Bohol that turn brown in the dry season, the peaks here are jagged, sharp, and almost violently pointed. They are draped in a vibrant, year-round green cloak. This isn’t a gentle, rolling landscape; it’s a dramatic, petrified sea of spikes that feels like it was pulled directly from a fantasy epic.
Fact-Checking the Elevation: Just How High is Osmeña Peak?
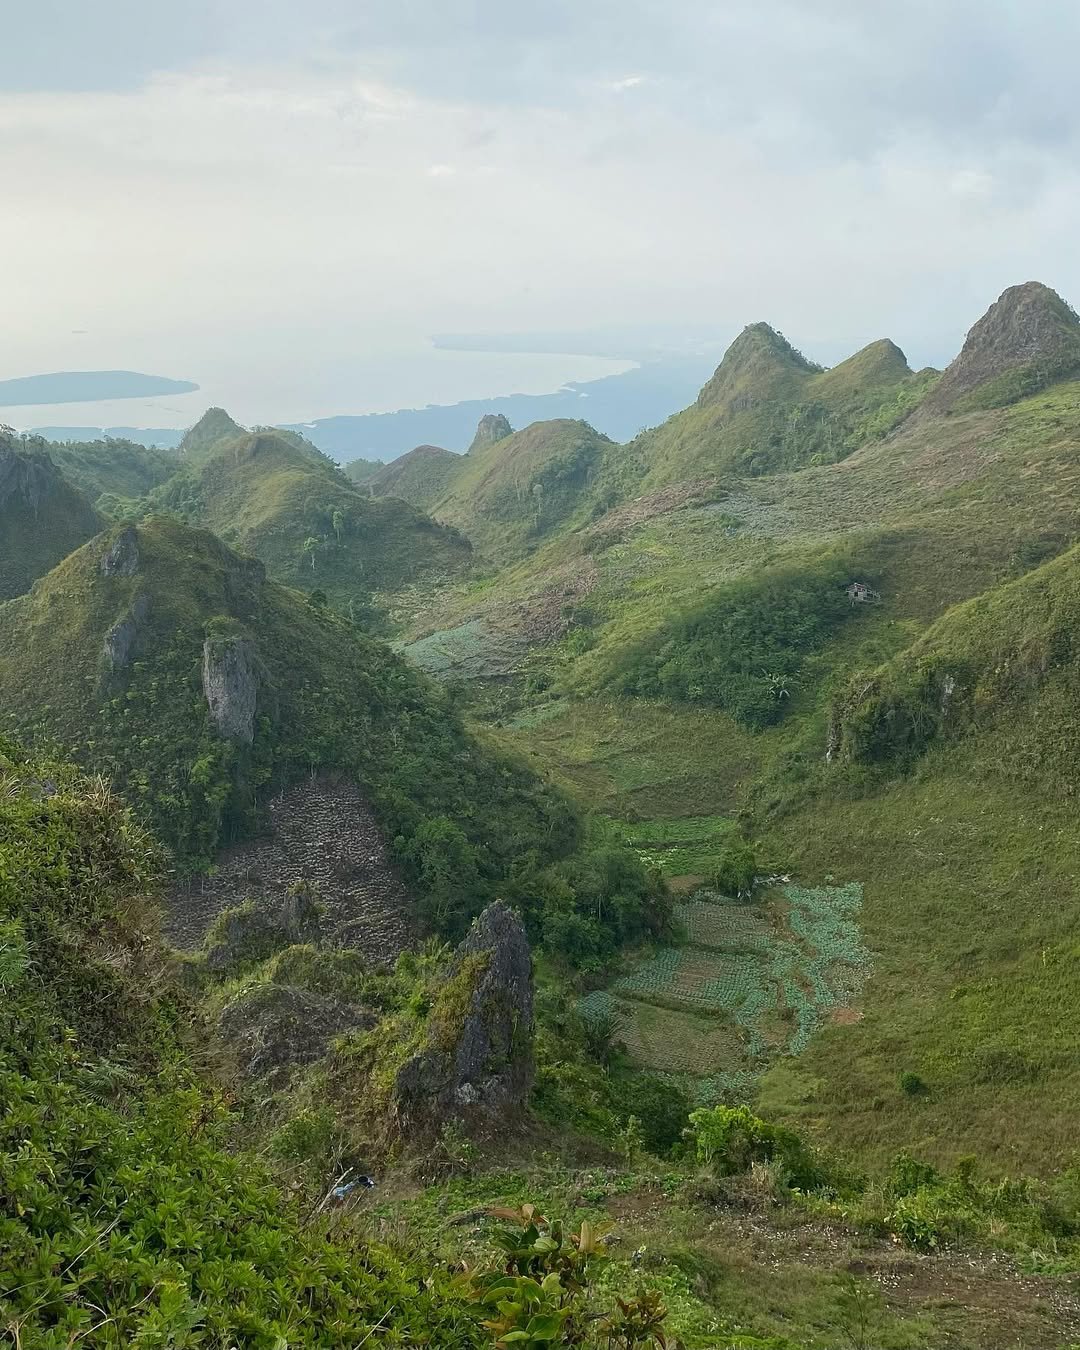
Let’s get one key fact straight: Osmeña Peak Cebu is officially the highest point on the island. Now, if you’re a stickler for details, you’ll find conflicting information online about its precise height. Some sources say 1,013 meters, others 1,042, and I’ve seen photos of on-site signs claiming 1,073.6 meters. As of August 2025, there’s no single, universally agreed-upon figure.
This discrepancy likely stems from different survey methods over time. Honestly, for the purpose of the hike, this difference is negligible. What truly matters is the reward: an absolutely stunning 360-degree panoramic view. From the summit, I could clearly see the blue of the Tañon Strait to the west and the distant coast of Negros, a sight that makes any debate about a few meters of elevation feel wonderfully insignificant.
The “Vegetable Kingdom”: Experiencing the Real Osmeña Peak, Dalaguete
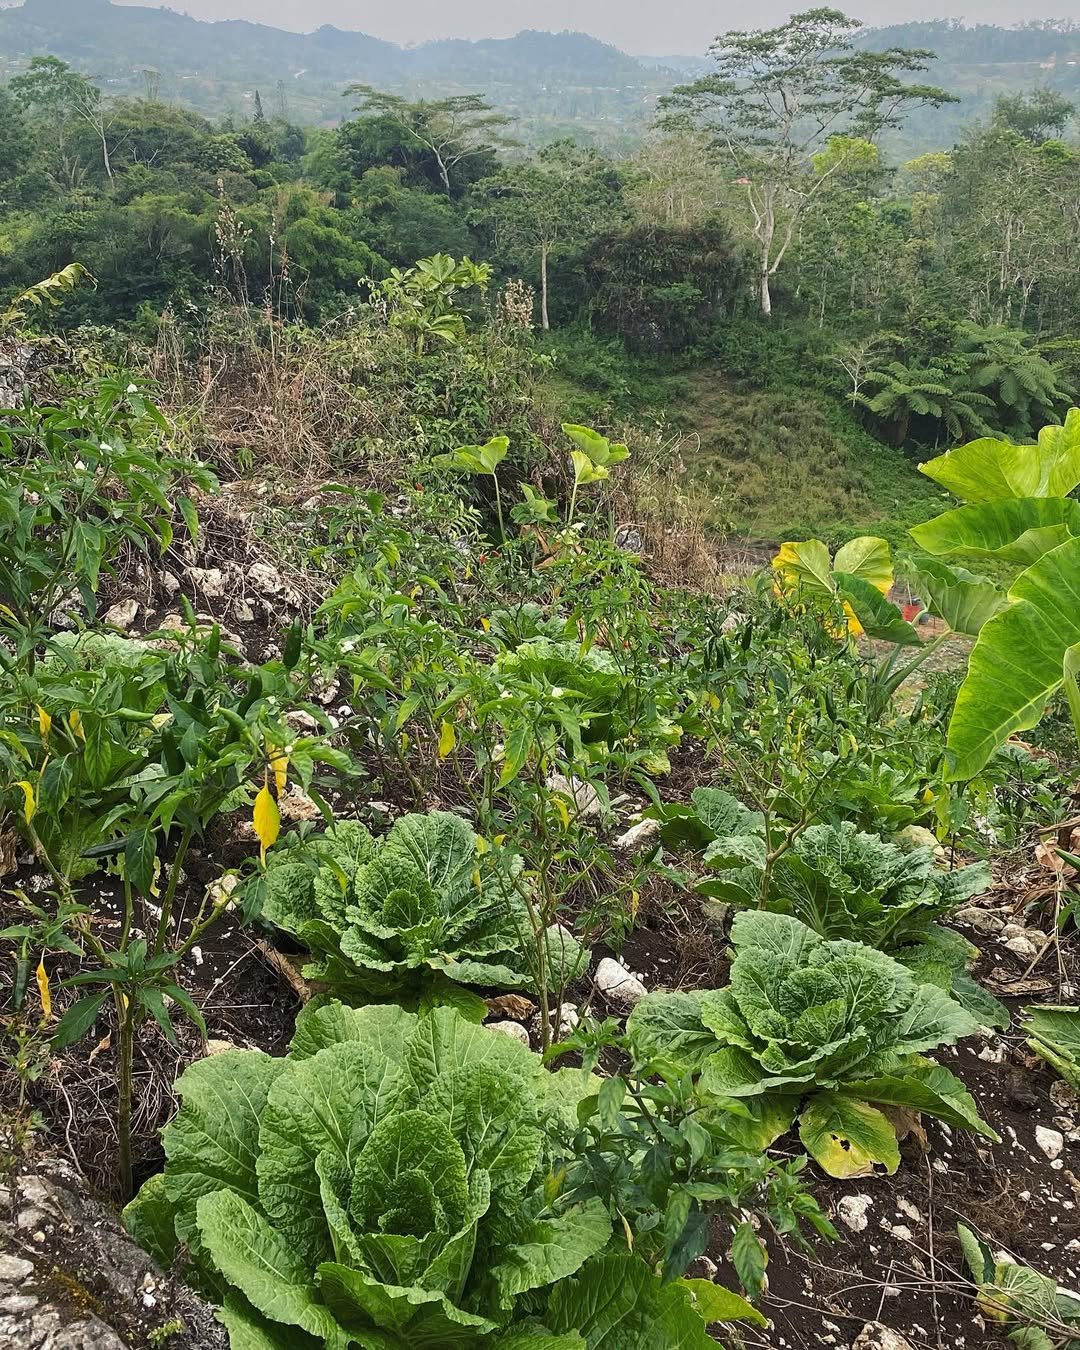
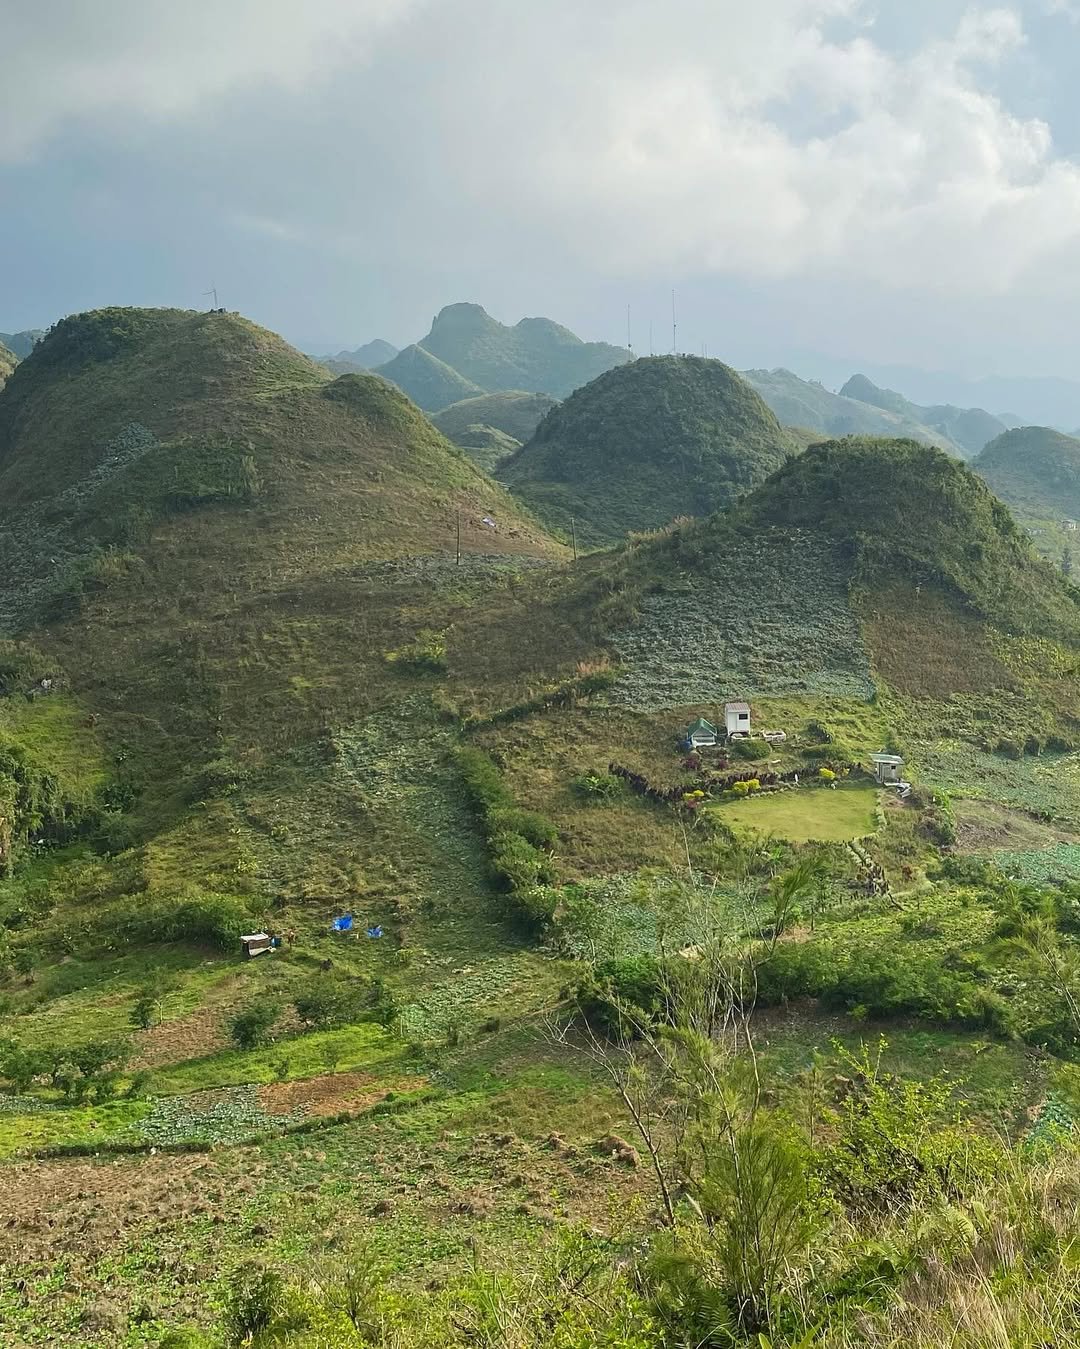
The adventure truly begins on the ride up. The journey takes you through the heart of Osmeña Peak, Dalaguete, an area lovingly called the “Vegetable Basket of Cebu.” The expertise of the local farmers is on full display here. The cool mountain climate, a stark contrast to the lowlands, allows them to cultivate a huge portion of the province’s produce.
As I traveled the winding roads, I saw terraces carved into the mountainsides, overflowing with cabbage, lettuce, and carrots. Passing the bustling Mantalongon market, where farmers converge to sell their fresh harvest, gives you an authentic, vibrant glimpse into the local economy that thrives in the mountain’s shadow.
The Osmeña Legacy: Understanding the Peak’s Cultural Significance
This is more than just a beautiful mountain; it’s a landmark steeped in local importance. Authoritative sources confirm it was named in honor of the Osmeñas, one of the Philippines’ most respected political families. It was reportedly a favorite horse-riding destination for former President Sergio Osmeña. But its significance runs deeper than politics.
Long before it became a must-see tourist spot, these fertile slopes were—and still are—the lifeblood of local farmers. The peak is a proud symbol of Cebuano heritage, a critical watershed, and a tribute to the deep connection between the people and the land they cultivate.
Mission Planning: A Strategic Framework for the Perfect Hike
A successful trip to Osmeña Peak hinges on careful planning. From my experience, the difference between a breathtaking adventure and a disappointing, uncomfortable outing often comes down to two things: timing and gear. The mountain’s high altitude and variable weather mean you can’t just show up and hope for the best.
This section is my strategic framework, built from lessons learned on the trail, to ensure your visit is safe, memorable, and absolutely worth the journey. Think of this as your mission briefing before you set foot on the mountain.
When is the Absolute Best Time to Hike Osmeña Peak?
This is probably the most important question you can ask, and the answer involves a strategic trade-off between visibility, crowds, and comfort.
The Sunrise vs. Sunset Dilemma: A Data-Driven Recommendation
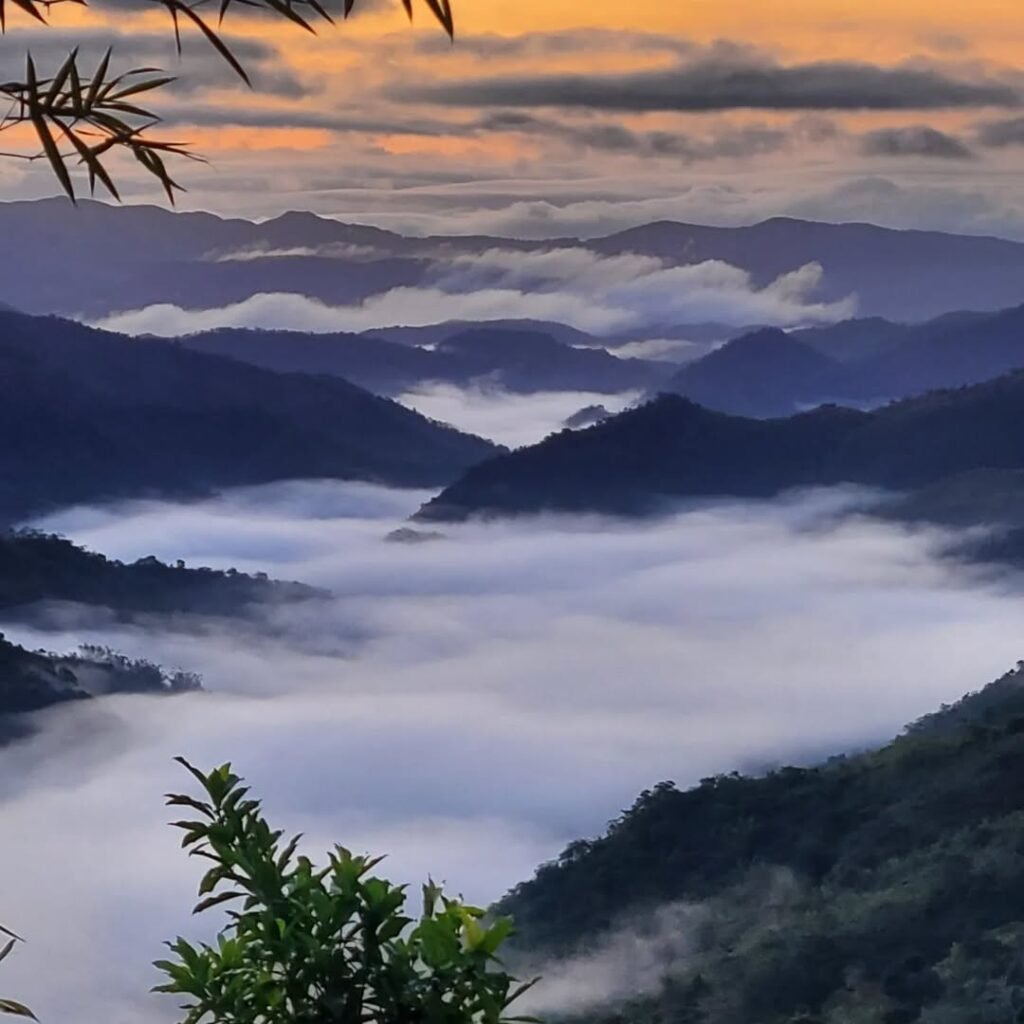
Let me be brutally honest with you about the sunrise hike. Seeing the first light hit those jagged peaks is an incredible, almost spiritual experience. However, it is a high-risk, high-reward gamble. During the cooler months of the dry season (especially December and January), the peak is frequently swallowed by a thick blanket of morning fog. I’ve seen countless travelers make the pre-dawn journey only to be met with a complete white-out, seeing nothing but the few feet in front of them.
Based on this, my expert recommendation for most visitors is to aim for the sunset in Osmeña Peak. Your probability of getting clear, dramatic skies is significantly higher in the late afternoon. As the sun descends over the Tañon Strait, it paints the landscape in spectacular warm colors, offering a more reliable and equally stunning reward for your efforts. For a guaranteed beautiful view, a sunset hike is the smarter bet.
Choosing Your Season and Day: An Insider’s Tip for Avoiding Crowds
If you have any flexibility in your schedule, this choice is simple. The dry season, which runs from roughly December to May, is overwhelmingly the best time to visit. The trails are safer, less slippery, and you’ll have more sunny days. Attempting the hike during the rainy season (June to October) can be hazardous due to the muddy, rocky path.
Here’s my most valuable insider tip: visit on a weekday. Osmeña Peak is extremely popular with local tourists, and on weekends and public holidays, the summit can become quite congested. A visit between Monday and Friday offers a much more serene and personal encounter with the landscape, allowing you to soak in the views without jostling for a photo spot.
Your Essential Gear Checklist: What I Packed (And What I Wish I’d Brought)
After several trips to mountain environments like this, I’ve learned that packing right is crucial. The hike is short, but the conditions demand respect. Here’s what I’ve learned you absolutely need.
Day-Hike Essentials:
Sturdy, Closed-Toe Shoes: This is non-negotiable. The trail is rocky and uneven. Hiking in flip-flops is a recipe for a twisted ankle.
A Light Jacket or Windbreaker: I can’t stress this enough. Even on a hot day, the wind at 1,000 meters can be surprisingly cold, especially after sunset. I was so glad I had mine.
Headlamp or Flashlight: If you’re hiking for sunrise or sunset, the trail will be pitch black before you start or after you finish. Your phone’s flashlight is not a reliable substitute.
Water: Bring at least one liter. The hike may be short, but the altitude and sun will dehydrate you quickly.
Sun Protection: Sunscreen, a hat, and sunglasses are a must. There is virtually no shade on the trail.
Dry Bag: A sudden rain shower can happen anytime. I always keep my camera and phone in a small dry bag just in case.
Overnight Camping Must-Haves:
A Solid Tent: You can rent one on-site, but if you bring your own, make sure it can handle wind.
Proper Sleeping Bag and Pad: This is a lesson I learned the hard way elsewhere. Nighttime temperatures can plummet to 16°C (61°F), and the ground gets cold. An insulated sleeping pad is crucial for a comfortable night’s sleep.
Portable Stove and Fuel: CRITICAL WARNING: Open campfires are strictly prohibited to prevent grass fires that could devastate the area. You must bring a portable gas or solid fuel stove for cooking.
Sufficient Food & Water: Pack enough for dinner and breakfast, and at least 2 liters of water per person.
How to Get to Osmeña Peak: A Verified 2025 Transportation Guide
The journey to Osmeña Peak is an integral part of the adventure, a scenic transition from the tropical coast to the cool mountain highlands. But navigating it can be confusing with the mix of public and private transport required. I’ve made this trip using different methods, and this section is my verified, step-by-step guide to get you to the trailhead safely and efficiently, with no unwelcome surprises. We’ll cover options for every budget, with up-to-date pricing as of August 2025.
Where is Osmeña Peak Located? Pinpointing the Trailhead
First, let’s get you oriented. To answer the question “where is Osmeña Peak located” precisely: the peak is situated in the Mantalongon mountain range within the municipality of Dalaguete in southern Cebu, Philippines. Your primary destination before the final ascent is the “Dalaguete junction” on the main highway, which serves as the jumping-off point for the ride up to the registration area, or Hiker’s Center.
Getting There: A Step-by-Step Breakdown for Every Budget
Your starting point will likely be either Cebu City or one of the popular tourist towns on the west coast, like Moalboal. Here’s how to tackle it from both.
My own journey started at the bustling Cebu South Bus Terminal. The process is straightforward: find a Ceres or Sunrays bus with a signboard for “Bato via Oslob” or “Santander/Liloan”. The most important thing I did was tell the conductor (the ticket collector) my destination was the “Dalaguete junction for Osmeña Peak” as soon as I boarded.
They know the spot well—it’s right by a 7-Eleven. The ride itself took about 3.5 hours with traffic and, as of August 2025, cost me around PHP 170. For those prioritizing comfort, hiring a private car or taxi cuts travel time to about two hours, with costs ranging from PHP 730–1,750 ($13–31).
For travelers based in Moalboal, renting a scooter is a popular and flexible option. However, this comes with a serious warning.
CRITICAL SAFETY WARNING: Do NOT Follow Google Maps on a Scooter from Moalboal
Please read this next part carefully. It is arguably the most important piece of safety advice in this entire guide. If you use Google Maps to navigate from Moalboal to Osmeña Peak, it will likely try to direct you onto the unfinished and treacherous Badian Highland Road. I cannot overstate how dangerous this is for a standard scooter. Other travelers have described it as a “super busted road that eventually devolves into a dirt trail,” suitable only for experienced dirt bikers. Following this route is a common and serious mistake.
To get there safely, my expert advice is to take the main coastal highway south to Badian town proper, and only then turn inland towards the mountains. I strongly recommend using an offline map app like Maps.me, which often has more accurate trail data, and confirming your route with a local before you depart.
The Habal-Habal Ride: What to Expect and How Much to Pay in 2025
Regardless of how you reach the Dalaguete junction, the final leg of your journey is a thrilling 45 to 60-minute habal-habal (motorcycle taxi) ride up a winding mountain road. This ride was a highlight for me; the views of the coastline opening up below as you climb are spectacular.
Now, let’s talk about the cost so you can approach the drivers with confidence. Based on the latest information, a one-way trip costs between PHP 100 and PHP 200 per person. However, it’s crucial to know that drivers will almost always charge for a minimum of two fares (PHP 200) for the trip, even if you are traveling solo.
The most common and authoritative arrangement is to hire a driver for a round trip, where they take you up, wait for an hour or so while you hike, and then take you back down. As of August 2025, the standardized fare for this round-trip service is PHP 400 per motorcycle. Confirm the price and terms before you get on to ensure there’s no confusion.
The Ascent: A Guide to Fees, Guides, and the Trail Itself
Once your habal-habal drops you off at the base, you’ve arrived at the final staging ground for your adventure. This small cluster of buildings, known as the Hiker’s Center or Tourism Information Center, is where you’ll handle the on-site formalities.
The management of the peak has become more organized over the years, which is a good thing, but it has led to some outdated information online. This section will give you the clear, verified details you need for a smooth and confusion-free start to your hike, based on the most current information available in August 2025.
Osmeña Peak Entrance Fee and Guide Policy: Clearing Up the Confusion (2025)
If you’ve researched this trip, you’ve probably seen conflicting reports about the costs. Let’s clear that up.
First, the Osmeña Peak entrance fee. You’ll see figures online ranging from PHP 30 to PHP 50. More recent accounts, however, point to a single, consolidated fee of PHP 100 per person. To be safe and avoid any hassle, I highly recommend you budget for the PHP 100 fee. This fee typically covers your environmental fee and, in some cases, the guide service. This kind of evolving fee structure is common in developing tourist destinations, so it’s best to be prepared.
Second, the guide policy. While older blogs might say a guide is optional, my authoritative information confirms that as of 2025, hiring a local guide is now considered mandatory. This rule was reportedly implemented for visitor safety after a past accident, which I see as a responsible move by the local community.
The guides are local residents who rely on this income, so hiring one is a fantastic way to directly support the community. They are incredibly helpful, often sharing stories about the area and, from my experience, are wizards at taking amazing photos. The standard, fair rate for a guide is around PHP 150 per group if not already included in your entrance fee.
The Trail to the Top: An Honest Review of the Difficulty
After all the planning and travel, I can honestly say the hike itself is the easiest part. From the moment I started from the registration area, it was clear this trail is accessible to almost anyone, regardless of fitness level. The entire ascent took me about 20 minutes at a very relaxed pace, stopping frequently to take photos.
The path is a well-trodden dirt track that winds its way up the mountain. It follows a gradual incline with no steep drop-offs or technically challenging sections. My best advice is to watch your step, as the trail is quite rocky in several places, which reinforces why good, sturdy footwear is essential. As you climb, you’ll walk alongside the very vegetable farms that give the region its nickname, a constant and beautiful reminder of where you are.
The Summit & Camping: Maximizing Your Experience
Reaching the summit is an incredible reward for very minimal effort. Once you’re there, it’s all about soaking in that 360-degree view. For the photographers, my expert advice is to plan your hike for the golden hours—the hour after sunrise or the hour before sunset. The light during these times is soft and magical. The midday sun, particularly between 2 PM and 5 PM, can be extremely harsh and create difficult backlighting against the main cluster of peaks, washing out your photos.
For those wanting the full immersive experience, camping is permitted at a designated site near the peak. Here are the authoritative costs and details:
Camping Fee: PHP 50 per person.
Tent Rental: If you don’t bring your own, tents are available for rent on-site for approximately PHP 300 to PHP 400.
A final, crucial reminder: the nights get very cold and windy. As I mentioned in the gear section, you absolutely need a proper sleeping bag and ideally an insulating pad to be comfortable. Do not underestimate the mountain chill.
Beyond the Peak: Crafting the Ultimate South Cebu Itinerary
From my experience, Osmeña Peak rarely exists in a vacuum on a traveler’s itinerary. Its strategic location in the heart of southern Cebu makes it the perfect anchor for a full day of exploration. The key to maximizing your time is understanding how to connect the dots between the highlands and the coast. This section is your logistical playbook for building an unforgettable adventure, combining the peak with the region’s other famous natural wonders.
The Classic Duo: Osmeña Peak & Kawasan Falls
The most popular pairing is the “summit-to-sea” experience of combining the cool highlands of Osmeña Peak with the turquoise waters of Kawasan Falls in Badian. Here are the two ways to do it.
Option A: The Traverse Hike (The Hardcore Route)
For serious hikers and true adventure seekers, a traverse trail connects the Mantalongon range directly to Kawasan Falls. This is a challenging, multi-hour trek that can take anywhere from 3.5 to 8 hours to complete. It’s an incredibly immersive journey through remote villages and farmlands, but be warned: it is physically demanding, with long exposed sections and a significant downhill portion that is tough on the knees. This option requires a full day and a high level of fitness.
Option B: The Habal-Habal Transfer (The Popular Route)
This is the far more common and practical method for most tourists. After your hike, you can hire a habal-habal driver for the scenic cross-island journey from Dalaguete to Badian. The ride itself takes about 1.5 to 2 hours. Because this specific transfer is so popular, a standardized “tourist price” has emerged. You should expect to pay PHP 1,000 per motorcycle, which can accommodate two passengers (effectively PHP 500 per person). This reflects the long distance and the driver’s half-day commitment.
Exploring the “Trilogy of Peaks”
If you’re more interested in bagging summits than chasing waterfalls, Osmeña Peak is the centerpiece of a local “Trilogy of Peaks.” With a dedicated habal-habal driver for the day, you can also visit Casino Peak (noted for its striking resemblance to Bohol’s Chocolate Hills) and Kandungaw Peak, which offers a steeper, more challenging climb with its own dramatic rock formations.
Sample Itinerary Table: Osmeña Peak & Kawasan Falls Day Trip from Cebu City
To put it all together, here is a proven, full-day itinerary that combines three of South Cebu’s most famous activities. This is a long but incredibly rewarding day.
| Time | Activity | Location | Est. Duration | Est. Cost (PHP) | Notes & Tips |
| 08:00 AM | Depart Cebu City | Cebu South Bus Terminal | 3 hours | 170 | Take a bus bound for “Bato via Oslob.” |
| 11:00 AM | Arrive & Hire Habal-habal | Dalaguete Junction | 1 hour | 500 (per person) | Negotiate a full-day rate for Osmeña Peak to Kawasan Falls (PHP 1,000 per bike). |
| 12:00 PM | Arrive & Register | Osmeña Peak Trailhead | 15 mins | 100-175 | Includes entrance & mandatory guide fee. |
| 12:15 PM | Hike to Summit | Osmeña Peak Trail | 20-30 mins | – | Easy, gradual ascent. |
| 12:45 PM | Enjoy Views & Photos | Osmeña Peak Summit | 45 mins | – | Take in the 360-degree panorama. |
| 01:30 PM | Descend & Travel | Mountain Roads | 1.5 – 2 hours | – | Scenic cross-island journey to Badian. |
| 03:30 PM | Arrive & Canyoneering/Swim | Kawasan Falls, Badian | 1.5 hours | 45 (entrance) | Pay entrance fee and enjoy a refreshing swim in the turquoise pools. |
| 05:00 PM | Depart for Cebu City | Badian Highway | 3 – 3.5 hours | 150 | Walk to the main highway and catch a Ceres bus heading back to Cebu City. |
| 08:30 PM | Arrive in Cebu City | Cebu South Bus Terminal | – | – | End of a long but fulfilling day. |

Where to Stay: Vetted Accommodations Near Osmeña Peak
Choosing the right place to stay is crucial for structuring your South Cebu adventure. Your basecamp will define your travel rhythm, determining your access to the peak and other attractions. From my travels in the area, I’ve found that where you sleep can be just as important as what you see. This is my vetted guide to help you pick the perfect hub for your trip, with recommendations based on consistently high traveler reviews as of August 2025.
Choosing Your Basecamp: Dalaguete vs. Moalboal vs. Badian
Your choice of town depends entirely on your travel style. Here’s my expert breakdown:
Dalaguete: This is the best choice for convenience. If you’re planning a sunrise hike at Osmeña Peak, staying here is almost essential. It offers a quieter, more authentic local experience away from the main tourist crowds.
Moalboal: This is the all-in-one hub, perfect for international travelers. It has the widest range of restaurants, dive shops, and nightlife. I recommend it if you want a bustling base and plan to do the sardine run and other west coast activities, but be prepared for a 1-2 hour journey to the peak.
Badian: This is the adrenaline junkie’s base. If your top priority is canyoneering at Kawasan Falls, staying in Badian makes the most sense. The peak is still an accessible day trip from here.
Vetted Accommodation Guide
Once you’ve picked your town, here are a few specific places that stand out for their value and positive guest experiences.
Highland Retreat (Mantalongon): For a unique experience right near the peak, 150 Peakway Mountain Resort offers stunning views and glamping domes. Recent guests consistently rave about waking up above the clouds.
Mid-Range Coastal (Dalaguete): I’ve personally had friends stay at The Beachhouse, and they loved it. It has a great pool and restaurant, and its location offers a perfect balance between a seaside stay and easy access to the mountains.
Budget-Friendly (Badian): For those on a tighter budget, Maya Suites Badian consistently gets excellent reviews for being clean, comfortable, and offering fantastic value. It’s a reliable and safe bet if you’re basing yourself near Kawasan Falls.
Final Briefing: Safety, Responsible Tourism, and Official Contacts
Before you pack your bags and head out, here is your final briefing. A truly successful trip is one that is not only memorable but also safe and respectful to the community and environment you are visiting. Consider these last few points as essential intelligence to ensure your adventure to Osmeña Peak goes off without a hitch.
On-the-Ground Safety vs. Official Advisories
When researching, you may see broad government travel advisories for the Philippines. It’s important to put these into context. As an experienced traveler in the region, I can tell you that these are often national in scope, with the highest-risk warnings pertaining to areas in Mindanao, which are geographically very distant from Cebu. The tourist areas of South Cebu are widely considered safe for travel. The most probable risks you face are not related to crime, but to the road safety issues mentioned earlier. Please, heed the warning about the Badian Highland Road and avoid driving on unlit mountain roads after dark.
How to Be a Responsible Tourist at Osmeña Peak
Visiting this beautiful place comes with a responsibility to preserve it. My trust in you as a traveler is that you’ll follow these simple but vital principles:
Leave No Trace: This is the golden rule. Pack out everything that you bring in. There are no trash bins on the trail, so be prepared to carry your own litter.
Respect Local Livelihoods: The trail passes directly through active vegetable farms. These crops are a family’s income. Stay strictly on the designated path.
Support the Local Community: Hiring a local guide, buying a drink from a trailside stall, or purchasing souvenirs at the base are the most direct ways to ensure the community benefits from your visit.
Official & Verified Contact Information
Information can change. For the most authoritative and up-to-the-minute announcements, such as temporary closures or changes in regulations, the best source is always the local government unit (LGU) itself. I highly advise you to check their official channels before your trip.
Official Website: Municipality of Dalaguete
Contact Number: Mayor’s Office – (032) 407-9055