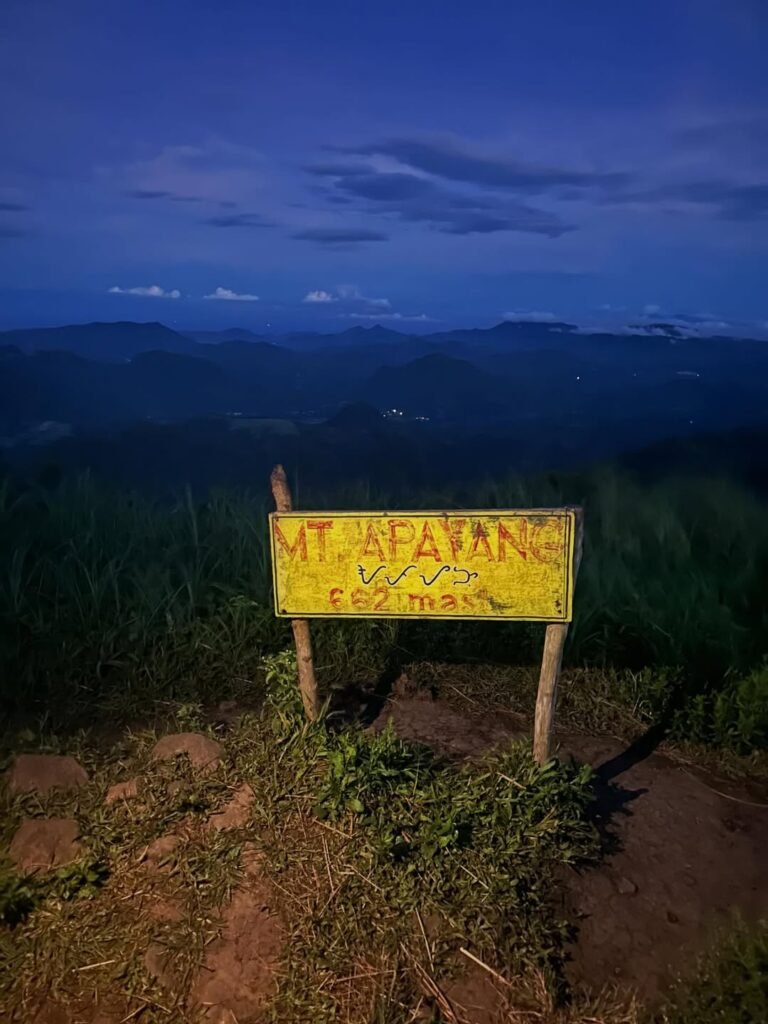
Mt. Kulis is a beginner-friendly minor climb in Tanay, Rizal, sitting at 620 MASL inside the Fresno Agro-Forestry Eco-Tourist Campsite. The full circuit takes 3–5 hours, depending on photo queues at landmarks like Noah’s Ark and Sambong Peak. It is one of the closest places to Metro Manila where you can realistically catch a sea of clouds at sunrise — but only if you arrive before 5:30 AM.
Mt. Kulis Quick Guide
| Detail | Info |
|---|---|
| Mountain | Mt. Kulis |
| Location | Sitio Maysawa, Brgy. Cuyambay/Laiban, Tanay, Rizal |
| Province | Rizal |
| Elevation | ~620 MASL (Summit); Sambong Peak ~629 MASL |
| Difficulty | 2–3/9 (Minor Climb; doubles in wet season) |
| Jump-off | Fresno Agro-Forestry & Eco-Tourist Campsite, Brgy. Cuyambay |
| Best Season | November–February (Amihan); Dry season March–May |
| Trek Time | 3–5 hours full circuit (photo queues dependent) |
| Registration | On-site at campsite gate; valid ID + liability waiver required |
| Campsite | Yes — tent pitching, kubo (nipa hut) rentals, comfort rooms |
Table of Contents
Where Is Mt. Kulis Located?
Mt. Kulis is a beginner-friendly mountain located in Sitio Maysawa, Barangay Cuyambay, Tanay, Rizal. It sits on the western edge of the Sierra Madre mountain range, roughly 2.5 to 3 hours by public transport from Cubao, Metro Manila.
Mt. Kulis is a portion of the Fresno Agro Forestry and Eco Tourist Campsite, owned by a family. This means you are not hiking inside a DENR-managed national park — you are on private agro-forestry land. That distinction matters for rules, fees, and trail management.
Mt. Kulis has a height of 620 MASL, while the adjacent Sambong Peak stands at 629 MASL. Both peaks are accessible within the same circuit hike, and most groups visit them together.
The mountain sits within the broader Mt. Kulis Tanay Rizal cluster of eco-tourism sites, alongside nearby destinations like Treasure Mountain and Nagpatong Rock. If you are mapping out a weekend in the uplands, check out the full list of Tanay Rizal tourist spots before finalizing your itinerary.
How to Get to the Mt. Kulis Jump-off Point
The most practical route from Metro Manila uses public jeepney from Cubao.
Expect a total travel time of 2.5 to 3 hours from Cubao. From Aurora Blvd near Gateway/LRT, take a jeepney or UV Express bound for Cogeo Gate 2 or Cogeo Market (fare: ~₱35–₱40). Alight at Cogeo Gate 2, walk toward the City Mall of Antipolo — the jeepney terminal for the uplands is located alongside or near this mall. Look for signage reading “Sampaloc” or “Tanay (via Marilaque).” Board the jeep and ask the driver to drop you at Sitio Maysawa (fare: ~₱60–₱70).
The first trip usually departs around 4:00 AM. At the Sitio Maysawa junction — landmark: large tarps and a waiting shed — hire a tricycle to the Fresno Agro-Forestry registration area (fare: ₱150 per tricycle, good for up to 4 passengers).
If you want the sea of clouds: Jeepneys do not run early enough for a pre-dawn summit push. The best option is to hire a tuk-tuk to the jump-off point for ₱600. Split between 3–4 people, this is worth every peso.
If you are driving: Pin “Fresno Agro Forestry and Eco Tourist Campsite” on Waze. The drive along Marilaque is straightforward, but the final 1.5 kilometers from the highway turnoff to the campsite gate is unpaved. In dry conditions it is dusty and uneven, but passable if you drive slowly. In wet conditions, do not force a 4×2 sedan down this road — the red clay turns into a viscous, slippery trap. It is smarter to park at the guarded spaces in the Sitio Maysawa junction and pay for a tricycle to bring you inside.
Return trip warning: Jeepneys coming from Sampaloc are often full by the time they pass Sitio Maysawa in the afternoon. Instead of waiting hopelessly by the highway, coordinate with a tricycle driver to bring you further up to the Sampaloc Terminal to secure a seat.
Permits, Fees, and Guide Requirements at Mt. Kulis
Registration happens on-site at the Fresno Agro-Forestry gate — there is no online booking system for day hikes as of 2026.
To enter Mt. Kulis in 2026, the process has simplified. You primarily need valid identification (for the manifest), cash for the various fees, and a signed liability waiver. No medical certificate is required for standard hikers. By signing the waiver at the gate, you declare yourself fit to climb and release the management from liability. If you have a known pre-existing heart condition or severe asthma, common sense dictates you should get clearance anyway.
Fees (as of 2025–2026):
At the campsite gate, you pay the entrance fee (₱200–₱300), secure your mandatory guide, and sign the waiver. A guide is required for sections involving Noah’s Ark.
If you want to rent a kubo (native hut) for overnight stay, reservations are highly recommended. These units are limited and sell out weeks in advance during the dry season.
Prepare small bills — ₱20, ₱50, ₱100. The local transaction culture is strictly cash-based. There are no card terminals at the gate.
Pro tip: Bring a pen. There is often only one ballpoint pen at the registration desk shared by 50 impatient hikers. Having your own pen lets you sign the waiver and logbook immediately, potentially saving 15 minutes while the sun starts to rise.
DENR official website — for updated regulations on hiking in Rizal’s protected mountain areas.
What Is the Mt. Kulis Trail Like?
The terrain follows a circuit: open grassland ridge on the ascent, slippery clay on the descent, a riverbed crossing, then a steep dirt road back up to camp. Elevation goes from ~620 MASL at the summit down to ~400 MASL at the river.
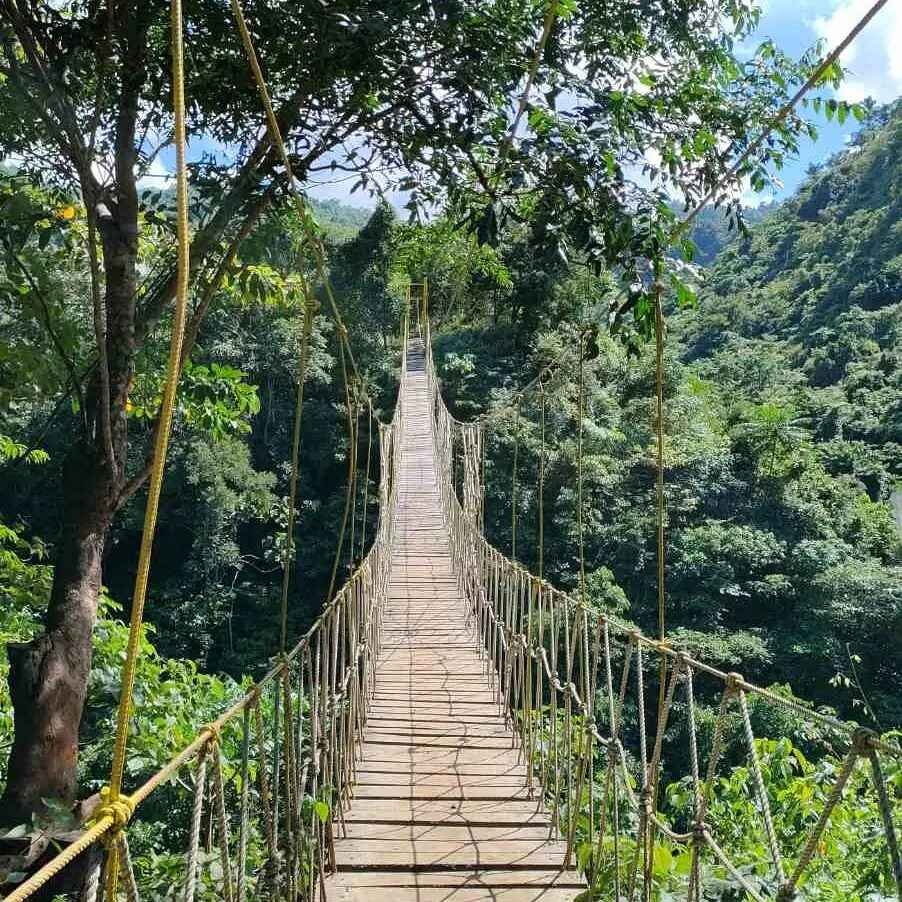
There are two camps within the Fresno Agro-Forestry site. Camp A is composed of the summit of Mt. Kulis (Bahay ni Cardo), Sambong Peak or Heart Peak, Spider Web, rock formation, and Noah’s Ark. Camp B is composed of the Hanging Bridge, Lion Falls, Twin Rock formation, Malinaw Falls, cave, and Natural Swimming Pool.
Trail Stage Breakdown with Difficulty Scores
Here is my honest per-stage difficulty rating for each section of the circuit (1 = very easy, 5 = hard):
Stage 1 — Registration gate to Bahay ni Cardo / Summit (Mt. Kulis Peak)
Difficulty: 2/5 — Wide, established dirt path through cogon grass with a gentle incline; zero technical terrain.
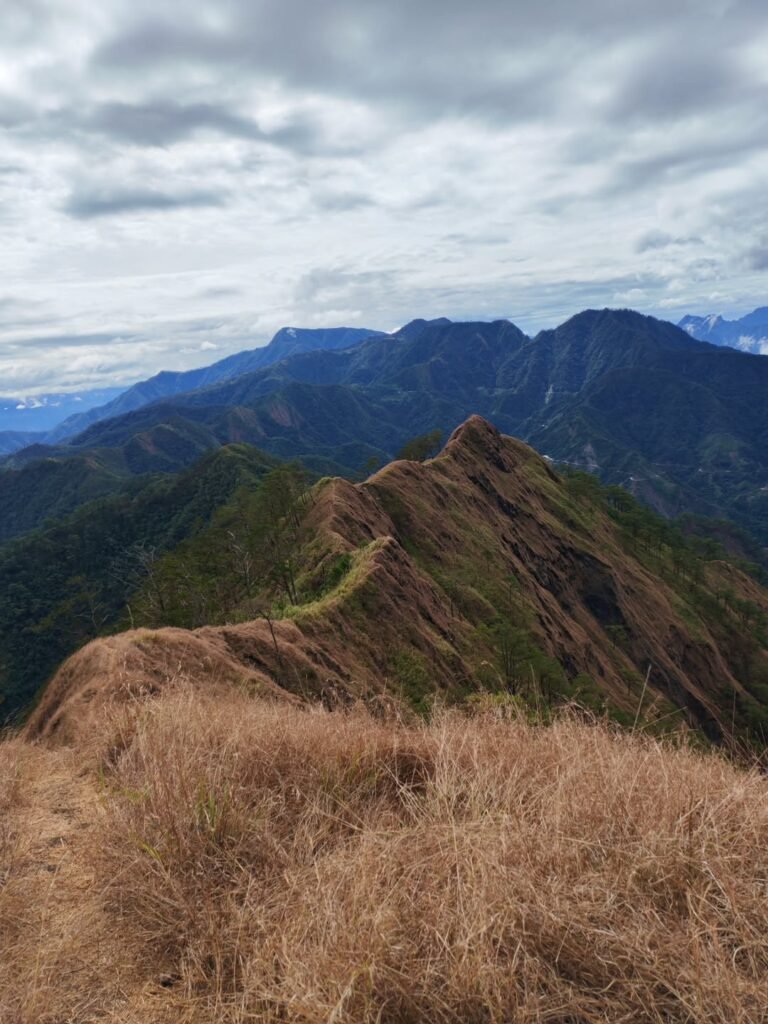
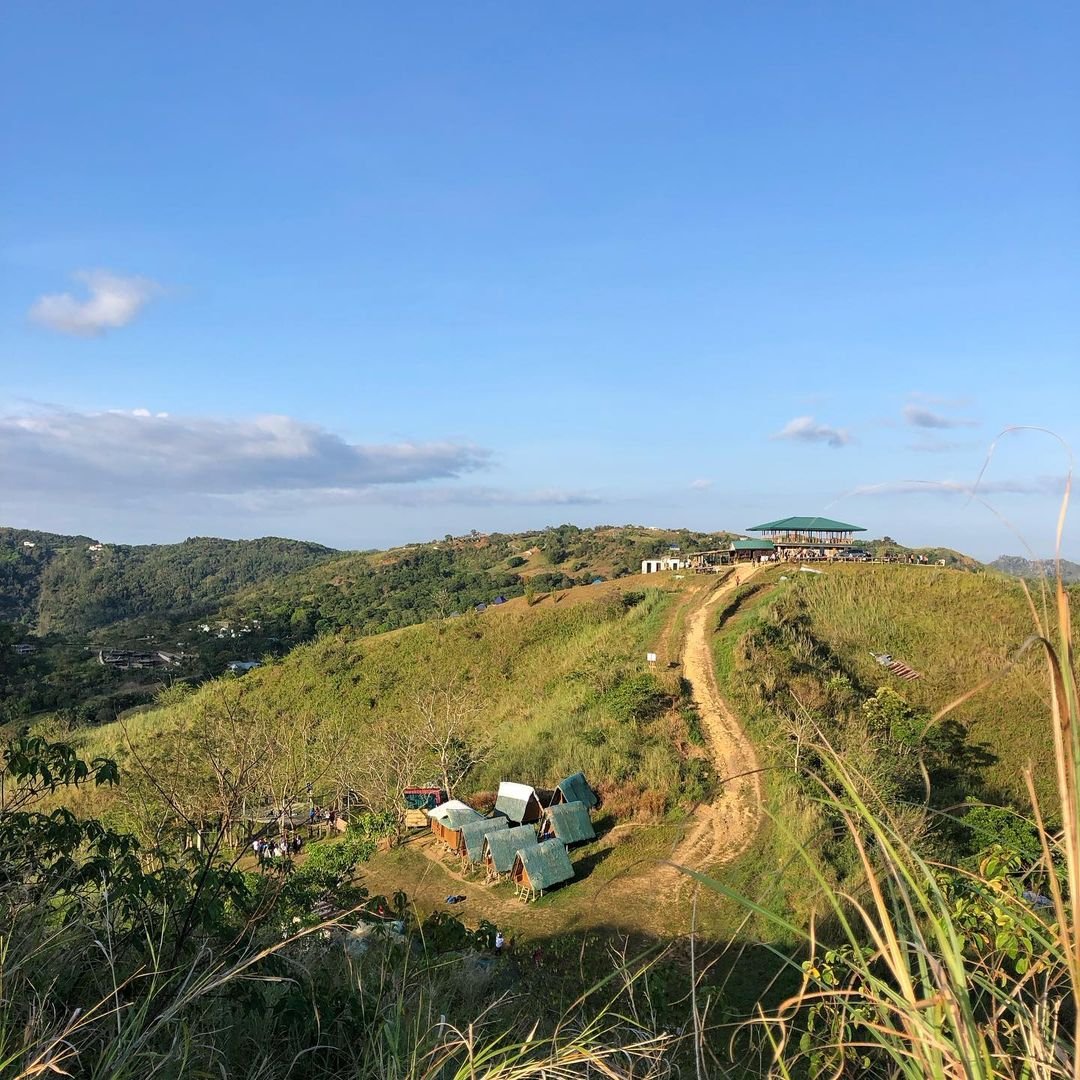
The hike begins on a wide, established dirt path that cuts through rolling hills of sharp cogon grass. There is zero tree cover here. You quickly reach Bahay ni Cardo, the summit hut popularized by Ang Probinsyano. It offers a legitimate 360-degree view of the Sierra Madre.
Stage 2 — Summit to Noah’s Ark
Difficulty: 3/5 — Narrow ridge trail; the descent to Noah’s Ark involves red clay that becomes frictionless when wet.
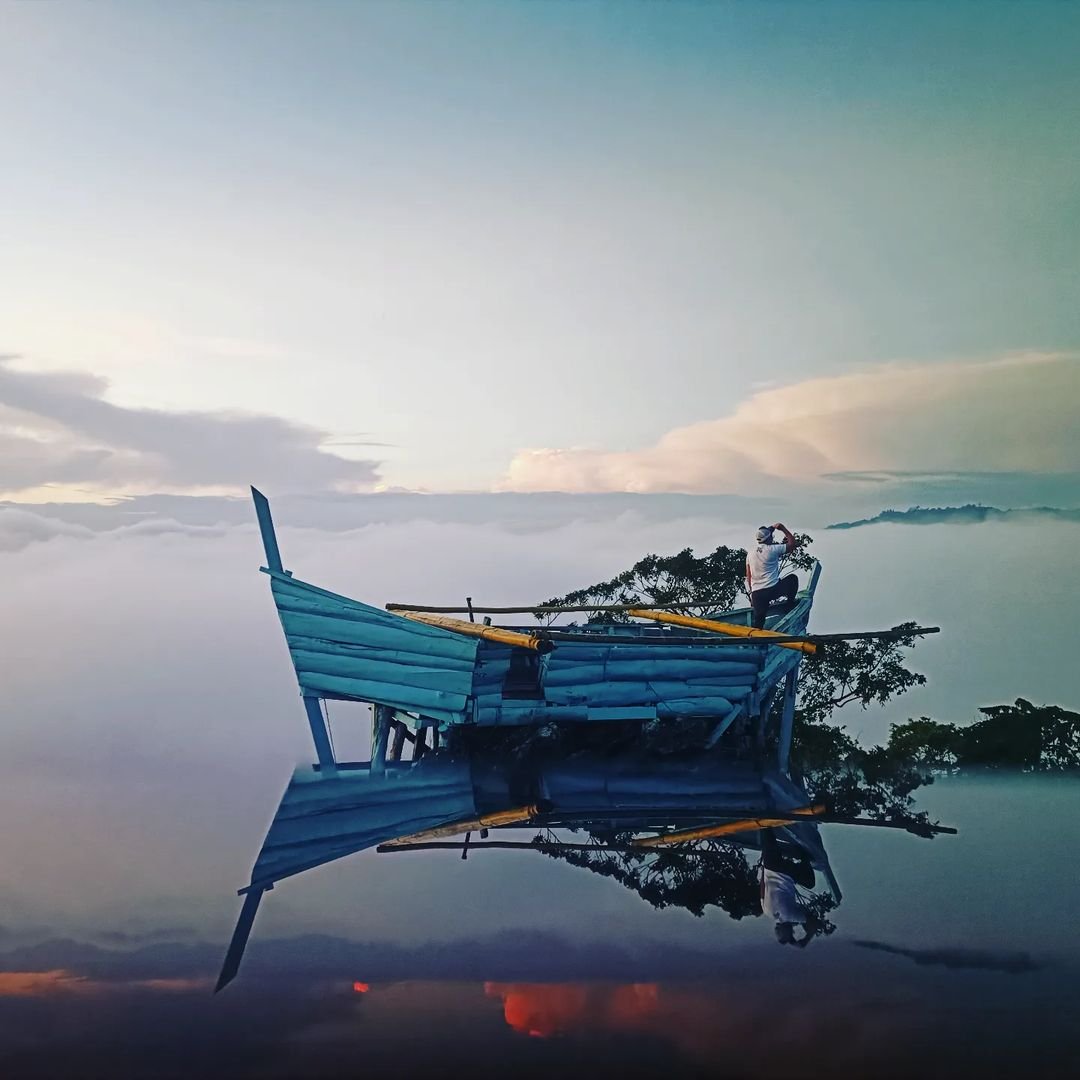
The reality of Mt. Kulis hits hard at Noah’s Ark. This limestone formation with a wooden boat structure is the most photographed spot on the mountain. The boat perched on top of a limestone rock formation is the perfect spot to catch the sunrise and the sea of clouds. Expect queues of 10–20 minutes on weekends.
Stage 3 — Noah’s Ark to Sambong Peak (Heart Peak)
Difficulty: 2/5 — Short ridge walk with minimal elevation gain from Noah’s Ark to the adjacent Sambong Peak.
After taking photos, you head to Sambong Peak, which stands at 629 MASL. It is also known as Heart Peak, thanks to the heart-shaped wooden pedestal used for photos.
Stage 4 — Descent to Riverbed, Camp B (optional)
Difficulty: 4/5 — The descent involves a steep dirt road with loose red clay; the riverbed crossing requires scrambling over wet rocks.
On a day with rain, the trail going to Noah’s Ark is extremely muddy, slippery, and the mud accumulates non-stop, making hiking shoes heavier. Going down to the running water is difficult because of its steep decline, though going up requires a lot of stamina.
Stage 5 — Camp B: Hanging Bridge, Lion House Falls, Natural Pool
Difficulty: 3/5 — Longer walk with a sustained uphill return; rewarding if you have time, but this section adds 1–2 hours.
Mt. Kulis offers two main camps — A and B. Camp A is relatively easy and beginner-friendly. Some trails have ropes to guide you along the way. Camp B demands noticeably more effort.
Wet Season Trail Conditions
Trail conditions on Mt. Kulis vary drastically depending on rainfall. In the height of summer (March–May), it is a dusty, sun-baked walk similar to the open trails of Mt. Batolusong. In the wet season, however, the lateritic clay transforms the path into a near-frictionless mud slide that effectively doubles the difficulty rating.
I climbed in June 2026, and the mud on the descent to Noah’s Ark was the single biggest challenge of the day. The red clay does not just get slippery — it accumulates on boot soles until you feel like you are walking on platform heels. Trekking poles or a bamboo staff from the locals at the gate are not optional in June, July, or August. They are essential.
Wet-season safety protocols to follow:
- Wear trail shoes with deep lugs or rubber-soled boots — smooth sneakers will send you sliding.
- Take smaller, deliberate steps on descents. Do not rush the clay.
- Use ropes installed along the trail where available — they are there for exactly this reason.
- Avoid the trail immediately after heavy rain. Wait 30 minutes for the worst drainage to settle.
- Tell your guide your honest fitness level before the descent. They will pace accordingly.
For comparison of how this trail stacks up against other Rizal options, see the beginner-friendly hikes and minor climbs guide.
Is Mt. Kulis Good for Beginners?
Yes — Mt. Kulis is one of the most beginner-appropriate hikes within two to three hours of Metro Manila, as long as conditions are dry.
Mt. Kulis is widely considered an excellent choice for beginner hikers. Its trails feature a manageable incline and relatively smooth paths, making it accessible for those with limited hiking experience. The ascent is steady but not overly challenging, allowing for a rewarding experience without extreme physical demands.
The key caveat: “beginner-friendly” applies to the dry season version of this trail. A wet-season climb at Mt. Kulis after overnight rain is closer to a moderate hike with real slip hazards. First-time hikers in the June–October wet season should go with a guide and wear proper footwear. Do not show up in flat rubber sandals thinking this is a park stroll.
Mt. Kulis is a great first mountain — the trail is beginner-friendly, manageable even for first-timers, and offers plenty of scenic spots along the way. The short summit time (30–45 minutes) also means you will not be exhausted before reaching the best views.
Day Hike vs. Overnight at Mt. Kulis
A day hike is perfectly sufficient for seeing all of Camp A’s main landmarks. The full circuit — summit, Noah’s Ark, Sambong Peak, Spider Web — takes 3–5 hours active hiking, not counting photo queues.
The real “hack” for Mt. Kulis is staying overnight. By camping, you bypass the morning rush entirely and get access to photo spots like Noah’s Ark during the “Golden Hour” (sunset). You also wake up already on the ridge, meaning you can walk five minutes to the viewpoint and watch the sea of clouds form without the 3 AM departure from Manila.
If you want to rent a kubo (native hut), reservations are highly recommended. These units are limited and sell out weeks in advance during the dry season. You can also pitch your own tent on the campsite grounds. Cooking is allowed but only through a butane stove. Bonfires and cooking with charcoal are strictly prohibited at the summit.
Bottom line: Day hike if you are on a tight budget or schedule. Overnight if you want the sea of clouds guaranteed and photos without a crowd.
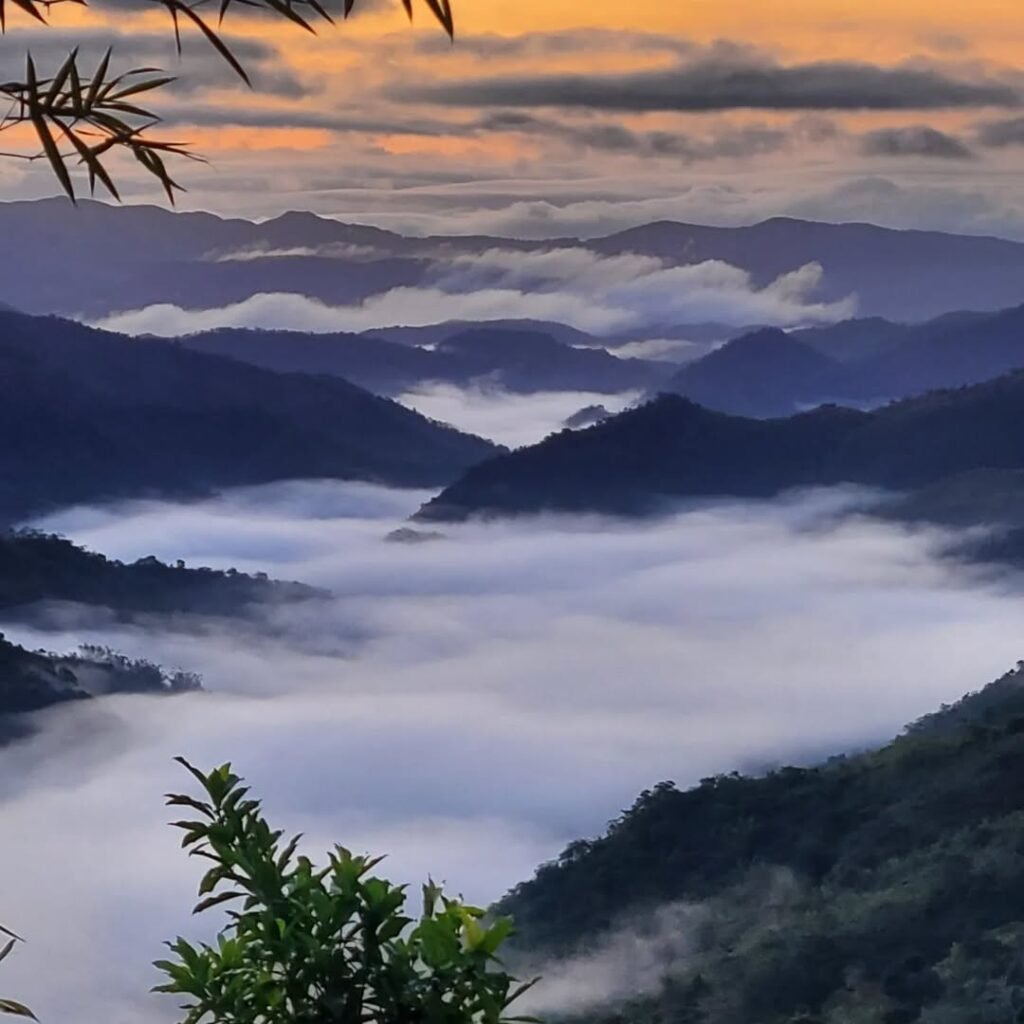
Sea of Clouds and Sunrise at Mt. Kulis
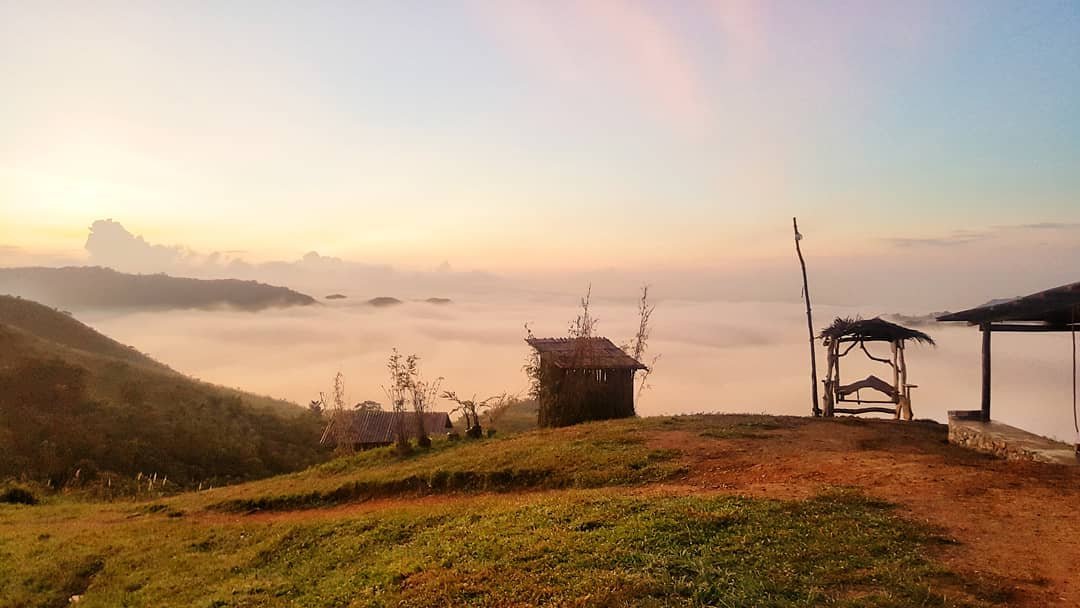
The sea of clouds at Mt. Kulis was the single most memorable moment of my June 2026 climb. I reached the Noah’s Ark viewing area at just past 6:00 AM, and the clouds were sitting thick and flat across the valley floor below — not wisps, but a solid white layer that made the ridge feel like an island. The Sierra Madre peaks poked through the far end. It lasted about 40 minutes before the sun burned it off.
The sea of clouds is a meteorological event, not a permanent fixture. To catch it, you need to be at the Mt. Kulis ridge (Camp A) before 5:30 AM. This is non-negotiable. Once the sun clears the ridgeline, thermals break up the inversion layer fast.
The Mt. Kulis sea of clouds forms due to thermal inversion — cool air trapped in the valleys overnight condenses into cloud cover. It is most reliable from October through February during the Amihan season, when cold northeasterly winds and overnight temperatures drop significantly. It still occurs in the rainy months (June is a good month for it, as I experienced), but it is less predictable.
For more spots to chase this phenomenon across Tanay, see 10 Must-Visit Sea of Clouds in Tanay Rizal.
Best Time to Climb Mt. Kulis
November to February is the best window for the Mt. Kulis hike. Amihan winds bring cool, dry air and clear mornings — ideal for the sea of clouds and comfortable summit temperatures.
March to May (dry season) is reliable for clear skies, but the trail becomes very exposed and hot. Start no later than 5:00 AM to avoid hiking the open cogon ridge in direct midday sun. Bring at least 1.5 liters of water per person — there are no water sources on the trail itself.
June to October (wet season) is entirely doable but demands respect for the mud. I climbed in June and had a full sea of clouds experience. The trade-off is that the descent to Noah’s Ark requires trekking poles and slow, deliberate movement. Trail shoes with grip are non-negotiable.
Avoid peak weekend crowds by arriving before 4:30 AM on Saturday and Sunday mornings. If you arrive after 6:00 AM on a holiday weekend, you will spend more time queuing at Noah’s Ark than hiking. Alternatively, consider a weekday climb or an overnight stay to sidestep the rush entirely.
For a broader weekend plan including nearby attractions, the ultimate guide to Treasure Mountain Tanay Rizal pairs well with a Mt. Kulis overnight.
Budget Breakdown for Climbing Mt. Kulis
The safe budget for a DIY Mt. Kulis day hike is roughly ₱1,200 per person, assuming a group of 4–5 sharing costs. Below is a realistic breakdown:
| Expense | Cost (PHP) |
|---|---|
| Cubao to Cogeo jeepney | ₱35–40 |
| Cogeo to Sitio Maysawa jeepney | ₱60–70 |
| Tricycle from Maysawa to campsite | ₱150 (per tricycle / ~₱40–50 per head) |
| Entrance / environmental fee (Camp A) | ₱200–300 |
| Mandatory guide fee (Camp A + Noah’s Ark) | ₱500 |
| Guide tip (recommended) | ₱100–200 |
| Comfort room / shower | ₱20 per use |
| Food and drinks (jump-off + campsite) | ₱150–250 |
| Tuk-tuk if targeting pre-dawn sea of clouds | ₱600 (shared, ~₱150–200 per head) |
| Estimated Total (DIY, group of 4) | ₱1,000–₱1,500 |
Note: All transactions are cash only. Bring small bills. ATMs are not available near the jump-off.
What to Pack for Mt. Kulis
| Item | Essential? |
|---|---|
| Trail shoes with deep lugs | Yes (critical in wet season) |
| Trekking poles or bamboo staff | Yes (wet season) / Optional (dry) |
| Headlamp with fresh batteries | Yes (pre-dawn starts) |
| 1.5L water minimum | Yes |
| Light rain jacket or poncho | Yes (wet season) / Yes (dry — for cold pre-dawn ridge) |
| Moisture-wicking shirt | Yes |
| Extra change of clothes | Yes |
| Sunscreen + hat | Yes (dry season) |
| Snacks / trail food | Yes |
| Small first-aid kit | Yes |
| Valid ID | Yes (registration requirement) |
| Cash (small bills) | Yes |
| Ballpoint pen | Yes (waiver signing hack) |
| Insect repellent | Recommended |
| Trash bag (pack out your waste) | Yes |
Cooking at the site is allowed only through a butane stove. If you are camping, a small portable stove and pre-packed ingredients are the simplest approach.
Safety Tips for Climbing Mt. Kulis
Know the mobile signal situation before you go. Smart has strong LTE signal on the trail, reliable for posts and calls. Globe has dead spots and intermittent coverage — do not rely on it for emergency communications. If your SIM is Globe, inform someone outside with your exact schedule.
Guides are mandatory for Noah’s Ark — do not skip them. Beyond the requirement, local guides at Fresno Agro-Forestry know exactly where the mud slips are worst, which ropes to use, and how to manage photo queues efficiently. Tour guides here are friendly and skilled at taking photos. Just don’t forget to tip them before you leave. A ₱100–₱200 tip per guide is standard and fair.
Wet-season hikers: Check the Tanay weather forecast the evening before. If there was heavy rain overnight, the descent section from Noah’s Ark to the river and back can become genuinely dangerous. Re-schedule rather than risk a fall.
Crowd management on peak weekends: Arrive before 4:30 AM to register and start moving before the main wave hits. Day hikes operate on a walk-in basis. Just arrive between 4:00 AM and 5:00 AM to beat the queue. On holidays, queues at Noah’s Ark can stretch to 30 minutes. Having a guide who manages your slot at the photo spot shaves off significant waiting time.
Leave No Trace strictly. This is private agro-forestry land. Throwing plastic wrappers on the trail threatens access for everyone else. Pack out everything you carry in.
municipal tourism office page — for any updated local ordinances or temporary trail closures.
Frequently Asked Questions About Mt. Kulis
1. Do I need to book in advance to hike Mt. Kulis?
For day hikes, no advance booking is needed. Walk-ins are the standard for day hikes. Just arrive between 4:00–5:00 AM to register before the queue builds. For overnight stays in a kubo (nipa hut), advance reservation through the Fresno Agro-Forestry Facebook page is strongly recommended, especially during peak dry season weekends.
2. Is there food and water available on the trail or at the summit?
There is a mini-restaurant where hikers can drink coffee, eat noodles, have breakfast, and take a nap while waiting for the start of the hike. However, there are no water sources on the trail itself. Carry at least 1.5 liters per person from the campsite. Bottled water is sold at the on-site store, but prices are higher than at convenience stores in town.
3. What is the mobile signal coverage on the Mt. Kulis trail?
Smart has strong LTE signal — reliable for posts and calls. Globe has dead spots and intermittent coverage — do not rely on it for emergency communications. Before you start, share your location and expected return time with someone not on the climb.
4. Are dogs allowed on the Mt. Kulis trail?
Dogs are not allowed on this trail. This is a firm rule enforced at the Fresno Agro-Forestry gate. Do not attempt to bring pets.
5. How do I get back to Cubao from Mt. Kulis after the hike?
Reverse the route: tricycle from the campsite to Sitio Maysawa junction (₱150 per tricycle), then jeepney from Maysawa toward Cogeo (₱60–₱70), and a final jeepney from Cogeo to Cubao (₱35–₱40). Jeepneys coming from Sampaloc are often full by the time they pass Sitio Maysawa in the afternoon. Instead of waiting, coordinate with a tricycle driver to bring you to the Sampaloc Terminal to secure a seat.
Final Verdict: Should You Climb Mt. Kulis?
4 out of 5 for first-time and beginner hikers. Mt. Kulis
Mt. Kulis sits on the western fringe of the Sierra Madre range — the longest mountain range in the Philippines and one of the most biodiverse corridors in Southeast Asia. The open cogon grassland on the ridge was likely cleared for agro-forestry, but as you descend toward Camp B, the vegetation shifts toward secondary forest with ferns, bamboo, and vine cover.
On the Camp B trail down to Lion House Falls, listen for the long, descending whistle of Philippine bulbuls in the tree canopy. The riverbed crossing at the base of the circuit passes through riparian vegetation — ferns, mossy rocks, and small freshwater fish visible in the shallows if the water is clear. The Hanging Bridge crossing gives you a view upstream into the narrow gorge.
The Sierra Madre that you see from the ridge is not just scenery — it is the watershed for much of Rizal Province and functions as a key wildlife corridor. The hike to Mt. Kulis allows visitors to observe diverse flora and fauna along the way. The Cogon grass (Imperata cylindrica) that covers the ridge is locally dominant and serves as an erosion buffer on the exposed hillside.
For a deeper dive into Rizal’s mountains within the Sierra Madre context, the mountains of the Philippines travel guide provides useful ecological background.