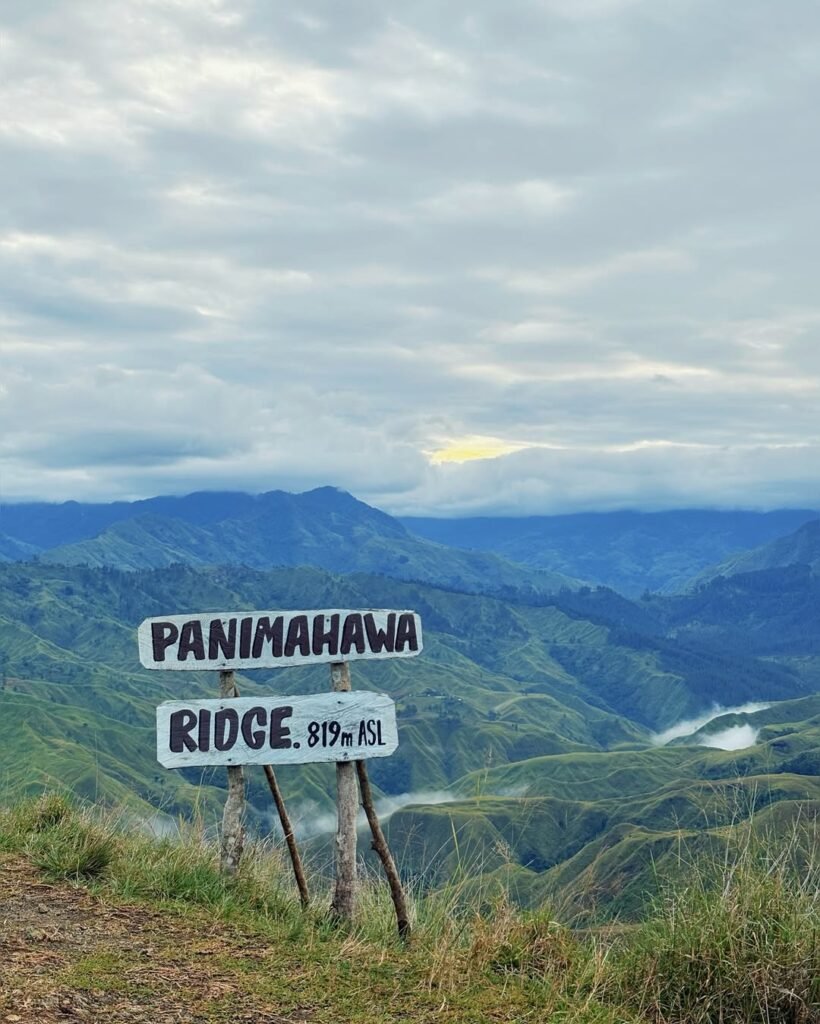
Panimahawa Ridge is a short, beginner-accessible hike in Impalutao, Impasug-ong, Bukidnon — about 6.5–8 km roundtrip with a total elevation of roughly 819 MASL. The trail takes 2–4 hours depending on your pace, and the biggest physical test is one steep section called Deadman’s Slope. I climbed it in April 2026 on a sunny morning and left thinking it was one of the most rewarding half-day hikes in Mindanao.
Panimahawa Ridge Quick Guide
| Detail | Info |
|---|---|
| Mountain | Panimahawa Ridge |
| Location | Brgy. Impalutao, Impasug-ong, Bukidnon |
| Province | Bukidnon, Northern Mindanao (Region X) |
| Elevation | ~819 MASL (approx. 2,687 ft) |
| Difficulty | 2/9 — Minor Hike |
| Jump-off | Ant Farm Basekamp, Barangay Impalutao |
| Best Season | Dec–Feb (sea of clouds); Mar–May (dry trails) |
| Trek Time | 2–4 hours total (day hike) |
| Registration | Ant Farm Basekamp (walk-in accepted) |
| Campsite | Open grassland ridge; camping allowed |
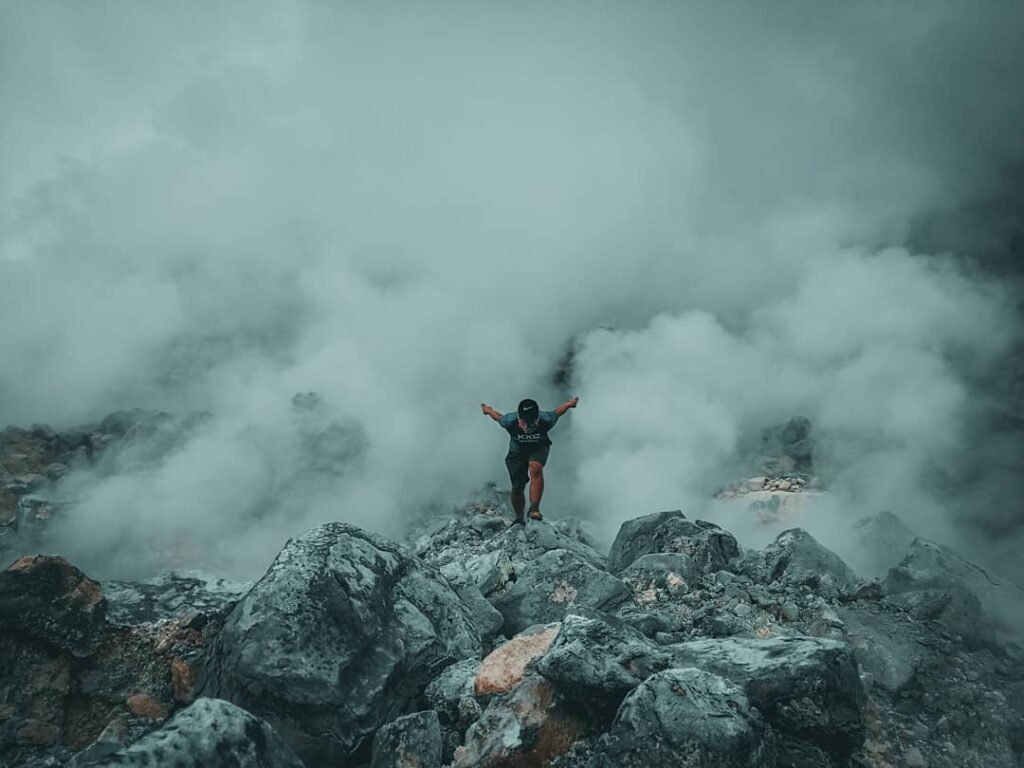
I hiked Panimahawa Ridge expecting a quick “beginner ridge walk,” but what surprised me was the terrain trick: you start on a plateau, drop into a river valley, then earn the ridge with one punchy climb. The views feel bigger than the elevation suggests—especially when the Tagoloan canyon fills up like a cloud ocean.
This guide is built for planning end-to-end: guide-fee, transport, trail breakdown, realistic pacing, budget, packing, and local safety rules.
Table of Contents
Where Is Panimahawa Ridge Located?
Panimahawa Ridge is in Impalutao, Impasug-ong, Bukidnon, in Northern Mindanao (Region X). It is part of a string of mountain ranges that dot Impasug-ong, Bukidnon, about 67 km north of Malaybalay City.
Panimahawa Ridge has an elevation of 819 Meters Above Sea Level (MASL), or around 2,687 feet. It is one of the five known ridges in Barangay Impasug-ong. The name comes from the Bisaya word pamahaw, meaning breakfast — which tells you something about how easy the original locals found this walk.
You may also see it spelled “Paminahawa Ridge.” That alternate spelling exists because Paminahawa is the name registered on Google Maps, though on the local tongue, they generally call it Panimahawa Ridge.
If you’re building a wider Bukidnon itinerary around this hike, check the complete Bukidnon tourist spots guide for surrounding attractions like Dahilayan and the Communal Ranch.
How to Get to the Panimahawa Ridge Jump-off Point
The jump-off is at Ant Farm Basekamp in Barangay Impalutao, and the route from Cagayan de Oro City is straightforward if you know the right drop-off landmark.
From Cagayan de Oro (CDO):
From CDO, catch a bus to Malaybalay and ask the conductor to drop you off at Impalutao Elementary School. From there, catch a habal-habal (single motorcycle) to Ant Farm, the trailhead for Panimahawa Ridge.
Getting to Panimahawa Ridge is easy by DIY because the route is “highway-access + short habal-habal transfer.” Ask the conductor to drop you at Impalutao Elementary School — not just “Impasug-ong.”
Total travel time from CDO to the jump-off is approximately 3–4 hours.
Habal-habal from Impalutao Elementary to Ant Farm:
The jump-off point is in Ant Farm, situated in Barangay Impalutao, about 9 km from Impasug-ong Elementary School. Habal-habal fare runs about ₱100–₱150 one way for shared rides; solo/charter riders may pay ₱150–₱200.
You can also contact the Ant Farm coordinator in advance: Sir Bob at 0997 801 3135 / 0935 198 6781. Before you leave CDO — especially if you’re solo — it helps to text the Ant Farm coordinator to ask if a “solo joiner/merge” is available on your date.
From Davao or other cities: From Davao, ride a bus to Cagayan de Oro City and alight at Impalutao Elementary School, then hire a motorcycle to the registration site.
There is no designated parking area for private vehicles marked within Ant Farm, but the barangay road leading to the basekamp is accessible by car. Private vehicle drivers can park near the vicinity of the Ant Farm compound and confirm space with the coordinator before arrival.

Permits, Fees, and Guide Requirements at Panimahawa Ridge
Panimahawa Ridge enforces a strict No Guide, No Hike policy — typically 1 guide per 5 hikers — to manage river safety and support local livelihoods.
Fees are commonly ₱300–₱350 per person, but exact breakdowns can change — verify with the local tourism office or guide coordinator. Based on older accounts, the minimum group fee is roughly ₱1,500 for five people, inclusive of registration and guide. Smaller groups pay the same per-head rate, which effectively means solo hikers pay more in absolute terms.
Walk-in registration at Ant Farm Basekamp is generally accepted. The Communal Ranch nearby may require a separate permit from the Poblacion Tourism Office — verify this in advance.
There is currently no separate DENR permit requirement specifically listed for this trail by local tourism operators, as the Ant Farm-managed registration process covers access. For the most current DENR policies on hikes in protected mountain areas of Bukidnon, consult DENR official website before your trip. For local tourism permits and coordination, contact municipal tourism office page for Impasug-ong.
Registration happens entirely at the Ant Farm Basekamp. You sign a basic waiver form, pay the fee, and are assigned a guide. The whole process takes about 10–15 minutes.
What Is the Panimahawa Ridge Trail Like?
The standard Panimahawa Ridge route is an out-and-back that feels like a “reverse mountain”: you begin on a plateau near Ant Farm, descend into the river valley, then climb steeply back up to the ridge spine. This structure surprises most first-timers. You lose altitude before you gain it, which means the descent on the return feels easier, but your knees still take the hit.
Most estimates place the total distance at around 6.5–8 km roundtrip with approximately 280–300 m elevation gain. A typical day hike takes 3–4 hours total, including short breaks. Beginners may take longer, especially if the clay is slippery or the group takes extended photo stops on the ridge.
Stage-by-Stage Trail Breakdown (with Difficulty Scores 1–5)
Stage 1: Ant Farm Basekamp → Corn and Pineapple Fields
Difficulty: 1/5 — Flat walking on open farmland; easy warm-up.
The hike begins with a coin-offering ritual to the local tribe’s ancestors, then continues along a flat path through cornfields stretching about 100 meters before reaching the trail leading down to the river.
Stage 2: Descent to the Dila River
Difficulty: 2/5 — Steep and slippery on red clay; manageable with proper footwear.
The first challenge is a sharp descent into a ravine that gets slippery if it’s raining. You can hold on to bamboo railings erected at some points for support. Journeying down through trees and lush vegetation, you can hear the Dila River flowing below. A makeshift bamboo bridge was built to cross it.
Stage 3: Deadman’s Slope (Post-River Ascent)
Difficulty: 4/5 — The hardest section; a sustained 30–45° climb on rugged terrain.
The trail is non-technical, but the steep Deadman’s Slope (about 30–45°) can feel challenging if you’re not used to sustained inclines. The trail consists of a long, steep ascent that stretches about 300 meters. This is the section where first-timers start asking their guides how much farther. The answer is always “almost there” — in true Filipino hiking guide tradition.
Stage 4: Mid-Trail Flat Walk and Rest-Stop Store
Difficulty: 2/5 — Moderate undulating terrain; a genuine breather.
After the steep climb, the trail eases into about 25 minutes of an easy stroll up to a store near the foot of the ridge. There is a mini shop before the final ascent where you can refill water bottles and buy sugary drinks.
Stage 5: Final Assault to the Ridge
Difficulty: 3/5 — Steep but shorter than Deadman’s Slope; the summit view makes it worthwhile.
After completing the first ascent in 45 minutes, there is a long walk on moderate slopes lasting about 20 minutes before encountering a second steep ascent to the campsite. The final ascent to the campsite is a long, straightforward climb on rocks and loose earth. It is slippery at times.
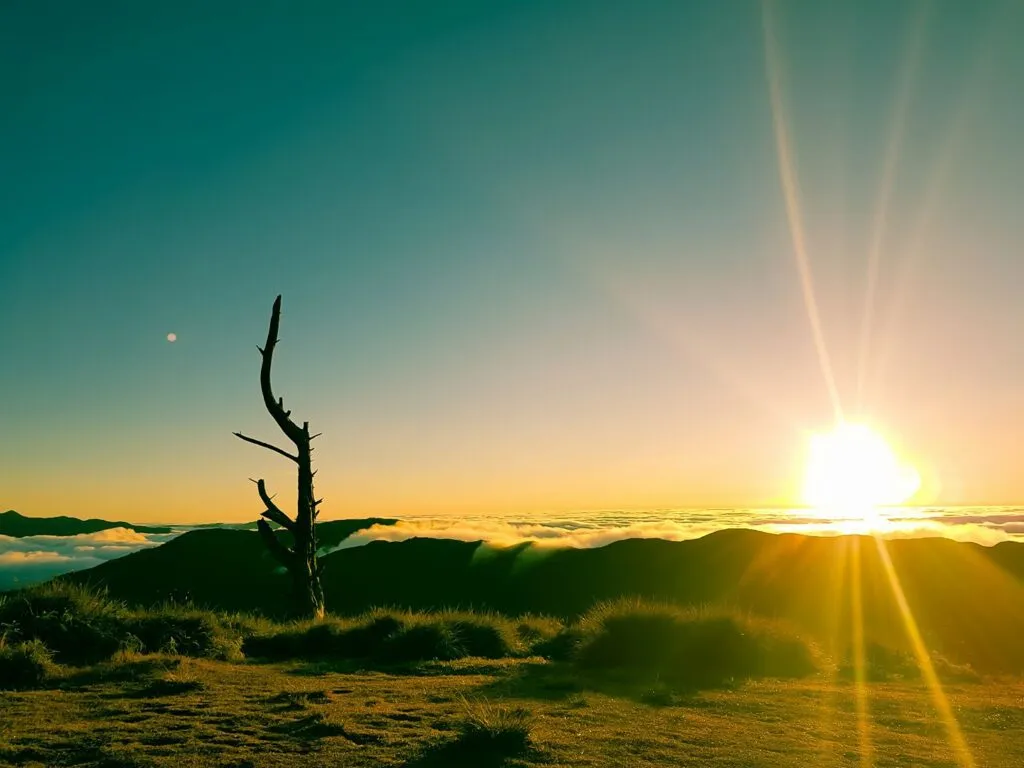
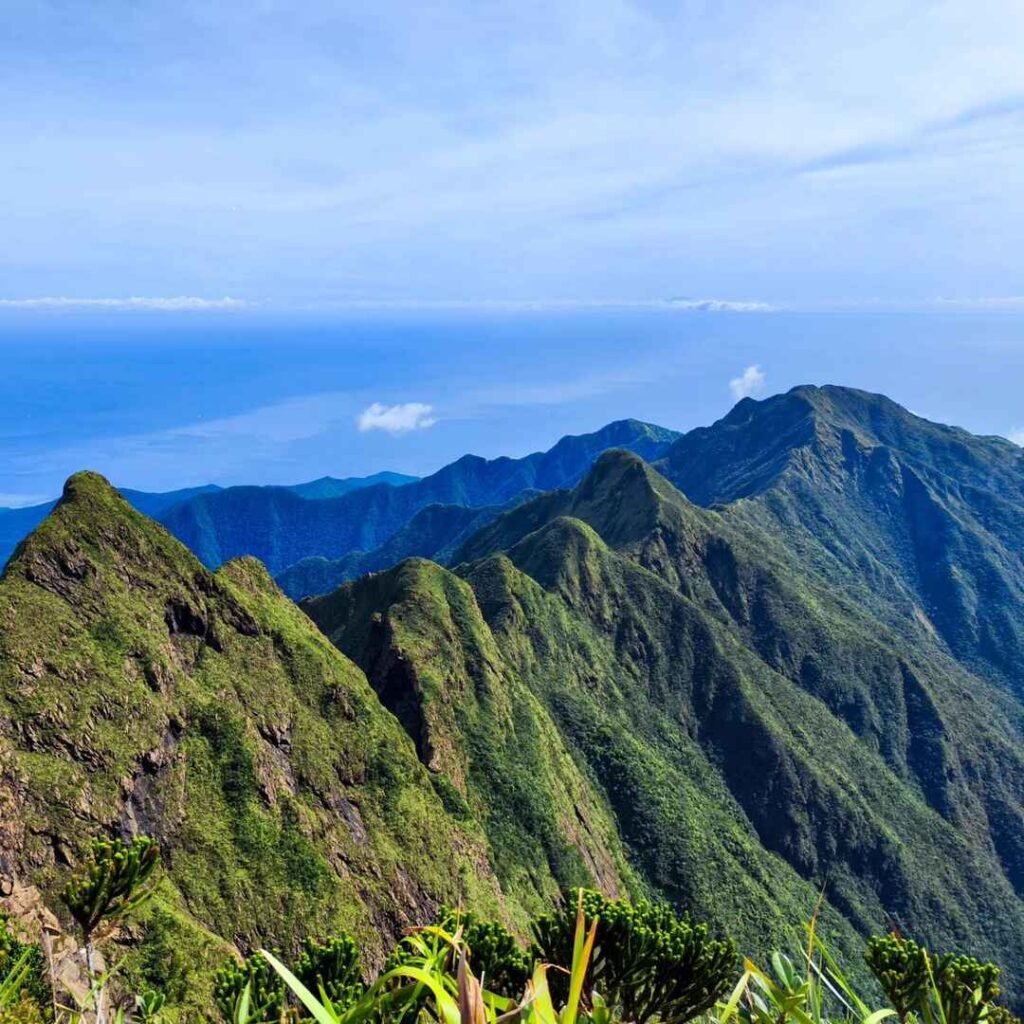
Standing on the ridge in April 2026 with full sun and a cool crosswind, the view made every sore muscle irrelevant. The Tagoloan canyon spread out below like a green bowl, and I could count at least four other distinct ridges from where I stood. On a clear morning, Mt. Kitanglad and Mt. Kalutungan are visible on the horizon.
Water Sources on the Trail
The dependable refill point is the Dila River, but you must filter or purify it due to potential upstream agricultural runoff. There is also a spring along the trail and a mini shop that sells bottled water and biscuits, though prices are higher than normal. Carry at least 1.5 liters from the start for a day hike. Don’t rely solely on the shop being stocked.
Signal and Connectivity
Signal is generally good, with Smart and Globe often getting 4G/LTE on the ridge because of clear line-of-sight to nearby towers. Expect occasional dead spots on lower sections.

The Coin Ritual: What It Is and Why It Matters
Every group that hikes Panimahawa Ridge participates in a coin-offering ritual at the start of the trek and before the final ascent. Most online guides mention it as a footnote. It deserves more explanation.
Hikers are required to leave some coins just before starting the trek and again just before the final ascent. This practice is connected to Lumad indigenous tradition. For the Lumad, ancestral land is far more than territory — it is identity, spirit, and survival. The forests, rivers, mountains, and fields are not just resources; they are sacred relatives, woven into the fabric of Lumad culture. The coin offering is a gesture of respect to the spirit of the mountain and to the ancestors associated with that land.
Lumad rituals and ceremonies are traditional practices of the indigenous people from Mindanao. These rituals are performed for various reasons, including seeking blessings, giving thanks, healing, and protection.
Do not skip this ritual. It is not optional, and it is not a tourist gimmick. It is a genuine expression of the community’s relationship with this land that predates the trail’s 2017 public opening. Bring at least ₱5–₱10 in coins. Your guide will show you the exact spot and the appropriate way to offer them. Participate with genuine respect, not with a camera pointed at the coins.
Is Panimahawa Ridge Good for Beginners?
Yes — Panimahawa Ridge is one of the most beginner-accessible hikes in Bukidnon. It is one of the more beginner-friendly hikes in Bukidnon because the trail is short, non-technical, and has reliable signal, plus guides are strictly required. The only part that can shock first-timers is the steep climb after the river (Deadman’s Slope), which feels harder than the distance suggests. With basic cardio and a steady pace, most beginners finish comfortably.
The trails are pretty manageable, with a mix of downward slopes, inclined and open trails, and a flat road where even cars can pass.
That said, do not go in wearing rubber slippers or flat canvas shoes. The first mistake many first-timers make is not physically training, believing the trek is very minor and short. The second mistake is not wearing proper shoes. A sturdy pair of shoes is necessary as the trail is a bit tough.
For more beginner-friendly hikes in the Philippines to train up before a bigger Bukidnon adventure, that linked guide covers minor climbs nationwide.

Best Time to Climb Panimahawa Ridge
For the best experience, pick months based on your goal: December–February for sea of clouds and cool winds; March–May for dry trails and astrophotography. Avoid rainy periods when the red clay turns slick and the Dila River can swell fast. Even in “good months,” your go/no-go decision should follow rainfall and river conditions, not the calendar.
I climbed in April 2026 — dry season, full sun, and a light wind that kept the ridge comfortable. The views were sharp and the trail was firm. This is the ideal window.
Seasonal River Safety and Flood Risk
The Dila River crossing is the hike’s single biggest safety variable. During the rainy months of June–October, heavy rainfall in the upper catchment can cause the Dila River to rise quickly — sometimes within hours of rain upstream, even if it is not raining at Ant Farm itself. Avoid rainy periods when the red clay turns slick and the Dila River can swell fast. Even in “good months,” your go/no-go should follow rainfall and river conditions, not the calendar.
Weather in Bukidnon is very unpredictable, so pack gear and outfit suitable for hot, rainy, or cold weather. Rain showers or thunderstorms usually occur in the afternoon.
The guide system exists partly for this reason. If your guide says the river is too high, the hike stops. No exceptions, no negotiating. This is not overcaution — Bukidnon’s mountain rivers rise fast and unpredictably after rain. Trust the call.
Trail Conditions After Rain
Safety on Panimahawa Ridge is less about technical climbing and more about respecting local conditions: river conditions, weather shifts, and the strict guide system. The red clay can turn a minor hike into a slip-and-sprain day. After heavy or sustained rain, the descent sections around Stage 2 and the final assault become significantly more difficult. The red clay becomes extremely slick. Good grip footwear goes from recommended to absolutely non-negotiable. The bamboo bridge at the Dila crossing should be inspected by your guide before crossing.
Budget Breakdown for Climbing Panimahawa Ridge
| Expense | Estimated Cost (PHP) |
|---|---|
| Bus from CDO to Impalutao Elementary School | ₱140–₱180 |
| Habal-habal from Impalutao to Ant Farm (shared) | ₱100–₱150 |
| Registration + Guide Fee (per pax) | ₱300–₱350 |
| Bottled water / snacks at trailhead store | ₱50–₱100 |
| Return habal-habal + bus | ₱240–₱330 |
| Meals (tapsilog at jump-off area) | ₱80–₱120 |
| Estimated Day Hike Total (per pax) | ₱910–₱1,230 |
I started my morning at the Ant Farm area with a tapsilog — rice, tapa beef, and a fried egg — before signing in. It cost less than a convenience store meal and kept my energy up for the first two stages. There are small eateries and sari-sari stores near the basekamp serving basic Filipino breakfast and snacks.
For a fuller budget trip that includes Cedar Falls or Communal Ranch on the same day, budget an extra ₱200–₱400 for those separate fees and transport. The nearby Communal Ranch DIY guide covers costs for that side trip in detail.

What to Pack for Panimahawa Ridge
Pack for Panimahawa Ridge like a “small hike with big weather swings”: open grasslands, strong wind, and slippery clay when wet. Keep your kit light because the distance is short, but never skip traction shoes, a wind layer, and water treatment.
| Item | Essential? |
|---|---|
| Trail shoes or hiking boots (lugged sole) | Yes |
| 1.5–2 liters of water | Yes |
| Rain jacket or light wind layer | Yes |
| Headlamp (even for day hikes) | Yes |
| Trekking pole(s) | Recommended |
| Snacks / trail food | Yes |
| Sunscreen and sun hat | Yes |
| Water filter or purification tablets | Recommended |
| Dry bag for electronics | Recommended |
| Extra set of dry clothes | Recommended |
| First-aid kit (basic) | Yes |
| Coins for ritual offering | Yes |
| Trash bag (for all your waste) | Yes |
| Tent + sleeping bag (overnight only) | Overnight only |
Do not bring: open-toed footwear, glass bottles, single-use plastics without a plan for carry-out, or a group attitude that says “the guide will handle it.”
Safety Tips for Climbing Panimahawa Ridge
River crossings come first. The Dila River bamboo bridge shakes with each step and can feel genuinely nerve-wracking. After the descent, you cross to the other side using a makeshift bamboo bridge. It shakes with every step. Most hikers make it across safely with slow, deliberate steps. Cross one person at a time, keep your weight centered, and hold the guide rope.
Footwear is your number-one piece of safety gear. If the clay is damp, traction beats comfort. A snug trail shoe beats a soft sneaker that slides.
Start early for a day hike. If you have limited time, day hike starts are typically at 4:00 AM — this lets you reach the summit before the midday heat and gives you ample buffer for the descent. Rain showers or thunderstorms usually occur in the afternoon, so getting down before 2:00 PM is a smart target.
Environmental impact and Leave No Trace. Panimahawa Ridge is an open grassland summit. There are no trash bins up top. Because the ridge is open grassland with limited privacy and shallow soil, consider portable waste bags for overnight trips. Pack out all trash, including food scraps. The guides and local community actively manage this site — they notice when visitors leave rubbish behind, and repeat offenders affect the entire community’s livelihood from tourism. Carry a trash compactor bag, fill it on the way down, and dispose of it in Impasug-ong. The simple rule: if you brought it up, bring it down.
Respect cattle. Campers at the ridge set up near one of the peaks, but finding a good spot requires avoiding cow droppings that are widespread at the campsite. Free-roaming cattle share the grassland. Give them space. They are more surprised by you than you are by them.
What Other Guides Get Wrong About Panimahawa Ridge
They call it purely “easy.” Every listing rates Panimahawa Ridge as beginner-friendly — which is true in overall terms — but this creates a false impression that the whole trail is a gentle walk. It is a minor climb, but to the uninitiated, the ascent can be very physically challenging and arduous as it gets steep.
The first mistake many first-timers make is not physically training, believing the trek is very minor. The Deadman’s Slope section is genuinely hard for anyone who hasn’t been doing cardio. Go in ready for that one sustained push.
They skip the Dila River flood risk. Almost no guide explains that the river can rise fast regardless of the season. If it has rained heavily in the surrounding highlands the night before your hike, ask your guide specifically about river levels before you pay and sign in. A guide fee is not a refund if the hike is cancelled — but a cancelled hike is far better than a dangerous river crossing.
They underestimate the afternoon heat in summer. April and May have the driest trails, but midday heat on the open grassland sections is significant. Even on a minor hike, a tirik (directly overhead) sun saps your energy fast. Bring sunscreen, a hat, and at least one extra 500ml of water beyond what you think you need.
They omit the coin ritual entirely or treat it as a curiosity. It is a living cultural practice tied to the Lumad communities of Mindanao. Participating with genuine respect — not as a photo opportunity — makes a meaningful difference to the local guides and community members who maintain this trail.

Frequently Asked Questions About Panimahawa Ridge
1. Where is Panimahawa Ridge located exactly, and how far is it from CDO?
Panimahawa Ridge is in Impalutao, Impasug-ong, Bukidnon, in Northern Mindanao (Region X). Total travel time from CDO to the jump-off is approximately 3–4 hours by public bus to Impalutao Elementary School, then a short habal-habal ride to Ant Farm.
2. What is the Panimahawa Ridge elevation in MASL, and does altitude affect the hike?
Panimahawa Ridge has an elevation of 819 MASL (approximately 2,687 feet). This is not high enough to cause altitude sickness for most people. The challenge is gradient, not altitude. The main climb at Deadman’s Slope rises steeply over a short horizontal distance, which spikes heart rate fast for untrained hikers.
3. How long is the Panimahawa Ridge trail in kilometers, and how long does it take?
Most estimates place the Panimahawa Ridge trail at around 6.5–8 km roundtrip with approximately 280–300 m elevation gain. Exact distance varies by starting point and side viewpoints. A typical day hike takes 3–4 hours total, including short breaks.
4. What is the Panimahawa Ridge entrance fee and guide fee in 2026?
Panimahawa Ridge enforces a strict No Guide, No Hike policy — typically 1 guide per 5 hikers. Fees are commonly ₱300–₱350 per person, but exact breakdowns can change — verify with the local tourism office or guide coordinator before your trip. Walk-in registration at Ant Farm is generally accepted.
5. Can I do Panimahawa Ridge as a day hike, or is overnight camping required?
A day hike is fully doable. Most hikers can finish Panimahawa Ridge as a half-day trip, but an overnight makes sense if you want sea of clouds at dawn or a Milky Way window at night. For a day hike, the recommended start time is 4:00 AM to catch sunrise and avoid afternoon heat. Overnight camping is allowed at the open ridge campsite — bring your own tent and sleeping bag, as none are provided.


Final Verdict: Should You Climb Panimahawa Ridge?
Panimahawa Ridge earns 4.5 out of 5 for beginner and intermediate hikers planning their first or second mountain experience in Mindanao. The trail structure is honest — one real climb, one real reward — and the guided system, coin ritual, and community-run registration make this feel like a hike with genuine local roots, not a packaged tourist product.
If you’re building a broader Bukidnon adventure, pair it with the Communal Ranch in the afternoon, or use it as a warm-up before taking on bigger Mindanao peaks like Mt. Dulang-Dulang — the mountains of the Philippines guide can help you plan that progression. Just bring the right shoes, carry your trash down, and drop a few coins at the start. The mountain will do the rest.