The Stairway to Heaven
Mt. Amuyao (2,702 MASL) is a Major Climb (8/9 Difficulty) located in Barlig, Mountain Province, defined by the grueling “Infinite Stairway” leading to its summit relay towers. This Mt. Amuyao Hiking Guide 2026 focuses strictly on the reliable Barlig Backtrail (out-and-back) to bypass persistent political closures on the Batad Traverse, providing updated logistics on Coda Lines schedules, summit bunkhouses, and safety protocols.
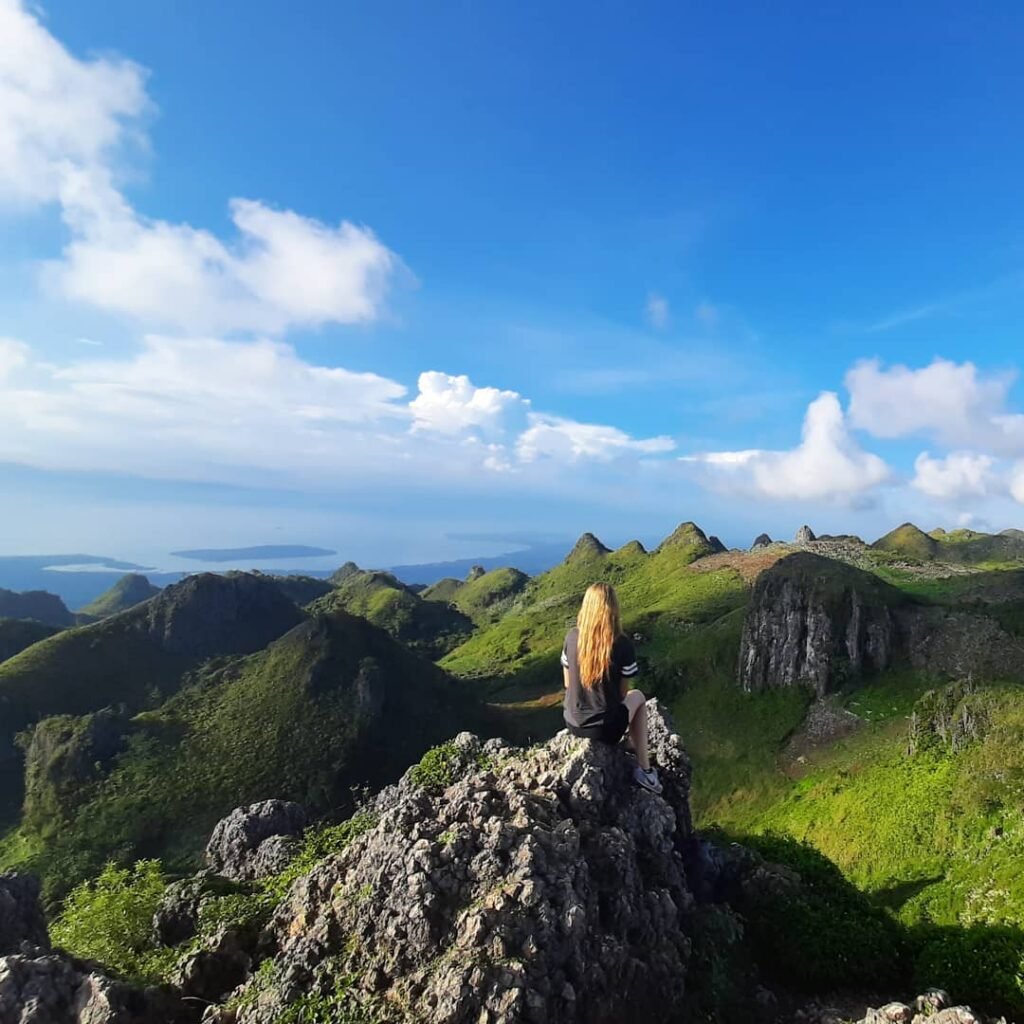
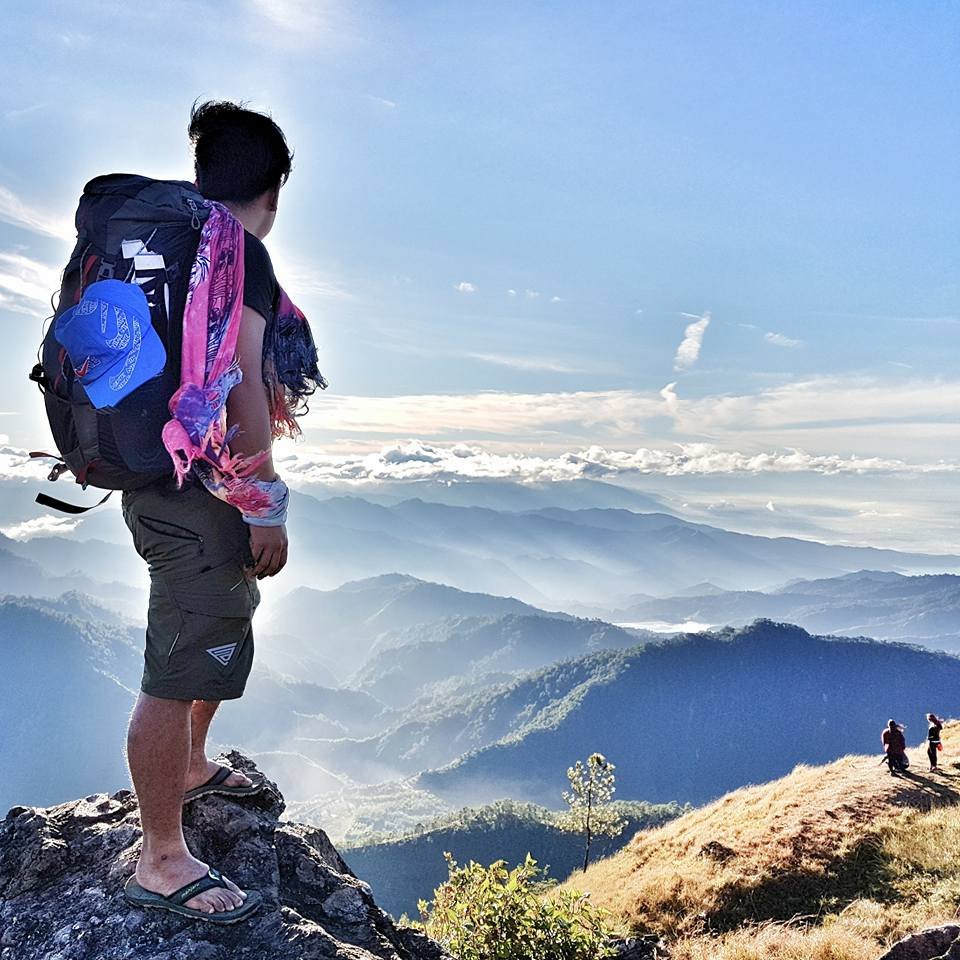
Most hikers know the iconic photo: two industrial relay towers piercing the sky, floating above a solid ocean of white clouds. From the photos, it looks peaceful. But the reality on the ground is a biomechanical endurance test that separates the tourists from the mountaineers. To stand on the 10th highest peak in the Philippines, you don’t just hike; you have to survive the stairs.
Located in the remote municipality of Barlig, Mt. Amuyao anchors the eastern flank of the Cordillera Central range. Unlike the rolling, grassy slopes of its neighbor Mt. Pulag, Amuyao rises sharply from the rice terraces. Its defining feature is the “Infinite Stairway”—thousands of concrete and carved earth steps originally built to service the PT&T and ABS-CBN transmitter stations at the summit.
I cannot stress this enough: this is not a beginner’s hike. The repetitive stepping motion locks your legs into a specific cadence that punishes your quadriceps on the ascent and destroys your knees on the descent.
Why This Guide Focuses on the Backtrail
For the 2026 hiking season, we are prioritizing the Barlig Backtrail (Out-and-Back). While the traverse to Batad/Banaue is legendary, it is currently plagued by “exit fee” disputes and friction between the Barlig and Banaue LGUs.
Based on recent on-ground reports, attempting the traverse without a pre-arranged “fixer” often results in hikers being stranded or extorted mid-trail. This Mt. Amuyao Hiking Guide 2026 is designed to give you a friction-free itinerary, covering the Coda Lines bus schedules from Cubao, the “Monster Jeep” logistics from Bontoc, and the strict Medical Certificate requirements you need to present at the Barlig Municipal Tourism Office.
Table of Contents
The Quick Specs: Mt. Amuyao Profile
The hike to Mt. Amuyao is rated as an 8/9 Difficulty (Major Climb), primarily due to the “Infinite Stairway”—a relentless ascent on concrete steps that punishes the knees. Standing at 2,702 Meters Above Sea Level (MASL), the Barlig backtrail typically requires 5 to 8 hours to summit. It is strictly recommended for hikers with significant leg conditioning.
Mt. Amuyao Difficulty and Elevation
Let’s be real about the numbers: Mt. Amuyao is widely recognized as the 10th highest mountain in the Philippines and the 5th highest in Luzon, towering over the Mountain Province at 2,702+ MASL. Unlike the gradual incline of Mt. Pulag via Ambangeg, Amuyao offers no “warm-up.”
The trail starts immediately from the Barlig Rice Terraces at roughly 1,600 MASL, forcing a vertical gain of over 1,100 meters in a relatively short distance. This is why the Mt. Amuyao difficulty rating sits firmly at 8/9. The challenge here isn’t technical rock scrambling; it is the mental and physical grind of the stairs.
The “Infinite Stairway” Factor
I’ve hiked many peaks in the Cordilleras, but Amuyao is biomechanically unique. Because the trail was originally built to service the PT&T and ABS-CBN relay stations at the summit, about 80% to 90% of the route consists of concrete steps, riprap, or carved earth risers.
Insider Tip: The stairs force you into a “locked-in” cadence. On a normal dirt trail, your stride length varies, allowing micro-muscles to rest. On the Barlig backtrail, the repetitive stepping motion creates immense eccentric load on your knees during the descent. If you are prone to ITBS (Iliotibial Band Syndrome) or knee pain, trekking poles are not optional—they are mandatory.
Quick Stats Table
Here is the breakdown of the technical details you need for your Mt. Amuyao Hiking Guide 2026:
| Feature | Specification |
| Location | Sitio Macalana, Barlig, Mountain Province |
| Elevation | 2,702+ Meters Above Sea Level (MASL) |
| Trail Difficulty | 8/9 (Major Climb) |
| Trail Class | 1-3 (Established stairs, mossy forest, no ropes needed) |
| Days Required | 2 Days (Standard) / 1 Day (Extreme Dayhike) |
| Limatik Presence | Yes (High density in the Mossy Forest zone) |
| Summit Features | Twin Relay Towers, Bunkhouses, Sea of Clouds |

Pre-Climb Requirements (2026 Protocol)
Mandatory Requirements & Permits
To hike Mt. Amuyao in 2026, you strictly need a valid Medical Certificate indicating you are fit for strenuous activity. Registration happens upon arrival at the Barlig Municipal Tourism Office near the Municipal Hall. While walk-ins are permitted, large groups must coordinate in advance via the Barlig Tourism Facebook page to secure guides.
The “Fit-to-Climb” Policy
The Local Government Unit (LGU) of Barlig takes safety seriously, and for good reason. The Mt. Amuyao requirements are stricter than your average day hike because the “Infinite Stairway” places extreme mechanical stress on the heart and lungs.
When I registered last season, the officer explicitly checked my Medical Certificate to ensure it wasn’t just a generic “fit to work” note, but one that cleared me for “strenuous physical activity” or “mountaineering.” Do not attempt to fake this. If you have a history of heart conditions or severe asthma, the Barlig Municipal Tourism Office has the right to deny your permit.
Registration Process & Fees
Upon arrival at the Poblacion (town proper), your first stop is the Municipal Tourism Office located near the Barlig Municipal Hall and the police station.
Here is the standard protocol for DIY hikers:
Step 1: Present your Medical Certificate and ID at the Tourism Office.
Step 2: Log in and pay the Environmental/Tourism Fee (approx. PHP 50 – 100 per person).
Step 3: Proceed to the Barlig Police Station for a courtesy call and logbook entry.
Step 4: Pay the Barangay Entry Fee (approx. PHP 50 – 100 per person) at Brgy. Latang or Brgy. Gawana.
Insider Tip: While walk-ins are generally accepted for solo hikers or pairs, the guide ratio is strictly enforced (1 Guide : 5 Hikers). If you are arriving on a holiday weekend or with a large team, message the Barlig Tourism Office Facebook page at least one week prior. Guide availability can be scarce during peak season.
Important Contact:
Barlig Municipal Tourism Office: (Check their official Facebook page for the latest mobile number as these change frequently).
Police Station: Located right next to the municipal hall; they also monitor hiker safety.

How to Get There (Manila to Barlig)
How to Go to Mt. Amuyao (DIY Guide)
To get to Mt. Amuyao from Manila, take the Coda Lines bus from Cubao to Bontoc (11-12 hours). From the Bontoc Poblacion terminal, catch the public passenger jeepney departing for Barlig at 1:30 PM daily. If you miss this trip or are in a large group, you must rent a private “Monster Jeep” from Bontoc to reach the jump-off.
Step 1: Manila to Bontoc (The Long Haul)
For the 2026 season, the most reliable operator for a Mt. Amuyao DIY guide itinerary is Coda Lines Corporation. They operate out of the HM Transport Terminal on Monte de Piedad Street, Cubao.
-
Schedule: Departures are typically at 8:00 PM and 9:00 PM.
-
Booking: You must book online via Biyaheroes or the Coda Lines website at least 1 week in advance.
-
Fare: Expect to pay around PHP 1,200 – 1,300 for the VIP/CR Bus.
Insider Tip: I strongly recommend spending the extra pesos for the VIP/CR Bus (lazyboy seats with a restroom). The Halsema Highway is notorious for its endless curves and limited stopovers. Having an onboard restroom saves you from the discomfort of long stretches between stops, especially when you’re trying to sleep before the hike.
Step 2: Bontoc to Barlig (The Critical Connection)
This is the friction point where many DIY hikers get stuck. Upon arrival at Bontoc Poblacion (usually around 6:00 AM – 8:00 AM), you have a long wait until the afternoon trip. The jeepney terminal is located near the Mountain Province State Polytechnic College (MPSPC) or the Public Market.
-
Public Jeep: The daily trip departs strictly around 1:30 PM to 2:00 PM.
-
Fare: Approximately PHP 150 per person.
-
Travel Time: 1.5 to 2 hours on rough roads.
Warning: Do not rely on the “late trip” (4:00 PM) as it is often fully booked by locals returning home. If you miss the 1:30 PM jeep, you are effectively stranded unless you hire a private ride.
Step 3: Private Logistics (The “Monster Jeep”)
If you are a group of 10+ or arrive late, hiring a “Monster Jeep” is the best strategy. These modified vehicles feature lifted suspensions to handle the Cordillera terrain.
-
Rental Cost: PHP 2,500 – 3,500 (One way, Bontoc to Barlig).
-
Drop-off: Direct to Sitio Macalana, Brgy. Latang (The Jump-off Point).
Insider Tip: If you choose to ride “top load” (on the roof) for the views, bring your windbreaker. The wind chill on the ride to Barlig cuts deep, and the road dust is relentless. Wear sunglasses and a face mask.

The Trail & Summit Features
Trail Conditions: The Infinite Stairway
The Mt. Amuyao trail is characterized by three distinct ecological zones: the exposed Rice Terraces/Pine Transition (1,600–2,000 MASL), the slippery, Limatik-infested Mossy Forest, and the Summit Assault. Approximately 80% to 90% of the route consists of concrete steps or carved earth risers, creating a relentless vertical ascent that demands exceptional knee stability and cardiovascular endurance.
The Biomechanics of the “Stairs”
I need to manage your expectations: the Mt. Amuyao difficulty doesn’t come from technical scrambling; it comes from the repetition. Unlike a natural forest floor where your stride length changes, the concrete stairs at Barlig force your legs into a “locked-in” cadence.
This lack of switchbacks means your quadriceps never get a micro-rest on the way up, and your patellar tendons take a beating on the way down. I strongly advise training on a StairMaster before attempting this. When you hit the section hikers call the “Demonyo Trail” (roughly halfway, past the “Waiting Shed”), you will understand why the locals respect this mountain.
Critical Trail Features
Here is the tactical breakdown of what you will encounter on the way to the 2,702 MASL summit:
Water Sources: There is a reliable spring in the mossy forest and another at Camp 1, located about 30-45 minutes below the summit.
Insider Tip: Do not drink directly from the streams. The runoff often contains E. coli from wildlife. I always use a Sawyer Mini or Aquatabs here. Fill up at least 2-3 Liters at Camp 1 because there is no water source directly at the summit towers.
The Summit Bunkhouses (Shelter): The summit is home to relay stations (formerly ABS-CBN and PT&T). The caretakers often allow hikers to sleep in the concrete bunkhouses for a fee (approx. PHP 200 – 300). Warning: These bunkhouses are “concrete refrigerators.” They insulate poorly and trap the cold. I learned this the hard way—sleeping on the floor without a high R-value sleeping pad will suck the body heat right out of you, even in a good sleeping bag.
Connectivity (Signal Status): If you need to post your summit selfie, Smart is the king of the mountain here, offering surprising 4G/LTE speeds at the peak. Globe signal is very spotty to non-existent. Note: There is a massive “Dead Zone” throughout the entire mossy forest section (Phase 2 & 3). Do not rely on your phone for emergency calls during the hike itself.

Itinerary Options (2026)
Recommended Mt. Amuyao Itinerary
The ascent via the Barlig Backtrail typically takes 5 to 8 hours depending on your pace and pack weight, while the descent requires 4 to 5 hours. For the full experience, a 2-Day/1-Night (2D1N) itinerary is highly recommended to witness the famous sunset and sunrise from the summit. Dayhikes are possible but require an extreme “Alpine Start” (3:00 AM) to ensure safety.
Option A: The “Weekend Warrior” (2D1N)
This is the most common Mt. Amuyao itinerary for DIY hikers using public transport. It maximizes the weekend but involves a significant “Night Trek” component on Day 1.
Important Warning: Since the public jeep from Bontoc departs at 1:30 PM, you will arrive in Barlig around 3:30 PM. Starting the hike this late means you will be hiking the Mossy Forest and Summit Assault in total darkness. Ensure your headlamps have fresh batteries.
| Time | Activity | Notes |
| Day 0 | ||
| 20:00 – 21:00 | Depart Coda Lines Cubao | Book the VIP Bus for sleep. |
| Day 1 | The Night Ascent | |
| 08:00 | Arrive in Bontoc Poblacion | Breakfast / Buy Supplies. |
| 13:30 | Depart Bontoc via Public Jeep | Terminal near MPSPC/Market. |
| 15:30 | Arrive Barlig / Registration | Secure Guide & Pay Fees. |
| 16:00 | Start Trek | Prepare for sunset on trail. |
| 19:00 | Arrival at “Waiting Shed” | Last rest before the “Demonyo Trail”. |
| 22:00 | Summit Arrival (2,702 MASL) | Secure Bunkhouse or Pitch Tent. |
| Day 2 | Sunrise & Descent | |
| 05:00 | Wake up / Sunrise Viewing | Coffee & Sea of Clouds. |
| 08:00 | Start Descent | Heavy load on knees. |
| 12:00 | Arrive at Barlig Jump-off | Wash up / Lunch at Halfway Inn. |
| 13:00 | Side Trip: Lake Tufob | Optional (30 min trek). |
| 14:00 | Catch Jeep/Van to Bontoc | Note: Last trip varies, secure transport. |
| 16:30 | Depart Bontoc to Manila | Coda Lines last trip ~4:00 PM or 5:30 PM. |
Insider Tip: If you want to avoid the night trek, our group rented a “Monster Jeep” (PHP 3,000) from Bontoc immediately upon arrival at 8:00 AM. This allowed us to start hiking by 10:30 AM and enjoy the trail views.
Option B: The “Alpine” Dayhike
This itinerary is strictly for fit hikers or trail runners. You miss the sunset/sunrise, but you carry a lighter load (Daypack only).
Constraint: You must be in Barlig the night before (Day 0) to start this early.
| Time | Activity | Notes |
| Day 1 | Speed Assault | |
| 03:00 | Start Trek (Headlamps On) | Cold start; wear layers. |
| 06:00 | Reach Mossy Forest | Catch sunrise on the ridge. |
| 08:00 – 09:00 | Summit Arrival | Quick brunch & photos. |
| 10:00 | Start Descent | Trekking poles essential. |
| 14:00 | Back at Jump-off | Wash up. |
| 15:00 | Depart for Bontoc | Catch the afternoon return trip. |

Mt. Amuyao Hiking Expenses 2026
A realistic DIY budget for Mt. Amuyao is approximately PHP 4,500 – 5,500 per person. This estimate covers the roundtrip VIP bus fare via Coda Lines (~PHP 2,400), the shared Guide Fee (PHP 2,500 per group of 5), and mandatory LGU/Barangay fees. Bring extra cash for the optional Climb Certificate (PHP 130) and porter services if your pack exceeds 15kg.
Mandatory Local Fees (The “Fine Print”)
Based on the latest Municipality of Barlig ordinance, the fee structure is strict. Upon arrival at the Municipal Tourism Office, you will pay a PHP 50.00 LGU Entrance Fee. You then proceed to the barangay level (Brgy. Macalana) to pay a separate PHP 50.00 Environmental Fee.
Insider Tip: Keep small bills handy. Unlike bigger tourist spots, Barlig does not have reliable ATMs or GCash signals at the registration area. I also recommend budgeting PHP 130.00 extra if you want the official Climb Certificate—it’s a nice souvenir to prove you survived the stairs.
Guide & Porter Fees (2026 Rates)
The guide ratio is strictly 1 Guide to 5 Tourists.
Overnight Guide Fee: PHP 2,500.00 per group.
Day Hike Guide Fee: PHP 2,000.00 (Strictly 5:00 AM to 5:00 PM).
Excess Pax Rule: If your group is 6 or 7 people, you pay an additional PHP 300.00 per head. If you hit 8 people, you are required to hire a second guide.
For porters, the rate is PHP 2,500.00 for an overnight hike, with a maximum load of 15 Kilos.
Warning: Weigh your bag before handing it over. There is a penalty of PHP 150.00 for every exceeding kilo. I learned this the hard way when my pack clocked in at 18kg because of extra water.
Detailed Expenses Table
Here is the breakdown for a solo joiner within a group of 5 (DIY Setup):
| Expense Item | Cost (PHP) | Notes |
| Transport | ||
| Coda Lines (Cubao-Bontoc RT) | ~2,400.00 | VIP/CR Bus Estimate |
| Jeep (Bontoc-Barlig RT) | ~300.00 | Public Passenger Jeep |
| Local Fees | ||
| LGU Entrance Fee | 50.00 | Paid at Tourism Office |
| BLGU Environmental Fee | 50.00 | Paid at Brgy. Macalana |
| Professional Fees (Shared) | ||
| Guide Fee (Share of 5) | 500.00 | Base rate: PHP 2,500 / 5 pax |
| Optionals/Misc | ||
| Bunkhouse/Camping Fee | ~250.00 | Est. fee (if not using tent) |
| Food & Emergency Buffer | 1,000.00 | Meals in Bontoc/Barlig |
| TOTAL SAFE BUDGET | ~PHP 4,550.00 | Excludes Porter & Souvenirs |
What to Bring (Gear List)
Gear Essentials for High Altitude
Is it cold at Mt. Amuyao? Yes, absolutely. Summit temperatures at 2,702 MASL frequently drop to 5°C – 8°C at night, and the wind chill at the relay towers can push the “feels like” temperature near freezing. A robust 3-layer clothing system (Base, Fleece, Shell) and a sleeping bag rated for at least 10°C comfort are mandatory for survival.
The “Concrete Refrigerator” Reality
Do not underestimate the Mt. Amuyao summit bunkhouses. While they protect you from the rain, they are essentially industrial concrete boxes originally built for equipment, not human comfort. Concrete has high thermal mass, meaning the floor retains the cold of the night.
Insider Tip: The single coldest night of my life wasn’t in a tent, but inside the ABS-CBN bunkhouse on Amuyao. I made the mistake of bringing a thin yoga mat. The cold seeped straight through the concrete floor and into my back. You must bring an insulated pad.
The “Infinite Stairway” Loadout
To survive the Barlig trail, your gear needs to address two specific enemies: the cold and the repetitive impact of the stairs.
Sleeping Pad with R-Value (2.0+): This is non-negotiable if you plan to sleep in the bunkhouses. You need an inflatable or closed-cell foam pad (like a Therm-a-Rest Z Lite) to create a thermal barrier between you and the concrete floor.
Trekking Poles (Dual Setup): You will be descending thousands of concrete steps for 4-5 hours. This creates massive eccentric load on your patellar tendons. Using two poles transfers roughly 25% of that weight to your arms, saving your knees from the dreaded “hiker’s knee” (ITBS). [Insert diagram of human knee joint illustrating impact points]
Limatik Defense Kit: The Mossy Forest zone (2,000 – 2,700 MASL) is prime territory for blood leeches, especially during the wet season. Bring a spray bottle with 70% alcohol or salt water to detach them safely. Do not pull them off forcibly.
Windbreaker / Rain Shell: The weather at the summit changes rapidly. Even if it’s sunny at the Barlig Municipal Hall, the peak is often shrouded in wet fog. A waterproof shell is essential against hypothermia.
Power Bank (20,000mAh): Cold temperatures drain lithium-ion batteries roughly 30% faster than at sea level. Keep your phone and power bank inside your sleeping bag at night to preserve the charge.
Post-Climb: Where to Eat & Side Trips
After conquering the Mt. Amuyao stairs, refuel at Halfway Inn in Barlig Poblacion for heavy local meals. For a true cultural experience, pre-order authentic Pinikpikan with Etag from your homestay. Don’t miss the side trip to Lake Tufob in Brgy. Lingoy, a mystic crater lake just a 30-minute hike from the road.
The Reward Meal: Pinikpikan & Coffee
You haven’t truly been to Barlig if you haven’t tasted Pinikpikan. Unlike the commercial versions you might find in Baguio, the Barlig preparation is ritualistic. The chicken is beaten with a stick to coagulate the blood, giving the meat a distinct, darker texture and richer flavor, often smoked or souped with Etag (salted cured pork).
Insider Tip: You cannot just walk into a restaurant and order this. It takes hours to prepare. I always ask our guide to coordinate with the homestay owner (usually at Halfway Inn or Seaworld Inn) the morning before we ascend. This way, the hot soup is ready the moment we limp back into town.
Halfway Inn: Located along the main road in Poblacion, this is the unofficial headquarters for hikers. Their serving sizes are perfect for the post-climb calorie deficit.
Barlig Rainforest Coffee: Before leaving, stop by the Municipal Tourism Office or local stores to buy beans. Barlig produces high-altitude Arabica/Robusta blends grown in the shade of the forest, offering a distinct profile from the more common Sagada coffee.
Side Trip: The Mystic Lake Tufob
If you have an extra few hours before your Coda Lines bus departs or while waiting for your “Monster Jeep,” take the short trip to Lake Tufob.
Located in Brgy. Lingoy/Chatol (about 20-30 minutes by vehicle from the town center), the lake is a geological wonder nestled in the mossy forest.
The Trek: It’s a short 15-30 minute hike from the drop-off point.
The Vibe: It is not a swimming lake. It is a quiet, crater-like formation often shrouded in thick fog. Locals believe it was formed by a volcano. It’s a great way to experience the Mossy Forest biome without the punishing steepness of the Amuyao trail.
Is Mt. Amuyao Worth the Pain?
The climb to Mt. Amuyao is a test of grit that goes beyond simple hiking. The “Infinite Stairway” will punish your legs, but the reward at 2,702 MASL—standing between the twin towers above a sea of clouds—is unmatched in the Cordilleras. Respect the difficulty, prepare your knees, and the mountain will grant you a sunrise you will never forget.
A Reminder on Impact (LNT)
The summit bunkhouses are a privilege, not a right. During my last visit, I saw trash left behind in the concrete corners of the ABS-CBN facility.
Pack it In, Pack it Out: There are no trash bins at the summit. Everything you bring up—including wet wipes and food wrappers—must come down with you to Barlig Poblacion.
Respect the Structure: Do not vandalize the walls of the bunkhouses. These are vital shelters for the station caretakers who keep the communication lines open for the province.
Call to Action
The Barlig Backtrail remains the gold standard for logistical reliability in 2026. While the Traverse to Batad offers the grandeur of the terraces, the political friction makes it a gamble best avoided by DIY planners. Stick to the Barlig circuit, engage local culture through Pinikpikan and coffee, and respect the stairs.
Ready to conquer the stairs? Share this Mt. Amuyao Hiking Guide 2026 with your hike buddies and start training those quads today!
Explore More Philippine Mountaineering Guides
If you survived the “Infinite Stairway” of Mt. Amuyao, you are ready to level up your hiking game. Check out our comprehensive guides to other major peaks in the Philippines:
The Cordillera Classics:
Planning to complete the “Luzon 3-2-1”? After Amuyao, your next stop is the “Playground of the Gods.” Read our updated Mt. Pulag Travel Guide 2024 for the latest reservation protocols.
For a traverse with pine forests similar to Barlig but with a longer ridge walk, check out the Guide to Mt. Ugo Traverse (Nueva Vizcaya).
Endurance & Training Climbs:
Need to train your legs for the stairs? The “Poor Man’s Pulag” in Zambales offers a grueling 36km day hike. Read the Mt. Tapulao Travel Guide: The 36km Challenge.
Test your steep assault capabilities on the rocks of Mariveles. See our Tarak Ridge Hike & Papaya River Guide.
Level Up Your Difficulty:
Ready for something harder than an 8/9? Explore our list of Harkor Climbs: Level 9 Difficulty Mountains.
Not sure where you stand? Check the full classification in our article on Major Climbs in the Philippines (Difficulty 5-8).
The ultimate goal: Plan your expedition to the highest peak. Here is the Mt. Apo Hike Guide: Sta. Cruz Permits & Difficulty.