The Kingdom of Maria Makiling
Mt. Makiling rises to 1,090 MASL at Peak 2, serving as a premier hiking destination in the CALABARZON region. The standard Mariang Makiling Trail (MMT) starting from UPLB College of Forestry is a Minor Climb (4/9 Difficulty) requiring 5–7 hours to trek. Unlike DENR-managed peaks, this ASEAN Heritage Park is strictly governed by UPLB-MCME, enforcing a “No ID, No Entry” policy and mandatory guide fees for all hikers in 2026.
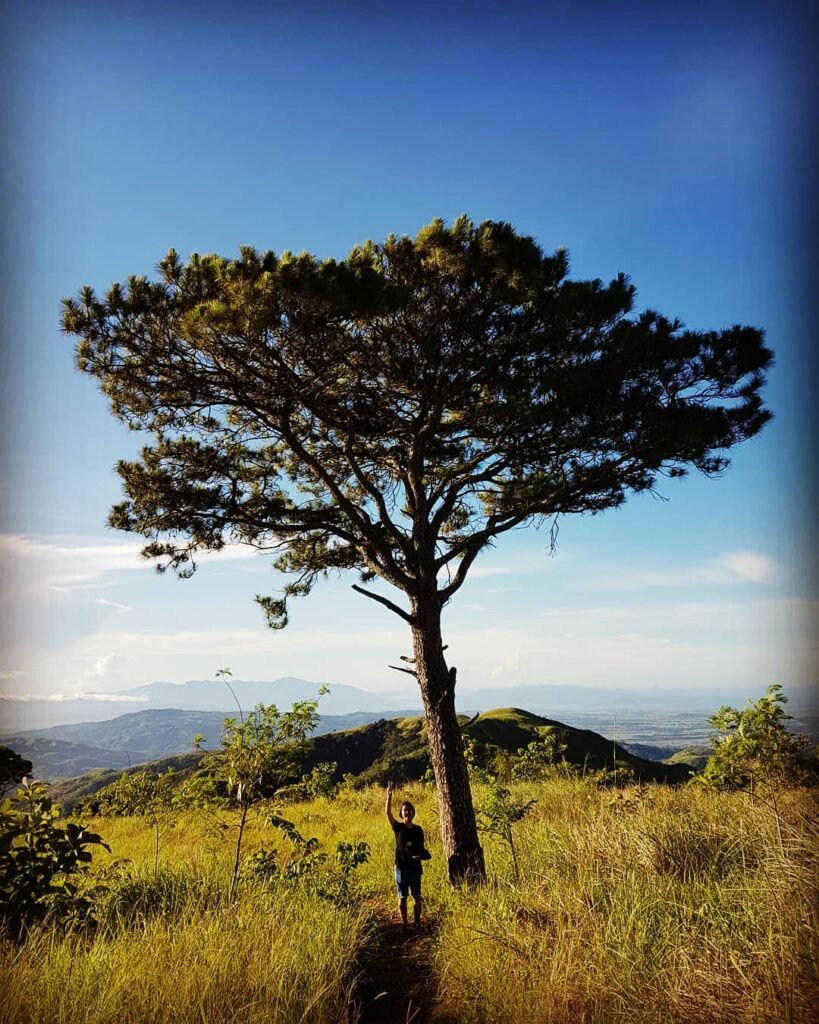
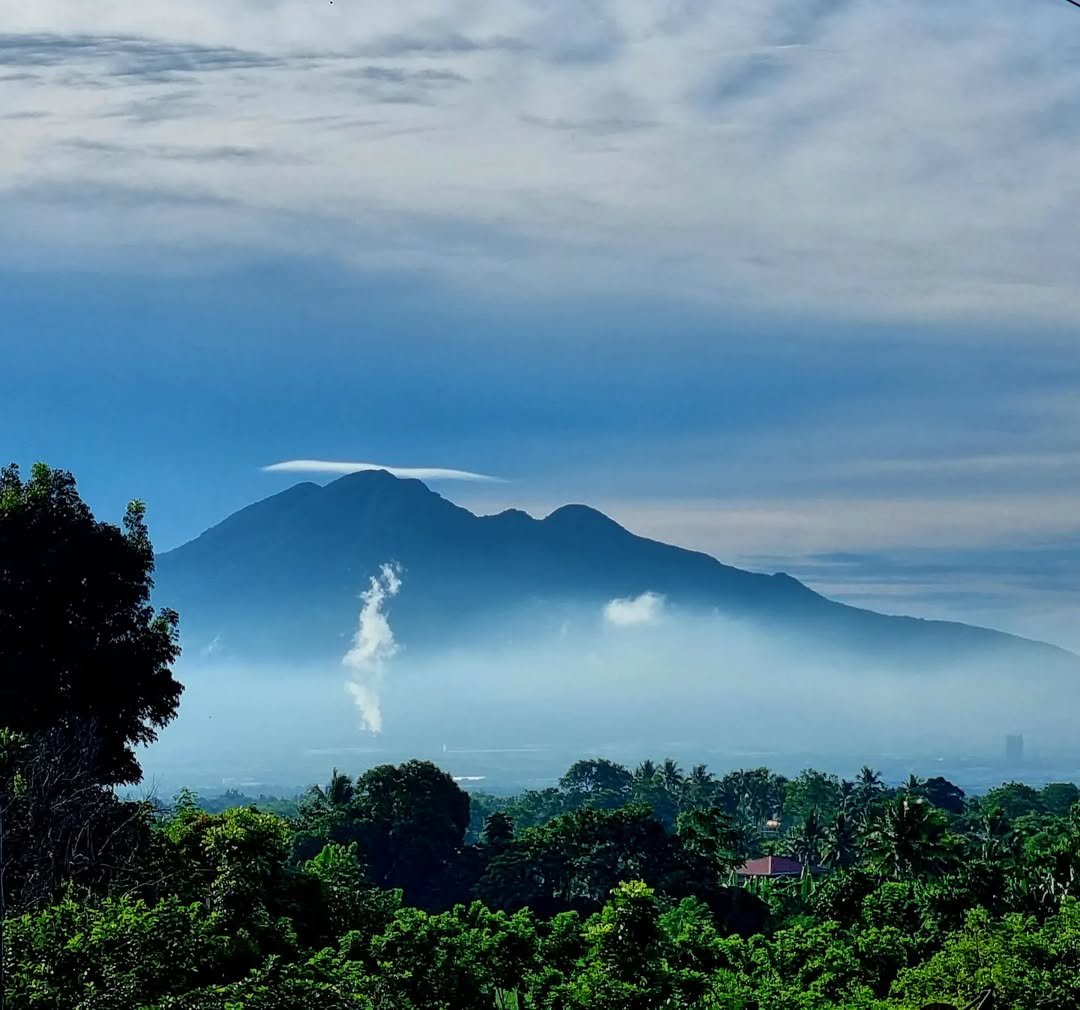
Rising like a sleeping giant over the southern tagalog plains, Mount Makiling is more than just a geological formation; it is a cultural institution. For decades, this dormant stratovolcano has served as the training ground for Manila-based mountaineers and the mythical abode of Maria Makiling, the guardian spirit said to protect its slopes. It is an ASEAN Heritage Park, a title that isn’t just a label but a warning: this is a protected biodiversity corridor, not a commercial tourist trap.
If you are hiking between February and May, keep your eyes peeled on the forest floor near Station 14. You might spot the Rafflesia panchoana or Rafflesia manillana, parasitic flowers that bloom briefly and unpredictably. Seeing one is a rare privilege that creates genuine “fear of missing out” (FOMO) among the hiking community, but remember: look, don’t touch.
Geographically, the mountain straddles the towns of Los Baños, Laguna and Sto. Tomas, Batangas. However, the operational reality is unique. Unlike mountains managed by the Department of Environment and Natural Resources (DENR), the Mt. Makiling Forest Reserve (MMFR) is under the exclusive jurisdiction of the University of the Philippines Los Baños (UPLB). Specifically, it is managed by the Makiling Center for Mountain Ecosystems (MCME).
This distinction matters. The “academic” nature of the mountain means rules are based on science, not market demand. We often joke that climbing Makiling is like entering a strict university campus—because it literally is. The regulations on biosecurity and access are rigid. This Mt. Makiling hiking guide covers everything you need for a safe dayhike in 2026, ensuring you navigate these institutional protocols without getting turned away at the gate.
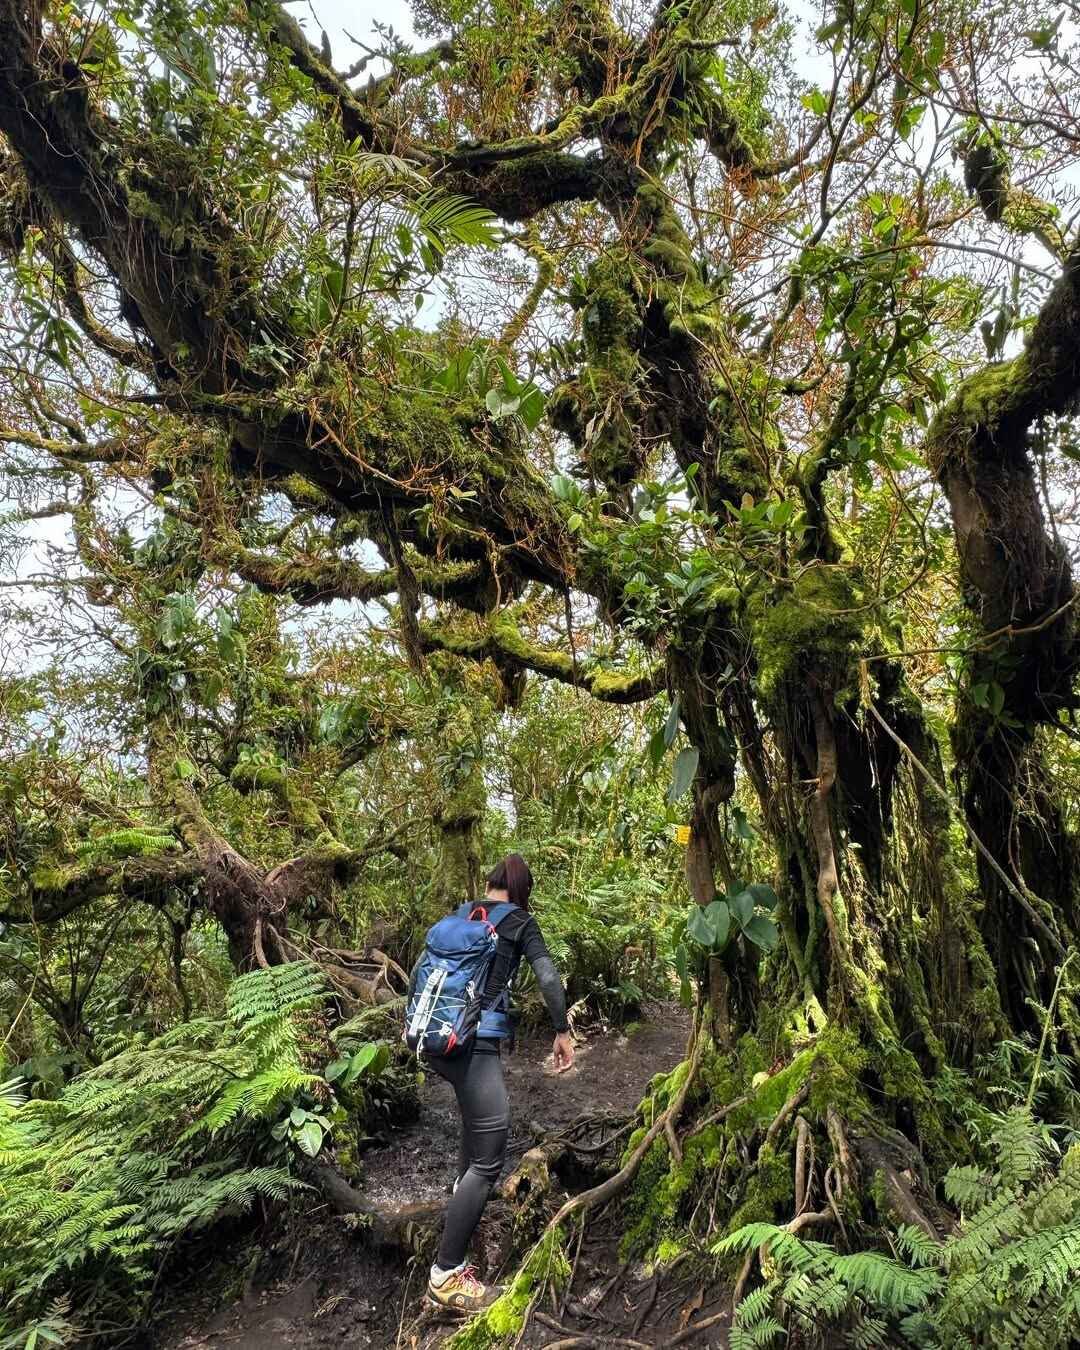
When I hike Makiling, I always feel a shift in atmosphere past Agila Base. The air gets cooler, the “chocolate mud” gets stickier, and the notorious Limatik (blood leeches) begin their watch. It is a place that demands respect—both for the Diwata and the rangers guarding her.
Table of Contents
Quick Specs: Mt. Makiling Profile
Mt. Makiling rises to approximately 1,090 MASL at Peak 2, which serves as the primary summit for hikers. The standard Mariang Makiling Trail (MMT) via UPLB is a Minor Climb with a 4/9 Difficulty, requiring 5–7 hours for the back-and-forth trek. While the challenging Makiling Traverse (MakTrav) rates a 6/9 Difficulty, it is frequently closed for safety; always check the 2026 status before planning.
| Specification | Details |
| Elevation | 1,090 MASL (Peak 2); 1,020 MASL (Peak 3) |
| Location | Los Baños, Laguna (Entry) / Sto. Tomas, Batangas (Exit) |
| Jump-off Point | UPLB College of Forestry and Natural Resources (CFNR) |
| Difficulty Level | 4/9 (UPLB Backtrail); 6/9 (MakTrav / Traverse) |
| Trail Class | 1-2 (Paved/Rough Road); 3 (Rooted & Roped Scrambling) |
| Hiking Time | 5–8 Hours (Dayhike) |
| Limatik Presence | High / Severe (Especially June – Dec) |
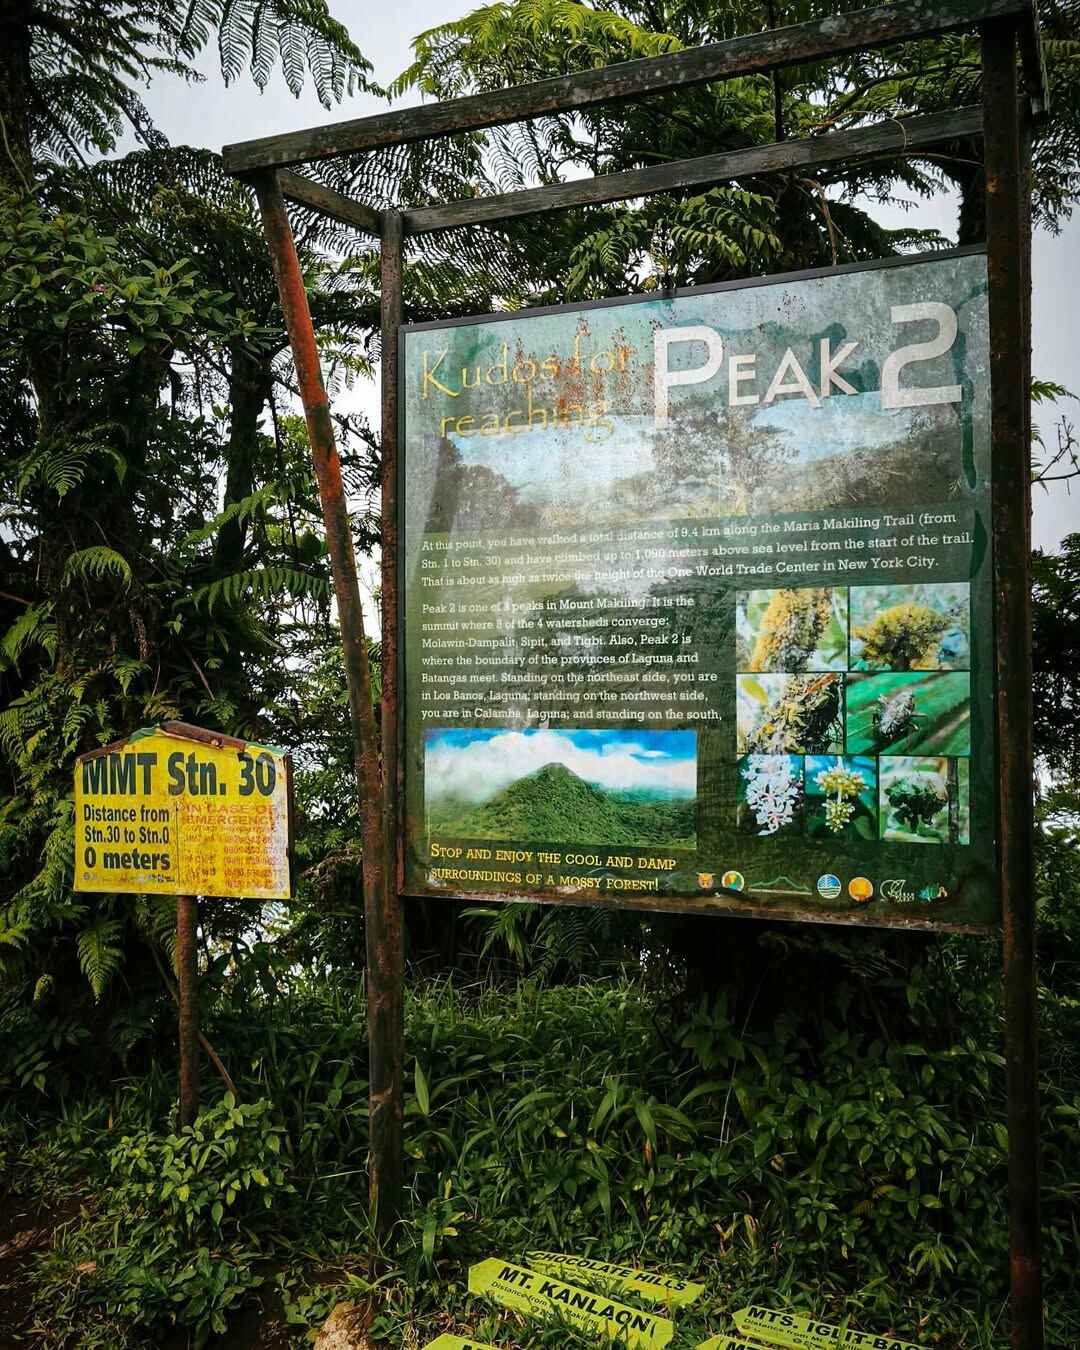
The mountain’s topography is often misunderstood by first-timers using a basic Mt. Makiling hiking guide. The summit isn’t a single point but a complex caldera rim comprising three distinct peaks. Peak 1 on the northern rim is largely restricted for geothermal monitoring and biodiversity conservation, making it off-limits to the public.
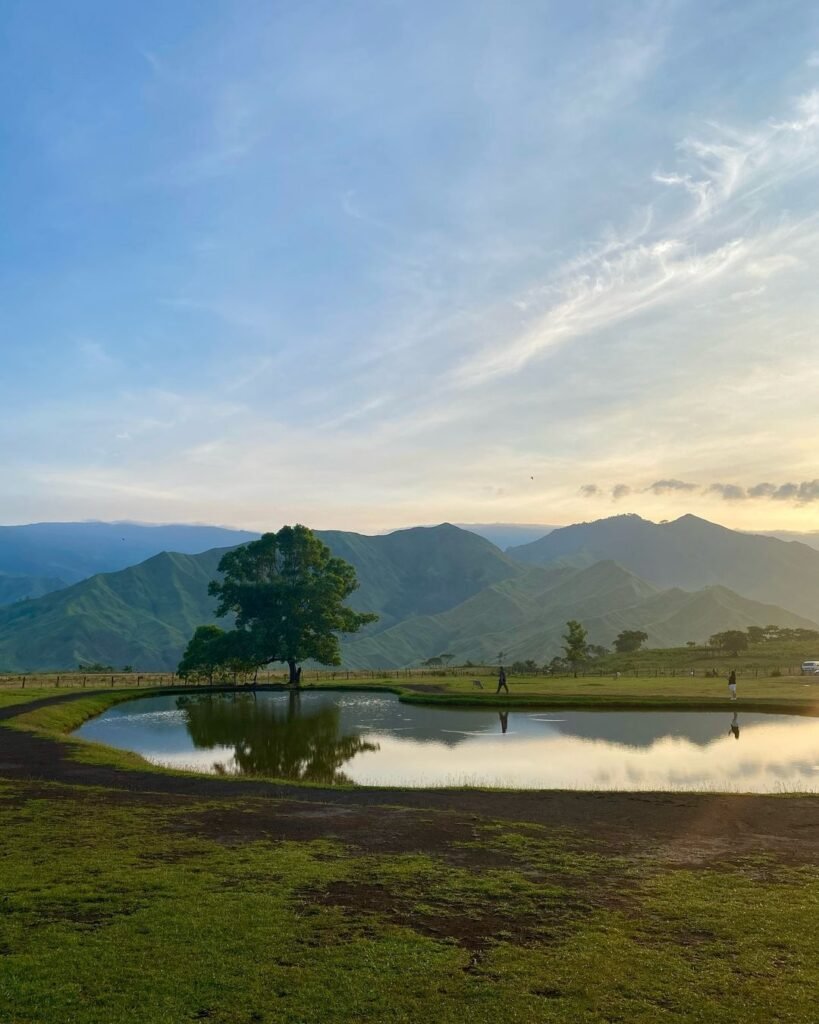
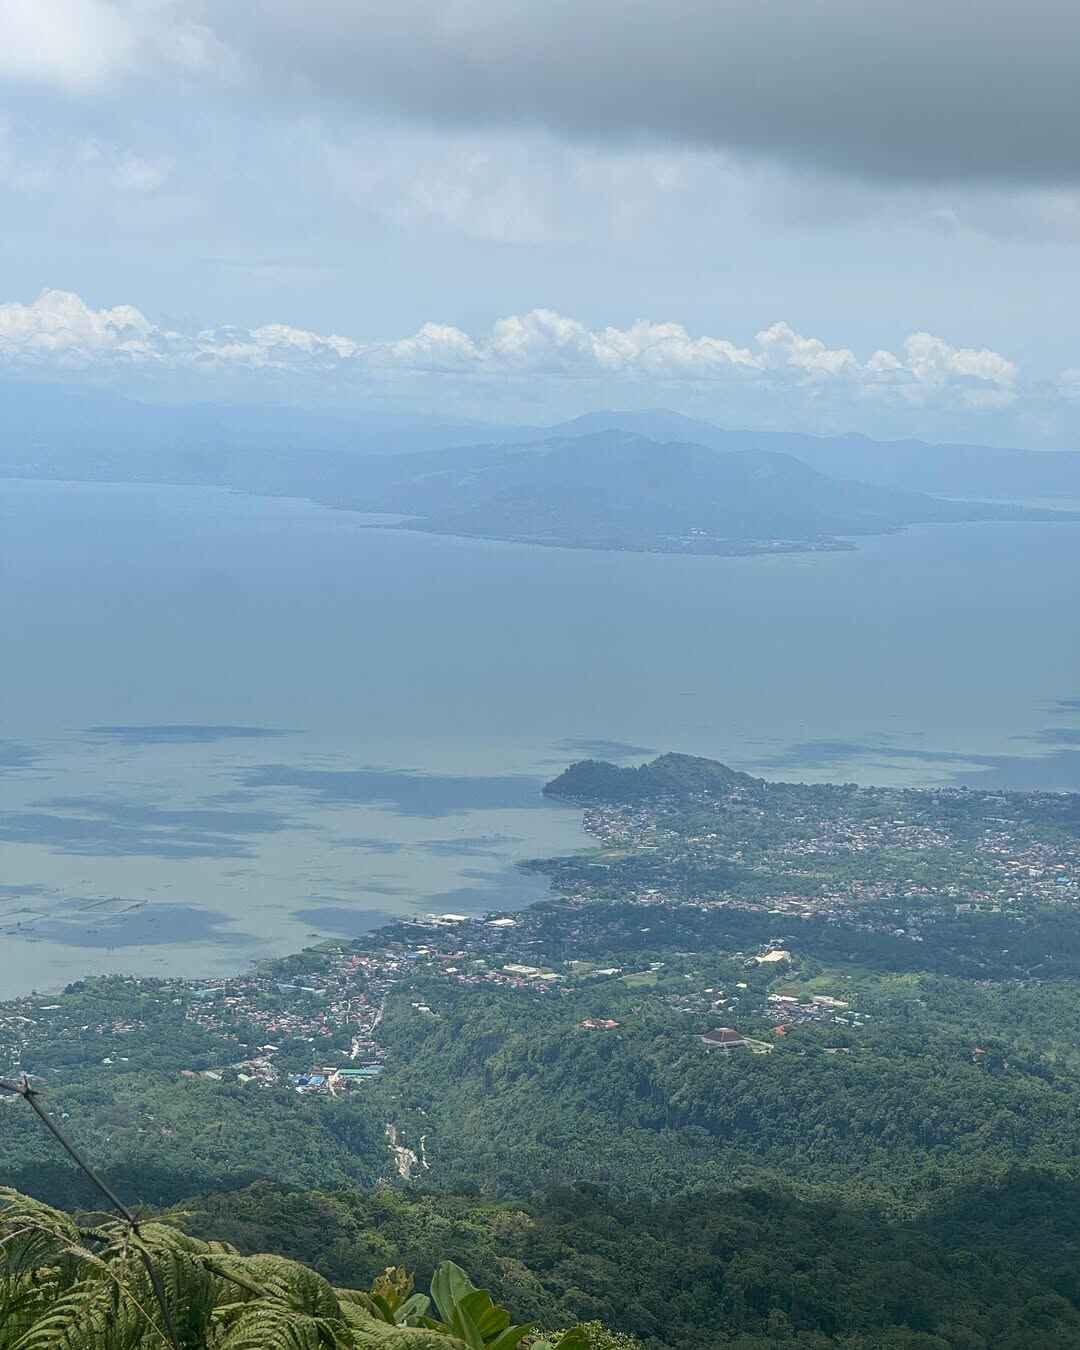
Peak 2 (1,090 MASL) is the goal for 99% of visitors. It offers a viewing deck that, weather permitting, provides a direct sightline to Laguna de Bay and even the Metro Manila skyline. However, in my experience, the Mt. Makiling summit creates its own microclimate; I’ve reached the top five times, and three of those times were total “whiteouts” with zero visibility.
Peak 3 (1,020 MASL) is the “wild” side, traditionally accessed via the Sipit Trail in Barangay San Miguel, Sto. Tomas. This forms the crux of the Makiling Traverse (MakTrav). Unlike the UPLB side, this route is physically rugged, involving steep ravines and rope-assisted ascents.
LakbayPinas Tip: Don’t underestimate the 4/9 difficulty rating of the UPLB Backtrail. While the first 6 kilometers are paved or rough road, the incline is relentless. I’ve seen marathon runners cramp up at Station 7 because the concrete pavement strikes harder on the knees than soft soil. Treat it like a long-distance endurance run rather than a technical climb until you hit the wilderness zone.
Pre-Climb Requirements & 2026 Protocols
For 2026, the strict “No Valid ID, No Entry” policy at Station 1 is non-negotiable. Guides are now mandatory for the Mariang Makiling Trail at a 1:5 ratio (PHP 1,200 per group). The gate opens at 06:00 AM, with a strict 09:00 AM cutoff at Station 11. While walk-ins are permitted, securing a slot via the MCME Facebook page is highly recommended for weekends.
The most significant friction point in the current Mt. Makiling hiking guide is the security protocol at Monitoring Station 1. The policy is simple but absolute: NO VALID ID, NO ENTRY. The group leader or a designated member must surrender one (1) physical government-issued ID upon registration.
This ID acts as collateral. It is retained by the rangers and only released once every single member of your group has logged out. This “one-out, all-out” system ensures no one is left behind on the mountain.
LakbayPinas Tip: Do not rely on digital IDs or photos of your license on your phone. I watched a group of hikers get turned away at the College of Forestry gate because they didn’t have a physical card. Bring your actual Driver’s License or UMID.
The Mandatory Guide Policy
Gone are the days of the “free-for-all” solo climb. To support local employment and enhance safety, hiring a guide is now mandatory for the Mariang Makiling Trail.
Ratio: 1 Guide for every 5 Hikers.
Rate: PHP 1,200 per group.
Payment: Paid directly to the guide association at the jump-off.
For solo hikers, this adds a “Solo Tax” to your hiking expenses, as you must cover the full PHP 1,200 fee yourself unless you find a “joiner” group at the registration area.
Strict Cut-Off Times
The Makiling Center for Mountain Ecosystems (MCME) operates like a university department—punctuality is required. The rangers enforce these times rigidly to ensure no one is stuck in the forest after dark.
Opening Time: 06:00 AM.
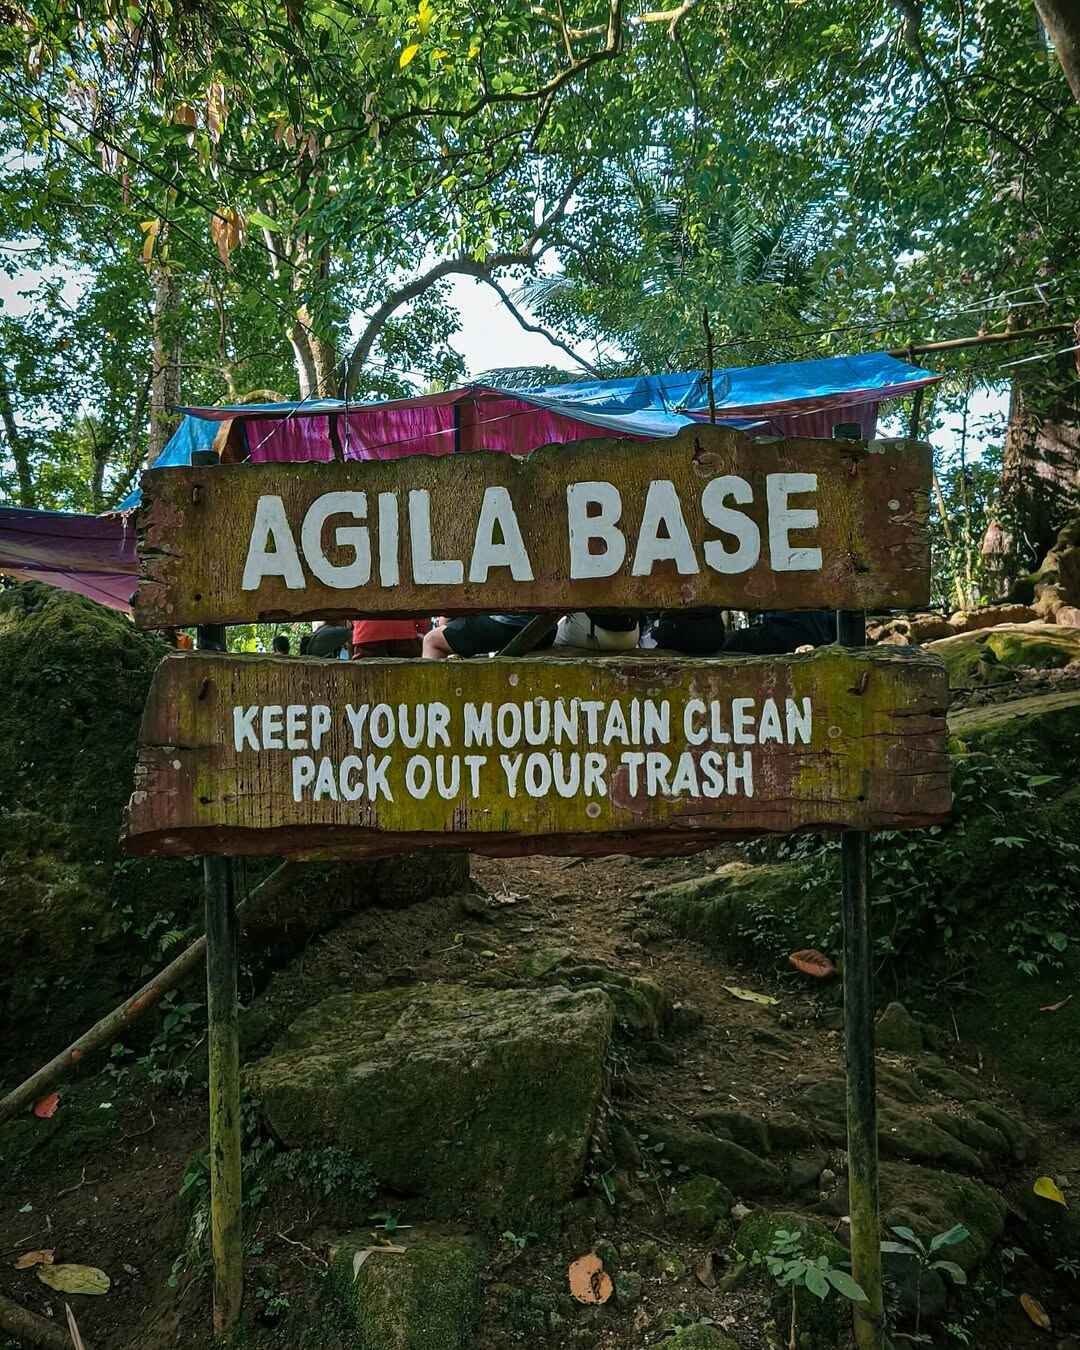
Peak 2 Cut-off: 09:00 AM. If you arrive at Station 11 (Agila Base) past this time, you will be prohibited from proceeding to the summit and diverted to Mud Springs.
Dayhike Exit: All hikers must exit the trail by 02:00 PM.
Camper Extension: Visitors with valid camping permits (secured 3-5 days in advance via email to
uplb@up.edu.ph) are allowed entry until 04:00 PM.
LakbayPinas Tip: Aim to start walking from Station 1 by 06:30 AM. The walk to Agila Base takes about 1.5 to 2 hours for average hikers. If you start late, you risk hitting the 9:00 AM cut-off and missing the summit entirely.
How to Go to Mt. Makiling (DIY Logistics)
To get to Mt. Makiling, take a bus from LRT Buendia (Taft) or PITX bound for Sta. Cruz, Laguna. Alight at Olivarez Plaza or College Junction in Los Baños. From the junction, board a jeepney specifically marked “Forestry” to reach the UPLB College of Forestry jump-off. Private vehicles must park at the CFNR grounds before 07:00 AM.
Public Transport: The Commute to Los Baños
For most Manila-based hikers, the journey begins at the LRT Buendia (Taft) or PITX terminals. Board any bus operated by DLTB Co. or JAC Liner with the signboard “Sta. Cruz, Laguna.” The fare currently plays around PHP 130 – 170 depending on the bus class.
Do not sleep through the drop-off! You need to alight at Olivarez Plaza or College Junction (near the Jollibee/McDonald’s intersection). Do not take the bus all the way to Sta. Cruz, or you’ll overshoot by an hour.
The “Last Mile” Challenge: Jeepney Logistics
Here is where many first-timers get confused. From College Junction, you need to take a jeepney to the jump-off.
Target Jeep: Look for the signboard “Forestry”. This will take you directly to the College of Forestry and Natural Resources (CFNR), where the registration area is located. Fare is roughly PHP 13–15.
The Wrong Jeep: Avoid jeepneys marked only as “UP College” or “Kanan”. These terminate at the main campus gate or Freedom Park.
LakbayPinas Tip: I’ve seen countless hikers take the “UP College” jeep thinking it’s close enough, only to realize they still have to walk 1.5 to 2 kilometers uphill to the Forestry registration site. If you can’t find a “Forestry” jeep, you can negotiate a “Special Trip” with a driver, but expect to pay a premium.
Private Vehicle & Parking
If you are driving, set your Waze or Google Maps pin specifically to “UPLB College of Forestry”. Parking is allowed near the registration area, but slots are extremely limited.
Critical Warning: You must arrive by 05:30 AM or 06:00 AM. On weekends, once the upper parking fills up, UPLB security diverts all vehicles to the lower grounds near Baker Hall or the Tennis Courts. This adds a painful, steep 2-kilometer warm-up walk before you even start the actual hike.

The Trail: Terrain & Biological Hazards
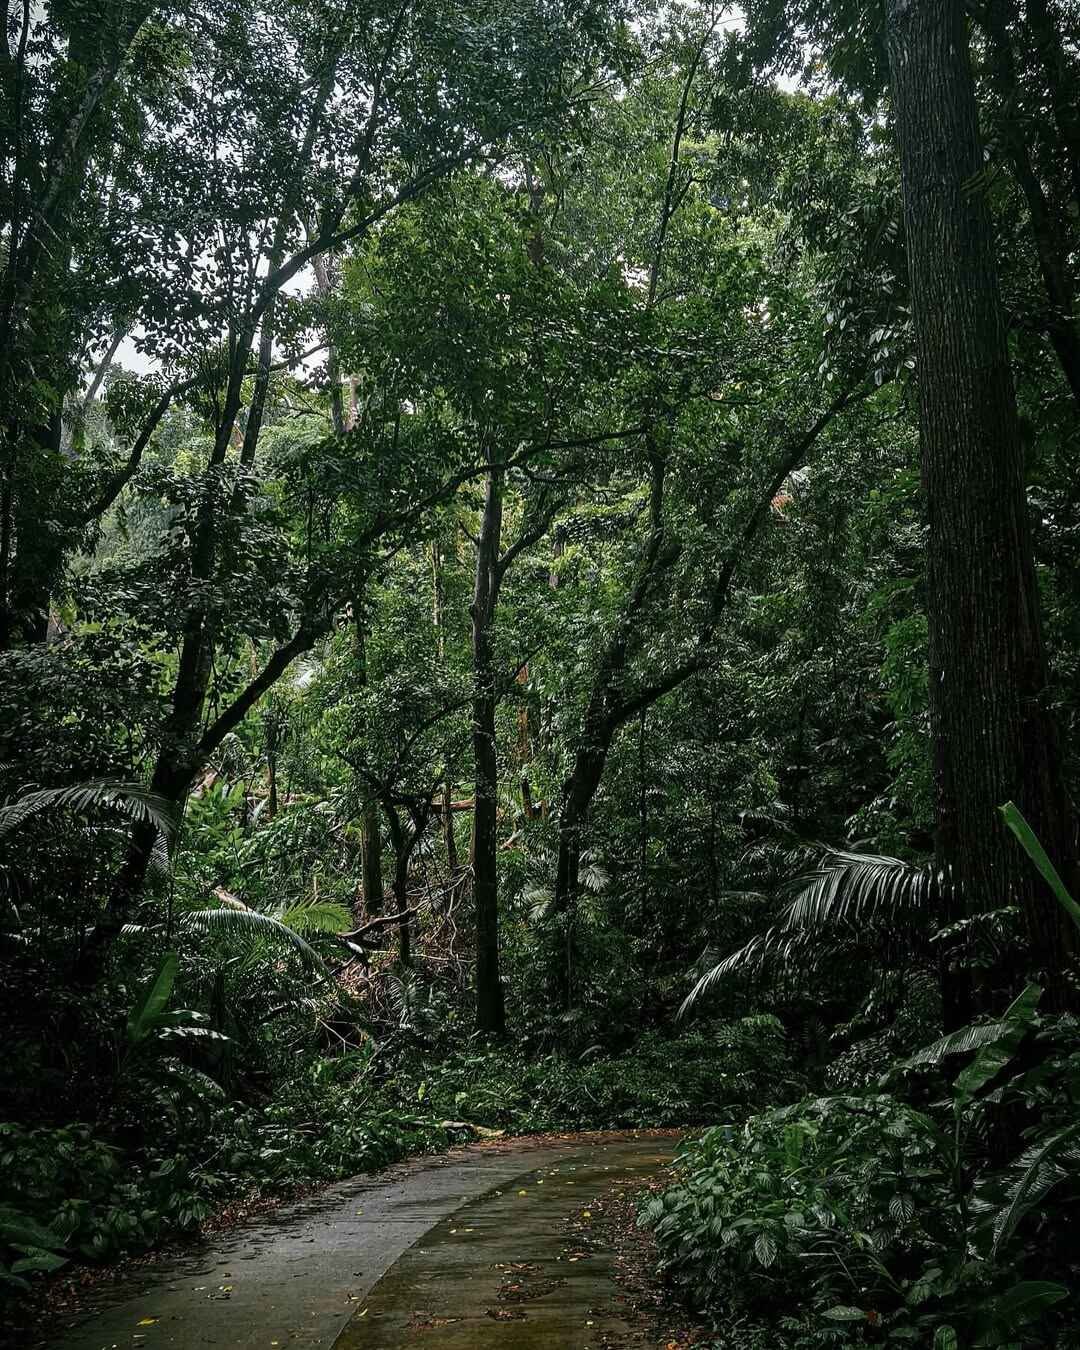
The Mt. Makiling trail is essentially divided into two distinct sectors: the “Paved Agony” (Station 1–11), a steep 5.4 km concrete access road, and the “Wilderness Zone” (Station 12–30), characterized by slippery clay soil and complex root systems. The mountain is a known “High Concern” zone for Limatiks (blood leeches). Hikers should carry at least 2–3 liters of water, as sources at Agila Base are not guaranteed.
Sector 1: The Paved Agony (Stations 1 to 11)
The first leg of the Mt. Makiling hike is deceptively difficult. From the registration area to Agila Base (Station 11), you will face approximately 5.4 kilometers of continuous uphill road. While the terrain is technically easy (concrete and rough vehicular road), the thermal stress can be punishing. Because the canopy is open in many parts, the heat radiates off the pavement, often causing hikers to burn through their water reserves early.
LakbayPinas Tip: If you want to save energy for the actual jungle, ask the rangers at Station 1 if Habal-Habal (motorcycle taxis) are allowed that day. When available, they can shuttle you straight to Agila Base for about PHP 100 per person. It cuts a boring 1-hour walk into a 15-minute ride.
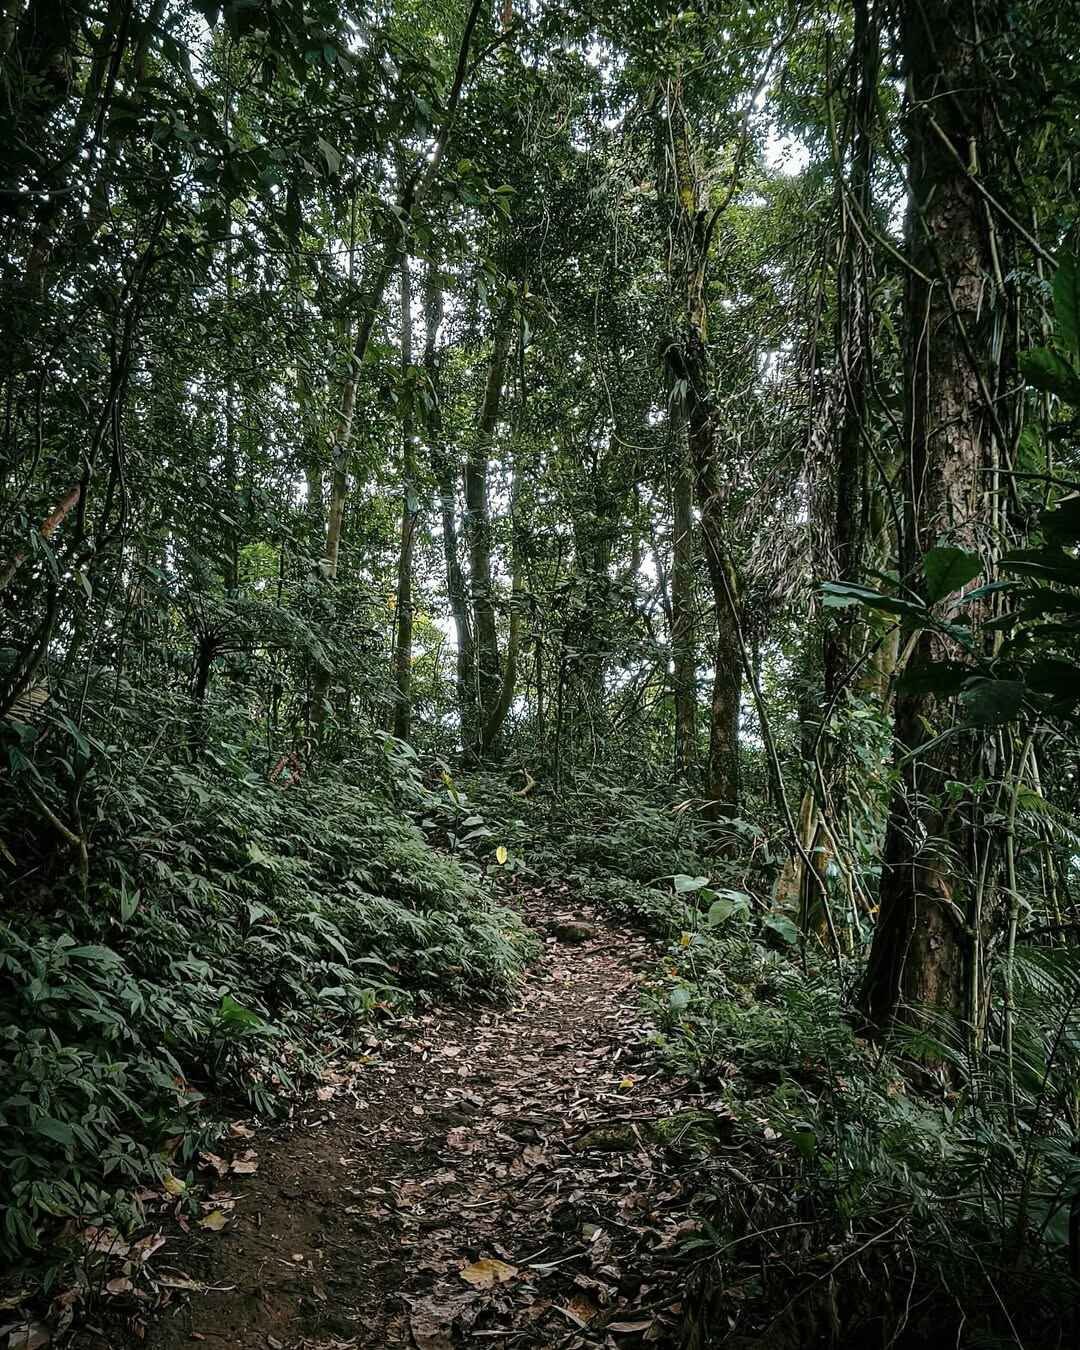
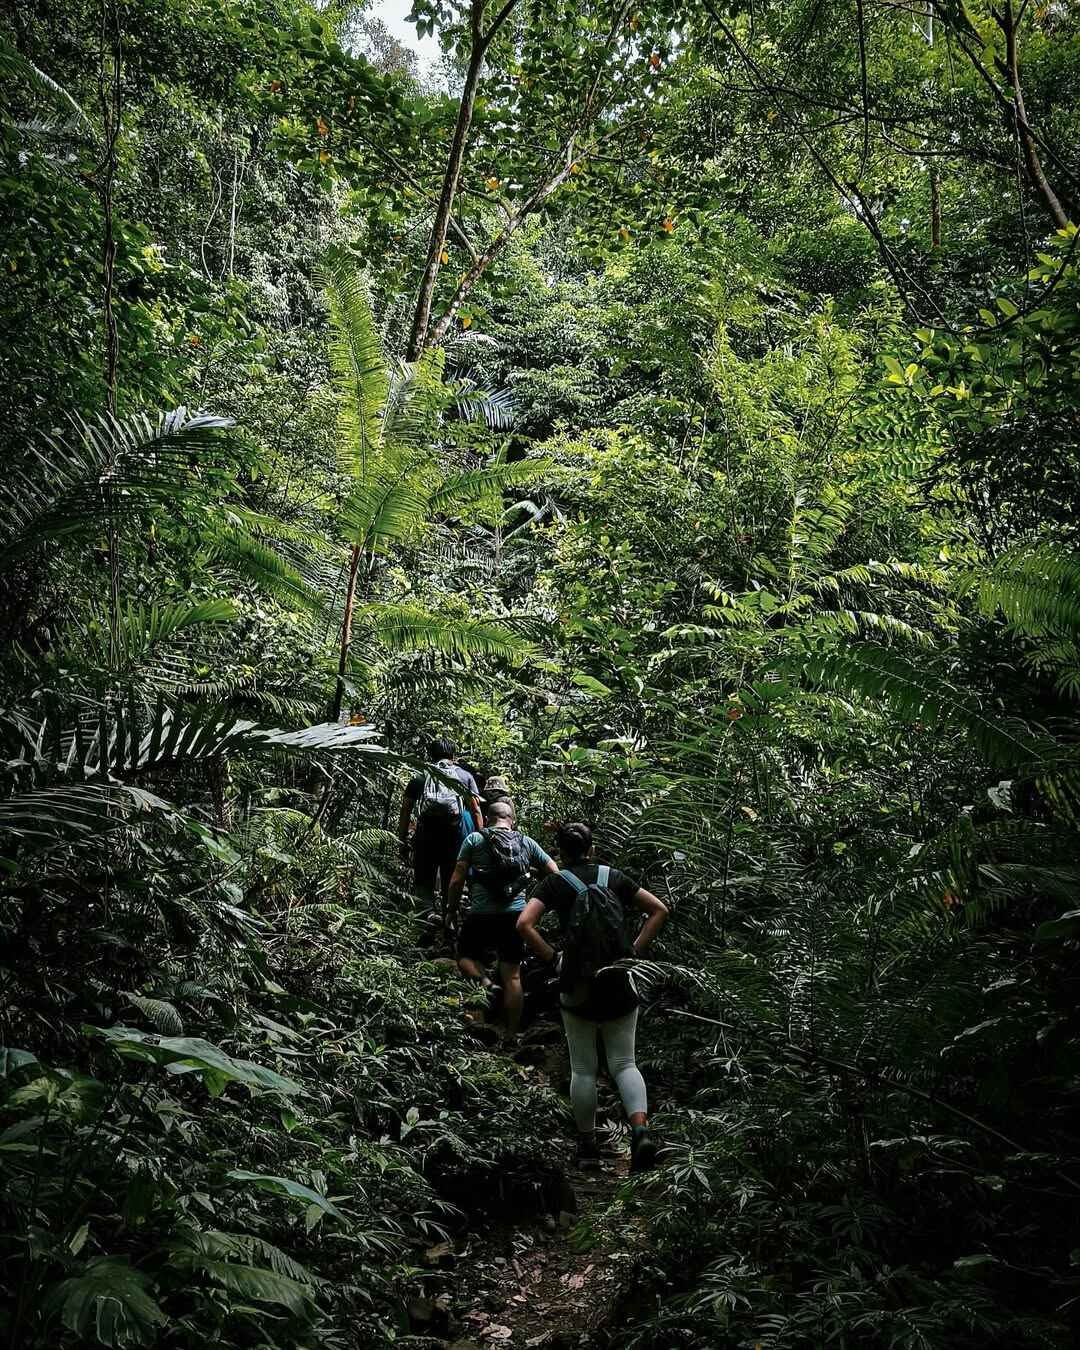
Sector 2: The Wilderness Zone (Stations 12 to 30)
The pavement ends at Station 12, marking the entry into the mossy forest. This is where the Mt. Makiling difficulty shifts from endurance to technical balance. The trail is infamous for its “Chocolate Mud”—a sticky, clay-heavy sludge that offers zero traction, especially during the wet season (June to December).
You will navigate through massive buttress roots and fallen logs. The gradient spikes significantly from Station 25 to Station 30 (Peak 2), requiring you to scramble on all fours.
The Limatik Dossier (Safety First)
Let’s be honest: You cannot talk about a Mt. Makiling itinerary without addressing the Limatik (Haemadipsa sylvestris). These tiger leeches are aggressive, sensing heat and vibration to ambush hikers from the ground and low-hanging leaves.
Anti-Limatik Protocol:
Mechanical Barrier: Wear compression leggings or tights. Leeches can burrow through loose mesh or cotton socks.
Chemical Barrier: Spray your shoes, socks, and pant legs with 70% Alcohol or a strong DEET-based repellent before entering the canopy at Station 11.
Removal: If one latches on, DO NOT PULL IT OFF. Pulling leaves the mouthparts embedded, which causes infection. Instead, spray it with alcohol or apply salt; it will detach on its own.
Water & Wash-up
Do not rely on the mountain for water. While there is a small sari-sari store at Agila Base, stocks of bottled water are inconsistent. The natural spring at Station 2 is often muddy, and the water at the base is generally non-potable for tourists.
I strongly recommend bringing a minimum of 2.5 to 3 Liters of water per person. For wash-up, there are basic shower facilities near the Forestry Registration Area (Jump-off) for a fee of PHP 20–50, usually strictly bucket-style (tabo).
Mt. Makiling Itinerary 2026 (Dayhike)
A well-planned Mt. Makiling itinerary begins with a 06:00 AM arrival at UPLB to ensure passing the strict 09:00 AM cut-off at Agila Base. Hikers typically reach the Peak 2 summit (1,090 MASL) by 10:30 AM and complete the descent by 03:00 PM, allowing time for a post-hike meal in Los Baños.
The timeline below is designed for the standard Mariang Makiling Trail (MMT) backtrail. Because UPLB-MCME operates with academic precision, adhering to this schedule is critical. If you arrive at Station 11 past 09:00 AM, the rangers will turn you back, regardless of how far you’ve traveled.
Standard Dayhike Itinerary (UPLB Backtrail)
| Time | Activity |
| 04:00 AM | Depart LRT Buendia or PITX (Bus to Sta. Cruz/Los Baños) |
| 06:00 AM | ETA Olivarez Plaza / Breakfast at Jollibee or McDonald’s |
| 07:00 AM | Jeep to Forestry; Register at Station 1 (Surrender ID & Secure Guide) |
| 08:30 AM | ETA Station 11 (Agila Base). Last toilet break and water check. |
| 10:30 AM | ETA Station 30 (Peak 2 Summit). Photo ops at the marker. |
| 11:00 AM | Start Descent. (Do not stay too long; the summit gets cold/windy). |
| 01:00 PM | Lunch at Agila Base. Optional side trip to Mud Springs (Station 7). |
| 03:00 PM | ETA Station 1 (Jump-off). Log out and retrieve ID. Wash up. |
| 05:00 PM | Post-hike celebration at Bonitos or Seoul Kitchen. |
| 07:00 PM | Board bus back to Manila (Cubao/Buendia). |
We allocated a generous 2 hours for the ascent from Station 11 to Peak 2. However, during the rainy season (June–December), the slippery mud can easily extend this leg by another hour. Adjust your pace accordingly.
LakbayPinas Tip: Most hikers burn too much time at Agila Base (Station 11) resting and buying snacks. Keep this break under 15 minutes. The “wilderness zone” starts immediately after, and your muscles will stiffen up if you cool down too much. Plus, the earlier you summit, the higher the chance of a clearing before the afternoon clouds roll in.
Important Disclaimer: This Mt. Makiling itinerary covers only the UPLB Backtrail. The Makiling Traverse (MakTrav), which exits via Sto. Tomas, Batangas, is a Major Climb (6/9 Difficulty). It requires a completely different logistical setup, including vehicle positioning at the exit point, and is frequently closed due to landslides. Always verify the status of the traverse with the Sto. Tomas tourism office before attempting it.
Budget Breakdown (The Financials)
The estimated safe budget for a Mt. Makiling day hike is approximately PHP 1,000 per person if you are in a group of 5, as you can split the mandatory PHP 1,200 guide fee. For solo hikers, the cost spikes to nearly PHP 2,000 because you must shoulder the entire guide fee alone unless you find a joiner group at the jump-off.
The financial landscape of climbing Mt. Makiling has shifted significantly with the enforcement of the mandatory guide policy. While the entrance fees remain nominal, the hiking expenses for 2026 are heavily weighted by the guide fee. This creates a “Solo Tax” that makes individual attempts expensive compared to the “Group Dividend.”
Below is a comparative breakdown of costs starting from LRT Buendia/Taft.
Estimated Expenses (Per Person)
| Expense Item | Solo Hiker | Group of 5 (Per Head) |
| Bus Fare (Roundtrip) | PHP 340 | PHP 340 |
| Jeepney/Trike (Local) | PHP 60 | PHP 60 |
| Registration Fee | PHP 40 | PHP 40 |
| Guide Fee (Mandatory) | PHP 1,200 | PHP 240 |
| Shower Fee | PHP 20 | PHP 20 |
| Food (Packed + Post-hike) | PHP 300 | PHP 300 |
| TOTAL ESTIMATE | ~PHP 1,960 | ~PHP 1,000 |
Note: Bus fares via DLTB Co. or JAC Liner fluctuate between PHP 130 – 170 depending on the time and bus class (Ordinary vs. Aircon).
The Registration Fee is collected at Station 1 (Forestry Gate). It is currently pegged at PHP 40.00 for regular visitors. While this is cheap compared to other mountains like Mt. Pulag, do not forget to bring small bills. The rangers at the gate often run out of change early in the morning.
LakbayPinas Tip: If you are a student, bring your valid School ID! UPLB grants a discounted rate (usually PHP 10.00 – 25.00) for students. I’ve seen many hikers forget this simple hack and pay the full price. It’s small change, but it buys you an extra bottle of water at Agila Base.
What to Bring: Anti-Limatik Gear List
Essential gear for a safe Mt. Makiling hike includes trekking poles for the slippery “chocolate mud,” a 70% alcohol spray for leech defense, and at least 2–3 liters of water. Wear aggressive trail running shoes instead of heavy boots, and avoid white clothing. Don’t forget your physical Government ID for the strict checkpoint at Station 1.
The gear requirements for Mt. Makiling differ from open-trail mountains like Mt. Batulao because of two factors: the canopy humidity and the biological hazards. You aren’t just packing for the hike; you are packing for the Limatiks and the mud.
Footwear: Leave the heavy trekking boots at home. I highly recommend Trail Running Shoes with aggressive lugs (e.g., Salomon Speedcross or Hoka Speedgoat). The mud from Station 12 to Station 30 is heavy clay; boots will just trap the mud and weigh you down, while trail runners shed it faster.
Clothing (The Anti-Limatik Shield): Wear compression leggings or tights. Leeches are incredibly agile and can worm their way through loose mesh or wide pant legs. Tights create a seal against your skin that they can’t penetrate. Avoid white clothes unless you want them permanently stained by the orange-brown mud.
Chemical Defense: Bring a small spray bottle of 70% Isopropyl Alcohol. This is your primary weapon against leeches. If one attaches to your gear or skin, a quick spray will make it detach immediately. Salt packets work too but are messier to apply in the rain.
Hydration: Bring 2 to 3 Liters of water. The humidity in the rainforest is suffocating, and you will sweat profusely even before reaching Agila Base. There is no reliable water source at the summit.
Tech & Safety: A Powerbank is crucial because the signal is spotty to non-existent past the mid-mountain, draining your battery as it searches for a network. Bring a Whistle for emergencies—getting lost in the dense foliage is a real risk if you stray from the trail.
Documents: Do not forget your Physical Government ID. As mentioned in the protocols, you cannot enter without leaving this at the registration gate.
LakbayPinas Tip: Bring a spare change of clothes and a dedicated “mud bag” (a thick plastic bag) for your dirty hiking shoes. When I hike Makiling during the wet season, I usually end up washing off pounds of mud at the Forestry shower area before getting back on the bus to Manila. You don’t want that mud inside your backpack.
Post-Climb: Where to Eat in Los Baños
After the hike, wash up at the Forestry Administration building (PHP 20–50) which offers basic “tabo-style” showers. For recovery food, head to Bonitos Bar & Restaurant on Lopez Avenue for their famous Ravioli Lasagna or Seoul Kitchen for authentic Korean BBQ. Before returning to Manila, queue for The Original Buko Pie in Brgy. Anos as the ultimate souvenir.
Shower & Wash-Up
Before hunting for food, you’ll want to scrub off the “chocolate mud.” The most convenient option is the Forestry Administration Building near the jump-off registration area.
Fee: PHP 20 – 50 per person.
Facilities: Basic. Expect a “Tabo and Timba” (bucket and dipper) system. Do not expect hot water.
LakbayPinas Tip: If the queue at the Forestry showers is too long (which happens on weekends when big groups descend at 02:00 PM), take a jeepney down to Pansol. You can rent a resort washroom or, better yet, dip in a Hot Spring for an hour to soothe your tired calves.
Gastronomy: The Los Baños Food Scene
A Mt. Makiling itinerary is incomplete without a proper calorie reload in Los Baños.
Bonitos Bar & Restaurant (Lopez Ave): This is the classic post-climb spot. Their air-conditioning is strong (perfect after a humid hike), and their Ravioli Lasagna and Sisig are legendary in the mountaineering community.
Seoul Kitchen (Umali Subdivision): Given the large Korean student population at UPLB, the Korean food here is authentic and affordable. Their Bulgogi and unlimited side dishes are perfect for protein recovery.
Herb Republic: If you prefer a healthier, organic meal to match the wellness vibe of the hike, this is your spot.
The Buko Pie Pilgrimage
You cannot leave Laguna without the holy grail of pasalubong.
The Original Buko Pie: Located in Brgy. Anos. The queue here is legendary—expect to wait 30 to 60 minutes.
Lety’s Buko Pie: A worthy competitor often preferred by locals for its creamier texture. It’s a great backup if “The Original” line is too long.
Orient – The Original Buko Pie: Located near the highway exit, making it a convenient stop for private vehicles heading back to the SLEX entry.
LakbayPinas Tip: I usually buy my pies before dinner. If you wait until 7:00 PM, stocks at The Original Buko Pie often run out, or the queue becomes unbearable with Manila-bound tourists. Secure the goods early!
Frequently Asked Questions (FAQ)
Mt. Makiling is beginner-friendly but physically demanding, often underestimating hikers with its steep 5km paved ascent. Solo hiking is permitted in 2026, provided you shoulder the full PHP 1,200 mandatory guide fee. Note that there are no reliable toilets or potable water sources beyond Station 11 (Agila Base). Rafflesia spotting peaks from February to May.
Is the Mt. Makiling hike beginner-friendly?
Yes, but do not underestimate it. While the UPLB Backtrail is technically a “Minor Climb” with a 4/9 Difficulty, the physical toll is real. The first 5.4 kilometers from Station 1 to Station 11 is a continuously ascending paved road. I’ve seen fit marathon runners get cramps here because the concrete impact is harsh on the shins. It is an endurance test more than a technical climb.
Can I hike solo?
Yes, solo hiking is allowed, but it comes with a heavy “Solo Tax.” Under the 2026 guidelines, you must hire a guide at the standard rate of PHP 1,200 regardless of group size. Unless you have money to burn, I strongly suggest waiting at the College of Forestry registration area to find other hikers willing to form a “joiner” group to split the cost.
Is the water at Agila Base safe to drink?
No. While you might see locals drinking from the source at Station 2 or the pipes at Agila Base, I strongly advise against it for visitors. Your stomach likely isn’t acclimated to the local flora. Bring 2–3 Liters of your own water from Los Baños, or bring a Sawyer filter if you insist on refilling.
Are there toilets on the trail?
The last reliable comfort room (CR) is at Station 11 (Agila Base). Once you enter the “Wilderness Zone” past Station 12, there are absolutely no facilities up to the Peak 2 Summit. If nature calls, you must practice strict “Leave No Trace” (LNT) principles—dig a cat hole off-trail and cover it.
When is the best time to see the Rafflesia?
The Rafflesia panchoana typically blooms during the drier months, specifically from February to May. However, these blooms only last a few days. Keep your eyes peeled near the forest floor around Station 14.
LakbayPinas Tip: If spotting the Rafflesia is your main goal, ask the guides at the Station 1 desk before you pay. They usually have fresh intel on whether a flower is currently in bloom.
Conclusion
Climbing Mt. Makiling in 2026 demands strict adherence to UPLB protocols: mandatory guides (PHP 1,200), the “No ID, No Entry” rule at Station 1, and the 09:00 AM cutoff at Agila Base. Respecting the Leave No Trace (LNT) principles honors both the protected ASEAN Heritage Park and the legend of Maria Makiling.
The days of the “cowboy” style ascent are over. The Mt. Makiling hiking guide for 2026 is defined by structure and safety. The administration at the UPLB College of Forestry has made it clear: preservation comes before recreation. Whether you are struggling up the paved road to Station 11 or battling the mud near the 1,090 MASL summit, remember that these rules exist to keep the mountain wild.
Beyond the physical challenge of the Mariang Makiling Trail, there is a cultural weight to this mountain. Locals believe the Diwata (Maria Makiling) guards these slopes. When we practice Leave No Trace (LNT)—packing out our trash, keeping noise levels down, and not picking the Rafflesia—we aren’t just following a memo from the MCME; we are paying respect to the host.
LakbayPinas Tip: When I stand at the Peak 2 viewing deck looking out over Laguna de Bay, I always take a moment of silence. It’s a tradition among old-school mountaineers. The cloud cover often clears up just for a few minutes if you show a little patience and respect.
Ready to conquer Peak 2? Share this guide with your hike squad and book your slot now!
Explore More: Similar Adventures in Laguna & Beyond
Done conquering the Mariang Makiling Trail? If you still have energy or want to cool down after the humid climb, Laguna offers plenty of side trips. Check out these guides to complete your itinerary:
Cool Down in Laguna: After battling the mud and heat, nothing beats a cold dip. Visit the majestic Ultimate Guide to Hulugan Falls or experience the icy waters of Majayjay (Taytay) Falls. For a more relaxed vibe, you can also raft through the famous Pagsanjan Falls Tour or unwind by the serene Yambo Lake in Nagcarlan.
More Laguna Hikes: If you are collecting peaks in the province, the nearby DIY Guide to Mt. Kalisungan offers a great twin-hike option with Bunga Falls. Alternatively, check out the grassy slopes of Mt. Sembrano Hike Guide on the boundary of Rizal and Laguna.
Level Up Your Game: Did you find the UPLB trail too easy? Browse our list of Beginner-Friendly Minor Climbs to find your next warm-up.
For the MakTrav Survivors: If you successfully finished the Traverse and are craving more adrenaline, you are ready for the big leagues. Check out our list of Major Climbs (Difficulty 5-8) or test your limits with these Hardcore Mountains (Difficulty 9/9).