Quick Guide Table
| Field | Details |
|---|---|
| Destination name | Aw-Asen Falls |
| Type | Waterfall |
| Location | Barangay Sto. Rosario, Sigay, Ilocos Sur |
| Nearest staging corridor | Tagudin / Bitalag Junction |
| Alternate staging point | Candon City |
| Map reference | 17.08627, 120.58854 |
| Typical Manila travel pattern | Manila to Tagudin or Candon, then inland transfer, then hike |
| Travel time from Manila | Roughly 6–8 hours road travel to the Sigay corridor, plus inland transfer and hike |
| Best time to visit | Drier months / summer side of the year |
| Environmental fee | ₱50 |
| Guide fee reference | ₱750 |
| Hike time | About 45 minutes typical |
| Trail character | River crossings, hanging bridge, climb segment |
| Waterfall height | Commonly presented around 110–120 meters |
| Day trip or overnight | Both possible |
| Swimming allowed | Possible, but catch basin conditions should be treated carefully |
| Cell signal | Can be weak or limited |
| Facilities | Restrooms and trail improvements were being developed; completion status should be handled carefully |
| Camping | Possible if coordinated with the tourism office |
Is Aw-Asen Falls Worth Visiting?
Yes, Aw-Asen Falls is worth visiting if you enjoy remote scenery, rugged access, and trips that feel like a real adventure instead of an easy roadside stop. For me, the real challenge here is the access, not the sightseeing. The waterfall itself is the reward, but the rough inland road, guide-led approach, river crossings, and hanging bridge are a big part of what makes the trip memorable.
What makes Aw-Asen Falls Ilocos Sur stand out for me is that it feels more earned than most waterfall trips. You head into Barangay Sto. Rosario, Sigay, Ilocos Sur, leave the easy highway rhythm behind, and deal with the kind of inland approach that already feels like a mini expedition before the hike even starts. Then the trail keeps it interesting with active sections instead of a simple walk-in path. That is why I would recommend it more to adventure-minded travelers than to people looking for a quick, effortless stop. In this Aw-Asen Falls Travel Guide, I’ll break down the location, route, fees, inland transfer, and what the hike actually feels like on the ground.
Table of Contents
Where Is Aw-Asen Falls Located?
Aw-Asen Falls is located in Barangay Sto. Rosario, Sigay, Ilocos Sur. If you are trying to pin it down for trip planning, that is the exact location that matters first. But for me, the location is not just about the map pin. The real geography of this trip includes the highway corridor, the inland access, and the jump-off logic that gets you from the main road into the remote waterfall area.
What helped me understand the trip better is thinking about it in layers. First, you are going to Ilocos Sur. Then you narrow it down to Sigay, and finally to Sto. Rosario, where the waterfall access is tied to the interior road network. The public map reference often used for Aw-Asen Falls location is 17.08627, 120.58854, which is useful as a navigation anchor, but I would not treat that pin as the whole story because the inland approach shapes the actual travel experience.
Location at a glance
- Province: Ilocos Sur
- Municipality: Sigay
- Barangay: Sto. Rosario
- Map reference: 17.08627, 120.58854
- Most practical staging corridor: Tagudin / Bitalag Junction
- Alternate staging point: Candon City
- Possible side base: Vigan, though it is farther north than the more direct inland approach
If you are choosing between Tagudin and Vigan, I would treat Tagudin/Bitalag as the better base for direct access, while Vigan makes more sense if Aw-Asen is only one stop in a wider Ilocos trip.
What Makes Aw-Asen Falls Special?
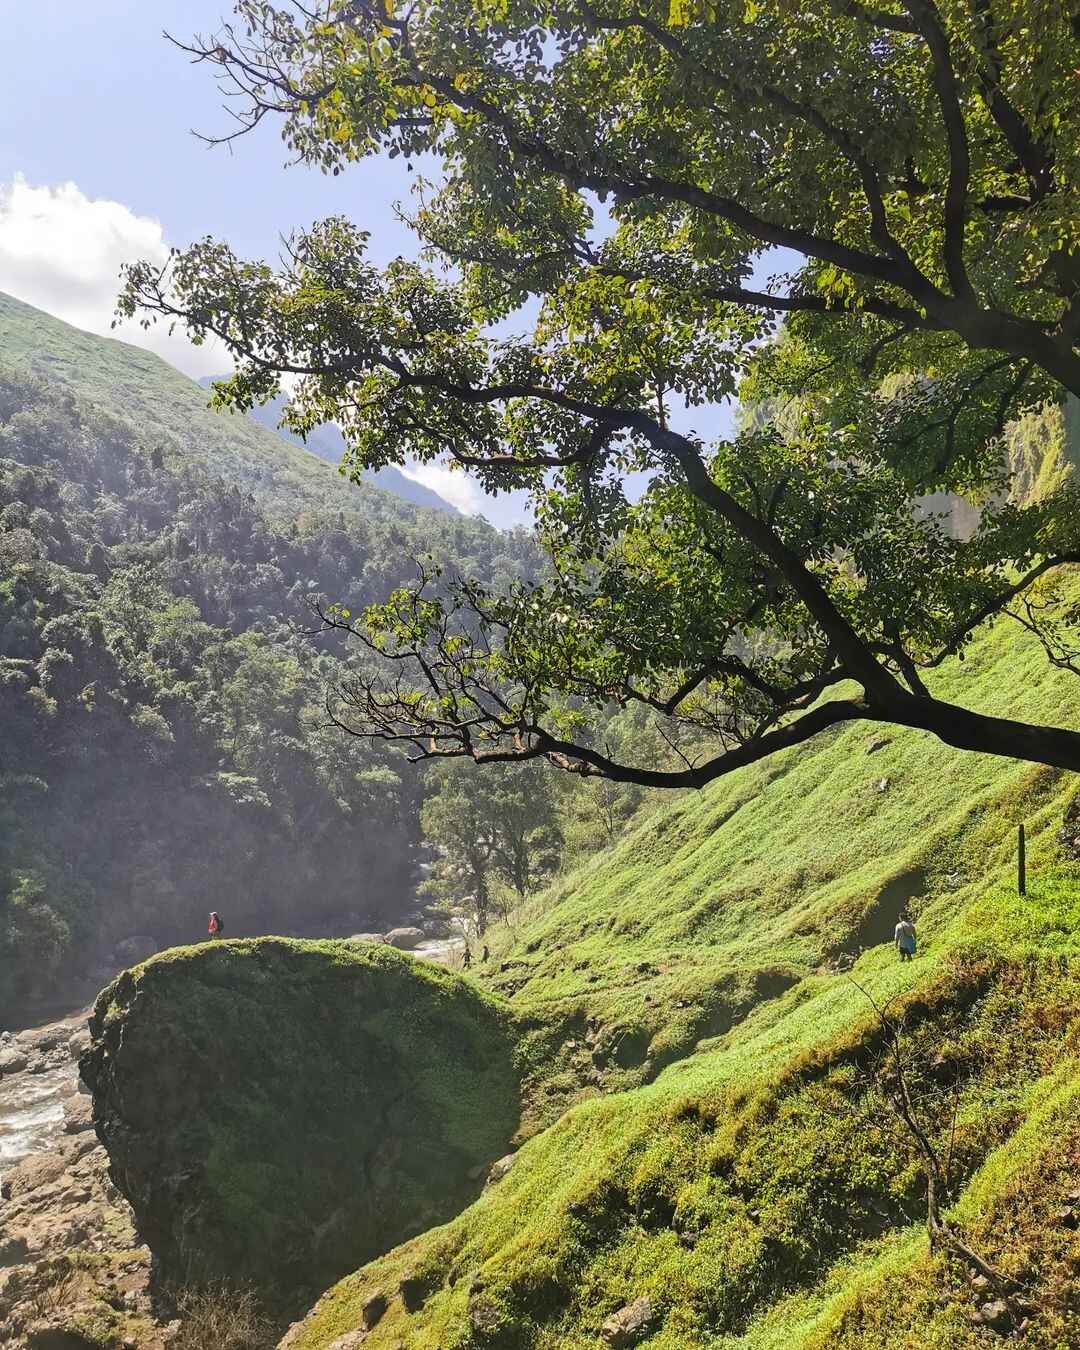
What makes Aw-Asen Falls special for me is that it does not feel like a quick roadside attraction you casually squeeze into a light itinerary. It feels bigger, rougher, and more dramatic than that. By the time I got there, the experience already felt earned because the rough inland access, the guide-led approach, the river crossings, and the hanging bridge all built up the sense that I was heading into something more remote and memorable than an ordinary waterfall stop.
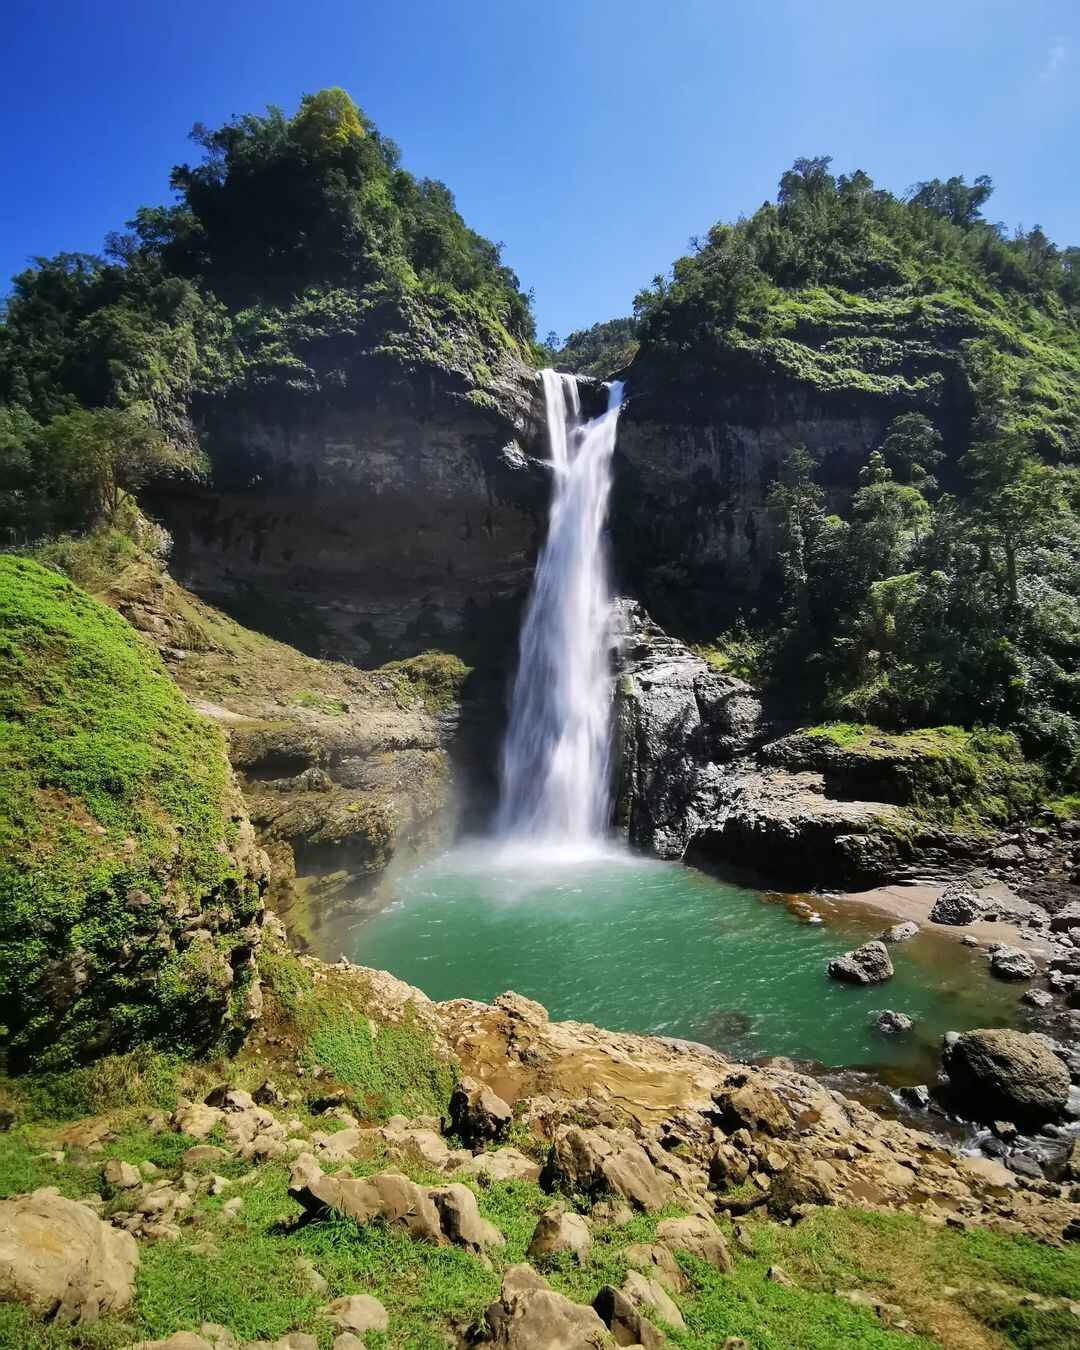
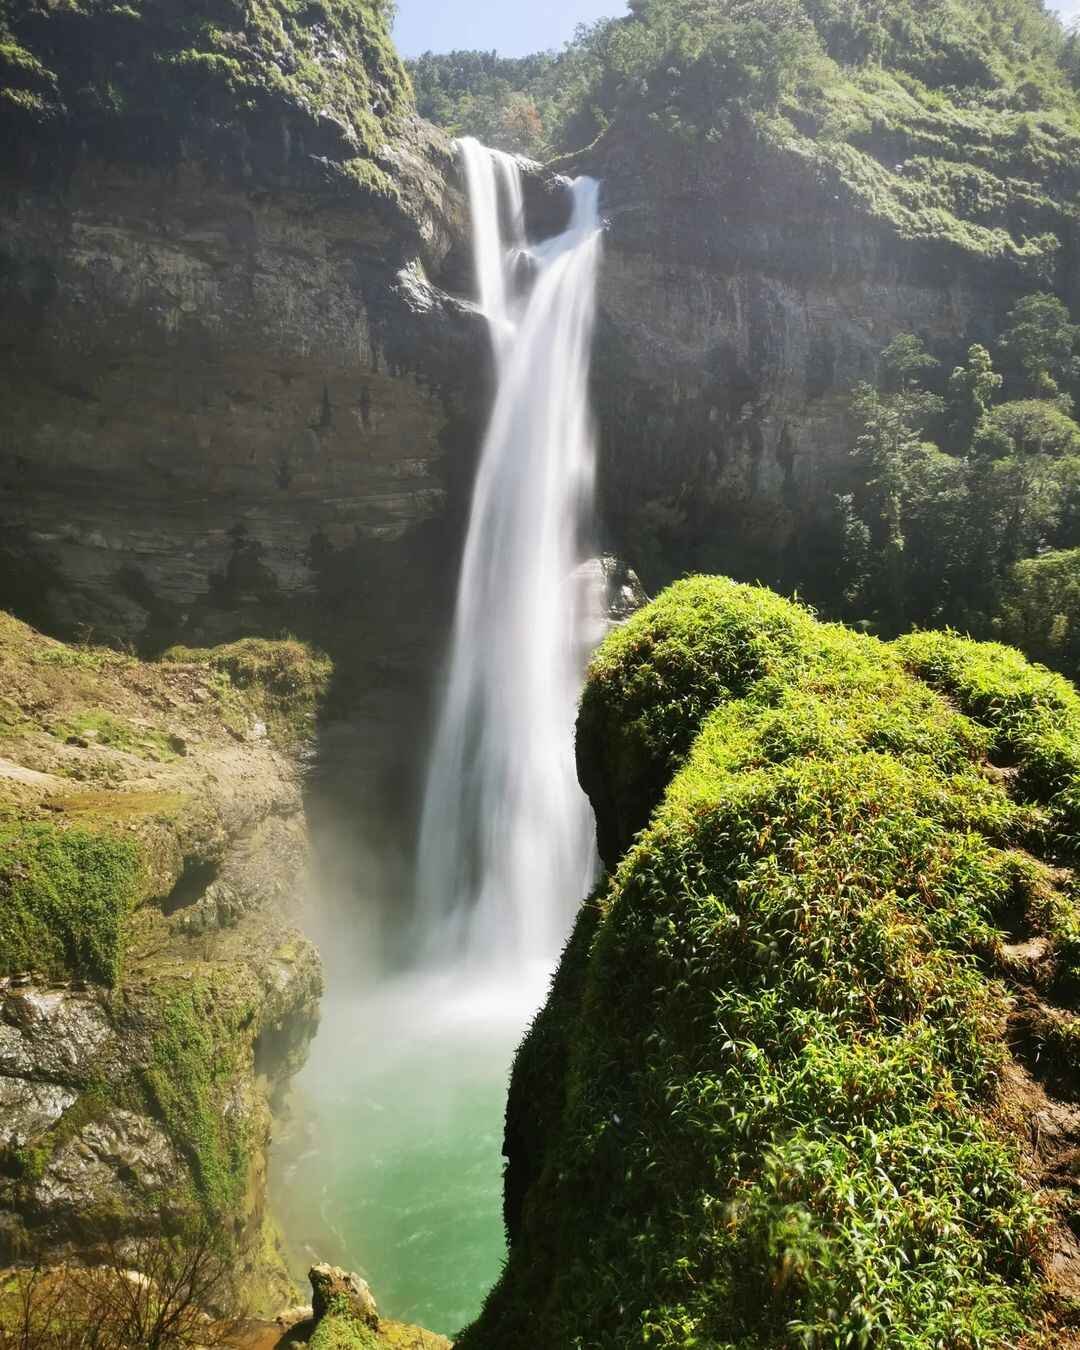
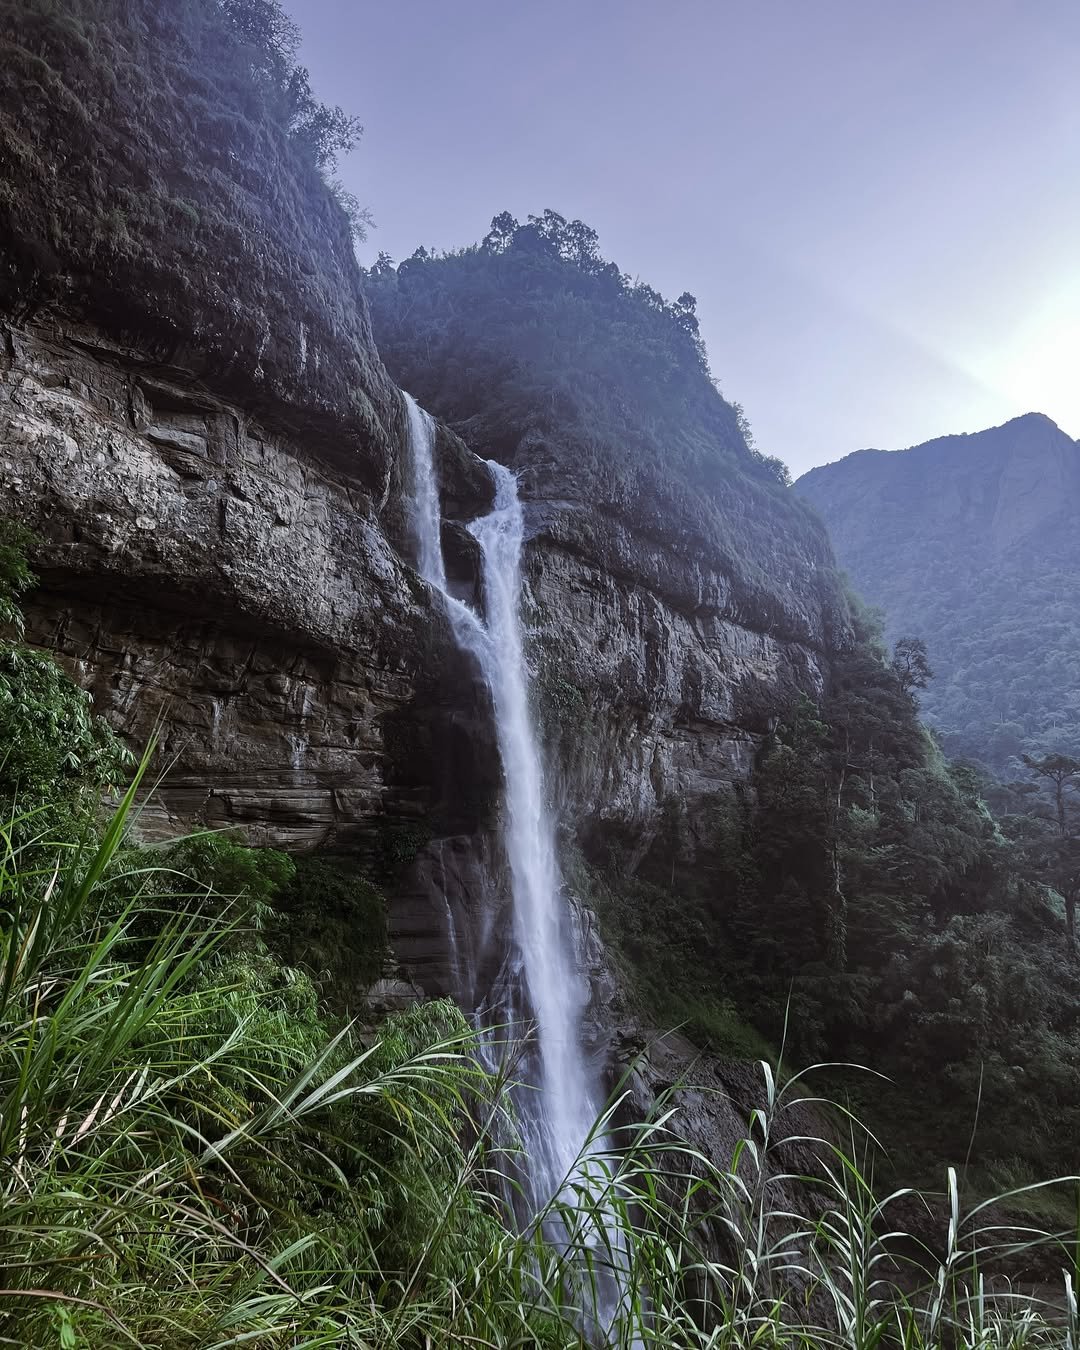
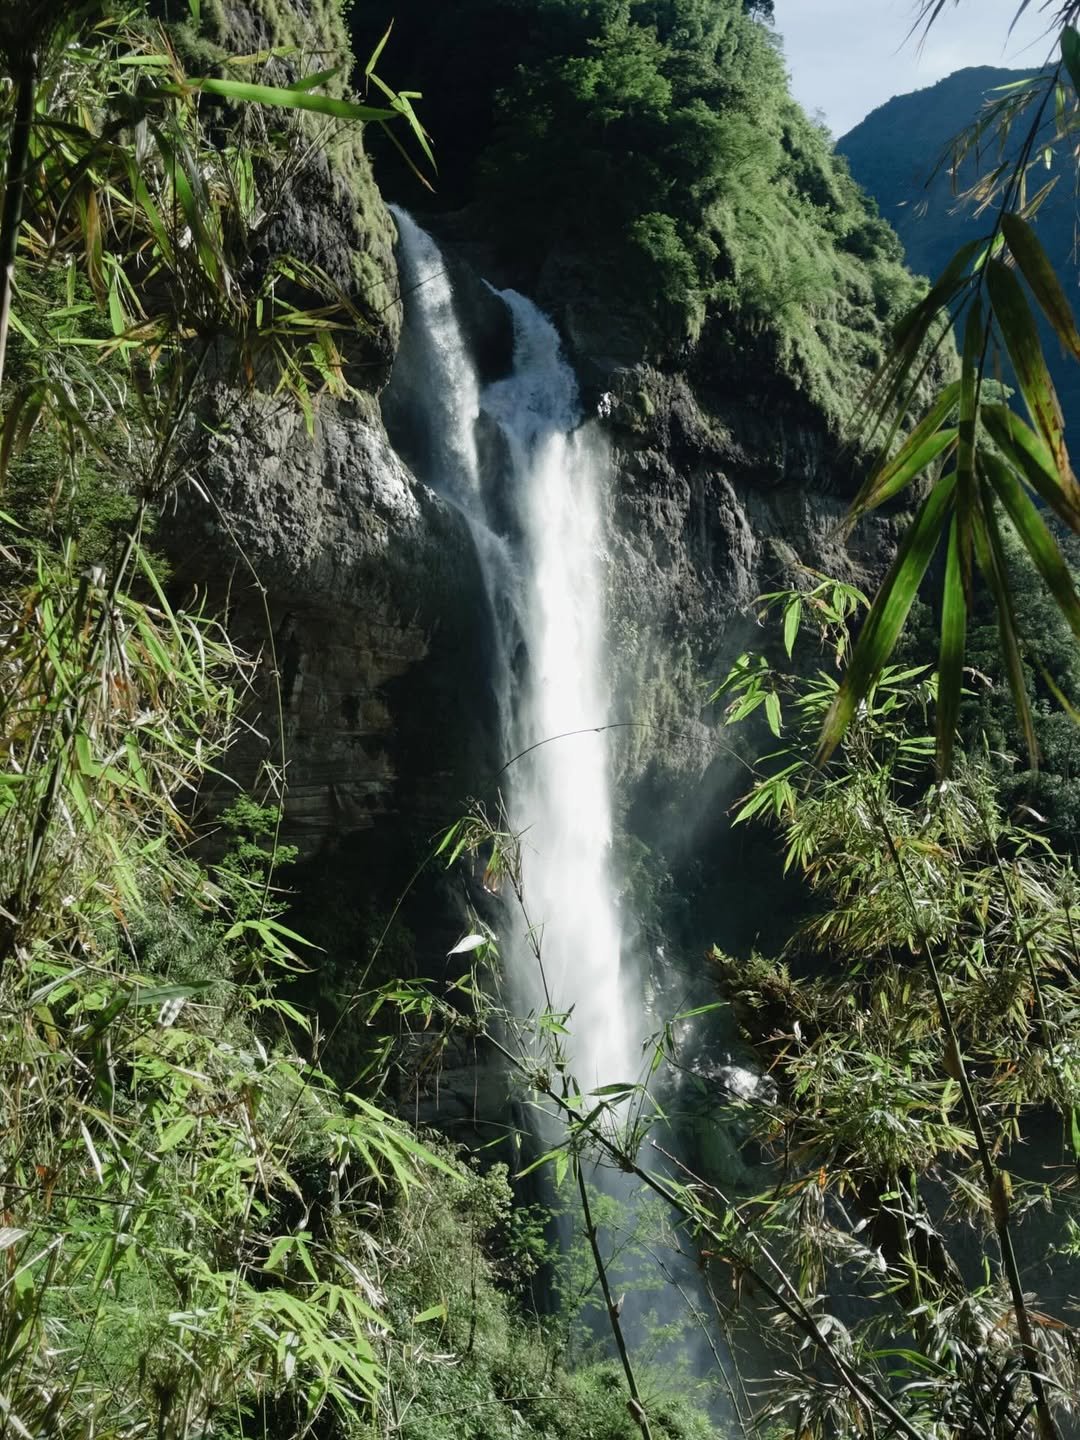
The first thing that really stands out is the scale. Aw-Asen Falls Height is often presented in the 110 to 120 meter range, and whether you call it 110 or 120, it still feels massive when you are standing near it and hearing the water crash into the basin below. It is also widely promoted as the tallest waterfall in the Ilocos Region, which makes the place feel even more iconic once you finally see the full drop in person.
The setting adds to that impact. The falls feel tucked deep into a rugged highland landscape, with a deep catch basin, a raw natural backdrop, and a stronger sense of adventure than the usual easy-access waterfall trip. Conditions can also change with the season, so the water, the flow, and the feel of the basin are not always exactly the same.
What stands out
- towering waterfall scale
- remote highland setting
- rough access that adds adventure value
- river crossings and hanging bridge approach
- deep catch basin with season-dependent conditions
How Difficult Is the Aw-Asen Falls Hike?
The Aw-Asen Falls hike is manageable for beginners with decent mobility, but I would not call it effortless. For me, it sits in that middle ground where the walk is short enough to feel approachable, yet active enough to punish anyone who comes in expecting a flat, easy waterfall stroll. The usual approach is around 45 minutes, and while it is not a major trek, the whole experience feels more demanding because the inland transfer is already tiring before the actual trail even begins.
What makes the trail feel more serious is the kind of terrain you deal with on the way in. The approach includes two river crossings, one section tied to a hanging bridge, and a climb segment that breaks the rhythm of the walk and reminds you this is still an adventure-type access route, not a paved tourist path.
I also like to think of the commonly cited 4 km trail estimate and around 1 hour approach as a realistic feel for the outing, especially if the group moves slowly or stops often. The biggest factor is weather. Once the trail gets wet, the rocks and ground can turn slippery fast, and the river sections feel less forgiving.
What makes the hike tricky
- short but active trail, not a flat walk
- river crossing sections
- hanging bridge segment
- climb portion near the approach
- muddy, slippery footing after rain
How to Go to Aw-Asen Falls from Manila
For me, the most practical answer to how to go to Aw-Asen Falls from Manila is simple: ride a northbound Ilocos Sur bus, get down at Tagudin/Bitalag Junction if possible, arrange your inland transfer ahead of time, head to the Sto. Rosario jump-off, then do the short but active hike to the falls. The full road trip to the Sigay corridor usually takes around 6 to 8 hours, and the final trail approach is about 45 minutes, so the trip works best when I treat the inland transfer as the real make-or-break part of the plan, not just an afterthought.
Here is the transport flow I would follow for an Aw-Asen Falls DIY trip:
- Stage 1: Bus from Manila
- Ride an Ilocos Sur–bound bus from Metro Manila.
- The two names that matter most here are Viron Transit and Partas.
- Stage 2: Pick the right drop-off
- My first choice is Tagudin / Bitalag Junction.
- My backup drop is Candon City.
- I only treat Vigan as a side base when I want to pair Aw-Asen with a wider Ilocos trip, because it sits farther north than the more direct inland approach.
- Stage 3: Pre-arrange the inland transfer
- From Tagudin/Bitalag or Candon, I would arrange a monster jeep or another high-clearance ride bound for Barangay Sto. Rosario.
- This matters because the interior access is not a casual tricycle hop. It involves rougher terrain, river-crossing sections, and the kind of road where high-clearance vehicles make more sense.
- Stage 4: Registration and hike
- Once at the jump-off, settle registration and guide setup, then start the walk to the falls.
- The final approach is usually around 45 minutes, with river crossings, a hanging bridge section, and a climb segment.
One practical detail I would keep in mind: even if your bus is heading farther north, you may still be able to get down earlier if it passes Tagudin, which is why I would always confirm my intended drop-off before the trip starts.
Bus Options and Fare Snapshot
If I wanted the clearest fare anchors for this route, I would start with Viron Transit. The fare points I would use for planning are:
- Manila to Tagudin: ₱680
- Manila to Candon City: ₱746
- Manila to Vigan City: ₱880
Partas is still a workable alternate, especially for Candon or Vigan-bound trips, but I would treat its fares more carefully because the pricing is presented by class and can vary depending on whether you get a Regular, Deluxe, Super Deluxe, or Luxury trip. In short, Viron gives me the cleaner one-value planning figures, while Partas feels more like a flexible backup that still needs a last check before I lock in my budget.
Why Tagudin/Bitalag Is the Best Practical Jump-Off Corridor
For me, Tagudin/Bitalag is the smartest base because it is the most direct and most practical handoff point between the highway ride and the rugged inland access to Aw-Asen. This is where the trip changes from a normal bus journey into a real upland approach. Travelers commonly use this corridor to arrange the ride into Sto. Rosario, and that is exactly why I would prioritize it over Vigan when the main goal is to reach the falls efficiently. Candon City still works as an alternate, but if I want the cleanest route logic, Tagudin/Bitalag is the better jump-off.
The Real Challenge: Inland Transfer from Tagudin/Bitalag to Sto. Rosario
For me, this is the real make-or-break part of the trip. The hardest part of Aw-Asen Falls DIY is not the waterfall itself and not even the hike. It is the inland transfer from Tagudin/Bitalag into Sto. Rosario, because this is where the route stops feeling like a normal commute and starts feeling like a real backcountry access run. If you get this part wrong, the whole trip becomes harder, slower, and much less predictable.
The interior approach into Sigay is described as roughly 30 kilometers of mixed terrain, with around 22 kilometers of concrete road and 8 kilometers of rugged sections. That already sounds demanding on paper, but it matters even more because the route includes stony river crossings and mountain-road conditions that can get worse fast when the weather turns. Once it rains, the trip can become slower, more slippery, and riskier, which is why I would never treat this as a casual last-mile ride.
If I were choosing the most practical ride after Tagudin, I would go with a chartered monster jeep or another high-clearance 4×4 transfer. That is the most group-friendly option and the one that makes the most sense for the road conditions described in the route. One example market rate in the analysis is around ₱800 per head, which I would treat as a working travel figure, not a fixed official tariff. For solo travelers or pairs, a habal-habal can sometimes work, and one travel-account example puts it at around ₱1,200, but again, I would treat that as a negotiable field price rather than a guaranteed standard.
Transport options I would consider
- Monster jeep / high-clearance 4×4: best for groups and the most practical for rough-road access
- Habal-habal: possible for solo or couple trips, but more weather-dependent and less ideal in poor conditions
- Public jeepney: sometimes mentioned, but I would not rely on it because no fixed timetable or official fare was confirmed in the extracted analysis
- Private vehicle: only if it has enough clearance; a normal low car is not the setup I would trust here
If I were doing this trip myself, I would arrange the ride ahead of time instead of assuming I could just walk in and sort it out on the spot, especially on busy weekends or holidays.

Aw-Asen Falls Entrance Fee, Guide Cost, and Other Charges
If you are budgeting for the trip, the strongest fixed on-site figures I would use for Aw-Asen Falls Entrance fee planning are the ₱50 environmental fee and the ₱750 guide fee reference. I would also come in cash-ready because that is the safest way to handle payment on the ground. For me, this is one part of the trip where it is better to stay clean and conservative with the numbers instead of mixing stable charges with loose travel chatter.
One thing I would make clear right away is that the guide is not something I would treat as optional in normal planning. The trip is remote, the access is rugged, and the local setup is built around guided entry and tourism coordination. If you are doing Aw-Asen Falls DIY,
I would treat the environmental fee and guide fee as the core site charges, then build the rest of the budget around transport, food, and any overnight setup. Camping is possible, but it should be coordinated with the tourism office instead of treated like a casual walk-in add-on.
Expect to pay
- ₱50 environmental fee
- ₱750 guide fee reference
- cash payment for on-site charges
Do not assume these are fixed
- camping fee
- parking fee
- comfort room fee
- shower fee
That last part matters. I would not publish any extra site charge as a hard fact unless it is confirmed for your trip date, because the research did not lock down a consistent official fee schedule for those items.
Tourism Contacts, Guide Coordination, and Booking Help
If I were arranging this trip myself, I would message the Sigay Tourism Office first before talking to anyone else. That is the cleanest way to sort out guide assignment, inland transfer coordination, and the most practical booking flow for your date. It is also the safest first step if you want to avoid mixing official coordination with informal arrangements, especially for a remote trip like Aw-Asen Falls DIY where the road access and jeep setup can affect the whole plan. The tourism office is also the best place to ask about monster jeep booking, guide availability, and whether there are any visitor flow limits or transport reminders on your travel date.
Official contact to prioritize
- Sigay Tourism / LGU Sigay Tourism Website
- Tourism Officer: Balligi Quitor
- 0968 443 7926
- 0916 443 0028
Useful backup contacts
- Kuya Ferdinand – 0951 308 6685
- Hari Bon – 0954 473 4675
- John Carl Alberto Lames – +63 916 375 4279
Best Time to Visit Aw-Asen Falls
For me, the best time to visit Aw-Asen Falls is during the drier months, when the trail feels calmer, the inland road is less stressful, and the river sections are easier to deal with. This is one trip where weather matters far beyond comfort. It affects the road approach, the crossings, the hike itself, and how confidently you can move through the whole route.
What makes timing more important here is the kind of access involved. Aw-Asen is not just a simple waterfall stop with a short paved walk at the end. You still have to deal with the Sigay interior road, possible stony crossings, and a trail that can get slippery fast once rain enters the picture. I would treat bad-weather timing more seriously here than I would for easier roadside attractions, because high water and slick footing can change the feel of the trip in a big way.
Best conditions
- drier or summer-leaning months
- calmer river flow
- less slippery trail sections
- easier inland road access
- more manageable crossing conditions
Harder conditions
- rainy days or recently wet weather
- stronger river flow
- slippery trail and rocks
- rougher inland road approach
- more hazardous crossings and slower travel overall
What to Expect at the Falls: Water Conditions, Swimming, and Scenic Experience
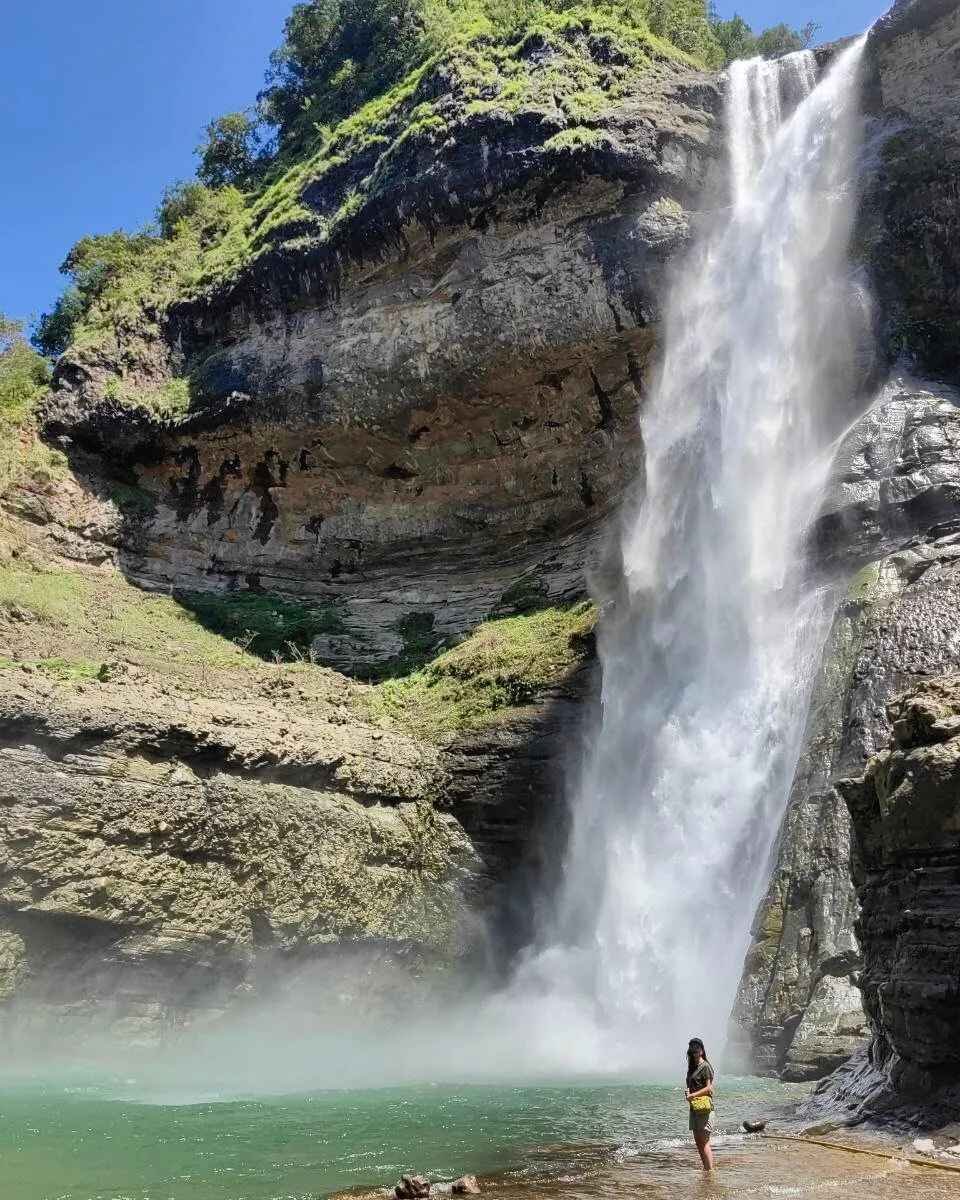
Yes, you can swim at Aw-Asen Falls, but I would treat it as a place to enjoy carefully, not casually. The pool below the falls is described as a deep catch basin, and the overall feel of the water can change depending on the season, so I would never assume the same depth, flow, or comfort level every time.
What stayed with me most is the payoff of the final reveal. After the rough access and the active approach, the falls feel bigger and louder than a photo usually suggests. The drop itself is dramatic, the sound of the water hits you before you fully settle into the viewing area, and the whole place has that refreshing, tucked-away feel that makes the trip feel earned. Since Aw-Asen Falls Height is commonly framed in the 110 to 120 meter range, it already carries that towering presence the moment you see the full cascade in front of you.
The water can look inviting, especially after the hike, but I would still stay alert. Seasonal changes can affect the flow, and the deep basin means swimming should always be approached with caution instead of impulse. For me, the experience works best when I treat the pool as part of the reward, while still respecting the power and unpredictability of the falls.
What to expect on arrival
- deep catch basin
- strong visual impact from the height
- loud, roaring cascade
- refreshing but caution-worthy swim area
- season-dependent water conditions
Sample Itinerary for Aw-Asen Falls
I would treat this as a sample plan, not a rigid timetable, because the inland transfer, river conditions, and group pacing can shift the day. Still, this is the cleanest Aw-Asen flow for me if I am staging at Tagudin/Bitalag and want a realistic early start. The overnight version also makes sense if I want more buffer for transport uncertainty, weather delays, or a less rushed return.
Sample Itinerary
| Time / Stage | DIY Day Trip via Tagudin/Bitalag |
|---|---|
| 04:00 | Meet-up at Tagudin/Bitalag Junction |
| 04:15 | Depart for Sto. Rosario jump-off |
| 05:30 | Registration, fee payment, guide briefing |
| 06:00 | Start trek |
| 06:45 | Arrive at falls |
| 06:45–08:30 | Photos, sightseeing, optional swim |
| 08:30 | Start trek back |
| 09:15 | Back at jump-off |
| 10:00 | Return to Tagudin/Bitalag |
| 12:00 | Lunch and onward travel |
Aw-Asen Falls DIY Budget Breakdown
If I were budgeting this trip, I would anchor everything around the most stable figures first, then let the variable parts sit as ranges. For an Aw-Asen Falls DIY plan, the strongest numbers to work from are the ₱1,360 roundtrip bus cost via Viron Tagudin, the ₱800 inland monster jeep example, the ₱50 environmental fee, and the ₱750 guide fee reference. Food and lodging are where the budget starts to breathe because those depend on appetite, room setup, and how many people are splitting costs.
For me, solo travel is the expensive version of this trip because I carry the full room cost and the full guide fee. Once I split the guide and lodging with a partner or a small group, the trip becomes much easier to justify. That is also why I would avoid pretending there is one neat “official total.” The more honest formula is this: per person, excluding lodging, think around ₱1,360 + ₱800 + ₱50 + guide share + food.
Quick budget anchors
- bus RT via Tagudin: ₱1,360
- inland transfer example: ₱800 per head
- environmental fee: ₱50
- guide fee reference: ₱750 total
- food budget: ₱300–₱500
- lodging near Tagudin/Bitalag: ₱1,000–₱2,000 per group
Budget Breakdown Table
| Cost Item | Planning Figure | Notes |
|---|---|---|
| Manila → Tagudin bus fare (one way) | ₱680 | Viron fare anchor |
| Manila → Tagudin bus fare (roundtrip) | ₱1,360 | Most useful DIY baseline |
| Manila → Candon bus fare (one way) | ₱746 | Alternate drop |
| Manila → Vigan bus fare (one way) | ₱880 | Better as side-base option |
| Inland monster jeep transfer | ₱800 per head | Example market rate, not LGU tariff |
| Habal-habal example | Around ₱1,200 | Negotiated example, more variable |
| Environmental fee | ₱50 | Stable site charge |
| Guide fee reference | ₱750 total | Best treated as group-share cost |
| Food budget | ₱300–₱500 | Variable |
| Lodging near Tagudin/Bitalag | ₱1,000–₱2,000 per group | Range, not official tariff |
What to Wear and Bring for an Aw-Asen Falls Trip
- Water: I would bring enough hydration from the start because this is not the kind of trip where I expect reliable stores once I head into the interior road. The access is remote, the inland transfer already takes time, and the hike still asks for energy.
- Trail food or snacks: I always treat Aw-Asen like a trip where I should already have my food sorted before going inland. Limited commercial stops around the jump-off and interior access mean I would rather pack what I need than hope something is available later.
- River-friendly footwear with traction: For me, this is one of the most important items because the trail includes river crossings, a hanging bridge section, and footing that can turn slippery after rain. I would choose footwear with real grip, not something smooth and casual.
- Dry bag for electronics: The combination of rough access, possible splashes, and river sections makes a dry bag feel less like a nice extra and more like basic protection.
- Basic first-aid kit: I would keep this small but useful because the trip is remote and not the kind of place where I want to rely on quick convenience access.
- Cash: I would go in cash-ready for fees and small on-ground expenses.
Comfort items
- Extra shirt or light towel: useful after the hike or an optional swim
- Waterproof pouch: good for phone, IDs, and small essentials
- Sun protection: especially helpful if the day turns hot during the inland ride and hike
Weather-dependent extras
- Light rain layer: worth bringing if the forecast looks unstable
- Extra socks or sandals: helpful if the trail or river sections get messier than expected
- Plastic bag for wet gear: practical after the swim or muddy approach
Safety Reminders Before You Visit Aw-Asen Falls
- Do not underestimate wet conditions. The trail gets slipperier after rain, and the river sections can feel more hazardous once water levels rise.
- Treat river crossings with respect. Even if the hike is short, high water changes the feel of the route quickly.
- Assume the inland road gets harder in bad weather. Rough road access, stony crossings, and wet surfaces make the approach less forgiving.
- Do not rely on strong signal. Parts of the approach are noted to have limited or no dependable data coverage.
- Buy supplies before heading inland. Limited commercial establishments near the jump-off mean poor planning is harder to fix once you are already inside the route.
- Treat the catch basin carefully. Swimming is possible, but the pool is described as deep and seasonal flow can change the risk level.
- Pre-arrange transport. I would not assume easy walk-in access for a jeep, especially on weekends or busy dates.
Pre-departure checklist
- check weather
- confirm transport
- bring cash
- pack water and trail food
- wear traction-friendly footwear
- save tourism contact details
- do not rush river decisions on-site
Aw-Asen Falls FAQs
Where is Aw-Asen Falls located?
Aw-Asen Falls is in Barangay Sto. Rosario, Sigay, Ilocos Sur. The most practical access logic still runs through Tagudin/Bitalag, with Candon City as an alternate staging point.
How tall is Aw-Asen Falls? I would describe the height as around 110 to 120 meters. That range is more honest than forcing one exact figure.
How difficult is the Aw-Asen Falls hike?
The hike is short but active, usually around 45 minutes, with two river crossings, a hanging bridge section, and a climb segment. It is manageable for many beginners, but it feels tougher in wet conditions.
How much is the Aw-Asen Falls entrance fee?
The clearest on-site figure to use is the ₱50 environmental fee.
Do I need a guide at Aw-Asen Falls?
I would plan as if the guide is part of the normal setup. The strongest fee reference in the guide is ₱750 for the guide, and the trip is structured around guided coordination.
How do I get to Aw-Asen Falls from Manila?
The most practical route is Manila to Tagudin/Bitalag or Candon, then inland transfer to Sto. Rosario, then hike to the falls.
Can I visit Aw-Asen Falls from Vigan?
Yes, but I would treat Vigan more as a wider Ilocos base than the most direct Aw-Asen jump-off. Tagudin/Bitalag is usually the cleaner route for the falls itself.
Is Aw-Asen Falls possible as a DIY trip?
Yes, but the trip works best when the inland transfer is arranged ahead of time. DIY is very doable, but the road access is the real bottleneck.
Can I camp near Aw-Asen Falls?
Camping is possible, but I would only treat it as a real option when it is coordinated with the tourism office.
What is the best time to visit Aw-Asen Falls?
I would go during the drier months, when the trail is calmer, the road is less stressful, and the river conditions are easier to manage.
Final Planning Tips Before You Go
- prioritize Tagudin/Bitalag as your main staging logic, with Candon as backup
- arrange inland transport ahead instead of assuming easy walk-in access
- bring cash for site charges and small travel expenses
- expect an active trail even if the hike itself is short
- pack water, snacks, and footwear with real traction
- treat weather as a major planning factor, not a minor detail
- use tourism office coordination to make the trip smoother from the start
- avoid the easiest mistake: underestimating the inland access and overestimating on-site convenience
Explore More Philippine Water Frontiers
If you survived the trek to Aw-asen Falls and loved the raw, unpolished beauty of the Ilocos hinterlands, challenge yourself with these next-level hydro-adventures:
The Terraced Wonder of the North: Just a province away in Abra, experience the seasonal grandeur of multi-tiered limestone pools.
 Read the Ultimate Guide to Kaparkan Falls (Abra)
The “New Zealand” of Zambales: If you enjoy the off-grid, pine-scented vibe of Sigay, you’ll love camping by this sunken lake created by the Mt. Pinatubo eruption.
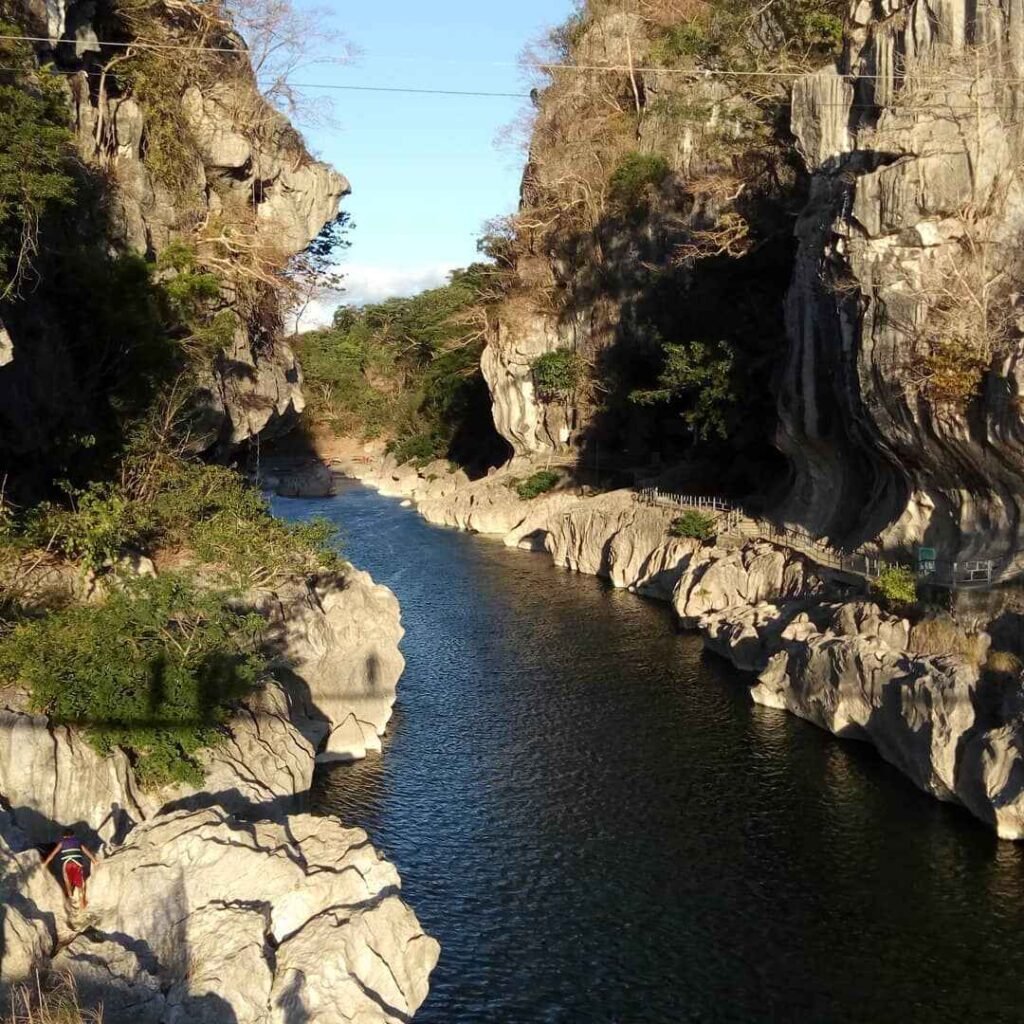
Complete Boat & Camping Guide to Mapanuepe LakeInto the Kidaco Canyons: For those who want to trade waterfalls for river gorges and crystal-clear swimming holes in Central Luzon.
Travel Guide: Coto Mines & Kidaco River (Zambales)The OG Rapid Shooter: Compare the bamboo raft “massage” of Aw-asen with the world-famous “Shooting the Rapids” experience in Laguna.
Pagsanjan Falls Tour: Rates, Location & Entrance Fees