
Quick Guide: Mapanuepe Lake
Location: Barangay Aglao, San Marcelino, Zambales.
Best Time to Visit: November to May (Dry Season). Avoid rainy season due to impassable river crossings.
Budget (DIY): Approx. ₱2,000 – ₱2,500 per person (overnight).
Key Highlight: The “Sunken Church” cross and “New Zealand” rolling hills.
Critical Warning: Swimming is strongly discouraged due to heavy metal contamination. High clearance vehicles recommended for the lahar trail.
Introduction: The Disaster That Became Paradise
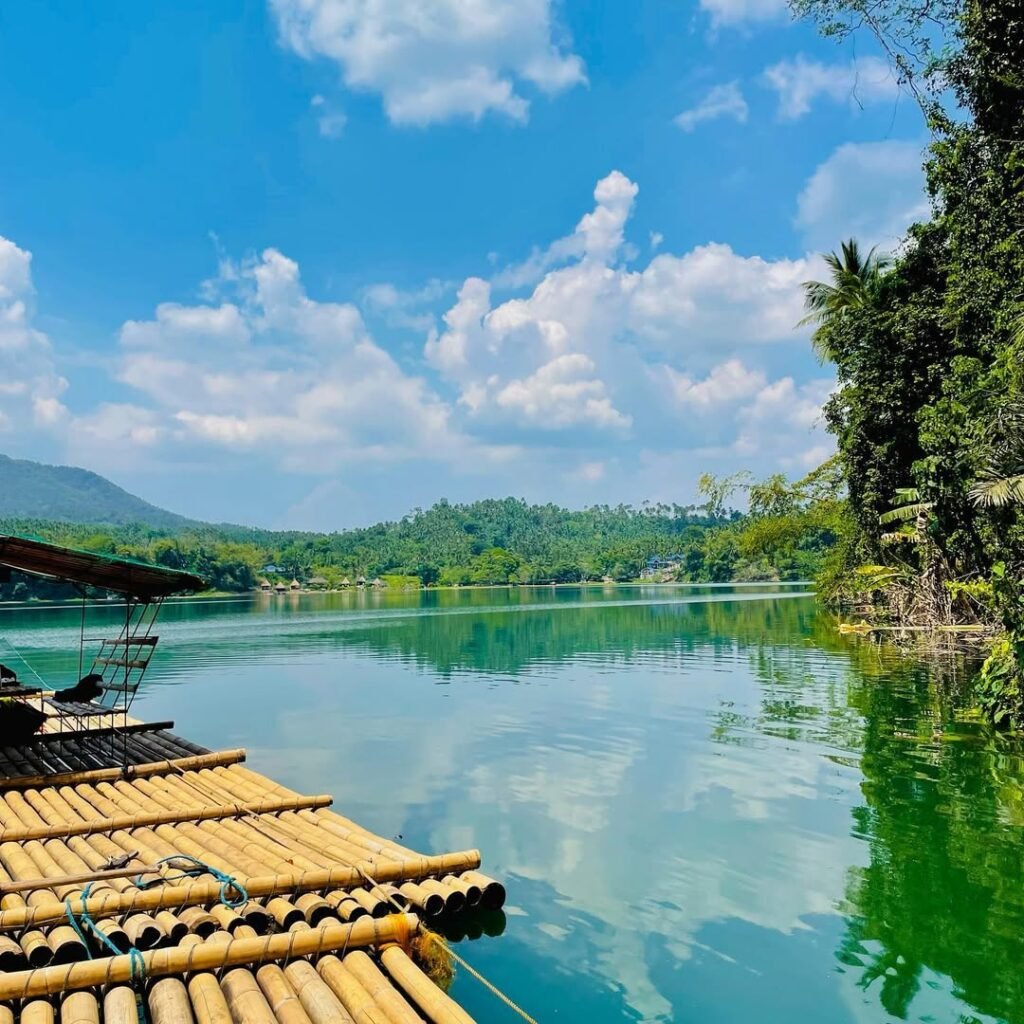
Mapanuepe Lake is a hauntingly beautiful freshwater body in San Marcelino, Zambales, accidentally created by the 1991 Mt. Pinatubo eruption, now famous for its “New Zealand” aesthetic and the iconic steeple of a submerged parish church.
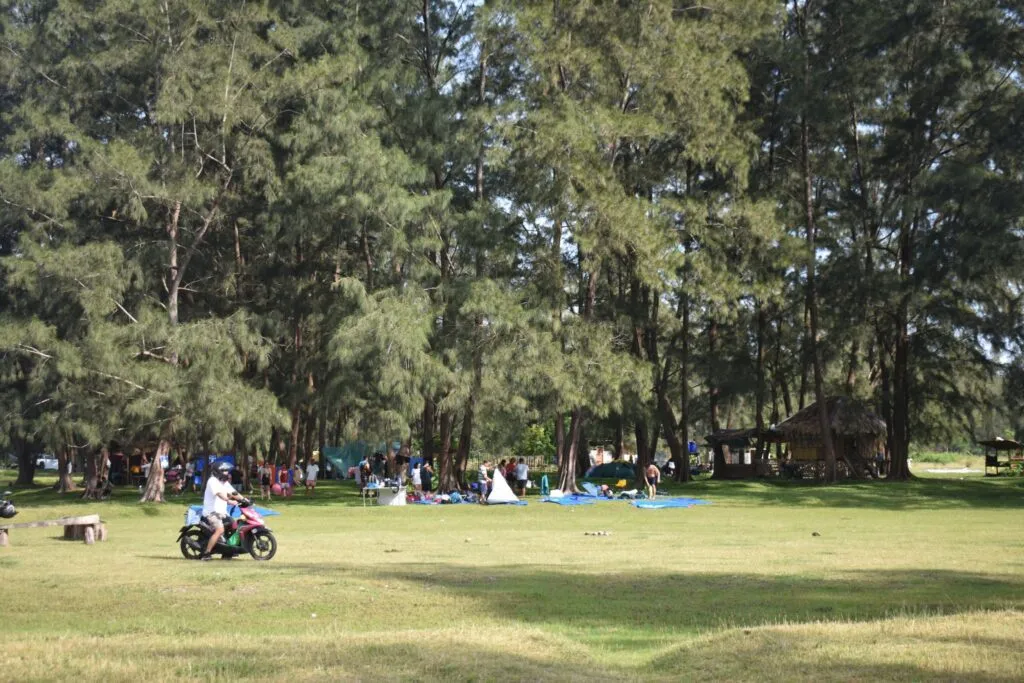
The first thing that hits you upon arrival isn’t the view—it’s the silence, broken only by the rustling of Agoho trees (Casuarina equisetifolia) that mimic the scent and sound of pine. As the dust from the 4×4 lahar trail settles, the landscape shifts from a harsh, grey volcanic wasteland to a surreal, verdant pasture. In the middle of the glassy water, a solitary rusted metal cross breaks the surface—a ghostly marker of where a town center once stood.
A Beauty Born from Destruction
This serenity belies a violent origin. Unlike the ancient tectonic lakes of the archipelago, Mapanuepe is geologically young, born from the cataclysm of the 1991 Mt. Pinatubo eruption. Billions of tons of volcanic debris remobilized as lahar (mudflows), effectively damming the Mapanuepe River. The rising waters swallowed the Mapanuepe Valley and the entire settlement of Barangay Buhawen (locally known as Bajaoen).
The church steeple you see today is the actual roof of the submerged local parish, serving as a poignant depth gauge: fully visible during the dry months (March–May), and barely peeking above the waterline during the monsoon season.
The “New Zealand” of Zambales
Today, the lake has transcended its tragic history to become a top-tier ecotourism destination, frequently styled as the “New Zealand of the Philippines.” The comparison is well-earned. The shoreline is defined by rolling hills carpeted in short, vibrant green grass, dotted with freely grazing cattle, carabaos, and horses.
It offers a visual palette that feels completely detached from the typical tropical beach scenery of Zambales. It is a place of stark contrasts: life flourishing on top of volcanic debris, and a calm lake hiding a buried village beneath.
“While the province is famous for its coastlines—detailed in our guide to the 10 Must-Visit Zambales Beaches—Mapanuepe offers a stark, freshwater contrast to the salty air of the West Philippine Sea. It creates a vista that feels remarkably distinct from the typical tropical scenery found in our Zambales Ultimate Travel Guide (2025).”
Table of Contents
How to Get to Mapanuepe Lake (2025 Logistics)
Reaching Mapanuepe Lake is a three-step adventure: a highway transit to San Marcelino, a provincial transfer to the mountain village of Aglao, and a final off-road or aquatic crossing to the campsite.
Whether you are commuting or driving, the gateway is always the San Marcelino Public Market. From there, the route changes depending on your vehicle’s capability to handle volcanic terrain.
Option A: Commute / DIY from Manila (The Backpacker Route)
The standard route is to take a Victory Liner bus from Cubao or Pasay to San Marcelino, Zambales (₱375–₱450). From the town proper, hire a “special trip” tricycle to Barangay Aglao (₱400–₱500), then take a boat (₱500/group) to the campsite.
-
Step 1: The Bus Transit (4-5 Hours)
Head to the Victory Liner terminals in Cubao (EDSA), Pasay, or Caloocan. Look for buses with the signboard “Iba” or “Santa Cruz.”
-
Insider Tip: Do not wait for a bus labeled “San Marcelino”—they are rare. Any Iba/Santa Cruz bound bus passes through the town.
-
The Drop-off: Tell the conductor explicitly: “San Marcelino Public Market” or “7-Eleven San Marcelino.” Do not sleep past Subic; the stop comes shortly after the town of Castillejos.
-
-
Step 2: The Tricycle to Aglao (30-45 Mins)
Upon disembarking, you will be approached by tricycle drivers. You need a “Special Trip” to Barangay Aglao.
-
Rates: The standard tariff is ₱400–₱500 per tricycle (one-way), fitting up to 3-4 passengers with backpacks.
-
Reality Check: The road starts paved but transitions to rough patches. The tricycles are modified for heavy loads but expect a bumpy, dusty ride. Wear sunglasses or a scarf to protect against road dust.
-
-
Step 3: The Boat Transfer (15 Mins)
The tricycle drops you at the Aglao tourism registration area (the “Bangkaan”). After paying fees, board a small outrigger boat (bangka) that navigates through the submerged trees to reach the Phase 1 or Phase 2 campsites.
Option B: Private Vehicle (Can Your Car Make It?)
SUVs, Pickups, and 4x4s can drive directly to the campsite during the dry season (Nov-May) with a mandatory local guide. Sedans, hatchbacks, and crossovers must park at the designated lot in Barangay Aglao (₱100/night) and take a boat transfer, as they will get stuck in the deep lahar sand.
-
Navigation & Waze:
Set your app to “San Marcelino Public Market” first. Once you reach the market intersection, reset the destination to “Mapanuepe Lake Jump-off” or “Barangay Aglao.”
-
Warning: Waze sometimes suggests “shortcuts” through mountain roads near Subic/Tipo. Ignore them; stick to the National Highway until San Marcelino town proper.
-
-
The “Lahar” Trap & Guide Requirement:
The trail from Aglao to the lake isn’t just a dirt road; it is a riverbed composed of lahar (volcanic ash). It behaves like quicksand—firm when dry, but treacherous when wet or loose.
-
Sedans: Do not attempt the crossing. The ground clearance is insufficient for the river streams, and street tires will lose traction in the sand.
-
SUVs/4x4s: You must hire a local guide on a motorcycle (₱500–₱800 per convoy). The river channels shift weekly due to rain and quarrying. The guide rides ahead to test the water depth and show you the firmest line to drive on.
-
Vehicle Decision Matrix
| Vehicle Type | Action Plan | Parking Cost | Transfer Cost |
| Sedan / Hatchback | PARK at Aglao | ₱100 / night | ₱500 (Roundtrip Boat) |
| SUV / Pickup (4×2) | DRIVE (Dry Season Only) | ₱600 (Campsite Fee) | ₱500 (Guide Fee) |
| 4×4 / Off-road Rig | DRIVE (All Season) | ₱600 (Campsite Fee) | ₱500 (Guide Fee) |
Practical Takeaway: If you drive a sedan, treat the trip as a “Park and Ride.” If you bring an SUV, air down your tires to 20 PSI at Aglao to prevent getting bogged down in the soft sand.

Total Budget Breakdown (DIY vs. Car Camping)
A realistic budget for a 2-day, 1-night trip to Mapanuepe Lake is approximately ₱2,200 per person for a group of four, regardless of whether you commute or drive private.
While driving offers more comfort for hauling gear, the cost of fuel and toll fees (NLEX + SCTEX) split four ways roughly equals the cost of roundtrip bus tickets and tricycle charters.
Expense Comparison Table (Based on 4 Pax)
Here is how the costs break down for a standard weekend trip. Note that “Car Camping” assumes you are driving an SUV into the campsite, while “DIY” assumes public transport and tent rental.
| Expense Item | DIY (Per Person) | Car Camping (Per Person) | Notes |
| Transport (Main) | ₱900 (Bus RT) | ₱875 (Fuel share) | Manila <-> Zambales |
| Transfers / Tolls | ₱250 (Trike share) | ₱250 (Toll share) | Trike vs. RFID costs |
| Boat Rental | ₱125 (Share) | N/A | Car crosses river |
| Guide Fee | N/A | ₱125 (Share) | Mandatory for river crossing |
| Mandatory Fees | ₱100 | ₱100 | Entrance (50) + Eco (30) + Env (20) |
| Campsite Fee | ₱0 (Included) | ₱150 (Vehicle fee share) | Car overnight fee is ~₱600 |
| Tent / Gear | ₱175 (Rental share) | ₱0 (Bring your own) | Standard tent is ~₱350 |
| Food & Water | ₱600 | ₱600 | Market ingredients + Ice |
| Incidentals | ₱50 | ₱50 | Showers / Toilet use |
| TOTAL ESTIMATE | ₱2,200 | ₱2,150 | Safe Budget: ₱2,500 |
Critical Money-Saving Tips
The “Market Run” Rule: Do your grocery shopping at the San Marcelino Public Market before heading to Aglao.
The Lake Markup: Prices at the small sari-sari stores on the campsite are 50% to 100% higher than town prices.
Example: A gallon of mineral water that costs ₱80 in town may cost ₱150 at the lake.
Example: A block of ice is gold here. Buy “block ice” (not cubes) in the market—it lasts significantly longer in a cooler.
Cash is King: There are no ATMs in Barangay Aglao or at the lake. The last reliable ATM is in the town proper near the 7-Eleven. Bring small bills (₱20s, ₱50s, ₱100s) for exact change when paying fees and tricycle drivers.
Practical Takeaway: Budget ₱2,500 per person to include a buffer for an emergency meal on the way home, but you can comfortably survive on ₱2,000 if you cook your own meals and split costs efficiently.
Accommodation: Where to Camp (Phase 1 vs. Phase 2)
Mapanuepe Lake is a strictly “off-grid” camping destination with no hotels or concrete resorts; visitors must choose between the shaded sanctuary of Phase 1 or the exposed, scenic plains of Phase 2.
Your experience heavily depends on where you pitch your tent. The campsite is informally divided into zones based on terrain and tree density.
Understanding the “Phases” (Choosing Your Spot)
Phase 1 is best for relaxation and shade, featuring a dense canopy of Agoho trees, while Phase 2 offers the iconic “New Zealand” open scenery but exposes campers to harsh midday sun and strong winds.
Phase 1 (The Sanctuary): Located closer to the river inlet and local settlements, this area is characterized by clusters of Agoho trees.
Best For: Hammock camping, midday naps, and groups who want privacy.
Insider Tip: If you arrive late (after 10:00 AM), head here immediately. The sun in the open fields is brutal, and Phase 1 is the only place you’ll find natural relief.
Phase 2 (The Showstopper): This is the “viral” location seen on social media—wide, rolling grassy hills with a direct view of the lake and the Sunken Church.
Best For: Car campers (overlanders), astrophotography (stargazing), and large groups.
Reality Check: It gets extremely windy here at night. I have seen standard dome tents flatten under the gusts. Use heavy-duty sand pegs or anchor your guy lines with rocks.
Gear Options: DIY, Rentals, and Glamping
If you don’t have equipment, you are not out of luck, but quality varies significantly.
DIY (Bring Your Own): The most reliable option. Ensure your tent has a waterproof rainfly, as mountain showers are unpredictable.
Tent Rentals (Budget): Locals at the registration area or boatmen can rent out basic tents.
Cost: ₱350 – ₱500 per night (Good for 2-4 pax).
Warning: These are usually basic department store dome tents. They are not always cleaned between uses, and waterproofing may be compromised. Bring a tarp for extra protection.
Glamping (Premium): Several tour operators now offer “Glamping Packages.”
Cost: ₱2,500 – ₱3,500 per person (usually includes van transfer and meals).
The Setup: Canvas bell tents, cots/foam mattresses, and curated picnic setups. This is the only “luxury” option available.
Practical Takeaway: If you prioritize sleep and comfort, choose Phase 1. If you prioritize the perfect sunrise photo and can handle the wind, choose Phase 2.

Important Safety Warnings & Restrictions (Must Read)
While Mapanuepe Lake is visually stunning, it is not a managed resort; it is a raw environment with specific biological, security, and logistical risks that every visitor must respect.
Ignorance here can lead to anything from a ruined gadget to a serious health issue. Before you go, understand the realities that TikTok clips often edit out.
Is Mapanuepe Lake Safe to Swim In?
No. Swimming is strongly discouraged due to potential heavy metal contamination (specifically mercury and lead) stemming from the submerged Dizon Copper-Silver Mines.
The Science: The lake was formed by damming the Mapanuepe River, which flows through the catchment area of the abandoned Dizon mines. While the water often appears crystal clear or invitingly blue, sediment analysis has historically shown elevated levels of toxic metals.
Health Risks: Short-term exposure can cause skin irritation, rashes, or eye infections. Ingestion (accidental swallowing) poses a higher risk.
Verdict: Stick to surface-level activities like kayaking, paddleboarding, or simply enjoying the view from a boat. If you fall in, rinse off immediately with fresh water at the local showers in Aglao.
Security and Theft (The “Tent Slashers”)
Recent reports from 2024–2025 indicate a rise in theft incidents, specifically “tent slashing,” where opportunistic thieves cut through tent fabric to steal bags while campers sleep.
Because the campsite is an open public space with no perimeter fences, access is difficult to control at night.
Secure Your Gear: Never leave backpacks, cameras, or shoes in the vestibule (the outer porch area of your tent). Bring everything inside the main sleeping compartment.
The “Body Bag” Rule: Sleep with your wallet and phone physically attached to you or inside your sleeping bag.
Car Campers: If you drove a vehicle, use it as a safe. Lock all expensive gear inside the car before going to sleep.
Deterrence: Bring a solar-powered motion-sensor light and stake it near your tent entrance. Thieves prefer the dark.
The Signal Situation
Mapanuepe Lake is a cellular dead spot; standard Smart and Globe signals are practically non-existent at the campsite level, though intermittent 2G/3G may appear on higher ground.
The Solution: You do not need to be completely cut off. Enterprising locals have set up Starlink satellite internet stations.
Cost: They sell “Piso WiFi” style vouchers, typically costing ₱50 for 1 hour or ₱100–₱150 for 24 hours.
Reality Check: The speed is decent for messaging and social media, but do not expect to join a Zoom video call or stream 4K movies reliably. Treat this as an emergency line, not a remote work office.
Practical Takeaway: Treat the lake water as “for your eyes only,” lock your valuables like you are in a city, and download your Spotify playlists offline before you leave Manila.

2 Days 1 Night Itinerary (Optimized for Lighting)
This itinerary is strategically timed to help you avoid the brutal midday heat, capture the best “Golden Hour” photos of the Sunken Church, and beat the weekend traffic back to Manila.
The key to enjoying Mapanuepe is respecting the sun; set up camp early, hide during noon, and explore when the light softens.
Day 1: The Arrival and The Golden Hour
04:00 AM: Market Run & Breakfast. Arrive at San Marcelino Public Market while it is fully stocked.
Insider Tip: Grab a hot bowl of Arroz Caldo or Goto at the market carinderias to warm up. Buy your charcoal and block ice here—cubes melt too fast in the open field.
07:00 AM: The Crossing. Board the boat or start the 4×4 trail from Barangay Aglao. The morning water is glassy, perfect for reflection shots.
08:00 AM – 09:00 AM: Strategic Setup. Pitch your tent immediately.
Reality Check: Aim for Phase 1 if you want shade. If you choose Phase 2, set up your tarp/awning first. By 10:00 AM, the sun becomes punishing.
12:00 PM – 03:00 PM: The Great Siesta. Do not hike. Do not swim. The heat index in the valley can be intense. Stay under the Agoho trees, nap in a hammock, and hydrate.
04:00 PM: Sunken Church Tour. Rent a boat to take you close to the metal cross. The lighting at this hour turns the hills golden and the water deep blue—this is your “New Zealand” profile picture moment.
07:00 PM: Socials & Stargazing. With zero light pollution, Mapanuepe is a haven for astrophotography. On clear nights, the Milky Way is visible to the naked eye.
Day 2: The Morning Mist and Departure
05:30 AM: Coffee & Fog. Wake up early. The lake is often shrouded in a mystical low-lying mist at dawn that vanishes by 7:00 AM.
10:00 AM: Decamp & “Leave No Trace”. Pack up before the heat returns.
Protocol: Bring your trash bags back to the mainland. Do not bury garbage in the lahar.
12:00 PM: Victory Lunch or Detour. If you aren’t ready to go home yet, the surf town of San Felipe is nearby. You can wash off the lake dust at a Liwliwa Beach Resort before heading back to the city. Alternatively, head north to relax at Magalawa Island in Palauig for a white sand experience.”
Practical Takeaway: Stick to this schedule to ensure you are always moving during the cool hours and resting during the heat. Leaving the campsite by 10:00 AM usually gets you back to Manila by dinner, avoiding the worst of the NLEX Sunday congestion.

Conclusion & Final Tips: The Reality of Mapanuepe
Mapanuepe Lake is a raw, rugged destination that rewards self-sufficient travelers but punishes the unprepared; it is less of a vacation spot and more of an off-grid expedition.
While the “New Zealand” aesthetic is undeniably photogenic, the reality involves volcanic dust, zero electricity, and limited sanitation. This is a place to disconnect from the digital grind—quite literally, given the signal dead spots—and reconnect with the basics of outdoor living. However, its viral popularity brings a heavy responsibility. The local community in Barangay Aglao benefits from tourism, but they lack the infrastructure to handle massive amounts of garbage.
Final Call to Action: Be a steward of this unique landscape. Pack out absolutely everything you bring in, from plastic bottles to wet wipes. Do not burn trash in the lahar. Respect the Aeta locals, support the economy by hiring legitimate guides, and always check the specific San Marcelino weather forecast before you depart—rain here changes everything.
Explore More of Zambales:
Hidden Gems: Coto Mines (Kidlao) Travel Guide
Top Attractions: 18 Must-Visit Zambales Tourist Spots


Pingback: Gigantes Island Travel Guide 2024: All you need to know! - LakbayPinas