
Fast Facts: Mt. Daraitan at a Glance
-
Elevation: 739+ MASL (Meters Above Sea Level)
-
Difficulty Level: 4/9 (Minor Climb, Major Technicality)
-
Trail Class: 1-4 (Sustained assault with technical limestone scrambling)
-
Time to Summit: 2.5 – 4 Hours (Pace dependent)
-
Jump-off Point: Barangay Daraitan, Tanay, Rizal
-
LGU Requirements: Guide is Mandatory; Environmental Fee applies.
-
Cell Signal: Intermittent/Weak at Jump-off; Stronger at the summit (Smart/Globe).
Introduction: The Definitive Guide to the Mt. Daraitan Expedition
Sitting on the jagged edge of the Sierra Madre range, Mt. Daraitan has earned a reputation as one of the most punishing yet rewarding day hikes in the Philippines. While often listed on paper as a “minor climb,” the Mt. Daraitan trail is a masterclass in tropical karst mountaineering, offering steep assaults, sharp limestone crags, and a traverse to the pristine Tinipak River.
For 2025, the operational landscape of a Mt. Daraitan hike has changed. With new environmental protocols and strict booking quotas in Tanay, showing up unprepared is no longer an option. Whether you are chasing the sea of clouds or testing your grit against the “Unli-Ahon,” this guide covers everything you need to know—from the updated budget and itinerary to surviving the “marmol” trails of Mt. Daraitan.
Sitting on the southern edge of the Sierra Madre range, Mt. Daraitan is a geological paradox. On paper, its elevation of 739 MASL classifies it as a “Minor Climb,” a label that frequently traps beginners into complacency. In reality, this is a Tropical Karst peak—a jagged limestone formation that demands agility, endurance, and respect.
Unlike the rolling slopes of other minor climbs, Mt. Daraitan offers zero “rolling” terrain. It is a relentless “Unli-Ahon” (continuous ascent) from the moment you leave the trailhead. The trail shifts rapidly from loamy secondary forest to a vertical coral reef of razor-sharp limestone rocks known locally as “marmol.”
Safety Check: Do not be fooled by the “Minor Climb” tag. The technical difficulty of Mt. Daraitan exceeds that of many higher mountains. The limestone terrain requires technical scrambling skills (using hands and feet) and balance. A slip on the sharp “marmol” rocks can result in deep lacerations.
The Beta: Mt. Daraitan is a hydrologically “dry mountain” above the river line. Despite the lush rainforest canopy, the limestone bedrock swallows rainwater instantly. There are no water sources from the trailhead to the summit. You must carry at least 2-3 Liters of water if you are doing the traverse day hike.
Table of Contents
Pre-Climb Requirements & 2025 Protocols
Mandatory Checklist (2025 Season):
Booking Status: Prior coordination/booking is highly recommended for weekends; limited slots for walk-ins.
Registration Point: Barangay Hall of Daraitan (All Mt. Daraitan expeditions funnel here).
Required Documents: Valid Government ID (for the manifest) and signed Waiver of Liability.
Health Protocol: Self-assessed Cardiovascular Fitness (Strictly advised).
As we move into the 2025 operational season, the days of unregulated, “show up and climb” mountaineering in Tanay are effectively over. The local government has implemented strict carrying capacity quotas to mitigate the environmental impact on the limestone forest of Mt. Daraitan. While walk-ins are technically possible on weekdays, weekend climbers without a prior booking risk being turned away at the barangay outpost.
Upon arrival at the Barangay Hall, your team leader must submit a complete passenger manifest. This is followed by the Mandatory Safety Briefing, a non-negotiable 15-minute orientation delivered by the head guide. Pay attention here—they will update you on real-time Mt. Daraitan trail conditions (e.g., “Slippery at Station 3” or “River level rising”). You will then be required to sign a Waiver of Liability. Do not sign this blindly. This legal document explicitly acknowledges the risks inherent to Type I and Type II terrain: rockfall, slippery “marmol” scrambling, and river hazards.
Safety Check: Cardiovascular Screening While Mt. Daraitan does not currently enforce the strict medical certificate requirement seen on Mt. Pulag, the trail is a continuous cardio-pulmonary stress test. The lack of “flat” recovery sections means your heart rate will remain in Zone 3-4 for 2-3 hours straight. If you have a history of hypertension, asthma, or cardiac events, consult a physician before this climb. The rescue response time from the summit is measured in hours, not minutes.
The Beta: Speed up your registration process by having your team’s manifest printed beforehand (Name, Age, Emergency Contact Person & Number). Also, bring your own ballpen. It sounds trivial, but fighting over the single working pen at the registration desk with 50 other hikers at 3:00 AM is a morale killer before the hike even begins.

How to Get to Mt. Daraitan (DIY vs. Private)
How to Commute to Mt. Daraitan (Step-by-Step):
Manila to Tanay: Ride a UV Express (Starmall EDSA-Shaw) or Jeepney (Cubao/Antipolo) to Tanay Public Market (₱100-200).
Tanay to Daraitan: Charter a Tricycle (“Pakyaw”) from the market terminal to Barangay Daraitan (₱500-600 per trip / 4-5 pax).
Alternative: For large groups (15+), charter a “Monster Jeep” at the market (Schedule/Availability varies).
Getting to the jump-off point in Tanay, Rizal, is a logistical mission that effectively splits into two distinct experiences: the “Executive” drive and the “Backpacker” grind. The route covers approximately 60-70 kilometers from Metro Manila, winding through the Sierra Madre foothills.
Option A: Private Vehicle (The Executive Route)
If you are driving to Mt. Daraitan, take Marcos Highway East towards Tanay. Navigate via Sampaloc Road until you hit the junction for Daraitan Road. While the main arterial roads are paved, the final 5-kilometer descent to the river valley is a mix of concrete and rough, unpaved sections prone to washouts.
Vehicle Requirement: High clearance is strongly recommended. Sedans can technically make it during the dry season with skilled driving, but an SUV or AUV is the prudent choice to avoid underchassis damage.
Parking: Designated secure parking is available near the Barangay Hall and river crossing (₱50-100 fee).
Option B: Public Transport (The Backpacker Route)
The commute is a test of patience. Once you reach the Tanay Public Market, the “Pakyaw” tricycle system takes over. Be prepared for a 45-minute to 1-hour assault on your glutes. The road to Mt. Daraitan is scenic but punishingly bumpy. The tricycles are often overloaded with gear, and the suspension is unforgiving.
For massive expedition teams (15-20 pax), the legendary “Monster Jeep” is the superior tactical option. These custom-lifted jeepneys, fitted with oversized tires, are designed to ford rivers and navigate the deep mud that paralyzes standard vehicles. They offer a rougher, open-air experience that sets the tone for the adventure ahead.
Safety Check: The road to Mt. Daraitan is narrow and lacks streetlights. Avoid driving this route at night if you are unfamiliar with the terrain. Landslides are common during the wet season.
The Beta: Do not buy your supplies in Manila. Stop at the Tanay Public Market during your transfer. The prices for fresh produce, meat, and charcoal are significantly lower, and you directly inject cash into the local economy (LNT Principle: Respect & Support Locals). Plus, the “Bibingka” stalls there are excellent pre-climb fuel.
Trail Description: What to Expect
The Approach: Jump-off to Station 1
Duration: 20–30 Minutes (Walk) or 5 Minutes (Tricycle)
Terrain: Open farmland, Coconut groves, Loamy soil
Elevation Gain: Minimal (Flat to gradual incline)
The expedition begins at the Barangay Hall. From here, you face a strategic choice: walk the 1.5 kilometers of flat dirt road or charter a tricycle to the official Mt. Daraitan trailhead. The terrain here is deceptive. It winds through coconut groves and agricultural patches. In the dry season, the trail is a suffocating dust bowl kicked up by other hikers. In the wet season, the loamy topsoil transforms into a sticky clay trap that adheres to boot soles like cement, adding unnecessary weight before the real climb begins.
Safety Check: Heat Exhaustion Risk. This section is largely exposed to the sun. Do not burn your energy or hydration reserves here. Establish a “Zone 2” heart rate (warm-up pace) and avoid rushing.
The Beta: Take the tricycle. It costs roughly ₱30-50 per head. Save your legs for the vertical kilometer ahead. There is no glory in hiking a flat dirt road share with tricycles.
The Assault: Station 2 to Summit (The Rock Garden)
Duration: 2.5 – 3.5 Hours
Terrain: Mossy Forest, Limestone Karst, Technical Scrambling
Gradient: Steep (Exceeds 40-50% grade)
Once you pass Station 1, the “Unli-Ahon” begins. The trail tunnels into the Dipterocarp forest, initially characterized by massive root systems that serve as natural ladders. However, as you breach Station 2, the soil thins, and the Mt. Daraitan mountain reveals its true skeleton: the “Marmol” (Marble).
This is the Rock Garden, and it is the crux of the climb. Bipedal hiking becomes insufficient here; you must engage four-wheel drive. The terrain shifts to technical scrambling over jagged limestone outcroppings. These are not smooth river stones; they are razor-sharp, ancient coral structures capable of shredding lightweight hiking pants and skin.
Safety Check: High Laceration Risk. Do not grab a rock without looking. Many limestone formations have serrated edges hidden by moss. Test every handhold for stability before committing your weight, as loose rocks are common in high-traffic zones on the trail.
The Beta: Gloves are mandatory here. Industrial-grade, rubber-dipped garden gloves (available at the jump-off) provide better protection and grip on sharp limestone than expensive fleece liners. Also, keep an eye out for Limatik (Leeches) in the mossy sections during the wet season—check your socks at every rest stop.
The Summit Experience
Elevation: 739 MASL
Atmosphere: Exposed, Windy, High UV Index
Campsite Capacity: Very Limited (Rocky/Uneven)
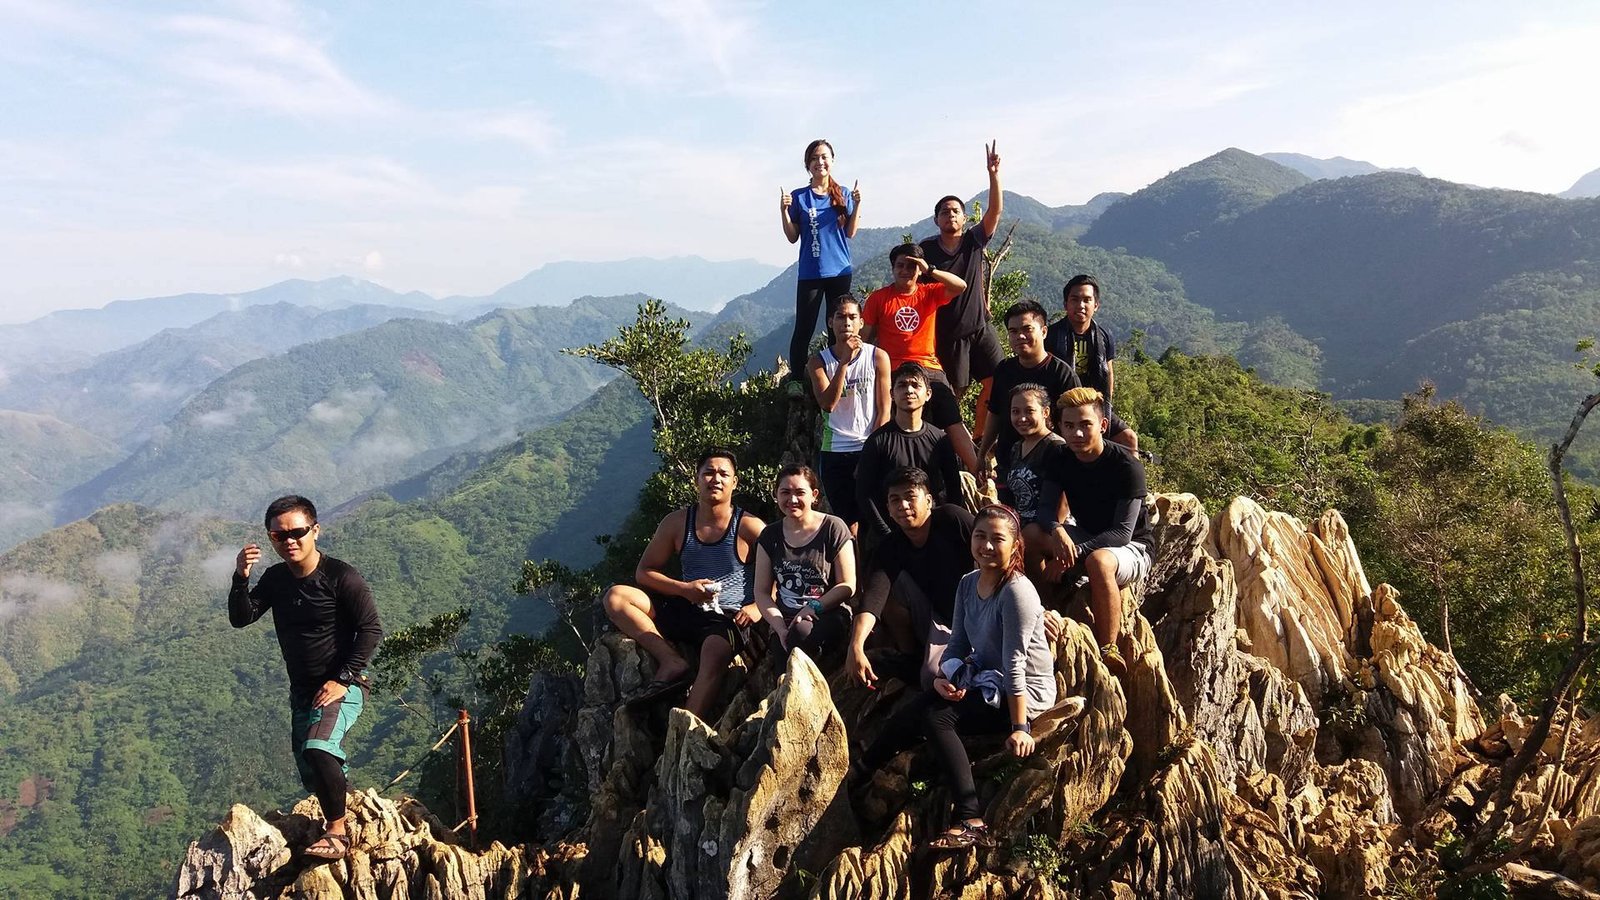
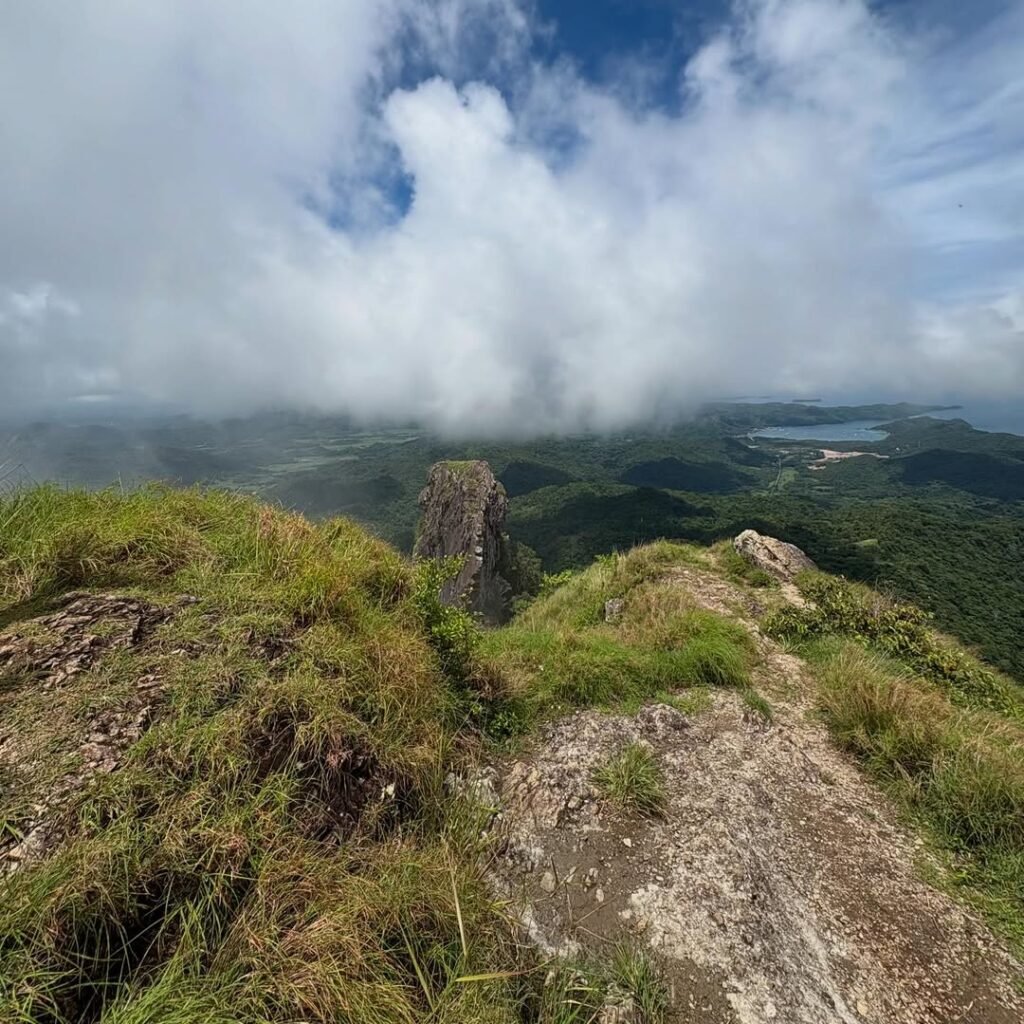
The summit of Mt. Daraitan is a small, rocky clearing offering a commanding 360-degree view of the Sierra Madre range and the snake-like Tinipak River below. There is zero canopy cover here. At midday, the heat is blistering; at night, the wind chill can induce hypothermia if you are wet from sweat. Space is at a premium—there is very little flat ground for tents.
If you are overnighting, be prepared to pitch on uneven rocks. Freestanding tents are superior here as driving stakes into the limestone bedrock is impossible. You will need to use guy lines tied to loose rocks to secure your shelter against the Amihan winds.
The Beta: For the iconic photo at “Heart Peak” (a limestone outcrop shaped like a heart), queue early. The line for this photo op can last 30 minutes on weekends. Be extremely careful—the drop behind the rock is precipitous.
The Traverse: Descent to Tinipak River
Duration: 1.5 – 2.5 Hours
Terrain: Steep Mud Slopes, Slick Limestone, Forest Descent
Descent Mode: Eccentric Loading / Controlled Sliding
While you can backtrail, the standard 2025 Mt. Daraitan itinerary is the Traverse. This route plunges down the “back” of the mountain toward the river. The gradient here feels steeper and wilder than the ascent. In the dry season, it is a loose scree run; in the wet season (Habagat), it becomes a literal mud slide.
Hikers often resort to the “butt-slide” technique—intentionally sitting and sliding down mud chutes—because standing upright on the slick clay is nearly impossible. This section puts immense eccentric load on your patellar tendons and quadriceps.
Safety Check: Knee Injury Risk. This descent destroys knees. Trekking poles are highly recommended to distribute the braking force. If you have a history of ITB syndrome or knee pain, wear support braces before you start the descent.
The Beta: Strictly adhere to Leave No Trace (LNT). As you descend toward the river, you may find trash pockets left by irresponsible groups. Do not add to it. Pack out everything, including your wet wipes and cigarette butts. The river ecosystem below is sensitive to the runoff from the trail..
Tinipak River & Cave System
Entrance Fee: ~₱50.00 – ₱70.00 (varies by access point)
Cave Guide Fee: Often included or minimal add-on (₱20-50)
Water Temp: Cool (River) to Freezing (Cave Pool)
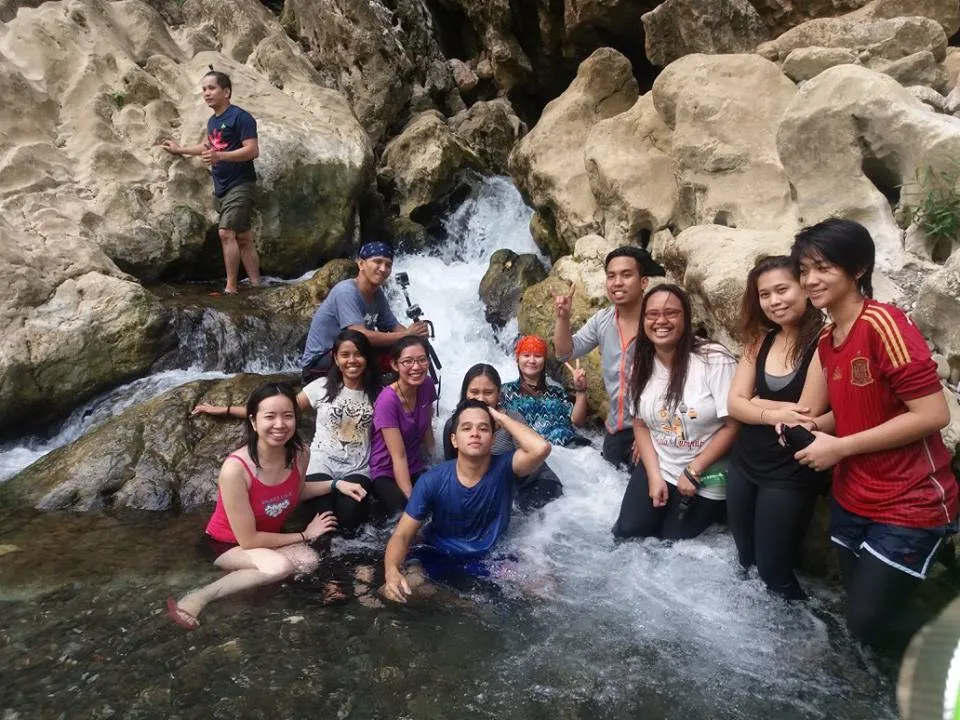
After the punishing heat of the summit assault, the Tinipak River feels like a different planet. Emerging from the forest, you are greeted by a surreal landscape of massive, bleached-white limestone boulders scattered across a riverbed of turquoise, mineral-rich water. This is a tributary of the massive Kaliwa River watershed, carved through the rock over millennia.
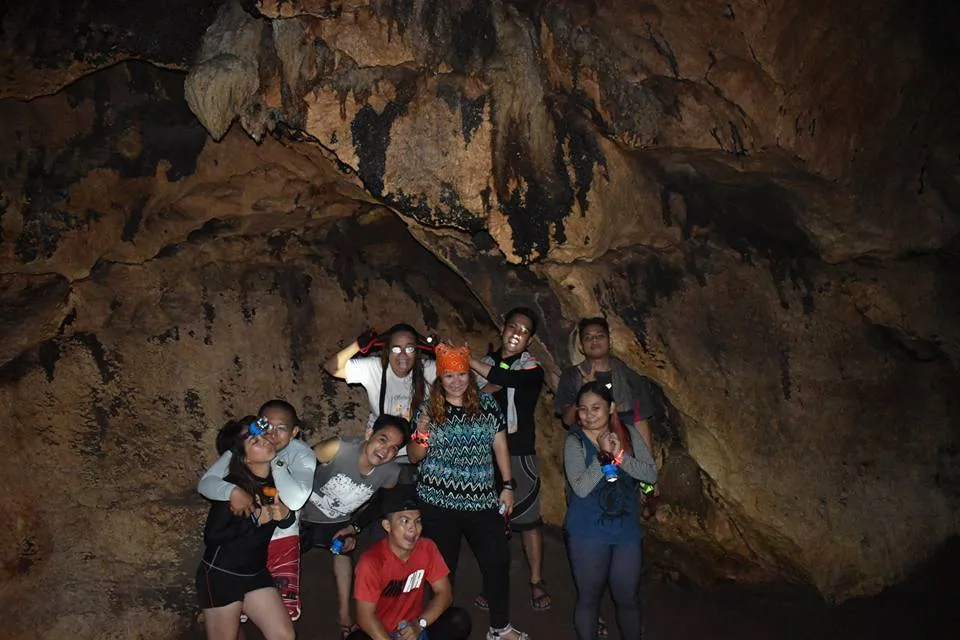
The main attraction here is the Tinipak Cave. A short trek from the riverbank leads to a small fissure in the rock. This is not a dry, tourist-friendly cavern; it is a “wet cave.” You will be wading through waist-deep water to reach the subterranean natural pool at the end. The water inside is significantly colder than the river outside, and the darkness is absolute. Phone flashlights are useless here—the humidity and water splashes will kill them.
Safety Check: EXTREME FLASH FLOOD HAZARD. The river canyon is narrow, acting as a funnel. If the water turns ‘chocolate brown’ or turbid, evacuate the riverbank immediately. This color change indicates heavy rain upstream in General Nakar or Infanta, and a wall of water can rush down the canyon in minutes, even if it is sunny where you are standing.
The Beta: No Soap, No Shampoo. The Tinipak River is a pristine water source for locals. Do not bathe with chemical soaps here. Rinse off the sweat with water only, and save the full shower for the paid facilities at the Barangay proper. Also, rent the helmet for the cave—low stalactites have caused many head injuries.

Standard 2026 itinerary involves the Traverse.
Mt. Daraitan Day Hike Itinerary vs. Overnight
Traffic Window: Leave Manila by 01:00 AM (Day Hike) to avoid the Rizal bottleneck.
Pacing: Moderate (Ample buffer for photo ops and queuing at the summit).
Objective: To capture the “Sea of Clouds,” you must breach the Mt. Daraitan summit clearing by 06:00 AM.
For the 2025 season, expedition planning requires precise timing. The popularity of Tanay has surged, meaning traffic on the trail can be as dense as the traffic on Marcos Highway. These itineraries are designed to optimize your window for the “Sea of Clouds” and minimize friction with other groups.
Option A: The “Sea of Clouds” Mt. Daraitan Day Hike
This is the “Alpine Start” protocol. It demands sleep deprivation but offers the highest visual reward.
01:00 AM: Depart Metro Manila. (Private Van strongly recommended).
03:00 AM: Arrive at Brgy. Daraitan Hall. Secure guides, process permits, and conduct final gear check (Headlamps ON).
03:30 AM: Start Trek. The initial assault is in pitch darkness. The forest will be humid and silent. Pacing should be slow and steady to prevent early burnout.
05:30 AM: Arrive at Station 3. First light breaks. The temperature will drop significantly here due to wind chill.
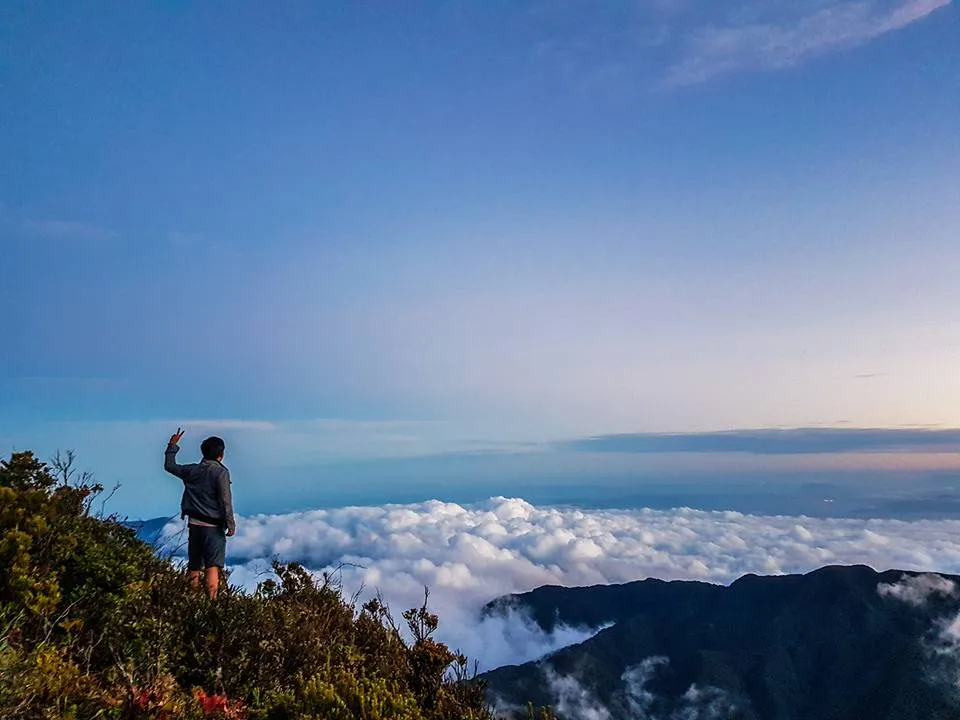
06:00 AM: Summit Assault. Secure your spot at the limestone crags. If the Amihan winds and humidity align, witness the Sea of Clouds over the Sierra Madre from the peak.
07:30 AM: Start Descent via Traverse Trail. Do not linger too long; the sun hits the limestone hard by 8 AM.
10:00 AM: Arrive at Tinipak River. Rest and early lunch.
11:00 AM: Spelunking (Tinipak Cave) and swimming.
13:00 PM: Trek back to Jump-off (Flat trail).
15:00 PM: Wash up at Barangay/Private showers. Depart for Tanay proper for Bulalo.
The Beta: Do not rely on GCash for payment. The signal at the trailhead is spotty at best. Bring physical cash for the environmental fees, guide tips, and that crucial post-climb soda at the Mt. Daraitan summit.
Option B: The “River Base” Overnight
This itinerary prioritizes immersion and comfort. Instead of sleeping on the jagged rocks of the Mt. Daraitan summit, you establish a base camp at the Tinipak River, where water is abundant and the ground is (relatively) flat.
Day 1: The Approach & Camp
08:00 AM: Depart Manila. Enjoy a relaxed breakfast in Tanay.
11:00 AM: Arrive Daraitan. Register and lunch at a local carenderia.
13:00 PM: Trek to Tinipak River Campsite. This is an easy 45-minute walk, bypassing the summit assault for now.
14:00 PM: Set Camp. Pitch tents on designated elevated platforms, never on the sandy riverbed.
16:00 PM: Cave exploration and river swimming.
18:00 PM: Dinner and Socials.
Day 2: The Reverse Assault
04:30 AM: Wake up / Light Breakfast.
05:30 AM: Summit Assault (From River Side). Warning: This is a brutal, steep ascent. You are climbing the “back” of Mt. Daraitan.
08:30 AM: Summit. Enjoy the views after the morning crowds have thinned.
09:30 AM: Descent via the Traditional Trail (Loop).
12:00 PM: Back at Barangay Hall. Lunch and Wash up.
Safety Check: Noise Discipline. The river canyon amplifies sound. Do not bring portable karaoke machines or loud Bluetooth speakers. Respect the locals who live near the river and the wildlife that hunts at night.
The Beta: If you choose Option B, leave your heavy packs at the River Camp (guarded/inside tent) and assault the summit with a light daypack only. only (water, phone, trail food). Hauling a full 50L pack up the river side is unnecessary torture.

Mt. Daraitan Budget Breakdown (Per Person)
The estimated safe budget for a DIY Day Hike is ₱1,200 – ₱1,500 per person (based on a group of 4-5).
In the 2025 operational landscape, Mt. Daraitan operates on a “community-based tourism” model. This means revenue is distributed across various stakeholders—the LGU, the guide association, private landowners, and the tricycle operators. Consequently, fees are fragmented. You do not pay one lump sum; you pay a series of small tariffs throughout the day.
Expedition treasurers must account for this “nickel-and-dime” structure. While the Guide Fee is standard, the ancillary costs—crossing the wooden bridge, accessing private lots near the river, or using shower facilities—add up quickly. The breakdown below assumes a DIY approach sharing costs with a full squad.
| Expense Item | Cost (Est.) | Notes |
| Environmental/Reg Fee | ₱100 – ₱150 | Mandatory LGU levy paid at Brgy. Hall. |
| Guide Fee (Day Hike) | ₱800 – ₱1,000 | Rate is per group (1:5 ratio). Strictly enforced. |
| Tricycle (Roundtrip) | ~₱300 (Share) | Assumes 4 pax sharing a ₱600/way charter. |
| River/Cave Fees | ₱70 – ₱120 | Combined access fees for river and spelunking. |
| Bridge/Shower Fees | ₱50 – ₱80 | Small fees paid to local cooperatives/households. |
| Safe Budget | ₱1,200 – ₱1,500 | Includes food and contingency fund. |
Financial Reality Check: The Guide Fee is fixed regardless of group size. If you are a solo hiker or a duo, you will shoulder the full ₱800-₱1,000 cost alone, significantly spiking your per-head budget..
The Beta: Cash is King, and Small Bills are God. The signal for GCash/Maya is practically non-existent in the river valley. Furthermore, local stores and tricycle drivers rarely have change for a ₱1,000 bill. Break your cash into ₱20s, ₱50s, and ₱100s before leaving Manila to avoid logistical delays.
The “Hot, Wet, & Sharp” Gear List
Mandatory Technical Gear Checklist:
Hand Protection: Rubber-dipped Industrial/Garden Gloves.
Hydration: Minimum 2-3 Liters (Bladder or Nalgene).
Illumination: Waterproof Headlamp (200+ Lumens).
Footwear: Deep-lug Trail Runners (Non-GoreTex preferred).
Emergency: Whistle & Thermal Blanket.
Packing for Mt. Daraitan requires a specific tactical approach for an environment that is simultaneously an arid limestone oven and a humid river canyon. Standard “hiking gear” often fails here.
The “Sharp”: This is the most critical variable. The Mt. Daraitan limestone trail is effectively a vertical coral reef. Your hands will be your primary tools during the scramble. Do not bring expensive fleece or wool gloves; they will shred instantly. You need cheap, robust, rubber-dipped garden gloves (mechanic style) to provide friction against the rock and protection against the serrated “marmol” edges.
The “Hot & Dry”: Because of the karst porosity, rainwater disappears immediately underground. There are no reliable water sources between the jump-off and the river. You are climbing in a tropical heat trap with high humidity. Carry electrolyte tablets (SaltStick or ORS) to combat the inevitable cramping from heavy sweat loss on the trail..
The “Wet”: For footwear, leave the heavy waterproof boots at home. Once water enters a waterproof boot during the river trekking portion, it stays there, becoming a heavy anchor. Opt for mesh trail runners with aggressive lugs (Vibram or Contagrip). They drain quickly after the river crossing and offer superior agility on the technical rock sections compared to clunky boots.
The Beta: Ditch the Cotton. In the humid Sierra Madre, “Cotton Kills” because it never dries. Wear synthetic Techwick or rash guards. Also, bring a Dry Bag for your electronics. You will be entering a cave with waist-deep water, and a Ziploc bag is rarely enough protection for a smartphone.
Final Verdict: The Rite of Passage
Bottom Line: Mt. Daraitan is not just a hike; it is a vertical lesson in humility.
Completing the traverse from the limestone crags of the summit down to the turquoise waters of Tinipak River is a definitive experience in Philippine mountaineering. It strips away the pretense. The mud, the sharp “marmol,” and the relentless gradient of Mt. Daraitan force you to focus on every single step. It is a place where physical suffering meets aesthetic perfection—the burning of your quadriceps is the price of admission for that sunrise over the Sierra Madre.
However, the mountain’s accessibility is its greatest threat. As we move through 2025, the responsibility falls on us, the visitors, to mitigate our impact. The limestone forest of Mt. Daraitan is fragile. The river ecosystem is sensitive. We are guests in the ancestral domain of the Dumagat people and the local community of Tanay.
Strictly adhere to Leave No Trace principles. If you brought it up, you bring it down. Do not leave your trash in the cave or bury your wet wipes on the trail. Let the only mark you leave be the sweat on the rocks, which the rain will wash away.
The Beta: The “Post-Climb Blues” are real, but so is the “Post-Climb High.” When you are eating Bulalo in Tanay after the climb, dirty and exhausted, take a moment to look back at the silhouette of the mountain. You conquered that. That feeling of grit is something you take back to the city.
Explore More of Tanay, Rizal
If you survived Mt. Daraitan and are hungry for your next adventure (or perhaps something a bit more relaxing next time), check out our other detailed guides for 2025:
For the Cloud Chasers:
Still chasing that perfect sunrise? Check out the 10 Must-Visit Sea of Clouds in Tanay, Rizal (2025).
For a more beginner-friendly camping experience with similar views, read our Ultimate Guide to Treasure Mountain or the DIY Guide to Mt. Kulis.
For the Rock & Water Enthusiasts:
If you loved the limestone formations of Daraitan, the Nagpatong Rock Formation is your next technical objective.
Prefer a relaxing swim without the trek? Head over to Daranak Falls.
For a Relaxed Sidetrip:
Cool down after your hike with a visit to the Pililla Wind Farm or find some peace at Regina Rica.
General Travel Guides:
Tanay Tourism Information & Contact Details
For hikers planning a hike, it is beneficial to have access to official Tanay tourism resources for accurate information on fees, trail conditions, weather updates, and safety guidelines. The Tanay Tourism Office manages the municipal level, but Barangay Daraitan manages the specific visitor registrations, hiking permits, and guide assignments for the mountain.
1. Tanay Municipal Tourism Office
General inquiries, complaints, and municipal-wide tourism updates.
Location: Second Floor, Tanay Municipal Hall, M. H. del Pilar St., Tanay, Rizal 1980
Landline: (02) 8736-1059 / (02) 8655-1773 loc 213
Mobile: 0951-460-2975 (Smart) / 0917-543-8550 (Globe) (Note: Mobile numbers change frequently; check FB for latest)
Email: tanaytourism1@gmail.com
Operating Hours: Monday to Friday, 8:00 AM – 5:00 PM
Official Facebook: facebook.com/TanayTourism (Most active channel for weather alerts)
2. Barangay Daraitan Local Tourism (The Jump-off)
Specific inquiries for Mt. Daraitan slots, campsite reservations, and river conditions.
Location: Barangay Hall, Brgy. Daraitan, Tanay, Rizal
Mobile (Booking/Inquiries):
0906-953-2946 (Globe)
0910-333-6332 (Smart)
0929-323-9524 (Alternative)
Facebook Page: “Daraitan Tourism” or “Brgy. Daraitan Council”
Pro Tip: Government landlines are often busy. For the fastest response regarding weather closures (e.g., if the Tinipak River is flooded), check the “Tanay Tourism” Facebook page first, as they post real-time advisories during the typhoon season.
Frequently Asked Questions (FAQ)
Quick Answers:
Beginner Friendly? Conditional Yes (Requires agility).
Showers? Available (Paid/Communal).
Limatik? Present (Seasonal).
Addressing the most common concerns for the 2025 season regarding the operational reality of Mt. Daraitan.
Is Mt. Daraitan beginner-friendly?
Physically, yes; Technically, no. Rated 4/9 on the difficulty scale, Mt. Daraitan is often marketed to novices because of its manageable elevation (739 MASL). However, this is a dangerous oversimplification. The trail requires Class 3 Scrambling, meaning you will often need to hang on to sharp limestone rocks to pull yourself up. If you have poor balance, fear of heights, or zero upper-body strength, you will struggle significantly. It is manageable for fit beginners who are comfortable with “getting dirty,” but it is not a walk in the park.
Is there a shower area at the jump-off?
Yes. The local community has established a robust support infrastructure. Various households and the Barangay complex offer shower facilities (“Liguan”) for a fee of ₱20 – ₱50. Expect a “Tabo system” (bucket and dipper) rather than high-pressure showers. These facilities are basic but clean enough to scrub off the limestone dust and river mud before the van ride home.
Are there Limatik (Leeches) on the trail?
Yes, but primarily during the Wet Season. While Mt. Daraitan is not as infested as Mt. Makiling or Mt. Halcon, the mossy forest sections near Station 2 and the summit do harbor Haemadipsa (blood leeches), particularly during the Habagat months (June-October) or after heavy rains. In the dry season (Amihan), sightings are rare.
The Beta: Check your “Singit” (Groin/Armpits). Limatik seek heat and thin skin. If you are climbing in the rain, tuck your shirt into your pants and your pants into your socks (The “Closed System”). If you get bitten, do not pull it off forcefully—this leaves the teeth in the wound and causes infection. Flick it or salt it.


Hi, thanks a lot for the tips here since they were helpful. Just to let you and the other readers know, the fees have already increased as follows (based on what I can remember from our day hike last 23 March 2025):
– Bridge crossing fee for vehicles (if the river is not swollen and thus no need to do bamboo raft crossing to reach the barangay hall for registration): ₱100 for four-wheeled vehicles; I think ₱80 for three-wheeled vehicles and ₱50 for 2-wheeled vehicles.
– Mt Daraitan entrance fee = Environmental fee to support conservation efforts = ₱100 per person
– Day Hike Guide Fee (for every 5 persons): ₱750
– Overnight Hike Guide Fee: ₱1500
– Parking fee for day hike visitors: ₱100
– Tinipak river entrance fee (when doing a traverse hike since that part of the trek is already located in the boundary of Quezon): ₱30; doing spelunking in the nearby cave: ₱70
– Tricycle fare from Barangay Hall to portion of river reserved for swimming for hikers (after hike): ₱30
Hi! Thanks so much for sharing these updated rates and your recent experience from your day hike on March 23, 2025! 😊 This information is super valuable and will definitely help future hikers plan their trip more accurately. It’s great to have firsthand insights from someone who recently visited Mt. Daraitan.
It seems like the fees have indeed increased a bit, especially for the guide services and parking. Good to know about the bridge crossing fee details, too. I’ll update the information accordingly to make sure everyone has the latest details.
Thanks again for sharing and happy hiking on your future adventures!
I’ll add to that.. the trike fare is 100/3 persons.. it was also a fun adventure but you really got to have great stamina and patience! Love your site btw!
Hi there, thanks for the informative post! Would you know if a guide/booking of some sort is needed for a trip to Tinipak River only? Trying to organize a trip to the river but not so sure where to start or who to contact (if any). Any help would be much appreciated! Thank you!