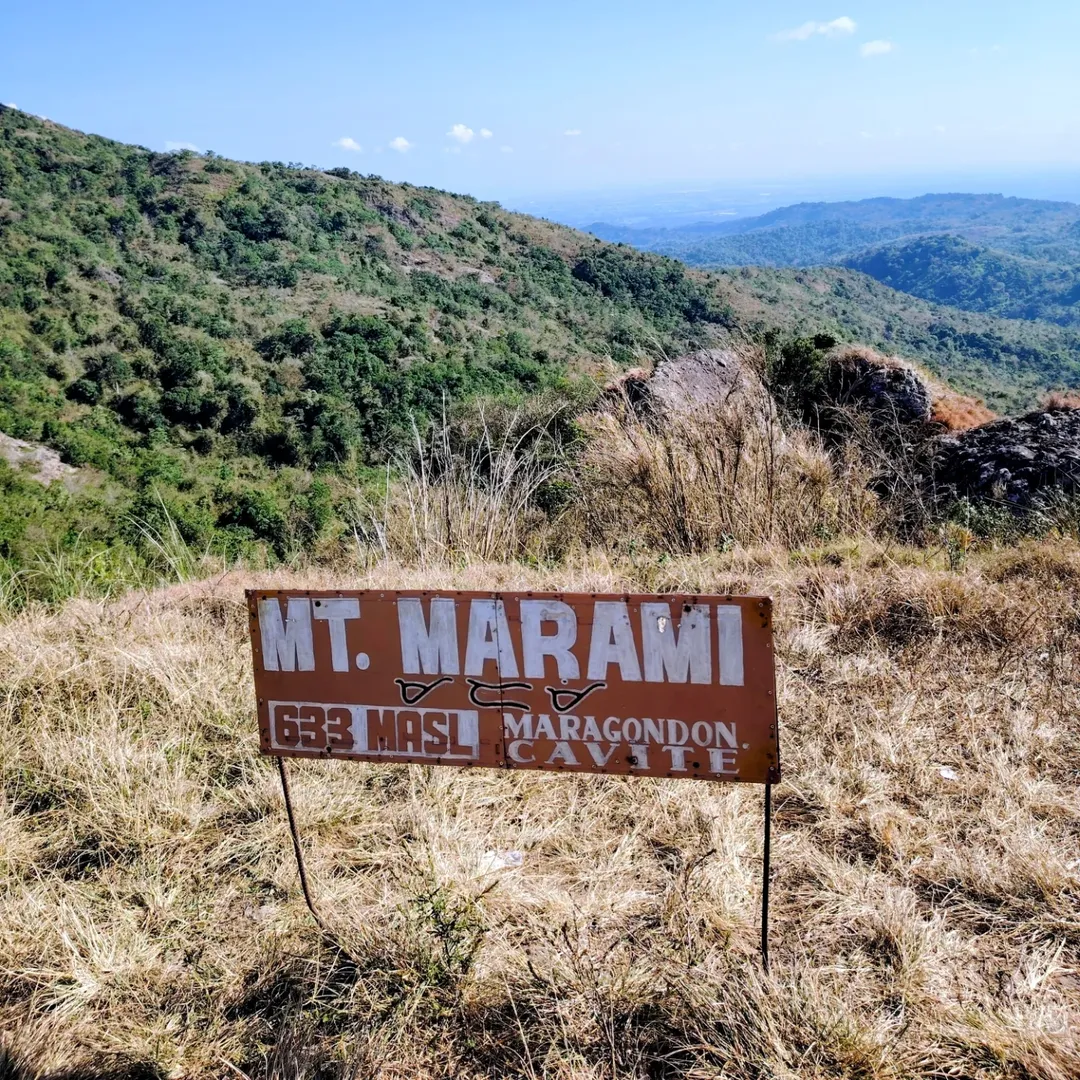
Mt. Marami is a beginner-to-intermediate day hike in Maragondon, Cavite, rated Difficulty 3/9, with a summit elevation of 405+ MASL and a total trek time of 3–5 hours to the top. The main reward is Silyang Bato, a dramatic rock chair formation at the summit with a full 360-degree panorama of Cavite. Hire a guide from Brgy. Ramirez — the trail branches frequently and there are reports of hikers getting lost without one.
Mt. Marami Quick Guide
| Detail | Info |
|---|---|
| Mountain | Mt. Marami (Mataas na Gulod) |
| Location | Maragondon, Cavite |
| Province | Cavite |
| Elevation | 405+ MASL |
| Difficulty | 3/9 (Minor Climb, Trail Class 1–3) |
| Jump-off | Brgy. Ramirez, Magallanes, Cavite (main); Brgy. Talipusngo, Maragondon (alternate) |
| Best Season | November–May (dry months) |
| Trek Time | 3–5 hours to summit; 3–4 hours descent |
| Registration | Brgy. Ramirez Barangay Hall (and a second checkpoint on-trail) |
| Campsite | Mataas na Gulod Campsite (along the trail, below the summit) |
Table of Contents

Where Is Mt. Marami Located?
Mt. Marami is located in the municipality of Maragondon in the province of Cavite. The major jump-off point, however, is situated at Barangay Ramirez in the neighboring municipality of Magallanes — the mountain sits in Maragondon, but you start your hike from Magallanes.
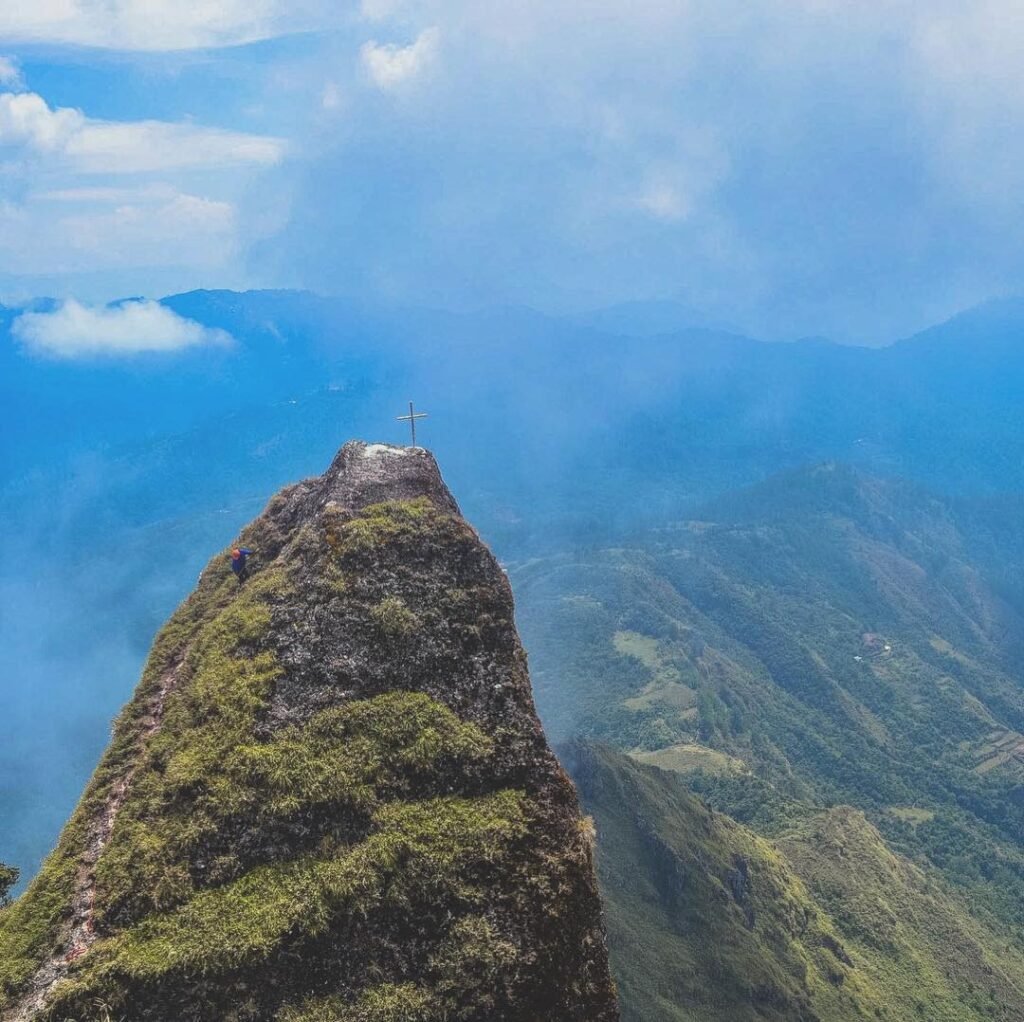
Think of Mt. Marami as the sequel to Mt. Pico de Loro — set in the same location and sharing the same character. Matching Pico de Loro’s rocky tower are two grand structures: the summit of Mt. Marami itself, a massive composite of rocky pillars, and its smaller companion, the Silyang Bato.
The Tagalog word “Marami” means “many,” and the mountain was named for the numerous gigantic rocks found along its trail. In geologic terms, this is significant — in the relatively recent geologic past, Mt. Marami was below sea level, which explains the sedimentary nature of its rocks.
Mt. Marami is located within Mount Palay-Palay National Park. That matters for understanding the ecology here. The mountain and its surrounding range shelter a mix of forest, grassland, and bamboo zones that support a variety of wildlife — birds, monitor lizards, and grazing cattle are regular trail companions. At the summit, rocks are patched with unusual mosses, lichens, and ferns, and winds are strong with cool weather. Grass, flowers, and fruit-bearing trees are visible in most parts of the trail heading toward the campsite.
For more mountains across the Philippines within a similar range, see this guide to mountains in the Philippines.
How to Get to the Mt. Marami Jump-off Point
The jump-off at Brgy. Ramirez can be reached in about 2.5 to 3 hours from Manila. There are two main ways to get there: by public transport or by private vehicle.
By Public Transport (Commute)
Ride a bus from PITX (Parañaque Integrated Terminal Exchange) bound for Naic, Cavite. From Naic, make your way to the jeepney terminal and ride a jeepney bound for Magallanes. Tell the driver you are going to Mt. Marami and ask to be dropped at the Brgy. Ramirez junction. From the junction, charter a tricycle to take you to the registration area.
Alternatively, ride a bus going to Nasugbu, Batangas, and alight at the intersection beside Amuyong School. Ride a jeep going to Brgy. Ramirez in the Magallanes jump-off area, then take a tricycle to the registration office.
Jeepneys from Naic to Magallanes usually start at 5:00 AM, so plan your departure from Manila by 3:00–4:00 AM to be at the jump-off before sunrise.
By Private Vehicle
Take the highways going to Tagaytay then continue to Nasugbu. Turn right before Amuyong School and follow the road to Brgy. Talipusngo. Turn left at the Mt. Marami signage and drive along a concrete road that transitions to rough, rocky dirt road passing by three shallow river crossings until you reach the first kubo past Nuestra.
If driving, set Waze to Ramirez Elementary School or Ramirez Barangay Road in Magallanes, Cavite. Parking spaces are available at the jump-off point.
I drove down in June 2026 with a group of four. We left Manila at 2:30 AM and arrived at Brgy. Ramirez by 5:00 AM — just enough time for registration, a quick bowl of Batangas Lomi from a nearby carinderia, and a pre-hike briefing with our guide before the 5:30 AM start.

Permits, Fees, and Guide Requirements at Mt. Marami
Registration at the Brgy. Ramirez Barangay Hall is required before you start — and there is a second registration checkpoint along the trail.
At the barangay hall, the environmental/maintenance fee is ₱20 per head. The walk from the barangay hall to Station 1 (the second registration point) takes about one hour, passing a small creek and a chapel. You pay another ₱20 per head at Station 1.
The entrance fee at the Talipusngo Barangay Hall (if using the alternate jump-off) is ₱65 per head.
Guide fees and availability:
For tour guide rates, ₱500 for a day climb for a group ratio of 1 guide per 10 climbers, or ₱1,000 for an overnight hike with the same ratio.
Guides are always available at the barangay hall — just inquire on the day of your hike. You do not need to book in advance, but calling ahead is wise on weekends. For guide inquiries and Mt. Marami guide hire at Brgy. Ramirez, you can contact Vincent Mendoza at 09651995296 or 09269164515.
Do not skip the guide. The trail is really confusing, and there have already been reports of missing hikers. Mt. Marami is considered the Labyrinth of Trails — the trail branches extensively despite the mountain being one of the most accessible in Maragondon.
For a DENR permit requirement check, contact the DENR CALABARZON regional office or visit the Brgy. Ramirez registration desk, which will advise on any current national park entry requirements. No separate DENR permit has been required under the standard day-hike setup via Brgy. Ramirez, but always confirm on the day.
What Is the Mt. Marami Trail Like?
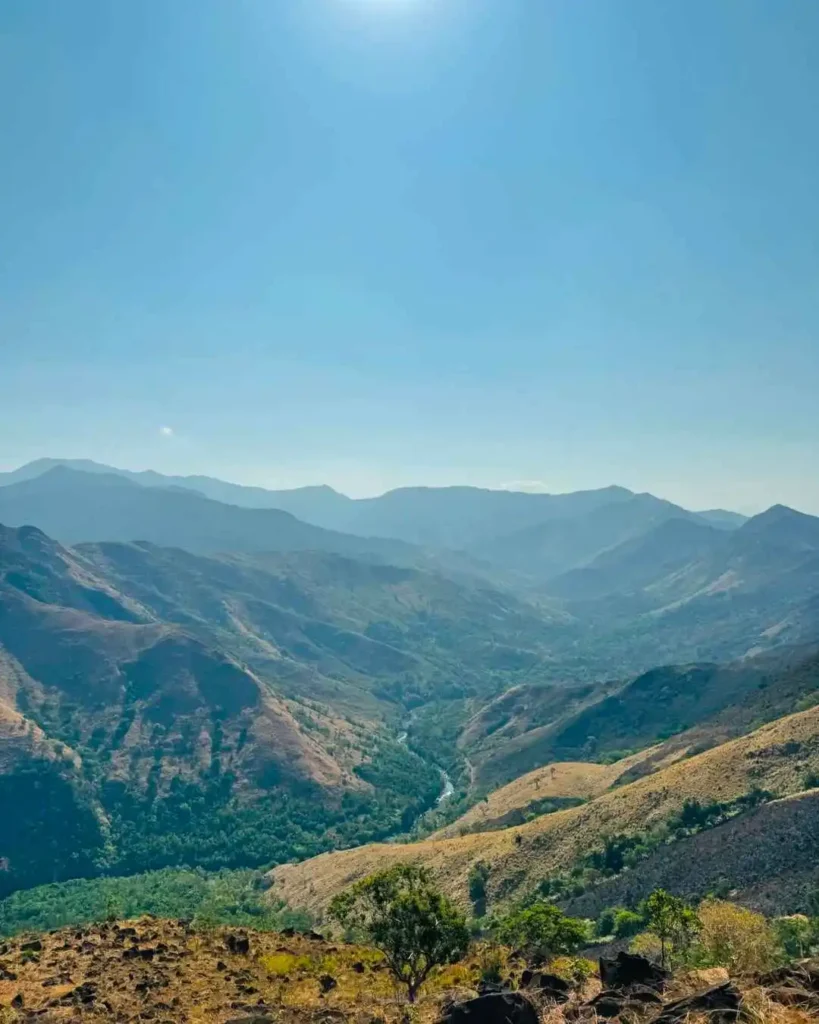
The terrain is a mix of vast rolling farmlands, river crossings, bamboo forests, and steep assaults. While the initial segments are relatively flat, the final approach to the summit involves a steep climb through the woods and over rocky outcrops.
Here is a per-stage breakdown with difficulty scores (1 = easy, 5 = hardest):
Stage 1: Brgy. Ramirez Barangay Hall → Bangkaan River Crossing
Difficulty: 1/5 — Flat to gently rolling concrete road passing residential houses; a good warm-up with no technical footing.
The first leg of the hike goes through a concrete road passing by residential houses. The concrete road ends and you then walk along a dry, up-and-downhill dirt road until the long descent to the river, which takes approximately 15 minutes.
Stage 2: River Crossings → Nuestra Señora de la Paz Chapel
Difficulty: 2/5 — Multiple river crossings that are manageable in dry season but demand caution after rain.
You cross three segments of the Bangkaan River before proceeding to Nuestra Señora de la Paz Chapel. About two hours into straight walking, river crossings can become knee-deep during heavy rains. Interestingly, the water in the rivers and streams appears milky white; when the rivers swell, it turns murky brown.
Stage 3: Nuestra Señora Chapel → Kapihan Nipa Hut (Second Registration)
Difficulty: 2/5 — Gradual ascent through mixed woodland and grassland; a few fork trails where a guide earns their fee.
Thirty minutes into the Nuestra Señora trail, you encounter a nipa hut called “Kapihan” by some. Nearby is the last reliable water source on the trail. At Station 2, another nipa hut sells cold drinks. This is the last chance to refill water before the summit push.
Stage 4: Kapihan → Bamboo Forest → Campsite
Difficulty: 3/5 — Enters denser vegetation, bamboo tunnels appear, navigation gets tricky, terrain rises steadily.
After roughly an hour of trekking from the Kapihan area, the bamboo forest is reached. One more hour of hiking brings you to Campsite 2 in the southern portion of Mataas na Gulod. There is a campsite — Mataas na Gulod Campsite — along the trail where overnight hikers can stay.
Stage 5: Campsite → Summit and Silyang Bato
Difficulty: 4/5 — Steep, rocky final assault; bouldering required near the top; the jump to reach Silyang Bato requires nerve.
The last leg of the hike is the most taxing, consisting of bamboo tunnels, steeper assaults, more obscured trails, a rock climb to the final stretch, and a short but committed hop from one cliff to the other. Going to Silyang Bato from the summit, you literally have to jump between two cliffs — there is a gap that can fit at least one person. Then you have to do a bit more climbing to reach the Silyang Bato spot itself.
At the top on a clear June morning, the view opened up to something worth every steep step. A panorama of the Maragondon mountains unfolds, including Pico de Loro, Mt. Mariveles, and even Mt. Banahaw on a very clear day. The summit rocks were warm underfoot from the early sun. Pico de Loro’s distinctive monolith was visible to the southwest. A wind hit steadily — enough to cool you down from the ascent.
The open trail leads to Silyang Bato at the summit. If Pico de Loro has Parrot’s Peak, Mt. Marami has Silyang Bato — a gigantic composite of rock pillars that offers a spectacular 360-degree view of Cavite.

Is Mt. Marami Good for Beginners?
At first glance, the Mt. Marami hike is often described as beginner-friendly, but that needs a little nuance. The trail is manageable for fit first-timers, yet heat, mud, and route branching can make it feel tougher than typical summaries suggest.
The first part of the trail is easy and beginner-friendly, with flat ground and short ascents. But the mountain has a habit of disguising how long it is. The total round-trip time for an average beginner is 7–9 hours, including breaks. That is a full day on your feet.
The biggest challenge for first-timers is the heat. The trail is open in most parts, so sun protection is essential. A sunny day in June — like the one I climbed in — puts the open grassland sections under direct sun for hours. There is almost no shade between Station 2 and the bamboo forest section.
Mt. Marami is a minor climb and the trails are still beginner-friendly, with some parts that are mildly difficult to navigate during the rainy season. In short: yes for fit beginners with a guide. No for anyone without decent footwear, less than 2 liters of water, or a plan to start after 8 AM.
For context on where Mt. Marami sits among beginner hikes, check this list of beginner-friendly mountains in the Philippines.
Best Time to Climb Mt. Marami
The best time to hike Mt. Marami is during dry weather, especially on cooler mornings when the trail is firmer and exposed sections feel more manageable. This is the kind of mountain where weather affects not just comfort but also pacing, footing, and how hard the day feels.
Dry Season (November–May): The trail is firmer and easier to read. Open sections are warm but manageable if you start by 5:00–6:00 AM. Peak months for hikers are December through February when temperatures are cooler. March to May gets hot — the grassland stretch becomes a furnace after 9 AM.
Wet Season (June–October): During the dry season, the terrain is fine, but it is totally different during the rainy season — the soil turns into deep, sticky, muddy terrain. Do not attempt river crossings if the water is chest-deep during the rainy season.
Rain can also make route branches feel less clear and the descent more tiring. My June 2026 climb was sunny and dry — unusually so for early wet season. The trail was firm and fast. But I was told by the guide that just two weekends earlier, a storm had made the river crossing impassable for a group who had to turn back.
Hazard calendar at a glance:
- June–October: Muddy trail, flooded river crossings, risk of flash flooding near Bangkaan River; typhoon risk
- March–May: Extreme heat on open grassland sections; dehydration risk
- November–February: Best conditions; cool, clear mornings; lowest risk

Budget Breakdown for Climbing Mt. Marami
| Expense | Cost (PHP) |
|---|---|
| Bus fare (PITX → Naic, one way) | ₱70–₱90 |
| Jeepney (Naic → Magallanes junction, one way) | ₱35–₱50 |
| Tricycle (junction → Brgy. Ramirez, one way) | ₱50–₱100 (shared) |
| Barangay registration fee (Ramirez) | ₱20 per person |
| Second checkpoint registration fee (on-trail) | ₱20 per person |
| Guide fee (day hike, per group up to 10) | ₱500 |
| Food and water (estimate) | ₱200–₱300 |
| Estimated total per person (group of 4) | ~₱550–₱700 |
| Tent rental (overnight only) | ₱400 |
| Guide fee (overnight, per group) | ₱1,000 |
The last jeepney trip from Magallanes to Naic is at 5:00 PM. Tricycles are available until 9:00 PM and can take you all the way to Naic if needed. Time your descent carefully — missing the last jeepney means chartering a tricycle to Naic at a higher shared cost.
What to Pack for Mt. Marami
| Item | Essential? |
|---|---|
| Trail shoes or hiking shoes with grip | Yes |
| 2–3 liters of water | Yes |
| Packed lunch + trail snacks | Yes |
| Sunscreen, cap, arm sleeves | Yes |
| Lightweight rain jacket / poncho | Yes (rainy season) |
| First aid kit | Yes |
| Headlamp or flashlight | Yes |
| Valid ID (for registration) | Yes |
| Trekking poles | Recommended for descent |
| Insect repellent | Recommended |
| Extra clothes and flip-flops | Yes |
| Tent and sleeping gear | Overnight only |
Carry 2 to 3 liters of water for a typical Mt. Marami day hike. There is a spring at the Kapihan area and sellers at Station 2 who offer fresh buko (coconut), for around ₱10 per cup. But do not rely on these — arrive self-sufficient.
Wear breathable hiking clothes that dry quickly. The trail gets hot, especially on exposed sections. Use proper sun protection — a cap, buff, sunglasses, and sunscreen.

Safety Tips for Climbing Mt. Marami
One of the most important practical details on Mt. Marami is navigation — branching trails are a primary reason many hikers still prefer a guide. This is not a well-marked trail in the same way that popular day hikes near Manila tend to be. Pay attention at every junction.
- Start by 6:00 AM. Heat builds fast on open sections. A late start is the most common reason hikers suffer unnecessarily on this mountain.
- Never skip the second registration. Your name logged at Station 2 is a safety record. In case of injury, rescue teams trace you from there.
- River crossing rule: Do not cross if the river is chest-deep during the rainy season. Turn back or wait. Flash flooding in the Bangkaan River can happen with little warning.
- Cellphone signal is sporadic throughout the entire trail. Tell someone at home your exact plan and expected return time before you leave.
- Emergency contacts: The Cavite PDRRMO emergency hotline is (046) 840-0774. The national emergency hotline is 911. Your guide will know the fastest route down in an emergency. This is another reason to hire one.
- The summit area is open and exposed — cold breezes hit at sunset, and it gets colder at night. There are shrubs and tall grass, so bring insect repellent.
For emergencies requiring DENR-level coordination, contact the DENR CALABARZON regional office which oversees Mt. Palay-Palay National Park where Mt. Marami falls.
What I’d Do Differently Next Time
Start at 5:00 AM instead of 5:30 AM. The extra 30 minutes makes a real difference on the exposed grassland stretch. By 9:30 AM on my June climb, that section was already uncomfortable with direct sun, even in what was technically the cool hours.
Bring a collapsible trekking pole for the descent. The final rocky section going down is steep, and knees feel it the next morning without any support.
Budget more time at Silyang Bato. I gave myself 30 minutes at the summit before descending to beat the heat. I regret not sitting on that rock formation longer. The views toward Batangas Bay on a clear day deserve more than a photo and a turn-around.
Call the guide the night before. Walk-in guide hire at the barangay hall worked fine for our group of four on a Sunday in June. But I overheard another group waiting almost 45 minutes because multiple guides had already left with earlier groups.
Mt. Marami vs Pico de Loro: Which One Should You Do First?
This question comes up constantly, and the direct answer is: do Pico de Loro first.
Mt. Marami is more challenging than Mt. Pico de Loro, despite having a lower official elevation and a similar difficulty rating. The longer total trail distance, the more confusing route branching, and the greater sun exposure make Mt. Marami the more demanding of the two for a first-time hiker.
Mt. Marami is often compared to Mt. Pico de Loro because both have enormous rocks and a massive composite of pillars and towers. They even share the same national park. But Pico de Loro has better trail signage, more regular foot traffic, and a shorter route that keeps a beginner’s total elapsed time under control.
Once you have done Pico de Loro, Mt. Marami feels like the logical next step. You already know the style of terrain — rocky outcrops, exposed ridgeline, bouldering near the top — but Mt. Marami demands more time on your feet. See our Mt. Pico de Loro day hike guide before committing to the traverse.
If you are building a progression from easy to harder Cavite hikes, the sequence that makes the most sense is: Mt. Talamitam → Mt. Batulao → Mt. Pico de Loro → Mt. Marami. Each one adds distance, route complexity, and physical demand over the previous.

Frequently Asked Questions About Mt. Marami
How difficult is Mt. Marami for first-time hikers?
Mt. Marami is officially rated Minor Climb, Difficulty 3/9, Trail Class 1–3. That puts it in the beginner-to-intermediate range. Fit first-timers can complete it, but the length of the trail, the lack of shade on exposed sections, and the confusing trail branches mean a guide is strongly recommended. Allow 8–10 hours for the full round-trip if you are new to hiking.
What is the jump-off point for Mt. Marami in Cavite?
There are two jump-offs going to Mt. Marami: one is Brgy. Ramirez, Magallanes, and the other is Brgy. Talipusngo, Maragondon. The Ramirez trail is easier and shorter than the Talipusngo trail, and it is the recommended option for beginners and first-timers doing the standard Mt. Marami day hike itinerary.
How long does it take to reach the summit of Mt. Marami?
Standing at 405 MASL with a difficulty level of 3/9, trekking can take around 3–4 hours to reach the summit where the Silyang Bato rock formation is located. In practice, add 30–60 minutes for rest stops, water refills at Kapihan, and registration at Station 2. Descent takes 3–4 hours. Total elapsed time for most hikers is 7–9 hours.
Is a guide required to hike Mt. Marami?
A guide is not legally mandatory, but it is strongly recommended by every hiker who has done the trail. Mt. Marami has a gradual trail but features several fork trails, so hiking guides are recommended. Reports of missing hikers have already occurred on this trail. Guides are always available — just inquire at the barangay hall on the day of your hike.
What is the best time of year to climb Mt. Marami?
Dry months are the safest and most pleasant choice — the trail is usually less muddy, visibility is better, and the open sections are easier to manage. November through February offers the coolest conditions. You can still hike in wet months, but expect a muddier trail, slower progress, and more slippery footing.
Final Verdict: Should You Climb Mt. Marami?
Mt. Marami earns a 4 out of 5 for hikers who have one or two climbs under their belt and want a full-day mountain experience near Manila. It provides mountaineers with an impressive view of the Cavite mountains and coastline — and Silyang Bato is one of the most distinctive summit rewards in Southern Luzon. Hire the guide, start early, and bring enough water. This mountain will test your patience, but it delivers exactly what it promises.