My Honest First-Hand Guide to Climbing Tarak Ridge (2026 Edition)
Tarak Ridge is a major climb on the western flank of Mt. Mariveles in Bataan — steep, rewarding, and fully doable as a day hike or overnight for hikers with some experience. Expect a punishing assault, a jaw-dropping knife-edge ridge, a cool dip at Papaya River, and winds strong enough to knock you off your feet.
Tarak Ridge Quick Guide
| Detail | Information |
|---|---|
| Mountain | Tarak Ridge / Mt. Mariveles |
| Location | Mariveles, Bataan, Philippines |
| Province | Bataan, Central Luzon |
| Elevation | 1,006 MASL (ridge); 1,130 MASL (peak) |
| Difficulty | Major Climb — Difficulty 5/9, Trail Class 3 |
| Jump-off | Barangay Alas-asin, Mariveles |
| Best Season | November to April (dry season) |
| Trek Time | 5–6 hours to summit (one way); 10–13 hours round trip |
| Registration | Barangay Alas-asin Hall (required before trek) |
| Campsite | Ridge area at 1,006 MASL; no water source at camp |
Table of Contents
Where Is Tarak Ridge Located?
Tarak Ridge sits on the western flank of the Mt. Mariveles volcanic complex in Bataan. It is part of a larger caldera system of Mt. Mariveles; others within the same range include Pantingan Peak and Vintana. The jump-off barangay, Alas-asin, is in Mariveles — the westernmost town on the Bataan Peninsula, facing the West Philippine Sea.
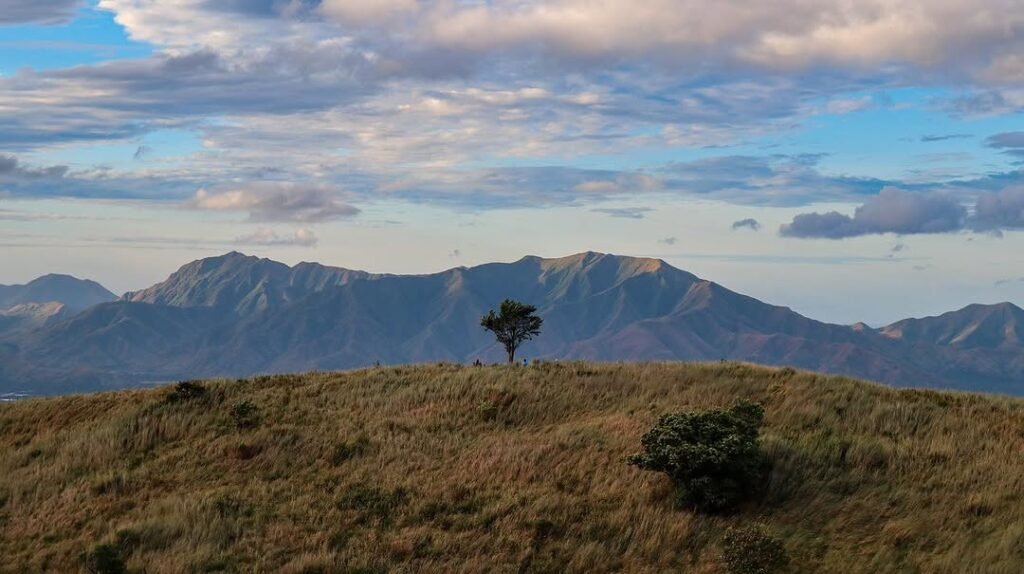
Locals named the ridge “Tarak,” an amalgam of “Tabak” (hunting knife) and “Tarik” (steep) — a name that perfectly describes what you’re getting yourself into. The ridge itself stands at 1,006 MASL while the peak rises to 1,130 MASL.
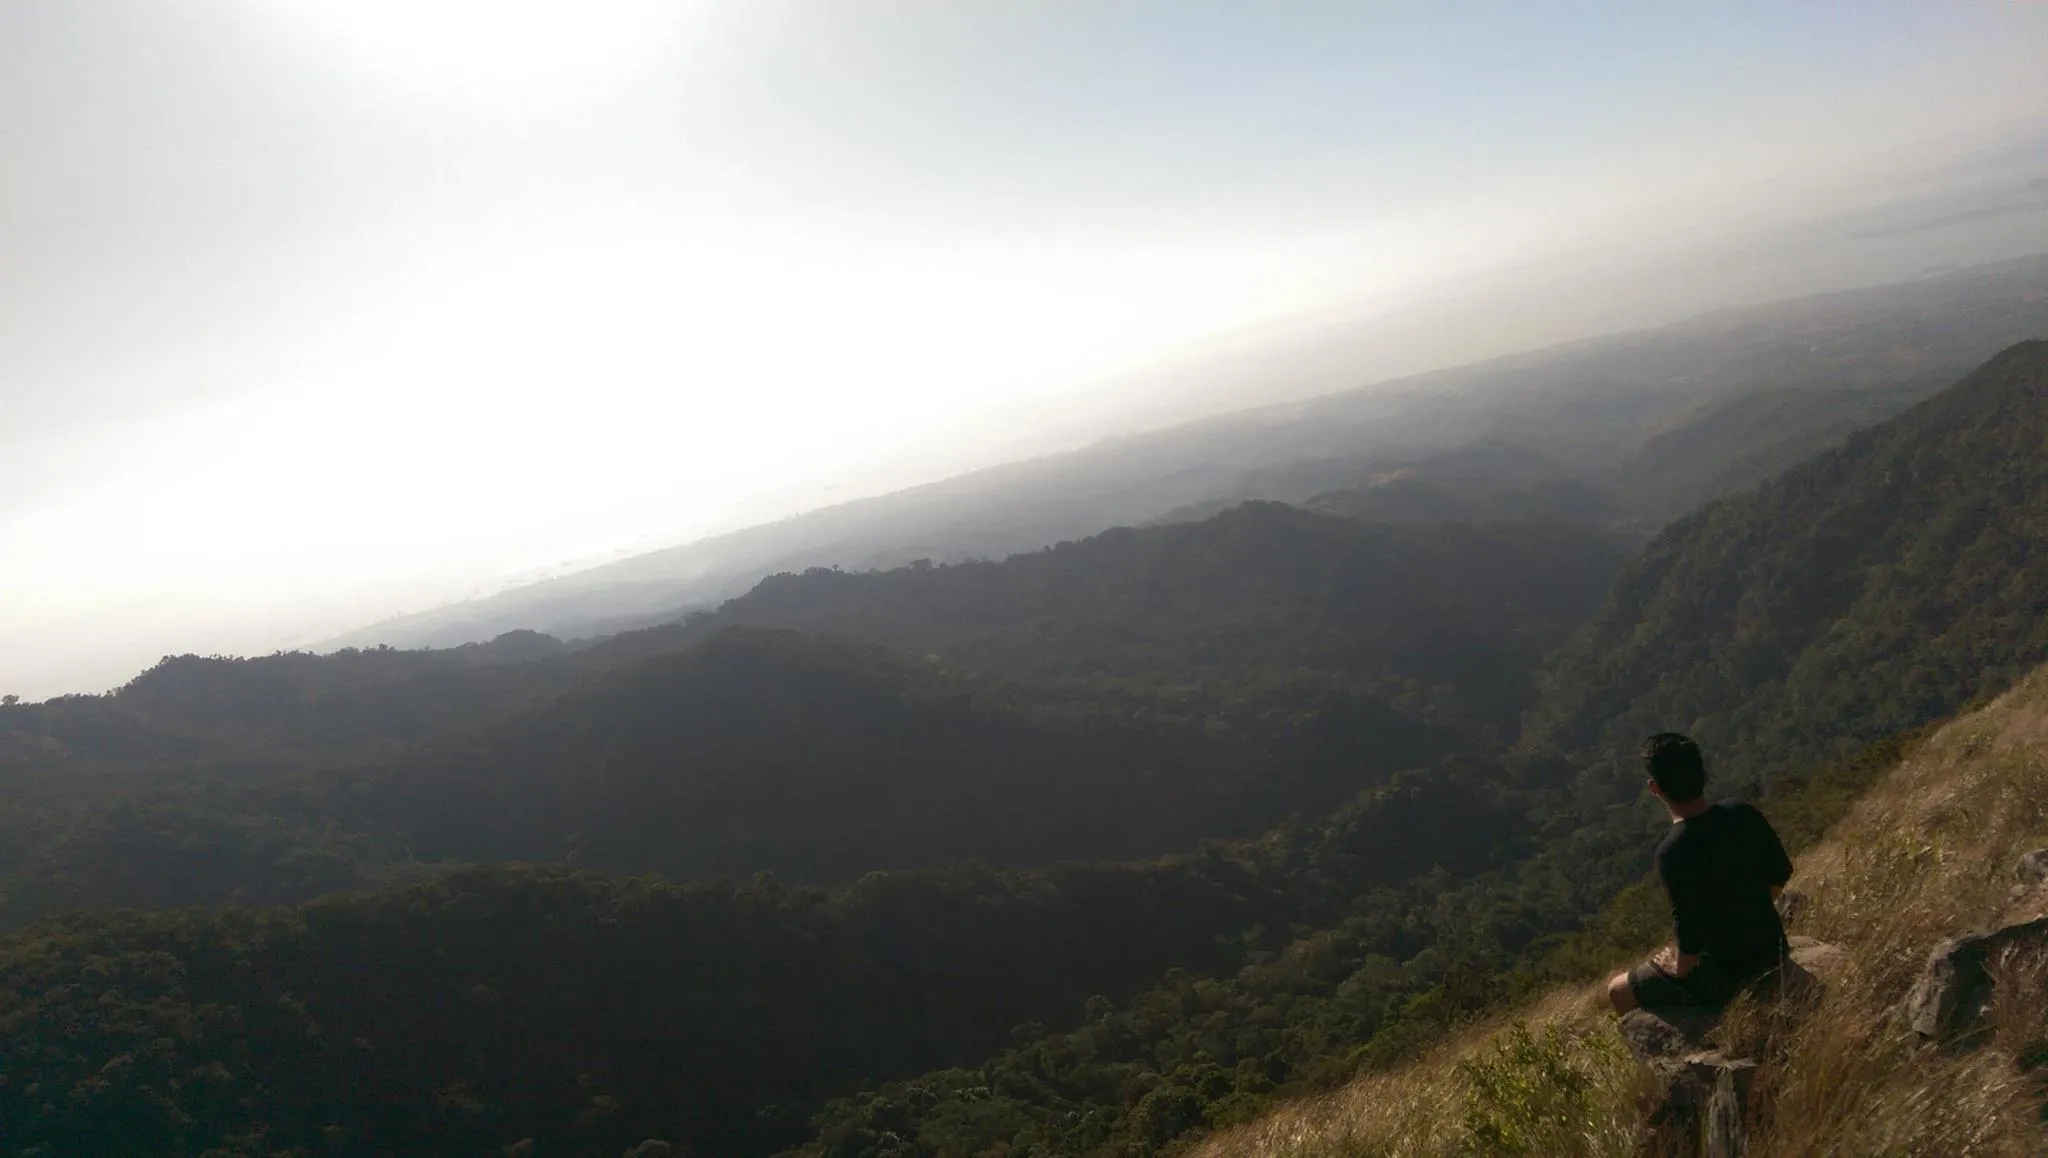
From the summit, there is a scenic, 270-degree view of Bataan which includes the islands of Corregidor and neighboring islands, as well as Manila Bay all the way to Cavite. On a clear April morning — like when I climbed in 2026 — you can see Corregidor looking almost close enough to swim to.
How to Get to the Tarak Ridge Jump-off Point
The jump-off point for climbing Tarak Ridge is Brgy. Alas-asin, Mariveles, Bataan, roughly 2–3 hours away from Metro Manila by land travel. There are two main ways to get there: by public bus or private vehicle.
By Public Bus (Recommended for Budget Hikers)
Take a Genesis or Bataan Transit bus bound for Mariveles (not Balanga) from Cubao or Pasay terminals. Fare is approximately PHP 340–380 depending on the terminal. Get off at Barangay Alas-asin (tell the conductor “Alas-asin High School” or “Tarak Jump-off”). Travel time is 3–4 hours.
For day hikers, the “midnight window” is critical. Departing between 11:00 PM and 1:00 AM puts you at the Alas-asin jump-off by 3:00 AM – 4:00 AM, giving you enough time to register and start trekking while the air is still cool.
The most common mistake beginners make is boarding a bus marked “Balanga.” These buses terminate at the Balanga City Transport Terminal, which is still 45 minutes away from the jump-off. Always say “Mariveles” and confirm with the conductor.
By Private Vehicle
If you are driving, set your Waze or Google Maps pin to “Barangay Alas-asin Hall” or “Tarak Ridge Jump-off.” The route is straightforward: take NLEX, exit to SCTEX, and follow the Roman Superhighway all the way to Bataan. Nanay Cording’s area is the closest parking to the trail, located about 1.5 km from the highway, but space is limited (5–8 cars). If interior lots are full, you can park near the registration area and expect to pay around PHP 50–100 for overnight parking.
By Ferry (Alternative Return Route)
For the return trip to avoid Sunday NLEX traffic, the 1Bataan Integrated Transport System ferry departs from the Esplanade Seaside Terminal (MOA) and docks at Capinpin Port (Orion) or directly in Mariveles. While the fare is higher at approximately PHP 450–600, it cuts travel time to under 2 hours.
From the Alas-asin barangay hall, you can start walking up to Tarak Ridge from the main highway or take a tricycle to a nearer jump-off point to save time and energy. Tricycles are almost always waiting near the highway junction — just agree on the fare before boarding.
Permits, Fees, and Guide Requirements at Tarak Ridge
Registration at Barangay Alas-asin Hall is mandatory before you set foot on the trail — and my insider tip is to go there first, before anything else. Registration at the Alas-asin Barangay Hall costs PHP 50 per person. A guide is required, priced at PHP 1,000 for a maximum of 5 people in a group.
Here is the key detail that many first-timers miss: register at the barangay hall first, then proceed to Nanay Cording’s area to begin your actual trek. Skipping the barangay hall and going straight to the trailhead is a mistake I’ve seen groups make — rangers and guides check for your registration slip at multiple points.
In 2026, Tarak Ridge has transitioned from a rugged, unregulated trail to a semi-managed eco-tourism site requiring mandatory guides and registration at Barangay Alas-asin. This is a significant change from earlier years when guides were optional. Factor it into your group budget.
The most significant variable in your Tarak Ridge budget is group size; since guide fees are fixed per group, hiking with a full squad of five drastically lowers the cost per head. If you’re planning solo, connect with other hikers online to share guide costs — Facebook groups like “Tarak Ridge Hikers Philippines” regularly post join-up threads before weekends.
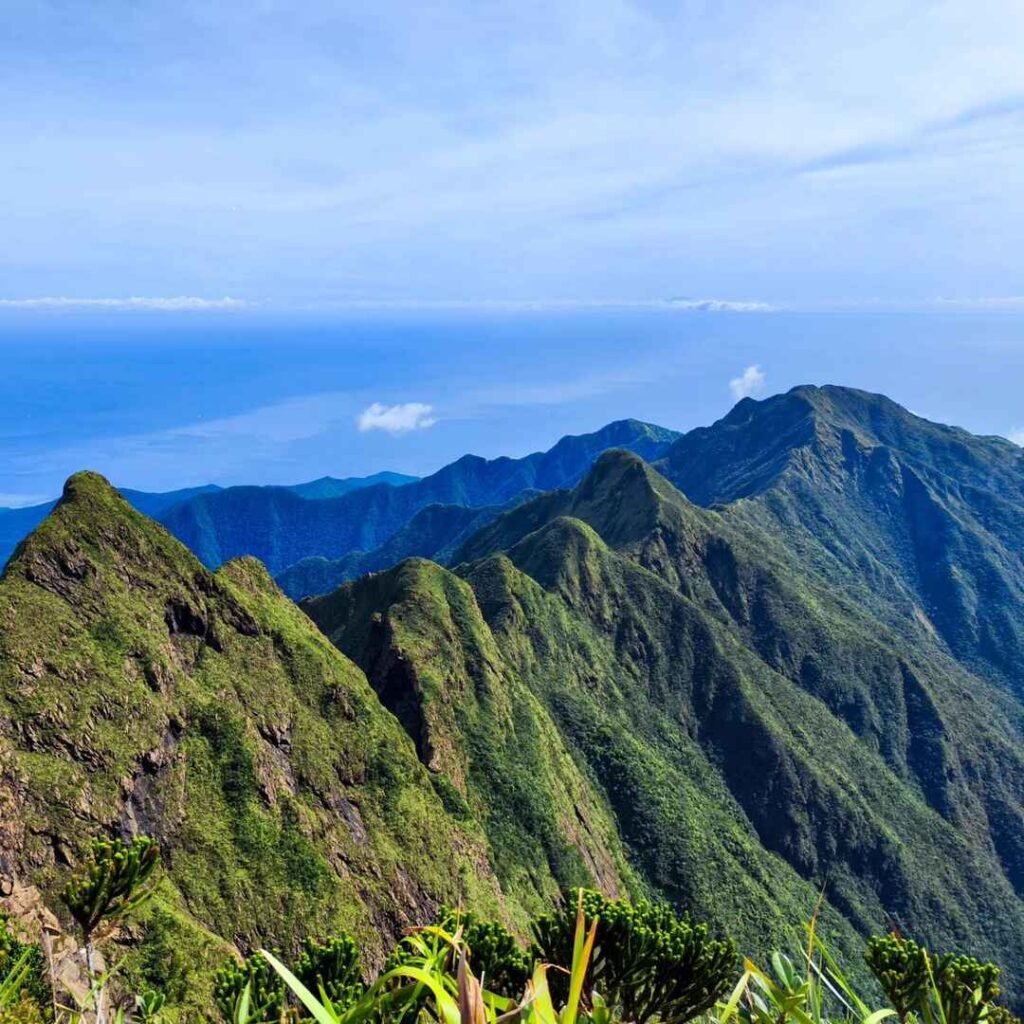
What Is the Tarak Ridge Trail Like?
Tarak is a popular hiking destination among seasoned hikers and mountaineers because of its challenging trail composed of craggy surface, rugged terrain, steep ridge, and forested trail. The full route is an out-and-back that covers approximately 8.2 miles (13.2 km) with an elevation gain of around 3,198 feet (975 m).
Stage 1: Barangay Hall to Nanay Cording’s Hut (30 minutes)
After registering, you walk (or tricycle) roughly 1.5 km down a gravel road toward the actual trailhead. The first part of the trail is light and easy, and it takes 30 minutes to reach Nanay Cording’s house. This stretch is flat and forested — perfect for warming up and mentally preparing for what comes next. Stock up on water here if you can; the store at Nanay Cording’s area sells drinks and light snacks.
Stage 2: Nanay Cording’s to Papaya River (2–3 hours)
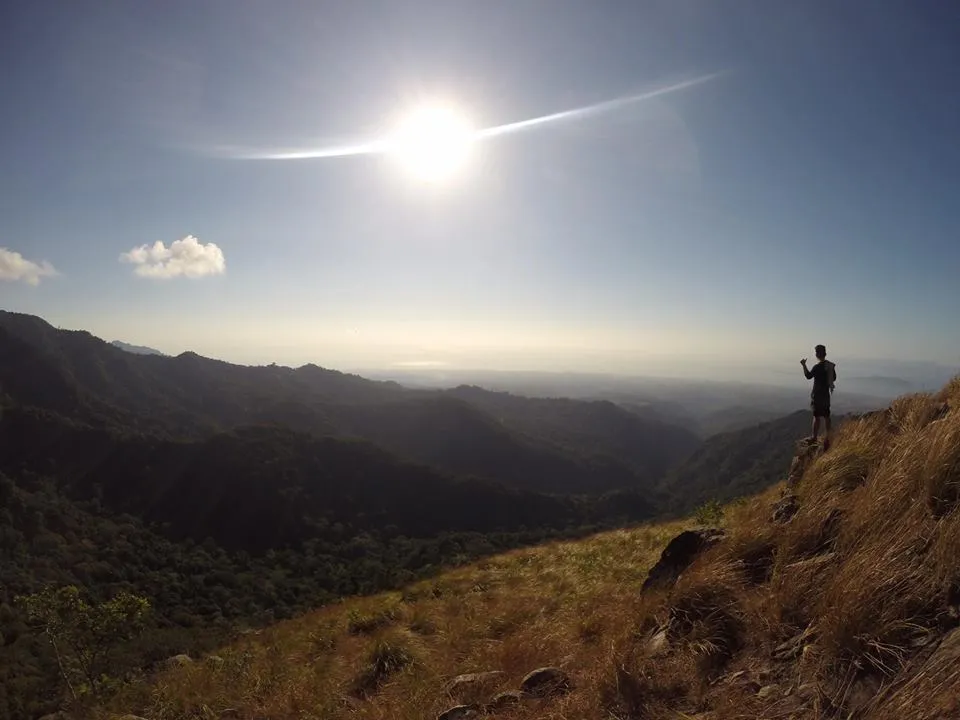
The first part of the trail is made of gravel roads with the trail wide enough. After an hour you reach the “Unang Dungawan” — the part of the trail that gives you a good glimpse of the ridge — and also the first rest area. After a quick stop, you head to Papaya River, which is reached after trekking open muddy grasslands without tree canopies.
This section is deceptively manageable at first. There are lots of clay, roots, and vines which you need to navigate to reach the peak. The trail alternates between wide open grassland and tight forested sections. On weekends, the trail can get congested here, especially near switchbacks.
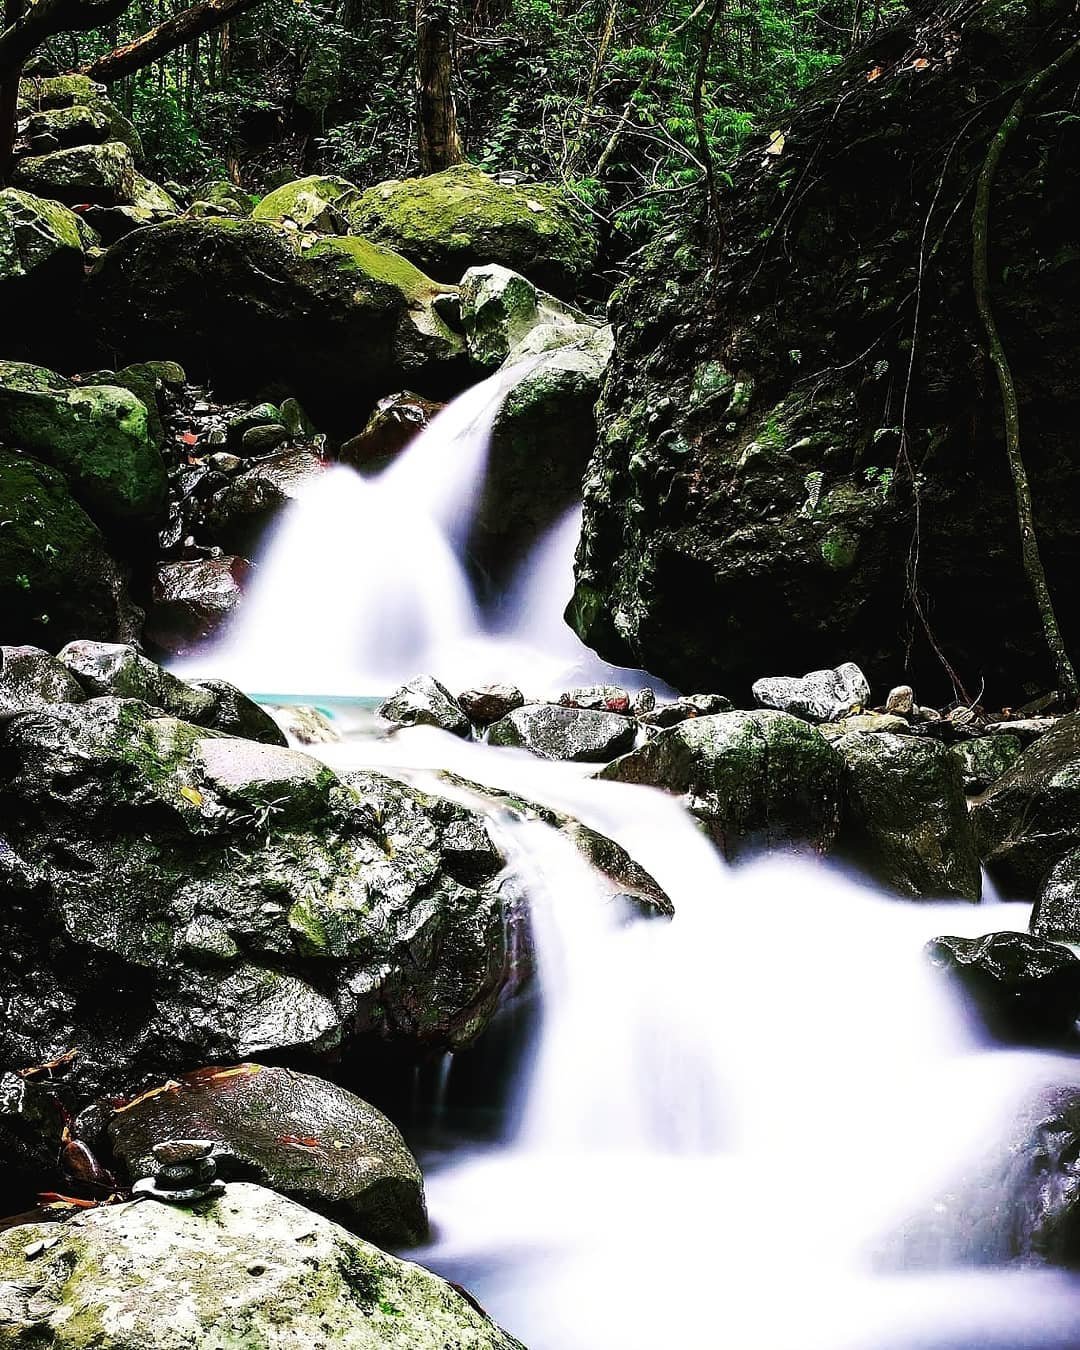
Upon arriving at Papaya River, you’ll find the growing number of hikers filling up their bottles and enjoying the water. The lower part of the river is where you can swim and bathe. The water is fairly cold and refreshing — and yes, it is clean and clear.
I got completely soaked here in April 2026 and I have zero regrets. After sweating through three hours of humid jungle trail, jumping into Papaya River is the single best decision you’ll make on this mountain. Do not use soap at the river since this is the drinking water source of communities downstream.
Potable water is available at Papaya River after about 3 hours of trekking from Brgy. Alas-asin. You don’t need to bring a lot of water — just enough for 3 hours so you won’t have the extra weight.
Stage 3: Papaya River to Tarak Ridge (1.5–2 hours — The Assault)
This is where Tarak earns its name and its reputation. Trail-wise, the hiker-friendly incline continues until Papaya River. But after the river is the hour-long assault that sends your heart, lungs, and legs into a frenzy.
The trail to the summit is punishing — the trail gets more inclined and you’ll be on all fours clinging into roots for support while you lift yourself with your heavy backpack. There are no shortcuts, no ropes, and very few flat spots to rest on. Every minute of this section demands something from you.
There are traces of landslides and fallen trees along the way making the trail even more taxing. There were instances that you need to make use of both hands for crawling and holding to roots and trunks to pass through.
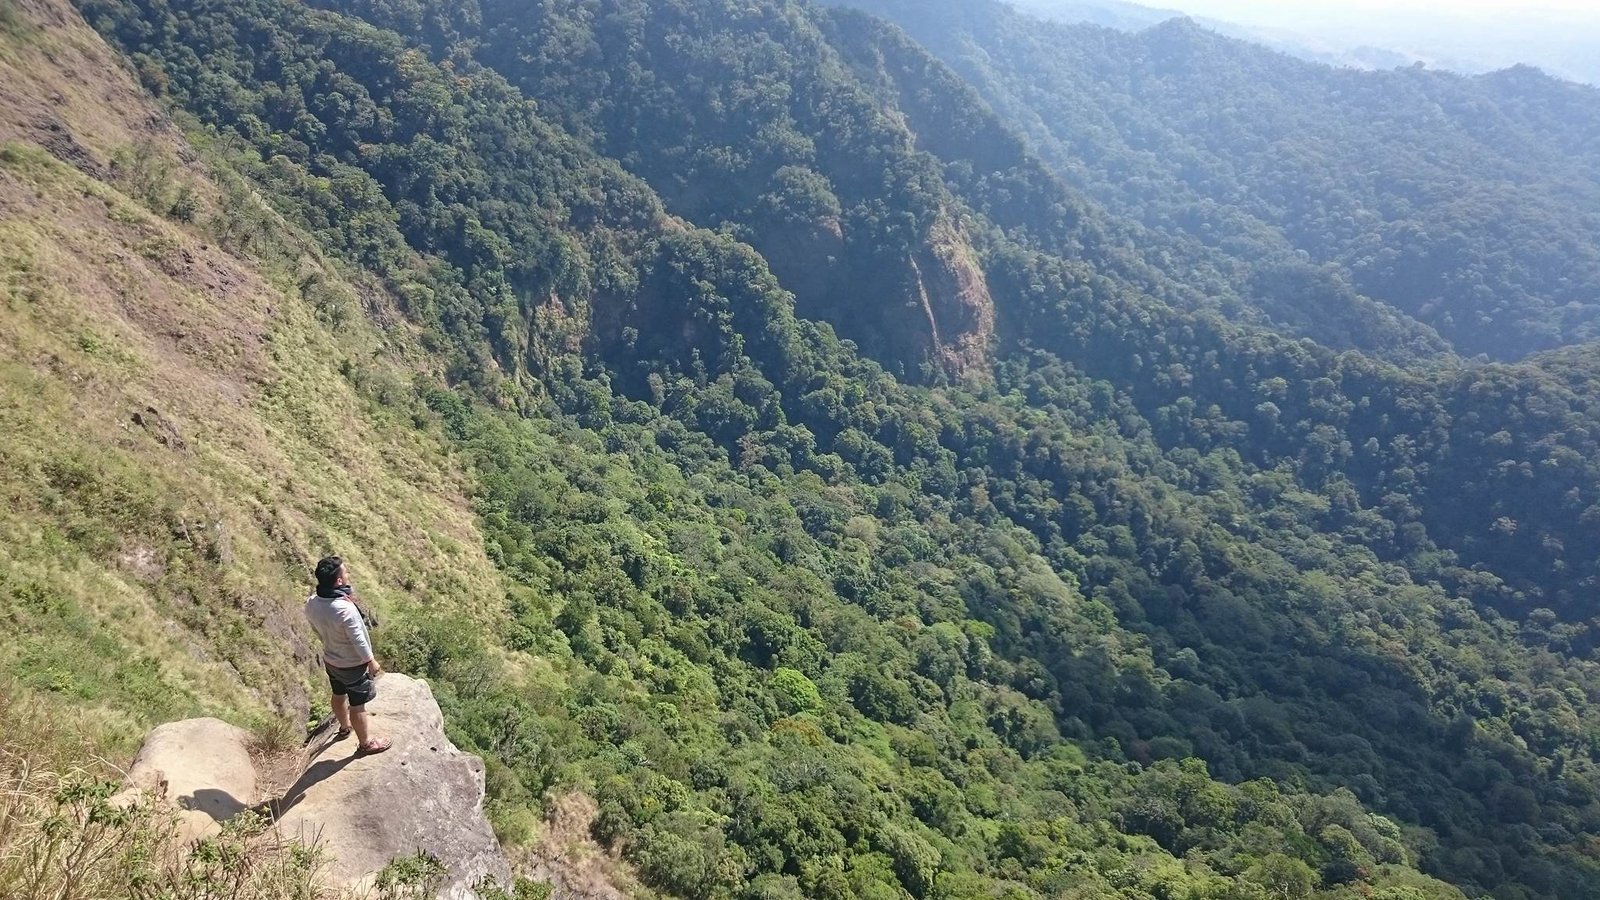
Stage 4: At the Ridge (1,006 MASL)
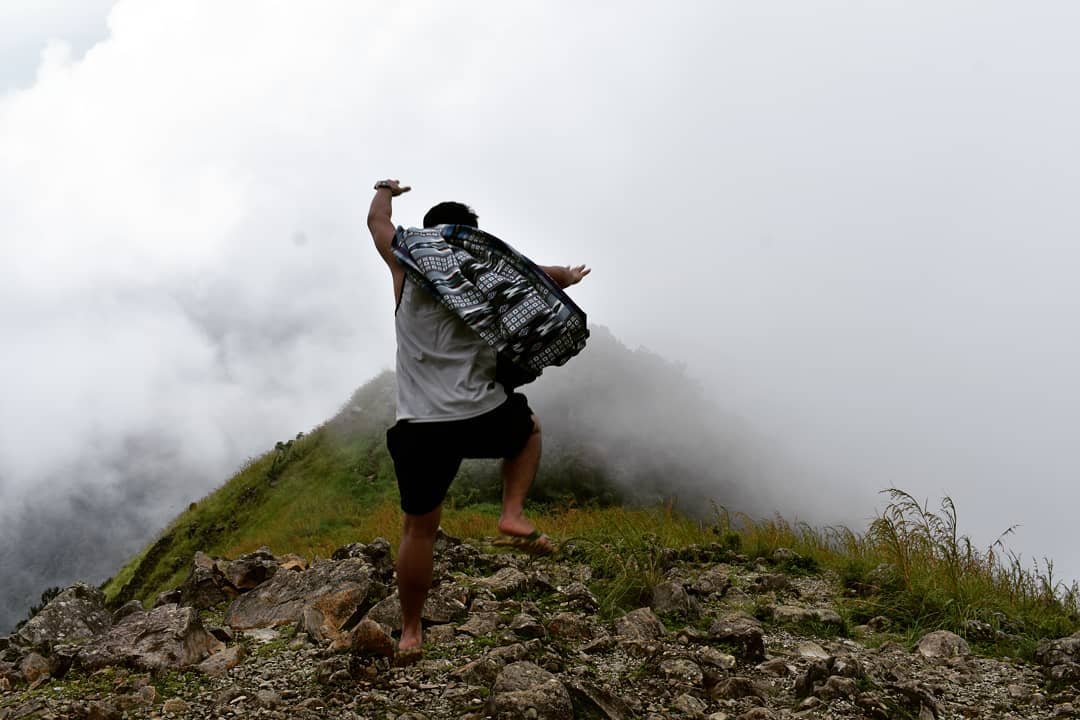
The moment you breach the tree line at Tarak Ridge, the experience shifts violently. You leave the suffocating humidity of the lower Dipterocarp forest and are immediately hit by the “wind tunnel” of the ridge — a cold, accelerating gale coming straight off the West Philippine Sea. It is a sensory shock that defines this climb: the duality of a punishing, sweat-drenched ascent and a shivering, wind-swept summit.
When I reached the ridge in April 2026, the wind was brutally strong — strong enough that I had to crouch and brace myself to move. I’ve done climbs where the ridge view was the reward; at Tarak, the wind IS the experience, almost more than the view itself. Winds up to 70 mph will greet you, so secure all your belongings — even yourself — as it’s strong enough to blow you off your feet.
Optional: Summit Assault to Tarak Peak (1,130 MASL, +30 minutes)
Some hikers don’t usually go to the summit because the view at the ridge is already breathtaking. For those who do push on, it’s another 30-minute rocky assault to endure — but all the pain felt during the trek is rewarded by the beautiful view at the summit.
Is Tarak Ridge Good for Beginners?
Tarak Ridge is not recommended for first-time hikers with zero mountain experience. This Bataan mountain hiking experience is best suited for seasoned hikers as the climb to the ridge is generally considered a major climb. That said, hikers who have completed one or two minor climbs and have good cardiovascular fitness can manage it — especially with a guide.
The honest challenge is endurance, not technical skill. The difficulty lies in endurance. You don’t need rope-work or bouldering ability; you need strong legs, mental patience, and enough water. If your previous climbs include peaks like Mt. Talamitam or Mt. Batulao, Tarak Ridge is a logical and very achievable next step. For context on where Tarak sits on the Philippine difficulty scale, check out this guide to mountains in the Philippines.
Day Hike vs. Overnight at Tarak Ridge
A day hike at Tarak Ridge is entirely possible, but it requires strict time discipline. Tarak Peak is considered a hard hike that covers 8.2 miles, with an elevation gain of 3,198 ft, and takes about 6–6.5 hours to complete (one way). Round-trip, most groups finish in 10–13 hours. For those commuting, the last trip of buses bound for Manila is 7:00 PM. Missing that bus means waiting for the 9:00 PM departure from Balanga — which adds stress you don’t need after 13 hours of hiking.
For an overnight, the hike can be done for a day but an overnight climb is more desirable, giving you more time to appreciate its beauty. However, I have a very honest warning about camping at the ridge: it is not advisable. The winds are relentlessly strong — fiberglass tent poles have been known to snap at the ridge. If you don’t have a tent with aluminum poles, pitch your tent inside the tree line before the ridge, not on the exposed saddle. And worse — there is a serious rat problem at the ridge campsite.
Best Time to Climb Tarak Ridge
November through April is the best season for the Tarak Ridge hike. Camping at Tarak Ridge is not advisable during the rainy season. The trail’s clay-heavy sections become dangerously slippery when wet, and the assault section above Papaya River turns into a mudslide-risk zone. The ridge campsite is really windy and cold; bring jackets.
Even within the dry season, April heat on the lower sections — especially the open grassland between Nanay Cording’s and Papaya River — can be punishing. I climbed in April 2026 and the lower trail was a sweat-fest; the river stop was absolutely non-negotiable. January is an ideal time since the weather is cool. December and February are also excellent, with lower humidity and manageable heat.
Budget Breakdown for Climbing Tarak Ridge
With the standardization of guide fees by the Mariveles Tourism Office and projected transport inflation for Genesis and Bataan Transit, budget accordingly.
| Expense | Cost (PHP) |
|---|---|
| Bus fare (Manila–Mariveles, one way) | PHP 340–380 |
| Bus fare (return) | PHP 340–380 |
| Barangay registration fee | PHP 50/person |
| Guide fee (split among 5 pax) | ~PHP 200/person |
| Tricycle (Barangay Hall to trailhead) | PHP 20–50/person |
| Parking (if driving, overnight) | PHP 50–100 |
| Food and water (bring from Manila) | PHP 200–350 |
| Wash-up/shower at jump-off area | PHP 20 |
| Ferry return via MOA (optional) | PHP 450–600 |
| TOTAL (day hike, public transit) | ~PHP 1,200–1,500/person |
Tricycle drivers at the Alas-asin junction at 3:00 AM rarely have change for a PHP 1,000 bill. Always break your bills into hundreds and fifties before leaving Manila — this tip alone will save you a real headache at 3 AM.
What to Pack for Tarak Ridge
| Item | Essential? |
|---|---|
| Trail shoes or hiking sandals (grippy sole) | Yes |
| 3L water capacity (hydration bladder or bottles) | Yes |
| Trekking poles | Highly recommended |
| Headlamp + extra batteries | Yes |
| Rain jacket / windbreaker | Yes (critical for ridge) |
| Dry-fit shirt and leggings | Yes |
| Extra set of clothes (sealed bag) | Yes |
| Trail food / energy snacks | Yes |
| First aid kit | Yes |
| Tent with aluminum poles (overnight) | Yes — aluminum only |
| Sunblock and cap | Yes |
| Towel for Papaya River | Strongly recommended |
| Trekking sandals for river crossing | Recommended |
| Garbage bag (pack out all trash) | Yes |
Unlike other popular hiking spots, you won’t find sellers or stalls at the top of Tarak Ridge. Everything you need above Nanay Cording’s area must come from your bag. Bring light snacks and trail food like chocolates, nuts, raisins, and jelly ace to keep your energy up during the hike.
Safety Tips for Climbing Tarak Ridge
Follow these safety rules and the Tarak Ridge trail will challenge you without harming you.
- Start before sunrise. For day hikers, a 5:00–6:00 AM trek start is essential to avoid being caught descending after dark. Make sure you’re back to the jump-off before 7:00 PM — the last trip from Mariveles back to Manila is at 7:00 PM.
- Register properly. Go to the Barangay Alas-asin Hall first, then proceed to Nanay Cording’s area. Don’t skip the barangay hall even if the trailhead looks close from the road.
- Never hike Tarak alone. According to locals at the jump-off point, guides are essential because they have changed the trails after typhoons and flooding that hit Bataan.
- Secure everything at the ridge. Winds can reach up to 70 mph — secure all your belongings. Loose items blow off immediately. Camera straps, hat clips, and tent stake bags all need to be secured or pocketed.
- Respect the river. Do not use soap at Papaya River since it is the drinking water source of communities downstream.
- Watch your footing on descent. The trek down is, if not more, slippery. More injuries happen on descent than ascent — slow down, use poles, and don’t rush to catch your bus.
- Check weather. Check weather updates before and on the date of the climb. Camping at Tarak Ridge is not advisable during the rainy season.
- Wildlife awareness. Philippine pit vipers have been spotted along the woodland section before Papaya River. Watch where you put your hands when grabbing roots.
If you’re planning more hikes in Bataan after Tarak, Mt. Natib is a natural next step — read our full guide here. And while you’re in the area, the nearby Laki Beach in Mariveles makes an excellent post-hike cooldown destination — white sand and calm water just minutes from the jump-off.
For a broader overview of everything Bataan offers, our Bataan tourist spots guide covers the whole province. And if you’re interested in combining your climb with a visit to Corregidor Island, the island is just 15 minutes away by boat from Mariveles — you can proceed there and return to Manila via Corregidor the next day.
Frequently Asked Questions About Tarak Ridge
1. Do I need to book a permit in advance for Tarak Ridge?
No advance online booking is required. Registration is done on the day of your climb at the Barangay Alas-asin Hall, which is the designated registration point. Arrive early — on peak weekends, groups can queue at the hall before 4:00 AM. Bring a valid ID. The barangay staff will record your name, contact number, and estimated return time. In 2026, guides became mandatory, so the hall also coordinates guide assignments.
2. How difficult is the Tarak Ridge trail compared to other hikes near Manila?
Tarak Ridge is classified as a Major climb, with a difficulty of 4/9 and a Trail class of 3. This puts it harder than minor climbs like Mt. Batulao or Mt. Talamitam, but significantly easier than 7/9 or 8/9 peaks. The challenge is almost entirely about sustained elevation gain and the assault section above Papaya River — it’s long and steep, not technically dangerous. Anyone who has completed 2–3 minor climbs and trains regularly can handle it.
3. Is there water along the Tarak Ridge trail?
Potable water is available at Papaya River after about 3 hours of trekking from Brgy. Alas-asin. There is no water source at the ridge campsite, so you must carry enough from Papaya River to see you through the final assault and the camp — at least 2–3 liters minimum after the river. Bring a water filter or purification tablets as backup.
4. What is the Papaya River, and is it really worth it?
Papaya River is a freshwater river crossing approximately halfway along the Tarak Ridge trail, about 1 hour from the trailhead to reach. The water is cool and refreshing. Refill your container here because you will need it for the next part — the climb to Tarak Ridge. It is the most beloved section of the trail for most hikers, functioning as both a water source and a natural rest stop. Swimming in the lower section is allowed and encouraged. On my April 2026 climb, I fully submerged in the river — it was the single most reviving moment of the entire day.
5. Can I camp at Tarak Ridge, and what should I know about the campsite?
You can camp at the ridge area at 1,006 MASL, but be warned: the campsite is brutally windy and exposed. Fiberglass tent poles snap at the ridge. If you don’t have a tent with aluminum poles, pitch inside the tree line, not on the exposed saddle. There is no water source at the campsite, so carry all your water up from Papaya River. Additionally, from personal experience, the ridge campsite has a serious rat problem — seal and hang all food, and don’t leave anything chewable inside your pack overnight. Despite all this, the sunrise and the sea of clouds on a clear morning make it worthwhile for those who come prepared.
Final Verdict: Should You Climb Tarak Ridge?
For hikers with at least one or two climbs under their belt looking for a true challenge near Manila, Tarak Ridge earns a 4.5 out of 5. The trail is punishing and honest — it never pretends to be easy — but the wind-swept knife-edge ridge, the panoramic views of Manila Bay and Corregidor, and the unforgettable cold plunge at Papaya River make it one of the most complete hiking experiences anywhere in Luzon. Just go prepared, go in a group, and go before the summer heat peaks. If you’re curious about the harder major climbs in the Philippines after conquering Tarak, the pathway forward is wide open.