Mt. Natib is a challenging mountain hike in Orani, Bataan, usually accessed through Barangay Tala. It is best for prepared hikers because the trail includes forest sections, slippery roots, basaltic boulders, limatik, ropes, rattan vines, and four near-vertical rock walls near the summit.
I hiked Mt. Natib in May 2026, and the most important thing I learned is this: Mt. Natib is not a soft beginner mountain. The standard Barangay Tala backtrail can be done as a day hike, but the summit assault demands cardio, grip strength, careful footwork, and patience. Pasukulan Falls and the Orani-to-Morong traverse are much harder options and should only be done with proper guide coordination.
Mt. Natib is officially promoted by Bataan tourism as a dormant volcano in Orani rising around 1,253 MASL, and local guides should escort visitors. Some hiking references and field notes also list the height at around 1,287 MASL, so it is safest to present the Mt. Natib MASL as 1,253–1,287 meters above sea level, depending on source.
Mt. Natib Quick Guide
Mt. Natib is a major climb in Bataan with a technical summit assault and several route options. For most hikers, the practical route is the Barangay Tala backtrail in Orani.
| Detail | Mt. Natib Guide |
|---|---|
| Location | Orani, Bataan |
| Protected area | Bataan National Park |
| Elevation | 1,253–1,287 MASL |
| Main jump-off | Barangay Tala, Orani |
| Main route | Tala backtrail |
| Difficulty | Moderate-to-major / major climb |
| Day hike time | Around 14.5 hrs Manila-to-Manila |
| Guide ratio | 1 guide per 7 hikers |
| Water source | Kubo House |
| Hardest section | Four Walls summit assault |
| Main hazards | Limatik, lipa, slippery rocks, mud |
| Best for | Prepared hikers, not total beginners |
Table of Contents

What Is Mt. Natib?
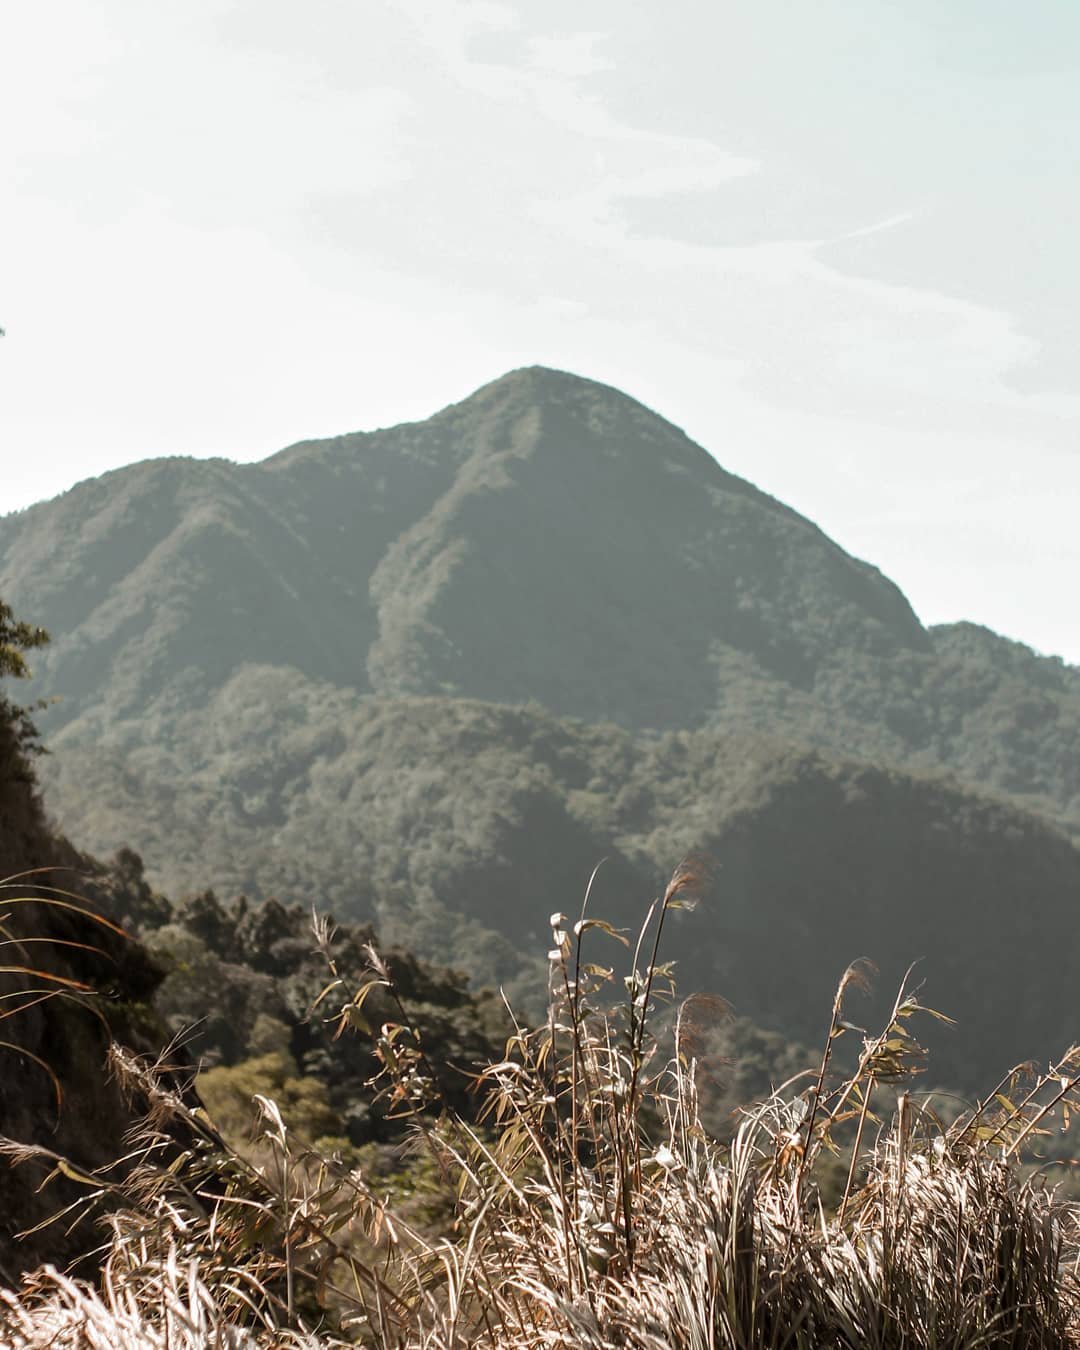
Mt. Natib is a dormant stratovolcano and caldera complex in Bataan. It is one of the major hiking destinations in the province and forms part of the protected forest landscape of Bataan National Park.
Geologically, Mt. Natib is not just a normal forested mountain. The Smithsonian Global Volcanism Program describes Natib as a large stratovolcano at the northern end of the Bataan Peninsula, truncated by a 6 x 7 km caldera. Its latest dated eruptive products are listed at 69,000 ± 27,000 years old, so it should not be described like an active tourist volcano.
In hiking terms, Mt. Natib feels raw and old-school. You get a mix of paved access, view deck, narrow forest trail, water-source stop, grassland campsite, steep roots, damp boulders, and a technical rock-wall finish. Bataan Natural Park is also a protected area; DOST-PCAARRD describes it as a protected area containing old-growth forests, while some local notes cite older area figures around 18,335 hectares. Use the latest DENR figure if you need to publish an exact protected-area size.
Where Is Mt. Natib Located?
Mt. Natib is located in Orani, Bataan, Central Luzon, Philippines. The common hiking access is through Barangay Tala, which serves as the practical jump-off for the standard Mt. Natib hike.
For DIY hikers, the usual travel chain is:
Manila → Orani Crossing → Barangay Tala → registration → Mt. Natib trail
Important nearby entities to mention in a complete Mt. Natib Bataan guide include Orani, Abucay, Balanga City, Bataan Natural Park, Barangay Tala, Pasukulan Falls, Sitio Kanawan, Morong River, Subic Bay, West Philippine Sea, and Zambales.
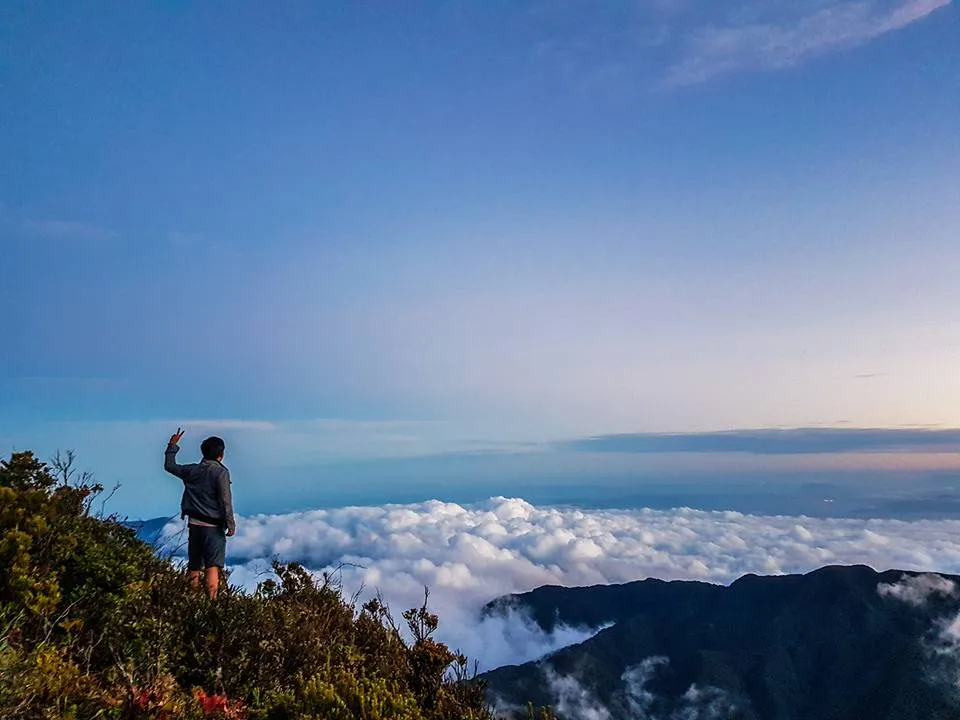
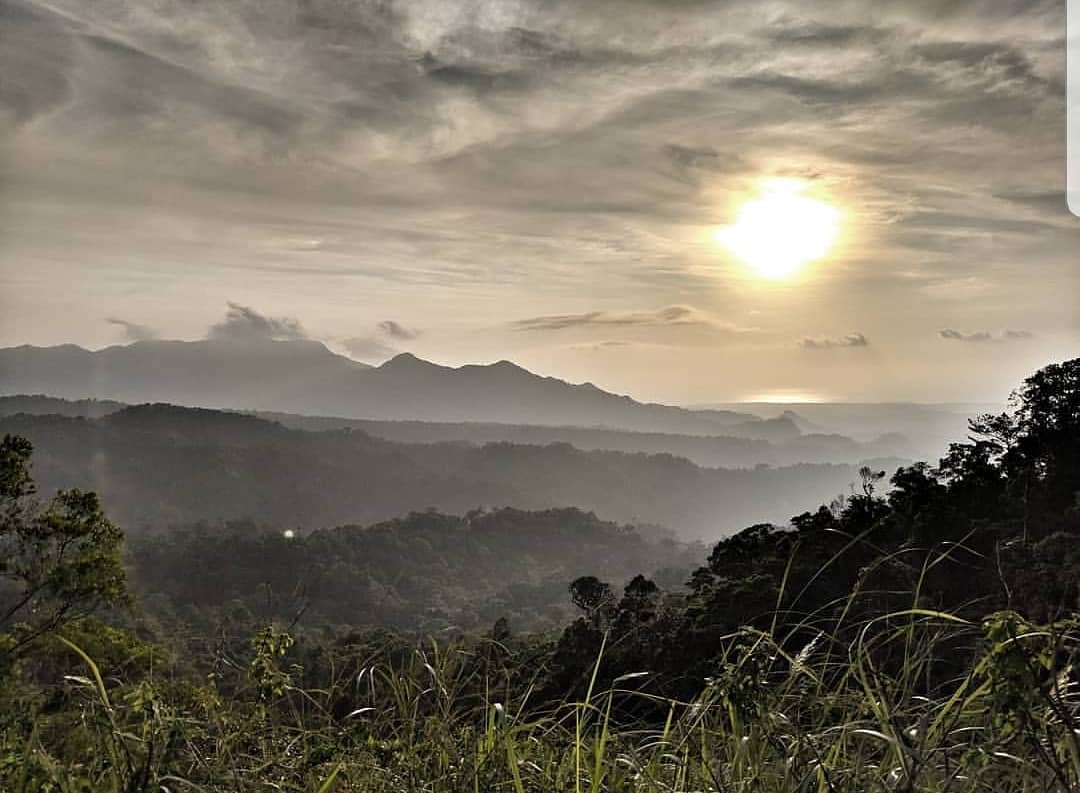
From the early trail and Pinagbutasan View Deck, you can get views toward Subic Bay, the West Philippine Sea, and Zambales when the weather is clear. This makes the Mt. Natib trail feel more scenic than expected, but the real challenge starts after the easier early sections.
Is Mt. Natib Open for Hiking?
Mt. Natib has been hiked through the Barangay Tala route, but current trail status should always be verified locally before going. Because the mountain is inside a protected area and routes are weather-sensitive, do not rely only on old blog posts or old joiner itineraries.
Before your Mt. Natib climb, confirm these with Barangay Tala, local guides, Orani LGU, Bataan Tourism, or DENR/Bataan Natural Park:
| Item | What to Verify |
|---|---|
| Trail status | Open, closed, or restricted |
| Registration | Current desk and process |
| Guide setup | Fee, ratio, availability |
| Pasukulan Falls | If allowed that day |
| Morong traverse | If permitted and safe |
| Camping | If overnight is allowed |
| Weather rules | Rain, storm, river risks |
| Local rules | Trash, drone, alcohol, bonfire |
For official tourism help, Behold Bataan lists the Provincial Tourism Office contact as (047) 935-0364, +63917-671-6995, and tourism@bataan.gov.ph. It also lists 1Bataan Command Center emergency numbers including 911, 0919-914-6232, 0927-605-911, and (047) 613-8888.
How Difficult Is Mt. Natib?
Mt. Natib is a major climb, especially because of the summit assault and Four Walls section. The standard Tala backtrail is manageable for prepared hikers, but the upper trail is not ideal for total beginners.
| Route | Difficulty |
|---|---|
| Tala backtrail | 4/9 moderate-to-major |
| Tala + Pasukulan Falls | 5/9 major |
| Orani-to-Morong traverse | 6/9 major |
| Summit assault | Technical and tiring |
The most difficult part is not the first few kilometers. The early hike from Barangay Tala to Pinagbutasan View Deck feels like a warm-up. The real test comes after Kubo House and Base Camp, when the trail becomes steeper, damper, and more technical.
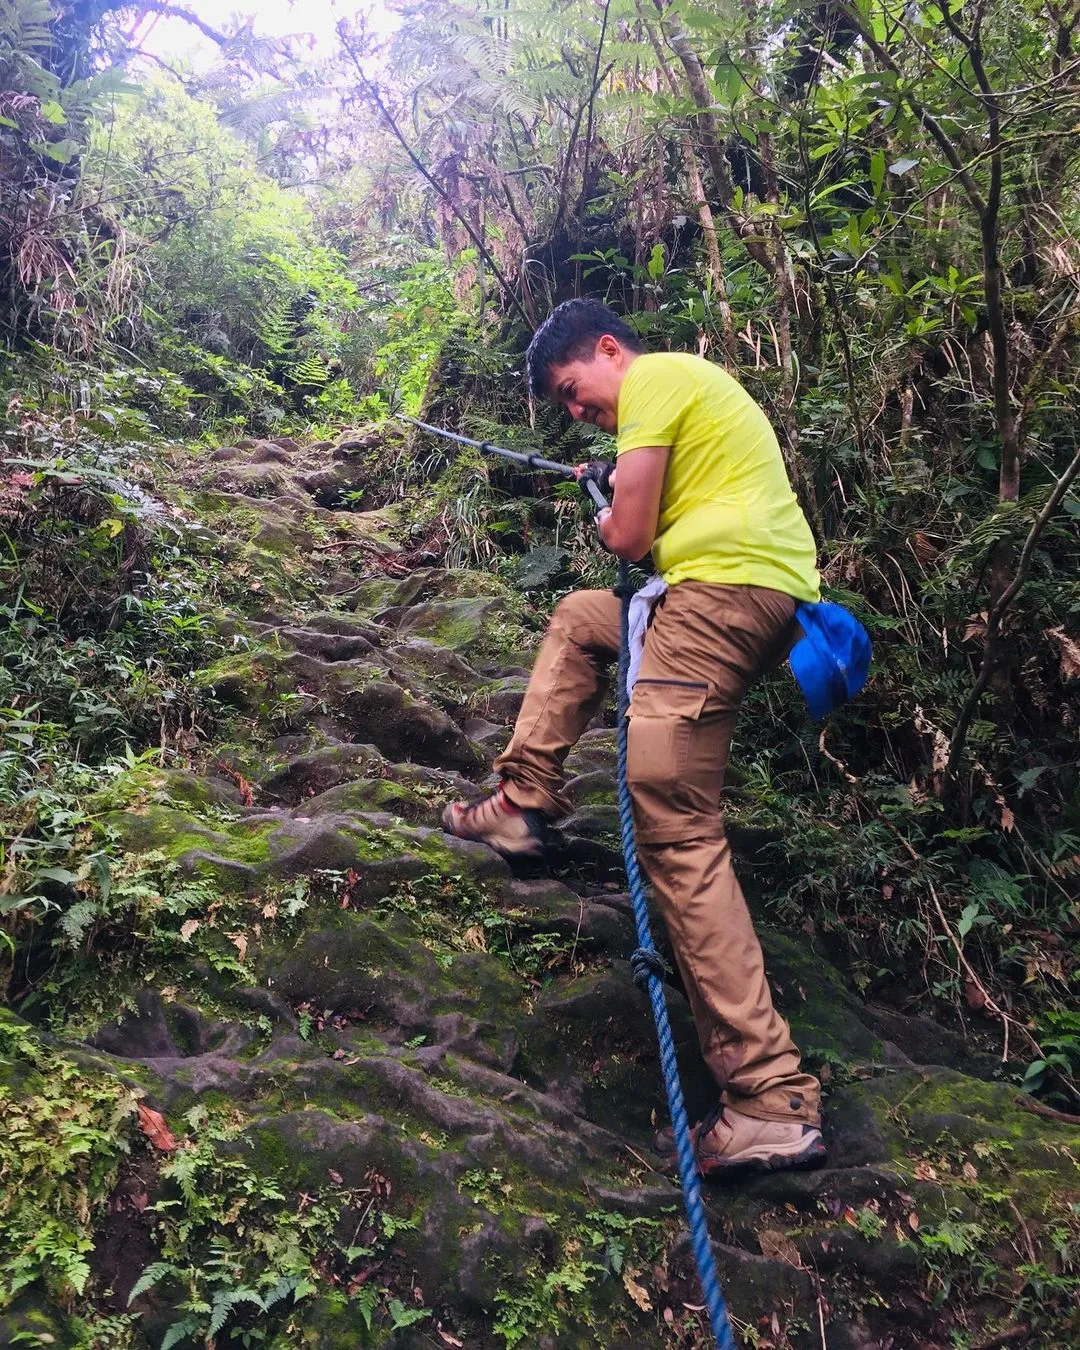
The summit assault covers roughly 400 meters of vertical gain over a short distance, usually taking around 45 minutes to 1.5 hours depending on group pace. Expect slippery roots, muddy channels, basaltic boulders, algae-covered rocks, ropes, and rattan vines. The Four Walls are near-vertical rock faces around 5–10 meters high, and you need both foot placement and upper-body control to climb safely.

What Is the Mt. Natib Trail Like?
The Mt. Natib trail changes from easy access road and view deck terrain into a forested, wet, technical summit climb. The best way to understand the hike is by trail sector.
Sector 1: Barangay Tala to Pinagbutasan View Deck
The hike starts around the Barangay Tala registration outpost, at roughly 560 MASL based on my May 2026 notes. The 3.3-km Mulawin–Tala access road is now paved, which makes the approach easier than older hike reports suggest.
| Detail | Trail Note |
|---|---|
| Start | Barangay Tala |
| Access road | Paved Mulawin–Tala road |
| Time | 30–45 mins to view deck |
| View | Subic Bay, West PH Sea, Zambales |
Sector 2: Pinagbutasan View Deck to Kubo House
After the view deck, the trail becomes a narrower forest single-track. In around 12–15 minutes, you reach Kubo House, one of the most important landmarks of the Mt. Natib trail.
Kubo House matters because it is the only reliable year-round freshwater source on the primary trail based on the May 2026 trail notes. It is also a route junction: straight leads toward Pasukulan Falls, while left leads to Base Camp and the summit.
Sector 3: Kubo House to Grassland Campsite / Base Camp
From Kubo House, the trail continues for around 45 minutes to 1 hour toward the Grassland Campsite or Base Camp. This is a spacious flat area used as a rest point, overnight pitching area, and final preparation stop before the summit assault.
This is where hikers should check shoes, gloves, hydration, rain gear, headlamp, and group pacing. After this, the trail becomes much more physical.
Sector 4: Summit Assault and Four Walls
This is the signature section of Mt. Natib. The Four Walls are damp, steep, and slippery. Heavy ropes and rattan vines help, but they do not make the climb easy.
Bring gloves, wear aggressive-tread shoes, and do not rush this part. The rocks may stay wet even without active rain because of shade, moss, algae, and moisture trapped in the forest.
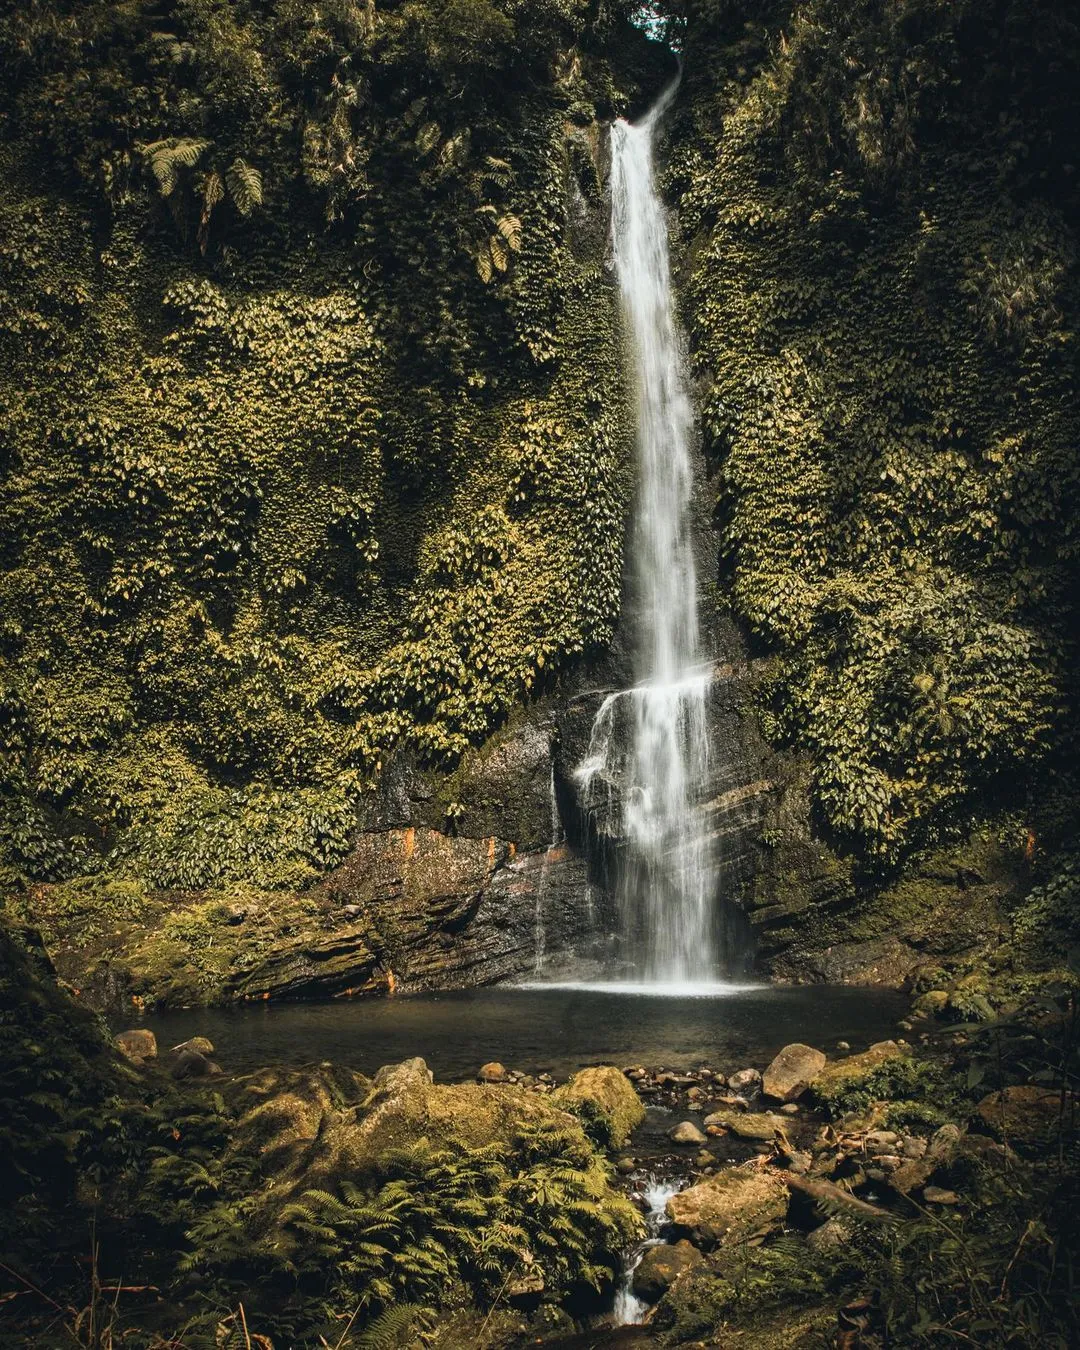
Sector 5: Pasukulan Falls Trail
Pasukulan Falls branches from the Kubo House junction. This route is advanced and should not be treated as a casual add-on.
| Detail | Pasukulan Note |
|---|---|
| Junction | Kubo House |
| Time | 2–3 hrs one way |
| Final descent | 70–80° ravine wall |
| Ground | Loose volcanic sand/gravel |
| Falls | Around 60 m / 200 ft |
| Pool | Cold, chest-deep lagoon |
Only include Pasukulan Falls if your guide confirms it is allowed, safe, and realistic for your group that day.
Sector 6: Orani-to-Morong Traverse
The Morong traverse is an advanced linear route from Orani-Tala to Morong, exiting near Sitio Kanawan, an Aeta community known for its wooden hanging bridge.
The western descent is around 12–14 km, passing old-growth forest and roughly eight knee-deep Morong River crossings. This is dangerous in wet season or after heavy rain. Do not attempt it without a specialized guide and current local clearance.
What Are the Main Mt. Natib Routes and Jump-Off Points?
The best route for most hikers is the Barangay Tala backtrail. Pasukulan Falls and the Morong traverse should be treated as advanced variations.
| Route | Best For |
|---|---|
| Tala backtrail | Standard day hike |
| Tala + Pasukulan | Strong hikers |
| Orani-to-Morong traverse | Advanced hikers |
| Abucay/Pasukulan access | Falls-focused plan, verify locally |
Barangay Tala is the practical jump-off for the Mt. Natib dayhike. Abucay is relevant when discussing Pasukulan Falls access, but route rules should be confirmed with LGU, DENR, and local guides before recommending it.
How Do You Get to Mt. Natib?
The easiest DIY route to Mt. Natib is by bus to Orani Crossing, then tricycle to Barangay Tala. Private car or private van is easier for early starts and group hikes.
| Route | Details |
|---|---|
| Cubao/Pasay/Avenida | Bus to Orani/Bataan |
| Bus operators | Genesis or Bataan Transit |
| Drop-off | Orani Crossing |
| Local transfer | Tricycle to Barangay Tala |
| Tricycle fare | ₱150–₱250/vehicle |
| Transfer time | 25–30 mins |
| Ferry option | Pasay to Orion Port |
| Ferry fare anchor | ₱499 promo, VERIFY LOCALLY |
From Manila, take a Balanga- or Mariveles-bound bus and ask to be dropped at Orani Crossing. From there, take a tricycle to the Barangay Tala jump-off. From Balanga City, travel north toward Orani, then transfer to Barangay Tala. From Abucay, coordinate first if your plan involves Pasukulan Falls or a non-standard route. From Olongapo/Subic, expect road transfers toward Bataan/Orani or a private arrangement.
All bus fares, first trips, last trips, and ferry prices should be treated as VERIFY LOCALLY because transport schedules change.
What Permits, Registration, and Guides Are Needed?
A local guide is required or strongly expected for Mt. Natib because the trail is inside a protected area and has technical, confusing, and weather-sensitive sections. In May 2026, the working setup was registration at Barangay Tala, local guide assignment, and a 1:7 guide ratio.
| Item | May 2026 Working Note |
|---|---|
| Registration fee | ₱30–₱70/head |
| Base guide fee | ₱1,000-1500 |
| Guide ratio | 1:7 |
| Pasukulan surcharge | ₱700 |
| Traverse guide | From ₱1,500, negotiated |
Step-by-step process:
- Coordinate with Barangay Tala or local guides.
- Confirm route: summit only, Pasukulan, overnight, or traverse.
- Travel to Orani Crossing or directly to Tala.
- Register at the Barangay Tala outpost.
- Pay the environmental/registration fee.
- Meet your guide.
- Start early to avoid late descent.
Mark fees as as of May 2026 / VERIFY LOCALLY because guide rates and registration policies can change quickly.
How Much Is the Mt. Natib Budget?
A Mt. Natib day hike can be affordable for groups, but solo DIY becomes expensive because guide and local transfer costs are not shared. Joiner tours are often the simplest option for beginners who do not want to manage transport and guide coordination.
| Budget Type | Estimate |
|---|---|
| DIY group of 4 | ₱1300-₱2,002/person |
| Joiner tour | ₱1800-₱2200/person |
| Solo DIY | Higher due guide/trike |
| Pasukulan combo | Add ₱700-1000 guide surcharge |
| Traverse | Guide starts around ₱1,500-2000 |
| Emergency buffer | ₱500–₱1,000/head |
Bring cash in small bills. Do not assume GCash, card payments, or nearby ATMs will solve your problem at the jump-off.

What Is the Best Mt. Natib Itinerary?
The best Mt. Natib itinerary for most hikers is a very early Tala backtrail day hike. Start early because the summit assault and descent can slow down the whole group.
| Time | Activity |
|---|---|
| 3:00 AM | Depart Manila |
| 5:30 AM | Arrive Orani / transfer to Tala |
| 6:00 AM | Register and meet guide |
| 6:30 AM | Start hike |
| 7:00–7:15 AM | Pinagbutasan View Deck |
| 7:30 AM | Kubo House / water source |
| 8:30 AM | Grassland Base Camp |
| 9:30–10:30 AM | Summit assault / Four Walls |
| 10:30–11:30 AM | Summit |
| 12:00 NN | Start descent |
| 3:00–4:00 PM | Back at jump-off |
| 5:30 PM | Return toward Manila |
For Mt. Natib + Pasukulan Falls, depart Manila around 12:00 AM by private van. This can stretch to around 21 hours Manila-to-Manila, so only strong hikers should consider it.
For the Orani-to-Morong traverse, expect an advanced, long, weather-sensitive itinerary with a possible 2:00 AM Manila departure and late-night return. River crossings make this route risky during wet season.
What Should You Bring for Mt. Natib?
Pack for mud, limatik, ropes, wet rocks, long hiking hours, and limited water access. Mt. Natib is not a trail where you should wear smooth running shoes and bring only a small bottle of water.
| Item | Why Bring It |
|---|---|
| 2–3L water | Limited source after Kubo |
| Gloves | Ropes and rock walls |
| Aggressive-tread shoes | Mud and algae rocks |
| Headlamp | Delayed descent risk |
| Long sleeves | Limatik and lipa |
| Alcohol/salt | Limatik removal |
| Rain jacket | Forest weather |
| Trekking pole | Slippery descent |
| Trail food | Long hike |
| Trash bag | Leave No Trace |
For Pasukulan Falls or traverse plans, bring more food, more water, emergency light, dry bag, and a stronger buffer for delays.

When Is the Best Time to Hike Mt. Natib?
The best time to hike Mt. Natib is during the drier months, but hikers should still check weather before the climb. Wet conditions make the Four Walls, Pasukulan ravine, and Morong River crossings more dangerous.
Avoid hiking after heavy rain if your group is inexperienced. Limatik activity is also higher during the wet monsoon months, especially from June to October, and on damp summit or Pasukulan sections.
Is Mt. Natib Safe for Beginners?
Mt. Natib is not recommended as a first-ever hike for total beginners. Prepared beginners with previous hiking experience may do the Tala backtrail with a guide, but Pasukulan Falls and the Morong traverse are for stronger hikers.
You should reconsider Mt. Natib if you:
- have no hiking background,
- are afraid of steep rope sections,
- cannot manage muddy descents,
- are not comfortable with limatik,
- have weak grip or poor balance,
- are starting late,
- or are hiking after rain.
A better approach is to train first on easier mountains, then climb Mt. Natib when you are comfortable with long hikes, steep trails, and technical sections.

What Common Mistakes Should You Avoid?
Most Mt. Natib problems come from underestimating the difficulty, starting late, and treating Pasukulan Falls as a simple side trip.
Avoid these mistakes:
- Starting after sunrise without a time buffer.
- Bringing less than 2L of water.
- Skipping gloves for the Four Walls.
- Wearing smooth-soled shoes.
- Ignoring limatik protection.
- Not checking Pasukulan access.
- Attempting Morong traverse without a specialized guide.
- Forgetting a headlamp.
- Assuming the summit assault is easy because the early trail is manageable.
- Leaving trash inside Bataan Natural Park.

Is Mt. Natib Worth Hiking?
Yes, Mt. Natib is worth hiking if you want a serious Bataan mountain climb with forest, volcanic terrain, technical walls, and a real sense of adventure. It is best for hikers who are already comfortable with long day hikes and want something more demanding than a casual beginner trail.
For me, Mt. Natib stands out because the trail has layers: the paved approach, Pinagbutasan View Deck, Kubo House water source, Grassland Base Camp, then the Four Walls summit assault. It feels like a proper mountain progression, not just a short scenic walk.
The final verdict: hike Mt. Natib if you are prepared, guided, and properly equipped. Skip it if you want an easy beginner hike, a relaxed waterfall trip, or a late-start DIY climb.
FAQs
Where is Mt. Natib located?
Mt. Natib is located in Orani, Bataan, Central Luzon, Philippines. The most common jump-off for hikers is Barangay Tala, which provides access to the standard Tala backtrail route.
How high is Mt. Natib?
Mt. Natib is commonly listed at 1,253–1,287 MASL. Bataan tourism lists it at 1,253 meters above sea level, while some hiking sources use 1,287 MASL.
Is Mt. Natib a volcano?
Yes. Mt. Natib is a dormant stratovolcano and caldera complex in Bataan. It has a 6 x 7 km caldera and is part of the protected Bataan Natural Park landscape.
How difficult is Mt. Natib?
Mt. Natib is a major climb. The Tala backtrail is around 4/9, the Pasukulan Falls combo is around 5/9, and the Orani-to-Morong traverse is around 6/9.
Is Mt. Natib beginner-friendly?
Mt. Natib is not ideal for total beginners. Prepared beginners with previous hiking experience may do the Tala backtrail with a guide, but Pasukulan and Morong traverse are advanced.
Do you need a guide for Mt. Natib?
Yes. A local guide is required or strongly expected because Mt. Natib is inside a protected area and has technical, forested, and route-sensitive sections.
How much is the Mt. Natib guide fee?
As of May 2026 field notes, the working base guide fee was around ₱1,000 for a day hike with a 1:7 guide ratio. Verify locally before hiking.
How much is the Mt. Natib budget?
A DIY group hike can cost around ₱927–₱2,002/person, while joiner packages may cost around ₱1,100–₱1,200/person. Solo DIY is higher because costs are not shared.
Where is the Mt. Natib jump-off?
The practical main jump-off is Barangay Tala in Orani, Bataan. From Manila, most DIY hikers go to Orani Crossing, then take a tricycle to Barangay Tala.
Is there water on the Mt. Natib trail?
Yes, but water is limited. The important water source is at Kubo House, which is the key refill point before the Base Camp and summit assault.
What is the Four Walls section?
The Four Walls section is the steep technical part near the summit. It has damp rock faces around 5–10 meters high, with ropes and rattan vines for support.
Can you include Pasukulan Falls in a Mt. Natib hike?
Yes, but only for strong hikers and only if allowed locally. Pasukulan Falls requires a longer route, extra guide coordination, and a steep 70–80° ravine descent.
Is there limatik on Mt. Natib?
Yes. Limatik is a known hazard on Mt. Natib, especially during wet months and on damp summit or Pasukulan sections. Wear long sleeves, tuck pants into socks, and bring alcohol or salt.
When is the best time to hike Mt. Natib?
The better time is during the drier months, when the rock walls, mud, and river crossings are less dangerous. Always check weather before hiking.
Is Mt. Natib worth it?
Yes, Mt. Natib is worth it for prepared hikers who want a serious Bataan climb. It is scenic, technical, forested, and rewarding, but it is not a casual beginner mountain.
More Bataan and Nearby Adventure Guides
If you are planning to hike Mt. Natib, you can also combine it with other Bataan, Central Luzon, and major-climb destinations depending on your schedule, fitness level, and travel style.
For a beach side trip after the hike, check my full guide to Laki Beach in Mariveles, Bataan. It is a good option if you want to balance a tough mountain climb with a coastal escape, island-hopping, or a relaxed overnight beach trip in Mariveles.
If you want to explore more places around the province, read my list of Bataan tourist spots. This guide includes historical sites, beaches, nature spots, and family-friendly destinations that you can add before or after your Mt. Natib hike.
For travelers interested in history and war heritage, you may also want to visit Corregidor Island. While it is not in Bataan, it connects well with a World War II heritage itinerary covering Mt. Samat, Bataan World War II Museum, and other historic sites around Manila Bay.
If you are looking for another challenging Central Luzon hike, consider reading my Mt. Arayat DIY travel guide. Like Mt. Natib, Mt. Arayat is a volcanic mountain with steep sections, forest trails, and a more serious difficulty level than casual beginner hikes.