
Quick Guide Table
| Field | Verified details |
|---|---|
| Mountain name | Mt. Mariglem |
| Location | Sitio Maporac, Barangay New San Juan, Cabangan, Zambales |
| Province / municipality / barangay | Zambales / Cabangan / Brgy. New San Juan |
| Elevation / MASL | Around 573 MASL |
| Difficulty level | Commonly cited at 4/9 |
| Trail type | Route-dependent day hike with ridge-to-river flow in some itineraries |
| Estimated hiking time | Around 2–3 hours to summit; often 4–6+ hours total elapsed |
| Estimated distance | Route-dependent; around 13 km roundtrip if starting from registration in one account |
| Jump-off / registration context | Registration/jump-off area is separate from some trailhead starts |
| Best time to hike | Broad dry-season window often described as November to April |
| Day hike or overnight | Usually day hike; summit camping not allowed in the cited Cabangan guide; river-area camping may be allowed |
| Guide setup | Guide commonly arranged; around ₱700 per group often cited |
| Water source | Limited on ascent; spring, river, or hose-fed water may appear on descent |
| Beginner-friendliness | Beginner-friendly on paper, but heat exposure makes it feel harder if started late |
Distance, timing, and total effort can vary depending on whether you walk from the registration area or ride to the trailhead first.
Is Mt. Mariglem Worth Hiking for a DIY Day Trip?
Yes, Mt. Mariglem is worth considering for a DIY day trip if you want a scenic minor climb in Cabangan, Zambales with open grassy ridges, coastal views, and a possible river finish. It is beginner-friendly for many hikers on paper, but the real challenge comes from heat, exposure, and how early you start.
What makes the Mt. Mariglem hike appealing is the overall mix. You get a mountain day with a commonly cited elevation of around 573 MASL, a 4/9 difficulty rating, broad ridge scenery, and in some itineraries, river sections on the descent. That gives the trip more variety than a simple summit-and-back hike.
What makes it feel harder than expected is not technical terrain. It is the exposed ridge, limited shade, and the way the sun can quickly drain you on a late-morning climb. So yes, Mt. Mariglem is beginner friendly for many hikers, but it is best enjoyed by groups that start early, pace well, and respect the heat.
Before conquering Mt. Mariglem or any off-the-beaten-path destination in the Philippines, don’t forget to get covered with travel insurance. We recommend SafetyWing Nomad Insurance for its flexible, subscription-based plans perfect for weekend warriors and long-term adventurers alike. With emergency medical coverage, trip interruptions, and worldwide support, it’s peace of mind that fits in your backpack.This is an affiliate link. I may earn a small commission if you sign up, at no extra cost to you. I only recommend services I trust

Table of Contents
Where Is Mt. Mariglem Located?
Mt. Mariglem is located in Sitio Maporac, Barangay New San Juan, Cabangan, Zambales. In simple terms, the mountain sits in Sitio Maporac, within Brgy. New San Juan, under the municipality of Cabangan in Zambales. For actual trip planning, that means your Mt. Mariglem Location is tied more closely to Cabangan logistics than to a generic province-level pin.
The most relevant nearby towns for planning are:
- Cabangan for local access and coordination
- Iba as a larger town reference in Zambales
- Olongapo as a major transport gateway from Manila
- Subic as a familiar road and navigation reference for drivers
If you are building your Mt. Mariglem Map, you may notice that different coordinates appear in different sources. That usually happens because they likely refer to different logistics points, such as the general hiking area, the registration area, or a trailhead access point.
Useful planning coordinates mentioned in research:
- General hiking area marker: 15.1324163, 120.0996741
- Academic locality reference: 15°07′58.30″N, 120°05′27.40″E / 15.132861, 120.090944
- Jump-off or registration point from one account: 15.1530306, 120.0692824
The area is also associated with the rivers Agbobotilya, Maligha, and Nilumabangan. Treat these as planning coordinates only, not guaranteed official summit survey points.
Mt. Mariglem Difficulty, MASL, Distance, and Hiking Time
Mt. Mariglem MASL is commonly cited at around 573 MASL, with a 4/9 rating often used for its Mt. Mariglem Difficulty Level. In practical terms, that puts it in the minor-climb category, but the effort can feel more demanding than the numbers suggest because the trail is exposed and the full day depends heavily on how your group starts the hike.
For most hikers, the useful benchmark is 2 to 3 hours to the summit. That is the stat most people want first, and it works well for rough planning. The bigger picture, though, is total elapsed time. A full Mt. Mariglem day often stretches to around 4–6+ hours, especially once you include registration, local transport, breaks, and possible river sections on the descent.
This is where route-dependent becomes the key idea. Mt. Mariglem KM is not best treated as one fixed official number because some hikers begin walking from the registration area, while others shorten the approach by riding to the trailhead first. One account said the hike could be around 13 km roundtrip if started from registration, but that should be treated as a route-dependent estimate, not an officially measured trail distance.
One detailed field account logged about 6 hours total elapsed time, with roughly 3 hours of moving time on foot. That same outing showed around 427 m / 1,403 ft of elevation gain, but it also included non-hiking segments, so it is more useful as a field record than a final official stat.
If you are planning around distance, ascent time, and effort, the safest takeaway is simple: Mt. Mariglem is manageable for many hikers, but its real workload is route-dependent, not just summit-dependent.
What Is the Mt. Mariglem Trail Like?
The Mt. Mariglem trail is best described as a hot, exposed ridge hike with a river-style finish in some itineraries. It is not known as a technical or rope-heavy climb. What shapes the experience more is the sequence of terrain: rough access, a steep opening push, an open grassy ridgeline, then a descent that may lead toward springs and river sections.
A realistic trail flow looks like this:
- Approach to trailhead: Some groups do not start walking immediately from registration. One account describes a rough or muddy ride-in approach where the vehicle occasionally needed push-assist, especially on uneven sections.
- Steep opening climb: The first part of the hike tends to feel direct and effort-heavy, especially if your legs are still adjusting after the ride or early travel from Manila.
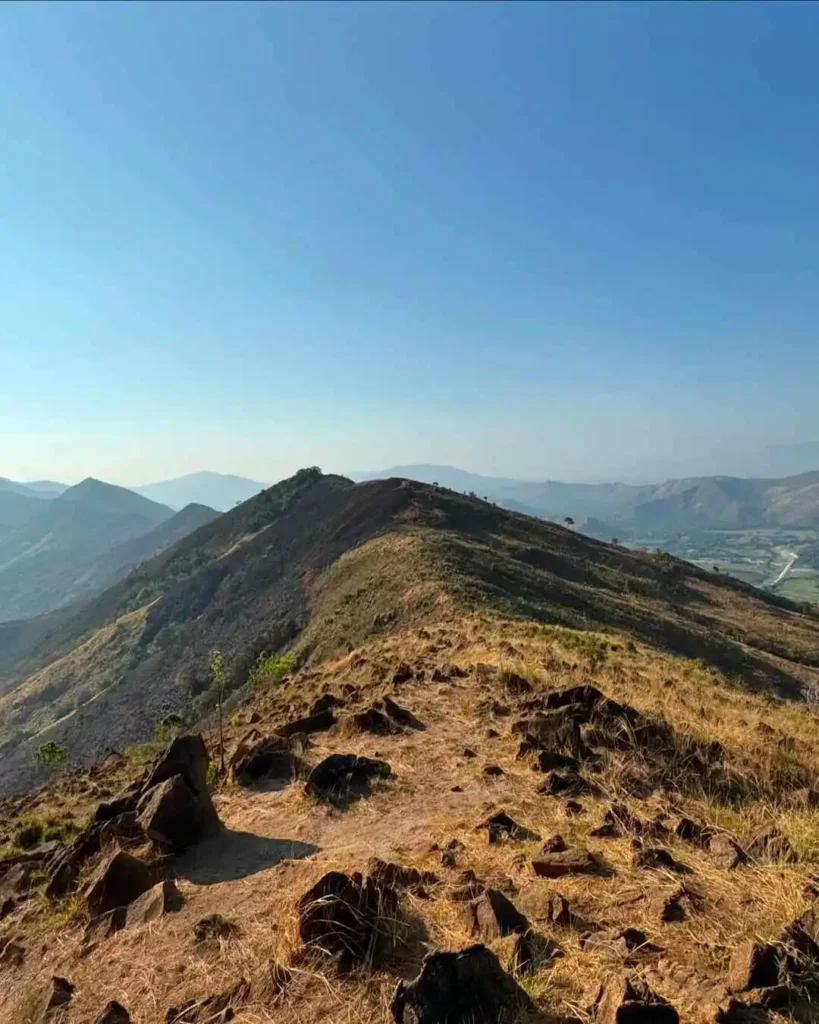
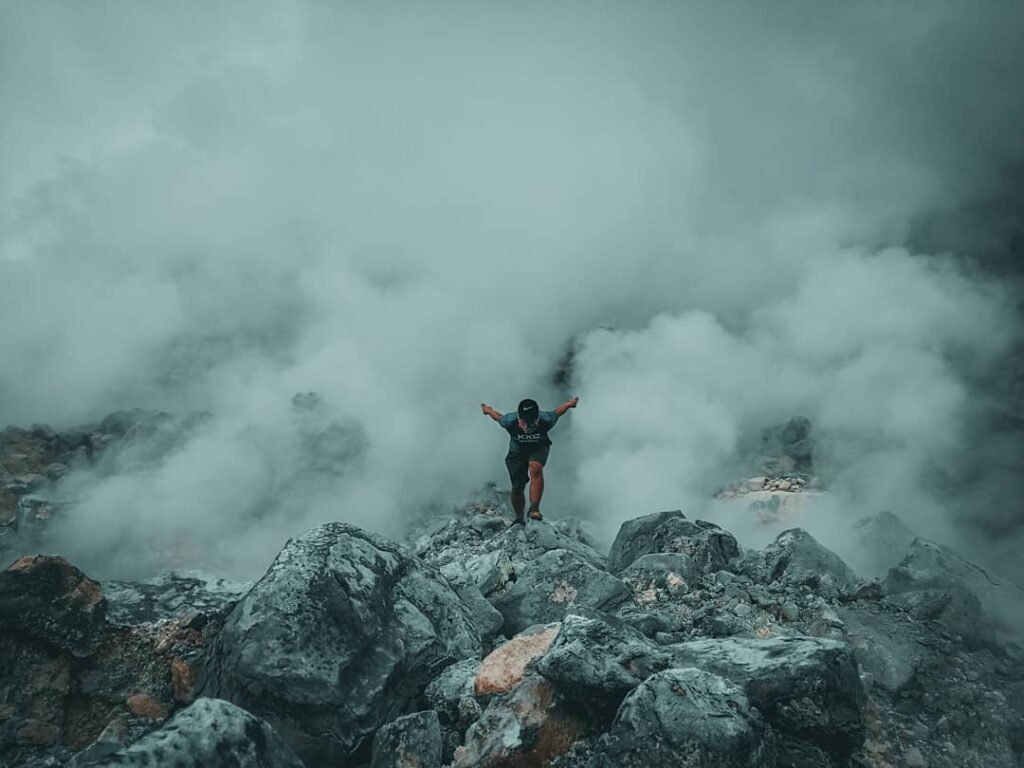
- Open grassy ridgeline: This is where the scenery opens up. Expect broad grassland views, wind on the open sections, and very limited shade.
- Heat becomes the real challenge: On a late start, the exposed climb can feel much harder because the sun sits directly on the ridge and the humidity builds quickly.
- Intermediate ridge points: Some narratives mention marked or signed points along the way, which help break the climb into smaller segments.
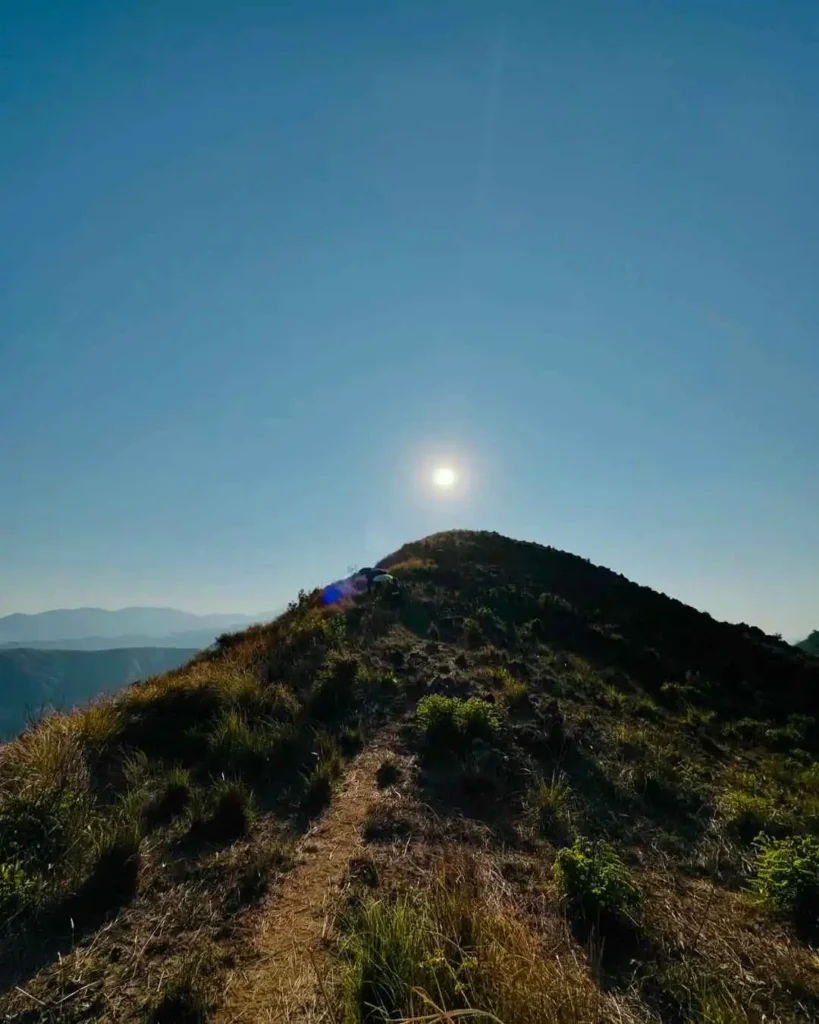
- Summit zone: The summit is associated with the 573 MASL marker and the wide-open feel many hikers remember from Mt. Mariglem Photo searches.
- Descent and water sections: The trail may continue toward springs or river areas, and some accounts mention vendors and swimming stops that make the finish feel cooler and more relaxed.
So no, it is not all grassland from start to finish, but the exposed ridge is the defining character of Mt. Mariglem Trails.

How to Go to Mt. Mariglem from Manila
If you are planning how to go to Mt. Mariglem from Manila, the most practical options are by provincial bus, private car, or joiner van. For most readers, the best choice depends on how much flexibility you want, how early you plan to start, and whether you want to handle the Cabangan commute yourself.
Bus Option for DIY Hikers
For a Mt. Mariglem hike on a DIY setup, the usual commuter flow looks like this:
- Go to a Manila bus terminal
- Ride a provincial bus along the Zambales corridor
- Get off in or near Cabangan
- Transfer by tricycle or kolong-kolong to the tourism or registration area
- Continue onward to the trailhead
Useful fare references from the research include:
- ₱308 from Avenida to Olongapo
- ₱495 from Caloocan to Iba
- ₱710 as a cited Cisco Bus fare example to Sta. Cruz, Zambales
- A rough Cabangan-bound estimate of around ₱370
For destination boards, buses marked Iba or Sta. Cruz can work for the Cabangan corridor. Travel time is commonly around 5 to 6 hours, but that can change depending on traffic, operator, and where exactly you board.
A practical note: do not treat these fares as permanent. Terminal, operator, and destination board can all affect both price and total travel time, so confirm before travel day.
Private Car Option
Driving is usually the easiest option if you want more control over timing. The standard route spine is:
- NLEX
- SCTEX
- Subic/Olongapo
- Olongapo-Bugallon highway corridor
- Cabangan
Under favorable conditions, the drive is commonly described at around 4 hours. This setup works especially well for small groups who want an earlier trail start and do not want to rely on bus arrival times. It also makes the rough inland access toward the jump-off or trailhead easier to manage.
Joiner Tour Option
A joiner van is the simplest option for solo hikers and first-timers. Joiner trips are commonly advertised at around ₱1,500 per person, while some public listings show ₱1,600 with an ₱800 down payment. That range shows how organizer pricing can vary.
Inclusions may bundle:
- Roundtrip van
- Registration
- Local guide
- Event coordinator
- Bag tag
These rates are best treated as convenience-package pricing, not official local tariffs.
Fees, Registration, Guide Requirement, and On-Ground Process
For planning purposes, the most commonly repeated Mt. Mariglem costs in the research are a ₱50 registration fee, a guide fee of around ₱700 per group, and ₱300 to ₱550 for kolong-kolong or trike transport per ride. Those are the figures most useful for budgeting, but they should still be confirmed before your hike because on-ground rates can change.
What you will most likely pay for:
- Registration / entrance: around ₱50 per person
- Guide fee: around ₱700 per group
- Trailhead transport: around ₱300 to ₱550 per ride for kolong-kolong or trike access
A few practical notes matter here:
- The guide fee is often framed for a small group, commonly around up to 5 hikers
- The difference in trailhead transport cost may reflect route variation, negotiation, or whether the driver is only dropping you off versus waiting and returning
- Some public material mentions environmental or tourism fee line items, but no confirmed current tariff sheet was established in the research, so those should not be treated as standard base-rate facts
One hiker account described the on-ground process like this:
- Pay the registration fee
- Fill out a one-page liability form
- Sign in two places
- Decide whether to take the guide
For DIY hikers, reservations and local tourism coordination are repeatedly linked to Municipal Tourism Office – Cabangan and public-facing Mt. Mariglem pages.
Before your trip, check these four items:
- confirm current fees
- confirm guide setup
- confirm trailhead transport price
- confirm reservation rules for your date
DIY vs Joiner Setup: Which Mt. Mariglem Trip Style Fits You Best?
Choosing between a DIY hike and a joiner van for Mt. Mariglem mostly comes down to control versus convenience. A DIY setup usually works better for hikers who want flexibility and can manage the moving parts, while a joiner trip is often the easier choice for solo travelers and first-timers who want a simpler plan from Manila to trail and back.
- Choose DIY if you want more control
- You can set your own departure time from Manila.
- You can adjust your pacing, side stops, and overall flow more freely.
- Shared well, it can lower costs for small groups.
- It works best for barkadas or flexible planners who are comfortable handling the Cabangan commute.
- Know the friction that comes with DIY
- You need to manage bus timing and route choice yourself.
- You need to sort out the Cabangan transfer after arriving.
- You still have to handle registration and local coordination.
- You may need to arrange local transport to the trailhead separately.
- Choose joiner if you want fewer moving parts
- It is usually easier for solo hikers and first-timers.
- A joiner van reduces planning friction and simplifies logistics.
- Public organizer pricing often starts around ₱1,500 to ₱1,600.
- The main caution with joiners
- Inclusions vary a lot, so convenience is the real selling point, not always the lowest price.
For most hikers, DIY is better for flexibility, while joiners are better for ease.
Sample Mt. Mariglem Itinerary for a DIY Day Hike
This Mt. Mariglem Itinerary works best as a planning template, not a fixed operating schedule. Use it to estimate your day, then adjust based on your transport choice, actual registration flow, and whether your group includes a longer river stop after the hike.
Itinerary Table
| Time | DIY day hike flow | Optional joiner-style timing |
|---|---|---|
| 12:00 AM–2:00 AM | Leave Manila by night bus or very early drive | Group assembly / van departure |
| 4:00 AM–6:00 AM | Arrive Cabangan area; transfer to registration | Arrive registration area |
| 6:00 AM–6:30 AM | Kolong-kolong to trailhead if used | Trailhead transfer if included |
| 6:30 AM–9:30 AM | Start hike; target summit window | Similar summit target |
| 9:30 AM–12:30 PM | Descend toward spring/river; lunch or swim window | Similar descent flow |
| 12:30 PM–2:30 PM | River crossings and return logistics | Regroup and return to van |
| 3:00 PM–5:00 PM | Back to highway; bus or drive out | Van departure |
| 9:00 PM–12:00 AM | Manila arrival depending on traffic | Manila drop-off |
Timing varies based on the trailhead ride, group pace, swimming stop, and return traffic.
Budget Breakdown for a Mt. Mariglem Hike
A realistic Mt. Mariglem budget depends on how you get to Cabangan, how many people share the guide and local transport, and whether you go fully DIY or book a joiner slot. The figures below work best as planning ranges for budgeting, not as fixed rates you should assume will stay the same on every trip.
Budget Breakdown Table
| Cost item | DIY estimate | Notes |
|---|---|---|
| Bus fare Manila to Zambales corridor | ₱308 to ₱495 | Sample fares from Avenida–Olongapo and Caloocan–Iba references |
| Rough Cabangan-bound bus estimate | Around ₱370 | Corridor estimate only; not guaranteed |
| Sta. Cruz route benchmark | Around ₱710 | Useful farther-route reference, not the only option |
| Tricycle / kolong-kolong | ₱300 to ₱550 per ride | Varies by route and arrangement |
| Registration fee | ₱50 per person | Recurring figure in the research |
| Guide fee | Around ₱700 per group | Usually shared |
| Food / drinks | 300-500 | Vendors and meals appear in some narratives |
| Water / snacks | 200 | Bring extra because the trail is exposed |
| Joiner fee baseline | Around ₱1,500 to ₱1,600 per person | Inclusions vary by organizer |
| DIY total range | Around ₱1,300 to ₱2,400 per person | Group-of-5 style estimate from the research |
| Joiner total range | Around ₱1,700 to ₱2,300 per person | Practical working range from the research |
| Overnight add-on | +₱500 to ₱3,000+ | Depends on accommodation style |
These are planning ranges, not a government tariff sheet, because local transport charges and joiner package inclusions can vary from one trip to another.
Best Time to Hike Mt. Mariglem and What Rules Matter Most
The best time to hike Mt. Mariglem is generally during the drier part of the year, often November to April, when trails are more manageable and river sections are less likely to be affected by strong runoff. For Mt. Mariglem Zambales planning, that seasonal window is the safer default, while the wetter Habagat and typhoon months on western Luzon bring a higher risk of muddy access, rough river conditions, and weather closures.
The most useful stable guidance is seasonal, but the most important trip decisions are operational. In the research, the repeatedly cited rules were:
- Tuesday to Sunday operations
- 3:00 AM to 6:00 PM operating hours
- 150 climbers per day
- weekends reservation-only
- walk-ins from Tuesday to Friday
- no overnight camping on the summit
- river-area camping may be allowed
These are helpful planning rules, but they should not be treated as permanent law because the same research also notes they are operational details that can change.
What to Wear and Bring for a Mt. Mariglem Hike
- Essentials
- Wear a hat or cap because Mt. Mariglem Trails are known for exposed ridges with very limited shade.
- Use sunscreen and sunglasses to manage glare and heat on open grassland sections, especially once the sun is fully up.
- Bring enough water for a hot climb since the exposed trail can feel draining fast. Do not rely on descent water sources for your ascent needs.
- Choose trail runners or hiking shoes with good grip for the steep start, uneven footing, and occasional dusty or rough trail conditions.
- Pack a basic first-aid kit with blister care, bandages, and personal medication for a practical Mt. Mariglem Hike setup.
- Comfort items
- Bring optional sandals or aqua footwear if your route includes river sections, water crossings, or a post-hike cool-down stop.
- Use a dry bag for your phone, wallet, and power bank in case of wet river sections or splashes on the descent.
- Add light snacks or electrolytes because heat and humidity can wear you down even on a minor climb.
- Weather extras
- Bring a headlamp if you are leaving Manila early and expect a pre-dawn start.
- Pack a light rain shell during unstable weather windows, especially if rain could affect ridge exposure or river conditions.
Safety Reminders Before You Hike Mt. Mariglem
- The main risk on Mt. Mariglem is not technical terrain but heat exposure. The trail is known for open sections with minimal shade, so the sun can drain you faster than the difficulty rating suggests.
- A late start usually makes the climb feel harder. Once the exposed ridge heats up, pacing slows down and hydration becomes more important.
- River conditions can change after rain, so do not assume the water sections will feel the same on every trip. A calm river finish on one day can be murkier or less predictable after recent weather.
- Storm-triggered closures are part of the mountain’s recent planning reality, which is why weather and access checks matter together.
- For emergency planning, the national hotline is 911.
- If a more serious medical issue comes up, the higher-capability hospital reference in the research is President Ramon Magsaysay Memorial Hospital in Iba.
- In practical terms, the most likely evacuation route flows back toward the Cabangan/Iba corridor, not deeper into the mountain area.
Before leaving for Mt. Mariglem:
- check the latest weather and access status
- start early enough to stay ahead of the heat
- carry more water than you think you need
- save the emergency route and nearest hospital reference
Rivers, Scenic Highlights, Food Stops, and Where to Stay
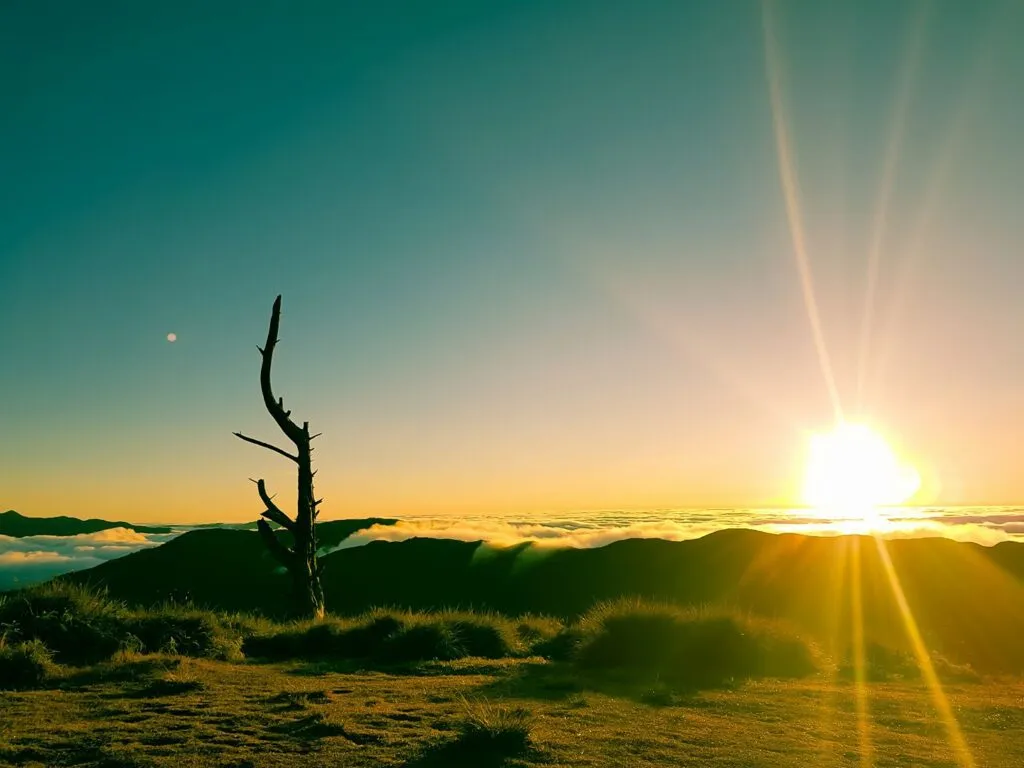
Scenic Highlights
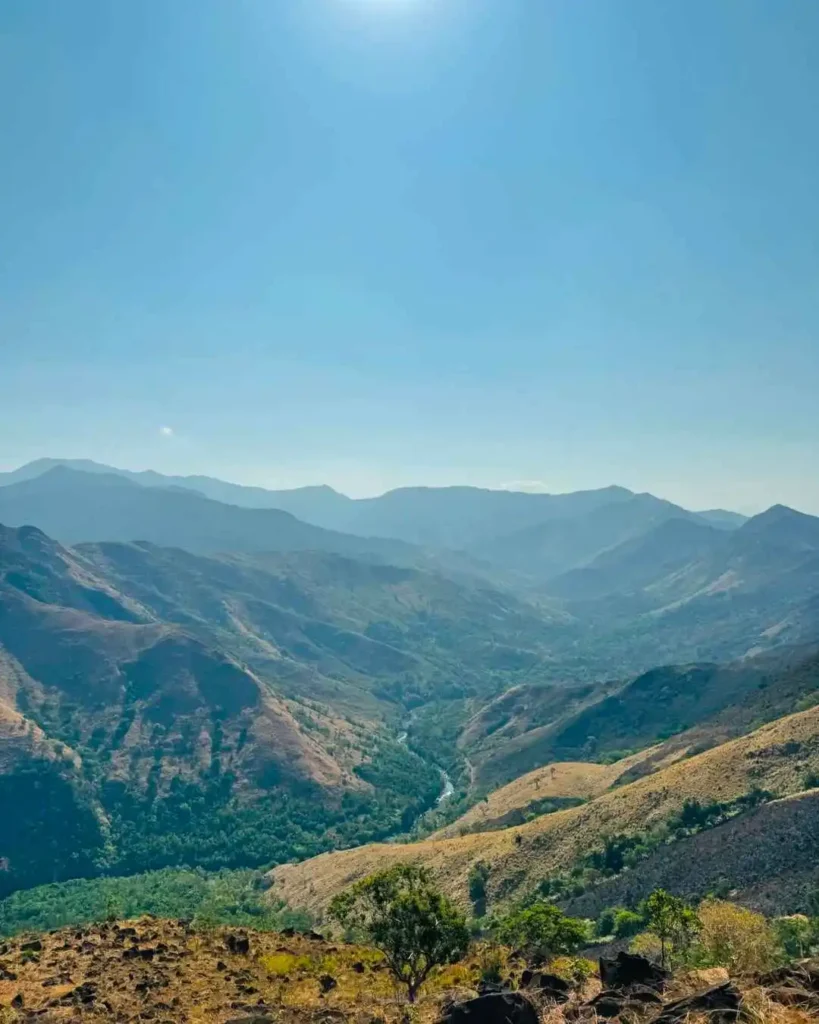
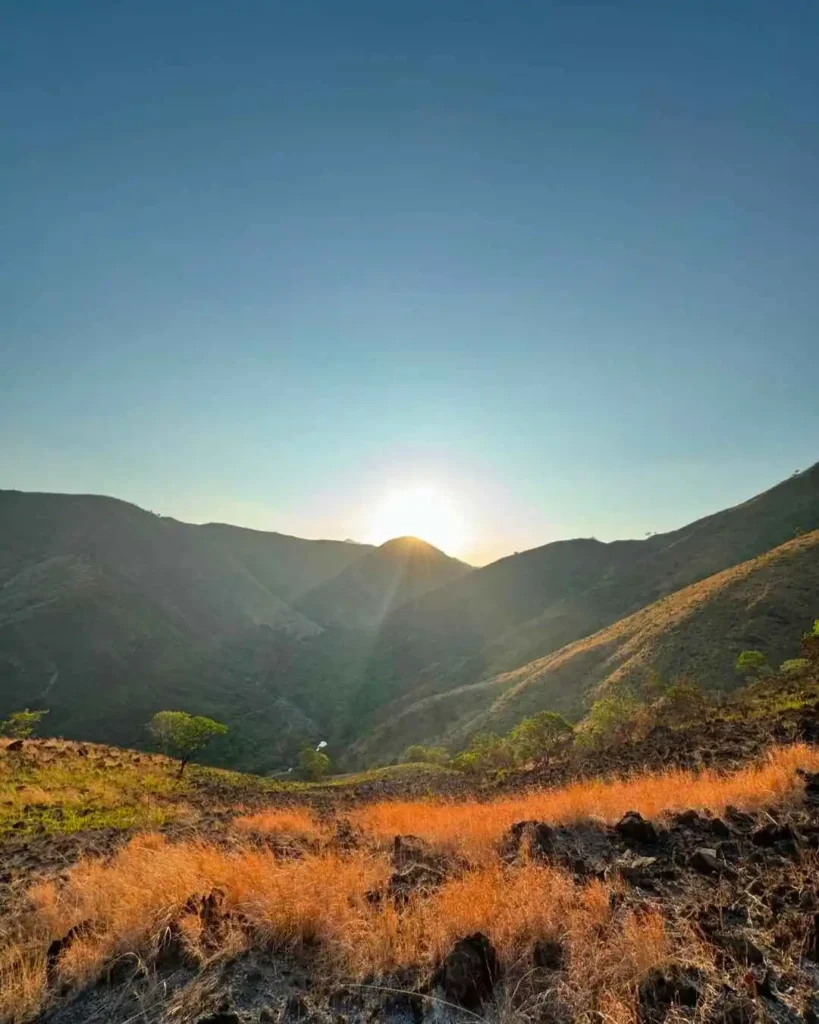
Mt. Mariglem Zambales stands out for its open grassy ridges, wide sky, and coastal-facing views that feel bigger than the mountain’s modest stats suggest. This is the kind of hike where the scenery opens up instead of closing in, which is why many of the strongest Mt. Mariglem Photo angles come from the ridge and summit zones rather than the approach.
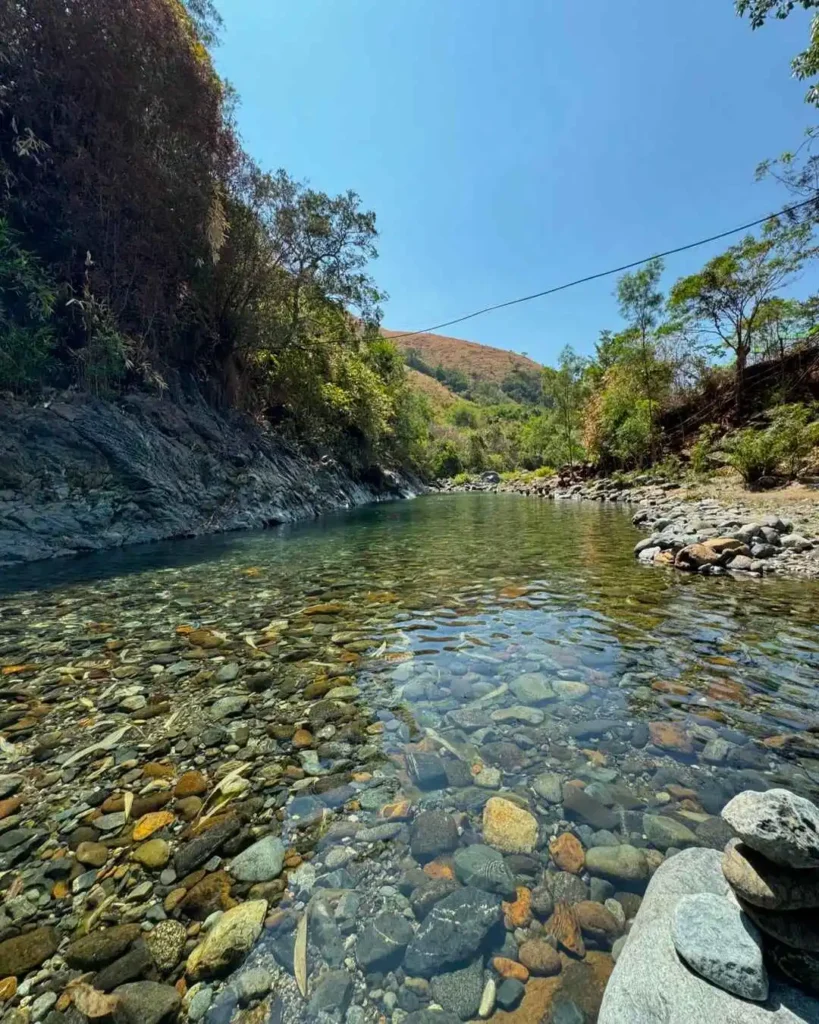
River Experience
The trip can feel fuller than a summit-only hike because the descent may lead toward springs and river sections. The 3 Rivers of Mt. Mariglem repeatedly associated with the area are:
- Agbobotilya
- Maligha
- Nilumabangan
That river finish gives the day a different rhythm. After a hot ridge walk, the water section can feel like a natural cool-down rather than just an added stop.
Food Notes
Food planning here is simple and practical. One narrative mentions cold drinks from a vendor on the descent, while another mentions fish and rice back at the registration area. A Cabangan guide also suggests that lunch may be available in the river section, but it is still smart to bring your own trail food.
Where to Stay
If you want to avoid a rushed same-day return, Casa Angelina in Cabangan is one named option in the research. Broader Cabangan travel material also points to a range of resort stays in town. If you want a stronger service base, more transport options, or an easier overnight setup, Iba or the Subic/Olongapo corridor may be more practical.
Mt. Mariglem FAQs
Is Mt. Mariglem beginner friendly?
Yes, Mt. Mariglem is beginner-friendly for many hikers, especially those with decent fitness and an early start. What usually makes it feel harder is heat and exposure, not technical terrain.
How high is Mt. Mariglem?
Mt. Mariglem is commonly cited at around 573 MASL. That is the figure most often used in planning references.
What is the Mt. Mariglem Difficulty Level?
The commonly cited Mt. Mariglem Difficulty Level is 4/9. It is usually treated as a minor climb, though the exposed trail can make it feel tougher than expected.
How many KM is Mt. Mariglem?
There is no single fixed official number confirmed in the research. Mt. Mariglem KM is best treated as route-dependent, with one account mentioning around 13 km roundtrip if starting from registration.
How long does a Mt. Mariglem hike take?
A common benchmark is 2 to 3 hours to the summit. Full elapsed time often stretches to 4 to 6+ hours once registration, transport, breaks, and river stops are included.
How do I go to Mt. Mariglem from Manila?
The most practical options are provincial bus, private car, or a joiner van. DIY hikers usually travel through the Zambales corridor, then continue by local transport in or near Cabangan.
Do I need a guide for Mt. Mariglem?
A guide is commonly arranged, with around ₱700 per group often cited in the research. Confirm current guide setup before your trip.
How much is the Mt. Mariglem registration fee?
The recurring figure in the research is around ₱50 per person. Treat it as a planning number, then recheck before travel day.
Can I camp on Mt. Mariglem?
The cited guide says summit camping is not allowed, while river-area camping may be allowed. Because that is an operational rule, it is best confirmed before your hike.
What are the 3 Rivers of Mt. Mariglem?
The three rivers repeatedly associated with the area are Agbobotilya, Maligha, and Nilumabangan.
What is the best time to hike Mt. Mariglem?
The broad favorable window is November to April, when conditions are generally drier. Wet-season weather can affect both ridge comfort and river conditions.
Final Planning Tips Before You Hike Mt. Mariglem
- Confirm the current open or closed status before paying for transport.
- Recheck whether weekend reservation rules apply to your date.
- Confirm the actual guide fee and group size setup for your hike day.
- Ask for the latest trailhead transport price before assuming the kolong-kolong rate.
- Leave Manila early enough to stay ahead of the ridge heat.
- Bring extra water, even if your route may include river sections later.
- Keep a time buffer for the river stop and the long return to Manila.
- Message Municipal Tourism Office – Cabangan or the public-facing Mt. Mariglem page before travel day.
Related Zambales Guides
If you are building a bigger Zambales itinerary beyond Mt. Mariglem, you can also check my Mt. Tapulao travel guide if you want a much tougher mountain challenge in the province.
For travelers who want to pair their hike with a scenic water destination, my Mapanuepe Lake travel guide is a useful follow-up, especially if you are planning a longer Zambales weekend.
If you want a broader trip-planning resource, start with my Zambales ultimate travel guide, then browse my list of must-visit Zambales beaches and top Zambales tourist spots.
For a more relaxed beach side trip after the hike, you can also read my Magalawa Island travel guide. If you prefer an inland nature stop instead, check my Coto Mines Zambales travel guide.


Pingback: Discover the Beauty of Mt. Mariglem: A Hiker's Guide to Zambales’ Hidden Gem
Thanks for sharing. I read many of your blog posts, cool, your blog is very good.
Pwede po makahingi number ng local Guide sa Mt Mariglem
Pingback: Mt. Mariglem DIY Guide: 2026 Itinerary & Budget (Zambales) - Dave's Travel Corner