The “Mini-Pulag” Near Metro Manila
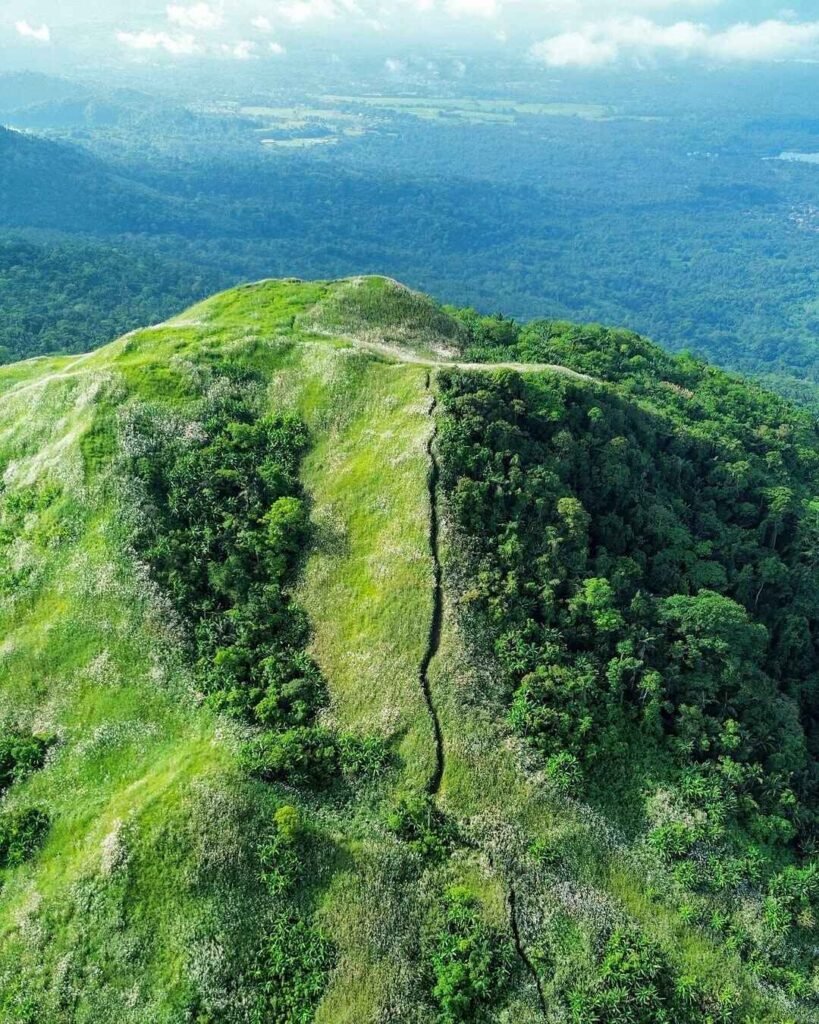
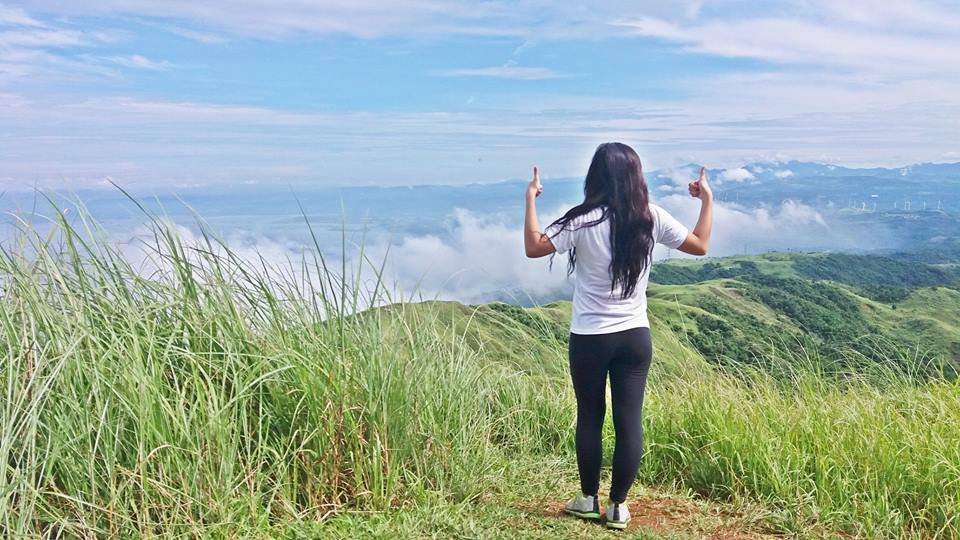
Mt. Sembrano in Pililla, Rizal is known as the “Mini-Pulag” for its rolling Cogon grass slopes and frequent sea of clouds phenomenon overlooking Laguna de Bay. A dormant volcano forming the rim of the Laguna Caldera, this beginner-friendly minor climb offers a 360-degree view of the Southern Tagalog Trilogy and the Metro Manila skyline.
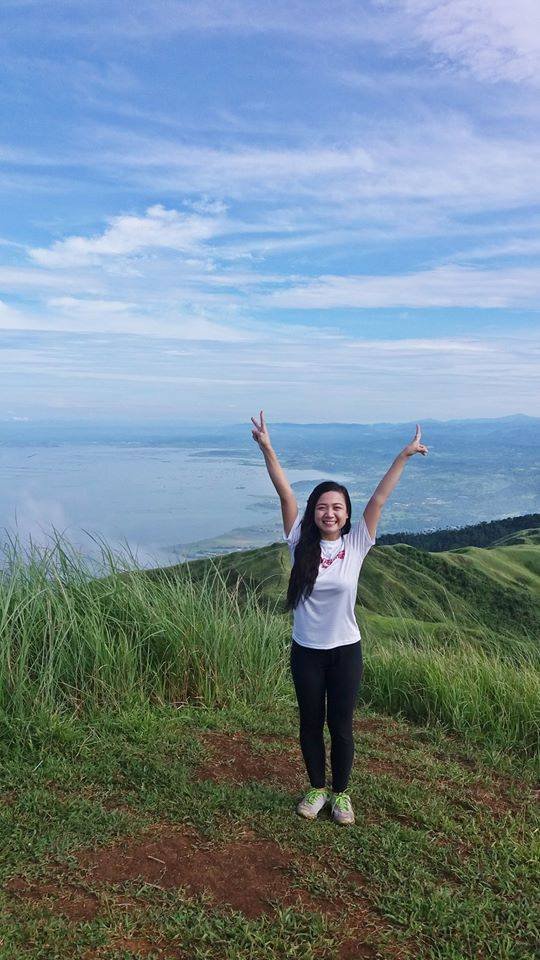
Imagine standing waist-deep in swaying golden grass, watching the sunrise burn off the morning fog to reveal the glittering expanse of the Philippines’ largest lake. You don’t need to endure a ten-hour bus ride to the Cordilleras to experience this. The “Visual Reward” of Mt. Sembrano is immediate and high-yield, earning it the well-deserved moniker of the “Mini-Pulag of Rizal.”
Situated on the Jalajala Peninsula in Barangay Malaya, Pililla, this mountain is distinct from the typical jungle treks of the Sierra Madre. It is technically a dormant volcano, which accounts for the fertile soil of its lower slopes and the distinct heat of its open ridges. Unlike the forested peaks nearby, Sembrano thrusts outward into Laguna de Bay, creating a unique micro-climate that often generates that elusive sea of clouds hikers crave.
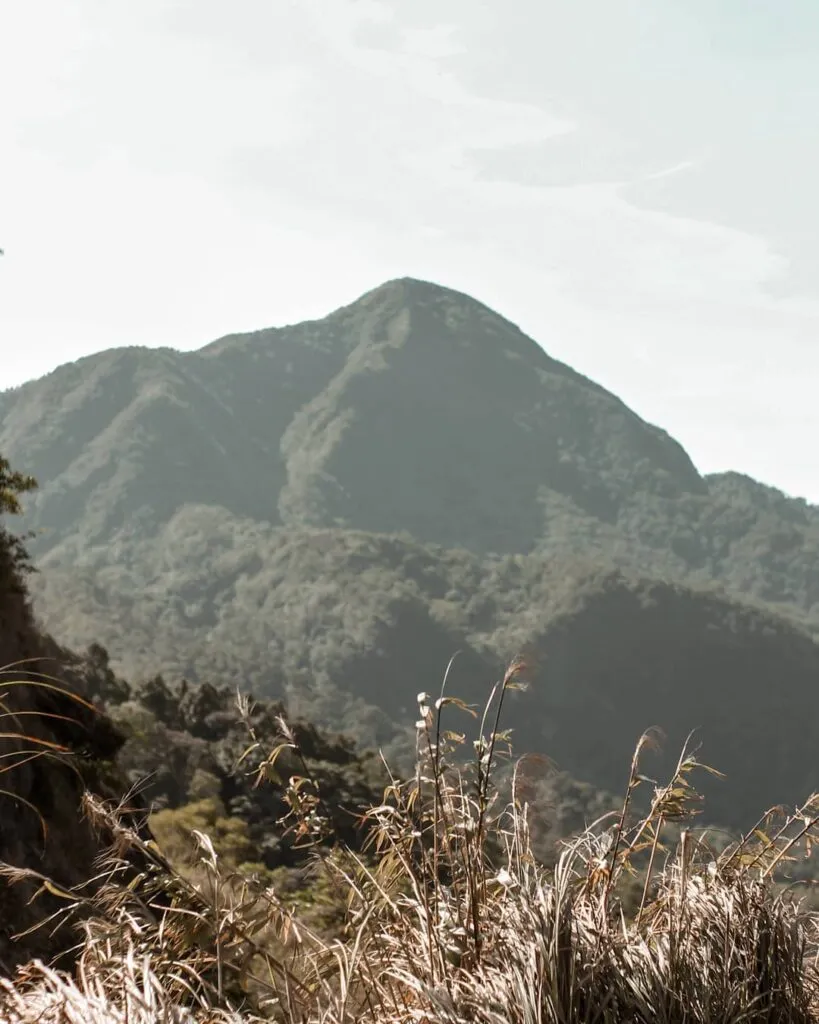
In this updated 2026 Mt. Sembrano hiking guide, we break down the operational realities of the climb. While the views are world-class, the trail is a tale of three zones: a humid agro-forest, a steep woodland assault, and the punishingly exposed grassland. From the 745 MASL summit (South Peak), you command a view that includes Talim Island, the conical Mt. Tagapo, and on clear days, the skyscrapers of Makati and Ortigas bridging the gap between the urban and the wild.
Whether you are a seasoned alpinist looking for a quick training run or a weekend warrior chasing a profile picture worthy of the “Mini-Pulag” tag, this guide covers the updated logistics, the “Walk-in” policy of the Barangay Malaya tourism office, and the honest budget you need for a safe ascent.
Table of Contents
Mt. Sembrano Difficulty & Elevation (Quick Stats)
Mt. Sembrano is classified as a Minor Climb with a difficulty rating of 3/9 to 4/9. The summit (South Peak) stands at approximately 745 MASL (Meters Above Sea Level), offering a beginner-friendly ascent that typically takes 3 to 4 hours to complete back-to-trailhead. It is located in Barangay Malaya, Pililla, Rizal.
Before you pack your bags, it is crucial to understand that “Minor Climb” does not mean “walk in the park.” While the Mt. Sembrano difficulty is manageable for novices, the trail requires decent cardiovascular health. Unlike the cool, shaded paths of other Rizal mountains, the open grasslands here expose you to direct heat, which can spike the perceived difficulty significantly.
There is often confusion regarding the true height of the mountain due to outdated municipal records citing lower figures. However, based on recent GPS readings and alpinist consensus, the South Peak (Summit) sits firmly at 745 MASL (approx. 2,444 feet). This elevation is sufficient to offer a commanding view of the Laguna Caldera rim without the altitude sickness risks associated with major Cordillera climbs.
Here is the technical profile for your Mt. Sembrano hiking guide planning:
| Specification | Details |
| Elevation | 745 MASL (South Peak) |
| Difficulty Level | 3/9 or 4/9 (Minor Climb) |
| Trail Class | 1-3 (Rough road to Grassland scramble) |
| Time to Summit | 1.5 – 2 Hours (Average Pace) |
| Total Hike Time | 3 – 4 Hours (Back-to-Trailhead) |
| Location | Brgy. Malaya, Pililla, Rizal |
| Limatik Presence | None (Rare to Non-existent) |
Insider Insight: The difficulty rating fluctuates based on the weather. I’ve found that hiking this during the “Habagat” season turns the Class 2 forest section into a mud-fest, pushing the difficulty closer to a 4/9. Conversely, a dry season hike is technically easier but thermally exhausting due to the “oven effect” on the cogon slopes.
The trail composition is a “Tri-Zone” ascent. You start on a wide Class 1 rough road used by farmers, transition into a Class 2 rooted forest path, and finally assault the Class 3 open grassland. This variety is exactly why Mt. Sembrano is an excellent training ground for those preparing for major climbs like Mt. Pulag or Mt. Ugo.
Requirements & Booking for Mt. Sembrano (2026)
For 2026, a medical certificate is NOT required for walk-in day hikers at Mt. Sembrano; a signed liability waiver at the registration desk is sufficient. Pre-booking is not mandatory for small groups, making it ideal for spontaneous trips. However, large groups (exceeding 10 participants) must coordinate with the Barangay Malaya Tourism office to ensure guide availability.
Unlike the complex online permitting systems of DENR-protected areas like Mt. Pulag, the Mt. Sembrano hiking guide requirements are delightfully simple. The administration operates under a localized, community-based tourism model managed by Barangay Malaya. This means less red tape for us hikers.
Medical Certification & Entry Policy
For standard DIY day hikes, the Barangay Malaya Tourism office does not strictly enforce the submission of a medical certificate. Upon arrival at the Barangay Hall, you will simply fill out a logbook and sign a waiver.
However, be aware of the “Commercial Loophole.” If you are joining a paid “Joiner Tour” organized by a travel agency, the organizer often mandates a medical certificate for their insurance policy. Always check with your coordinator. As a rule of thumb for any cardio-intensive activity, I always recommend carrying a digital copy of a recent health clearance just in case protocols tighten due to local incidents.
Booking Dynamics: Walk-ins vs. Reservation
Mt. Sembrano is one of the few remaining “Walk-in Friendly” mountains near Metro Manila.
Solo/Small Groups (1-5 pax): You can show up at the Barangay Hall as early as 4:00 AM without a reservation.
Large Groups (10+ pax): You strictly need to message ahead. The supply of accredited local guides is finite. I’ve seen large groups delayed by an hour at the jump-off because all guides were already deployed to early risers.
Verified Contact Channels (2025-2026)
Establishing contact is critical for checking real-time weather, especially during the Habagat season. The mountain is safe from insurgency, but typhoons can cause sudden closures.
Primary Coordinator: Barangay Malaya Tourism Facebook Page (Most responsive for official announcements).
Emergency Contact: (02) 8654-1093 (Pililla Municipal Hall) or dial 16211 for the local grid.
Specific Coordinators: Hikers have successfully coordinated with local guides directly. You can try reaching out to Jefferson Tolsa or Rey Dumail at 0912 933 6861.
Insider Tip: If you plan to hike on a holiday weekend, message the FB page 2 days prior. While walk-ins are allowed, they prioritize those who gave a “heads up,” ensuring you get a guide immediately upon arrival at the barangay.
How to Go to Mt. Sembrano (DIY & Private)
From Metro Manila, take a UV Express from Starmall Shaw or a jeepney from Cubao to Tanay Public Market (the main transport hub). From the market, transfer to a local jeepney with the signage “Malaya” or “Jala-jala” and alight specifically at the Barangay Hall of Malaya. Total travel time is approximately 2.5 to 3 hours.
Reaching the jump-off point for this Mt. Sembrano DIY guide is straightforward, but it requires a critical transfer at Tanay. Unlike Mt. Batulao where the bus drops you near the trail, Sembrano requires a “Gap Transfer” deep into the peninsula.
Commute Options: The Metro Manila Connection
Option A: The Starmall Shaw Corridor (Recommended for Speed) This is the most direct route I use for 4:00 AM start times.
Terminal: UV Express vans stationed at Starmall EDSA-Shaw or the Greenfield District terminal.
Route: These vans utilize the Ortigas Extension, bypassing the inner city traffic of Marikina.
Cost & Time: Fare is approximately ₱100.00 – ₱120.00. Travel time is roughly 1.5 to 2 hours if you depart before dawn (3:00 AM is optimal).
Option B: The Cubao Hub (Accessibility) If you are coming from the north (QC/Caloocan), this is your best bet, though it involves more transfers.
Terminal: Jeepneys and modern E-jeeps are available near Araneta Center Cubao (often along Aurora Blvd near the Telus building).
Route: You usually take a jeep to Antipolo (Cogeo) or Tanay via the Marilaque Highway.
Friction Point: This often involves a “cutting trip” (multiple transfers), adding about 45 minutes to your travel time compared to the Starmall route.
The “Gap” Transfer: Tanay Market to Barangay Malaya
Once you arrive at Tanay Public Market, you are not yet at the mountain. You must close the gap to the peninsula.
The Vehicle: Look for jeepneys with the signboard “Malaya” or “Jala-jala”. Do not take the “Sampaloc” jeeps as they go up to the mountains, not the lake.
The Drop-Off: Tell the driver specifically: “Barangay Hall of Malaya.” Do not just say “Sembrano,” as there are unofficial entry points that bypass the registration area.
Cost: ₱40.00 – ₱60.00 per person.
Travel Time: 30-45 minutes along the scenic lakeside road.
Insider Tip: The return trip is the tricky part. Jeepneys from Brgy. Malaya back to Tanay Market become very scarce after 6:00 PM. If you descend late, you might be forced to hire a “Special” tricycle for ₱300.00 – ₱500.00. Finish your hike and wash up by 5:00 PM to save cash!
Private Vehicle Navigation
For those driving, the road is paved 100% of the way.
Waze/Google Maps Pin: “Barangay Hall of Malaya, Pililla”.
Parking: The barangay compound serves as the primary parking area. If full, village watchmen (Tanods) will direct you to secure private lots nearby.
Fees: Parking ranges from ₱50.00 – ₱100.00 depending on the vehicle type.
Trail Conditions: From Mango Trees to Grassland
The Mt. Sembrano trail consists of three distinct zones: the “Agro-Forest” (wide dirt road), the “Transitional Woodland” (steep, rooted forest), and the exposed “Cogon Grassland” (the scenic highlight). While the path is well-established, the open ridges are prone to high thermal stress, and the forest section becomes slippery mud during the rainy season.
Understanding the “Tri-Zone” terrain is key to managing your energy on this hike. Unlike the consistent gradient of Mt. Maculot, the Mt. Sembrano trail changes rhythm drastically as you ascend.
Terrain Analysis: The Three Zones
Zone 1: The Agro-Forest (The Warm-up) The hike begins on a cemented road that quickly transitions into a wide, rocky dirt path used by local farmers. You will walk through the Manggahan, a sprawling mango orchard. This section is deceptively draining because, although the gradient is gentle, the air here is often still and humid.
Zone 2: The Transitional Woodland (The Ascent) Beyond the campsite, the real work begins. The trail narrows and steepens to a 45-degree inclination. You will navigate a secondary growth forest where tree roots and loose rocks serve as natural steps. This is the most physically demanding section for leg strength.
Zone 3: The Cogon Grassland (The Reward) The canopy breaks abruptly, revealing the open slopes covered in golden Cogon grass (Imperata cylindrica). This is the “Mini-Pulag” vibe everyone comes for. You will traverse the ridge past the North Peak to reach the South Peak (Summit).
Insider Tip: Do not underestimate the Cogon grass. The blades are serrated and can slice skin easily. I highly recommend wearing arm sleeves or a rash guard, even if it’s hot. The “paper cuts” from the grass are stinging souvenirs you don’t want.
Water Sources & Hydration Logistics
Hydration management is binary here: abundant at the base, non-existent at the top.
Manggahan Campsite: This is your last water source. It is located about 45 minutes to 1 hour from the jump-off. There is a reliable spring here, but I usually buy the fresh Buko Juice (₱25.00 – ₱35.00) sold by locals for a natural electrolyte boost.
Summit Status: There is NO water source at the North or South Peaks. You must carry at least 1.5 – 2 Liters from Manggahan to sustain the summit assault and return trip.
Hazards & Connectivity
Limatik Status: Unlike its neighbor Mt. Makiling, Mt. Sembrano is remarkably Limatik-free (Leech-free), even during the wet season. This makes it a stress-free option for those with a phobia of forest leeches.
Thermal Stress: The “Grassland Oven” effect is the mountain’s main hazard. Between 10:00 AM and 2:00 PM, the heat index on the exposed ridge can be dangerous.
Signal Strength: Surprisingly, digital nomads can rejoice. Globe and Smart 4G/LTE signals are robust at the Grassland and Summit due to the direct line-of-sight to Metro Manila and Laguna.
Sample Mt. Sembrano Itinerary (Dayhike & Overnight)
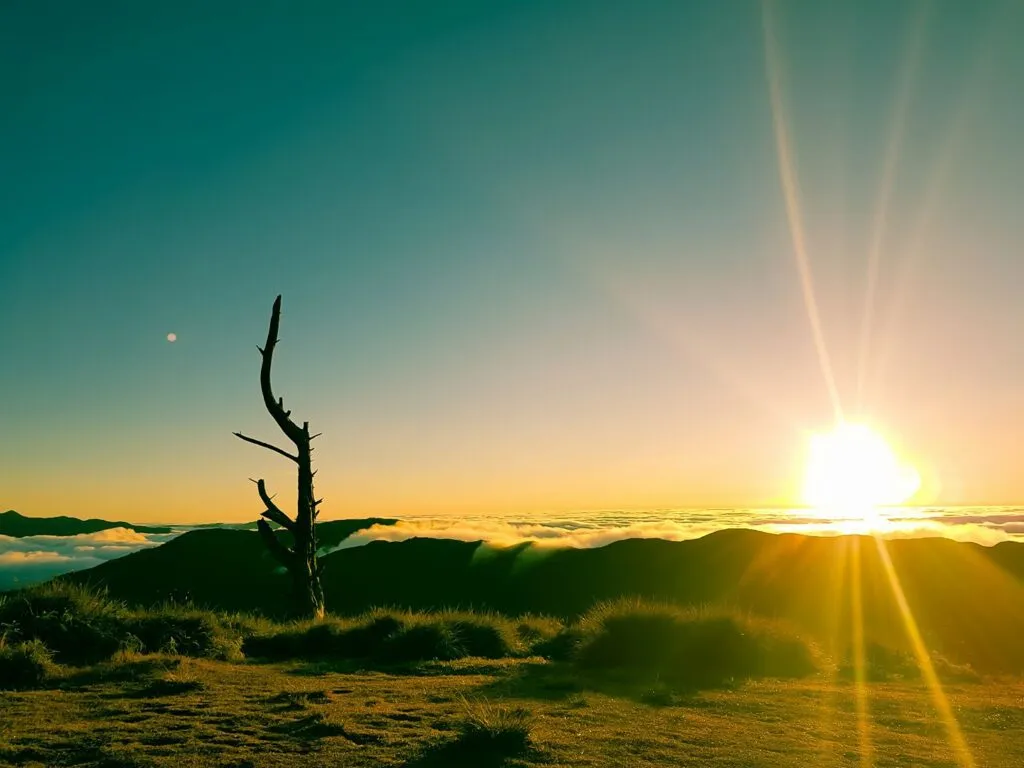
A standard Mt. Sembrano dayhike itinerary typically starts at 4:00 AM from Starmall Shaw to catch the sunrise and potential sea of clouds. Alternatively, the “Afternoon Assault” starting at 2:00 PM allows hikers to witness the sunset over Metro Manila and Laguna de Bay while avoiding the midday heat.
One of the best features of this mountain is its flexibility. Since Barangay Malaya does not enforce strict slot times for small groups, you can tailor your Mt. Sembrano itinerary based on whether you are chasing the “Sea of Clouds” or the “City Lights.”
Option A: The Classic Sunrise Dayhike
This is the most popular schedule. The goal is to reach the Grassland before the sun creates the “Oven Effect.” If you are lucky with the weather, the fog from Laguna de Bay rises to create a sea of clouds rivaling the Cordilleras.
| Time | Activity |
| 03:00 AM | Depart Starmall Shaw (UV Express to Tanay) |
| 04:30 AM | Arrival at Tanay Public Market; Breakfast / Buy Packed Lunch |
| 05:00 AM | Arrival at Brgy. Malaya; Register & Secure Guide |
| 05:30 AM | Start Hike (Headlamps needed for first 30 mins) |
| 06:30 AM | Arrival at Manggahan Campsite |
| 07:30 AM | Summit (South Peak 745 MASL); Photo Ops |
| 09:00 AM | Start Descent; Stop for Buko Juice at Manggahan |
| 10:30 AM | Side trip to Manggahan Falls (Optional/Seasonal) |
| 12:00 PM | Back at Jump-off; Wash up & Lunch |
| 02:00 PM | Board Jeep back to Tanay Market |
Option B: The “Afternoon Assault” (The Insider Choice)
I personally prefer this itinerary. By starting late, you avoid the morning crowds and the midday heat intensity. You hike the open grassland as the sun dips, bathing the cogon grass in golden light. The view of the Metro Manila skyline lighting up at dusk is spectacular.
Warning: You MUST bring a bright headlamp (at least 200 lumens) for the descent.
| Time | Activity |
| 10:00 AM | Depart Manila (Relaxed pace) |
| 01:00 PM | Lunch at Tanay Public Market or Kape Natividad |
| 02:00 PM | Arrival at Brgy. Malaya; Register |
| 02:30 PM | Start Hike |
| 04:30 PM | Arrival at Summit; Wait for Sunset (Golden Hour) |
| 06:00 PM | Start Descent (Night Trek) |
| 07:30 PM | Back at Jump-off; Wash up |
| 08:30 PM | Tricycle to Tanay Market (Jeeps are rare at this hour) |
Insider Logistics Tip: The only downside to the sunset hike is the return transport. Jeepneys from Malaya to Tanay become scarce after 6:00 PM. You will likely need to hire a “Special Trip” tricycle for roughly ₱300.00 – ₱400.00 back to the market. Split this cost with your group to keep the budget intact.
Mt. Sembrano Hiking Expenses & Budget 2026
The estimated safe budget for a DIY Mt. Sembrano dayhike is ₱700 – ₱1,000 per person for a group of 5. This covers roundtrip transport from Manila (approx. ₱400), the Registration Fee (₱100), and a shared Guide Fee (₱500 per group). Solo hikers should expect to pay significantly more unless they join a walk-in group.
Planning your Mt. Sembrano hiking expenses is relatively straightforward since the fees are standardized by the Barangay Malaya Local Government Unit (LGU). The “Scam Factor” here is very low, provided you register at the official Barangay Hall and not with random fixers on the highway.
Mandatory Fees & Policy Analysis
The most critical line item to understand is the Guide Fee.
Rate: ₱500.00 for a Dayhike (Group of 1-5 hikers).
Policy: The ratio is strictly 1 Guide : 5 Hikers. If your group has 6 people, you are technically required to hire two guides (Total: ₱1,000.00).
Solo Hiker Note: If you hike alone, you shoulder the full ₱500.00. I highly suggest waiting at the registration area to “merge” with other small groups to split this cost.
Projected Budget Per Person (Group of 5)
| Expense Item | Est. Cost (PHP) | Notes |
| UV Express (RT) | ₱250.00 – ₱300.00 | Starmall Shaw ↔ Tanay Market |
| Jeepney Transfer (RT) | ₱100.00 – ₱120.00 | Tanay Market ↔ Brgy. Malaya |
| Registration Fee | ₱100.00 | Environmental & Brgy. Fee |
| Guide Fee (Shared) | ₱100.00 | Based on ₱500 rate / 5 pax |
| Shower / Wash-up | ₱20.00 – ₱50.00 | Paid to local households |
| Food / Water | ₱150.00 | Packed lunch + trail food |
| TOTAL | ~₱720 – ₱800 | Safe pocket money: ₱1,000 |
Hidden Costs to Watch For:
Manggahan Entrance: The campsite sits on a private mango orchard. Caretakers often collect a separate ₱10.00 – ₱20.00 fee per head.
The “Special” Tricycle: As mentioned in the logistics section, if you miss the last jeepney (approx 6:00 PM), a tricycle back to Tanay Market will cost ₱300.00 – ₱500.00 per trip (“Pakyaw”).
Buko Juice: It’s hard to resist the fresh coconuts at the campsite. Budget an extra ₱25.00 – ₱35.00 for this.
Insider Tip: Bring small bills (₱20s, ₱50s, ₱100s). The local stores and jeepney drivers often struggle to break a ₱1,000 bill early in the morning. There is NO ATM in Barangay Malaya; the last reliable withdrawal point is Tanay Public Market.
What to Bring: Gear Checklist
Essential gear for Mt. Sembrano includes at least 2 Liters of water (as there is no water source at the summit), robust sun protection (arm sleeves and cap) for the exposed grassland, and trekking poles to navigate the loose, scree-like soil on the descent. A headlamp is mandatory if you are targeting the 4:00 AM sunrise start.
Preparing for this hike requires a balance between lightweight mobility and protection against the elements. Unlike the shaded trails of Mt. Makiling, the Mt. Sembrano hiking guide gear list prioritizes defense against two specific enemies: Solar Radiation and Sharp Grass.
The “Mini-Pulag” Loadout
Hydration System (Critical): Bring a minimum of 2 Liters of water. The Manggahan Campsite (45 mins in) is your last water source. Between the campsite and the 745 MASL summit, you are completely exposed to the heat. I personally carry a bladder for sipping continuously while assaulting the steep Section 2 forest.
Clothing: The “Cogon” Defense Do not hike this in sleeveless tops unless you want battle scars. The Cogon grass in Zone 3 is tall and serrated.
Upper: Drifit shirt with Arm Sleeves or a light Rash Guard.
Lower: Leggings or Trekking Pants. If you wear shorts, expect minor cuts on your shins.
Head: A wide-brimmed hat or cap is non-negotiable for the summit ridge.
Footwear: Grip is King The trail is a mix of sticky mud (forest) and loose, dry gravel (grassland).
Best: Trail Runners with aggressive lugs (e.g., Salomon, Hoka).
Good: Hiking Sandals (Tribu/Sandugo) – just watch out for ants in the mango orchard.
Avoid: Flat-soled sneakers like Converse or Vans. You will slip on the descent.
Safety & Electronics
Headlamp: Required for the 4:00 AM start or the 6:00 PM descent. The trail is pitch black under the mango trees.
Trekking Poles: Highly recommended. The descent from the South Peak is steep and slippery due to loose soil. Poles save your knees.
Whistle & First Aid: Basic safety standard.
The “Cash” Rule
Extra Cash: There are NO ATMs in Barangay Malaya. Bring small bills (₱20, ₱50, ₱100) to pay for the ₱100 Registration, ₱500 Guide Fee, and the ₱25 Buko Juice.
Insider Tip: Pack a small “Summit Towel” or windbreaker. While it’s hot climbing up, the wind coming off Laguna de Bay at the summit can be surprisingly chilly if you are soaked in sweat, especially during the “Ber” months.
Where to Eat & Sidetrips in Tanay/Pililla
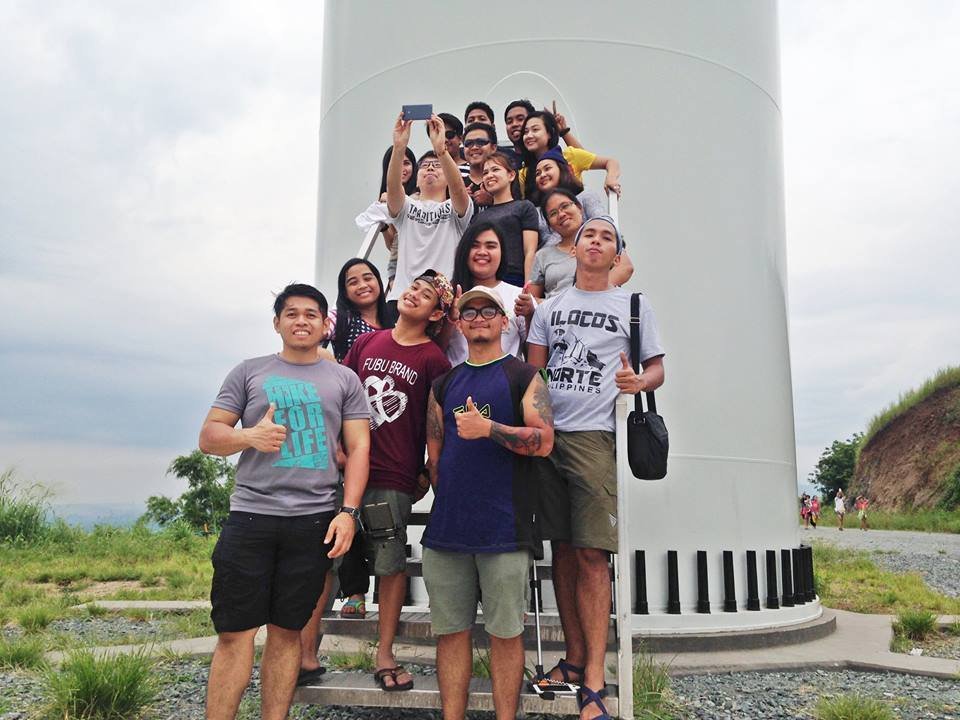
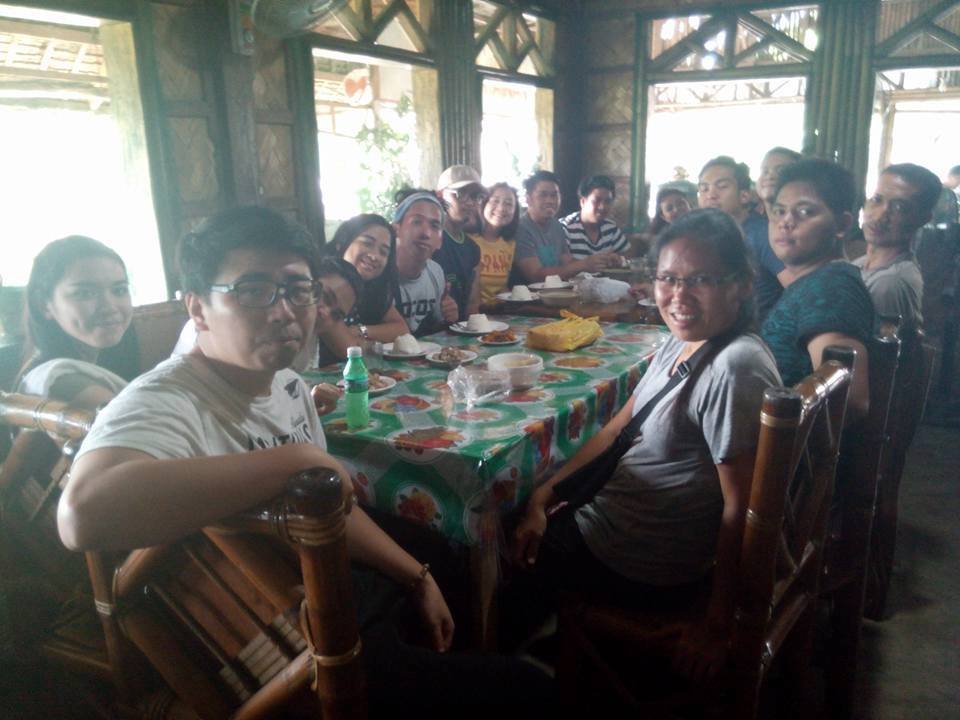
Post-hike dining ranges from budget-friendly Bulalo (approx. ₱150) at Tanay Public Market to scenic dining at Kape Natividad along the Marilaque Highway. The top side trip is the Pililla Wind Farm, located just 20 minutes from the jump-off, offering free entrance and strong breezes for cooling down.
After burning 1,500+ calories on the assault, you have two distinct culinary paths: the “Local Commuter” route or the “Scenic Upgrade.”
The Food: Recovery Meals
The Budget Option: Tanay Public Market If you are taking the jeepney back to Starmall, this is your most logical stop. The market terminal is surrounded by carinderias serving hot, salty Bulalo (Beef Marrow Soup) and Sinigang for around ₱100 – ₱150 per serving. It’s not fancy, but the sodium kick is exactly what your body needs after sweating buckets.
The Upgrade: Marilaque Highway Cafes If you have a private vehicle or extra budget for a tricycle ride up the hills, head to the “Little Baguio” area of Tanay.
Kape Natividad Roastery: Famous for its wood-fired pizza and locally sourced coffee. Expect to spend ₱300 – ₱500 per head. The view of the Sierra Madre here is excellent.
Wyndell’s Al Fresco: Open 24/7. Known for its fusion Filipino comfort food (try the Kansi). It gets very foggy and cold here at night, offering a total contrast to the heat of Sembrano.
The Side Trips
Manggahan Falls (The Quick Rinse) Located just 5-10 minutes from the Manggahan Campsite via a divergent trail. It is a small, multi-tiered cascade.
Status: Seasonal. It reduces to a trickle during summer (March-May).
Best Use: Use it to wash the mud off your hiking shoes and legs before the final walk back to the barangay.
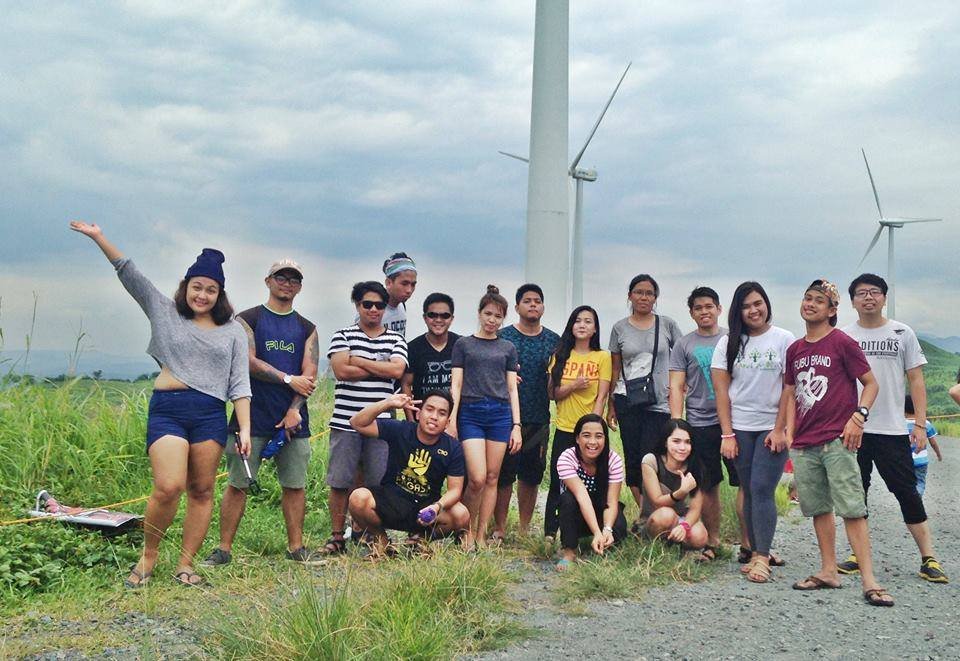
Pililla Wind Farm (The Cool Down) You can see these massive turbines from the summit; visiting them up close is the perfect way to end the day.
Logistics: From Brgy. Malaya, it is a 20-minute tricycle ride.
Entrance Fee: FREE.
Parking Fee: ₱50.00 for motorcycles/tricycles; up to ₱100.00 – ₱250.00 for private vans/cars.
Why go? The wind here is powerful and constant. It’s a great spot to cool down, drink a shake, and watch the sunset over the lake without the hiking effort.
Insider Tip: If you hire a tricycle from Brgy. Malaya to the Wind Farm, negotiate a “Wait and Return” rate (approx. ₱300 – ₱400). Getting a ride out of the Wind Farm back to the highway can be difficult if you don’t have a service waiting.
Frequently Asked Questions
Mt. Sembrano is widely considered beginner-friendly with a 3/9 difficulty rating, but it requires significant cardiovascular endurance due to the continuous uphill assault. Solo hiking is allowed, but you must pay the full ₱500 guide fee. The trail is declared safe from insurgents, and secure parking is available at the Barangay Hall.
Here are the most common questions we get from first-timers planning their Mt. Sembrano DIY trip:
1. Is Mt. Sembrano strictly for experienced hikers?
No, it is accessible to novices, but “beginner-friendly” does not mean “easy.” The trail is non-technical (no ropes required), but the 45-degree inclination in the forest section will test your leg strength. If you lead a sedentary lifestyle, expect to take frequent breaks. The heat in the open grassland is often the biggest challenge, not the terrain itself.
2. Are there toilets on the trail?
Sanitation facilities are limited.
Jump-off: Clean, paid toilets are available at the Barangay Hall and nearby houses (₱10 – ₱20).
On-Trail: There is a primitive latrine near the Manggahan Campsite (maintained by local families), but do not expect flush toilets.
Summit: There are NO toilets at the peak. Practice “Leave No Trace” principles strictly.
3. Is the trail safe from insurgents (NPA)?
Yes. While parts of Rizal were historical hotspots decades ago, Mt. Sembrano has been declared cleared and safe for tourism for many years. The LGU and Philippine Army maintain a stable peace and order situation. The mandatory guide policy adds an extra layer of security for all visitors.
4. Can I hike solo?
Yes, solo joiners are welcome. However, the ₱500.00 Guide Fee is per group (1-5 pax). If you hike alone, you must shoulder the full cost.
Insider Tip: If you want to save money, arrive at the Barangay Hall early (around 4:30 AM) and ask the registration staff if you can merge with another small group to split the fee.
5. Is there parking for private vehicles?
Yes. You can park directly inside the Barangay Malaya Hall compound.
Security: It is well-lit and guarded by Tanods (village watchmen).
Capacity: If the main compound is full, designated staff will direct you to nearby private lots.
Fee: Expect to pay ₱50.00 for motorcycles and ₱100.00 for cars.
Conclusion
Completing the Mt. Sembrano dayhike offers one of the most accessible “sea of clouds” experiences near Metro Manila. As you enjoy the 360-degree views of Laguna de Bay from the 745 MASL summit, strictly adhere to Leave No Trace (LNT) principles—specifically avoiding smoking on the dry cogon slopes to prevent grassfires.
The beauty of Mt. Sembrano lies in its ability to surprise. What starts as a humid walk through a mango orchard transforms into a world-class alpine experience at the summit. Standing at the South Peak, looking out over Talim Island and the Pililla Wind Farm, it is easy to see why this is the preferred training ground for aspiring mountaineers. It delivers the “Mini-Pulag” promise without the ten-hour bus ride.
However, the accessibility of this Mt. Sembrano hiking guide comes with a responsibility. The ecosystem here is fragile, particularly the grassland.
The “Leave No Trace” (LNT) Covenant
As visitors to Barangay Malaya, we must ensure the mountain remains pristine for the next generation of hikers.
No Smoking on the Ridge: This is critical. During the dry months (March-May), the Cogon grass becomes tinder-dry. A single cigarette butt can trigger a massive grassfire that endangers local farmers and fellow hikers.
Pack It In, Pack It Out: There are no trash bins at the summit. If you bring a wrapper up, you must bring it down. I often carry a small Ziploc specifically for my trail food wrappers.
Respect the Community: We are guests in Pililla. Keep noise levels down when passing through the residential areas near the jump-off, especially during the 4:00 AM call time.
We hope this guide helps you navigate the trails of Rizal safely and responsibly. The mountains are calling—answer them with preparation and respect.
Have you conquered the “Mini-Pulag”? Tag us in your summit photos on Instagram and TikTok using #LakbayPinas for a chance to be featured in our next adventurer spotlight!
Explore More: Rizal’s Hiking & Travel Gems
Looking for your next adventure after conquering Mt. Sembrano? Whether you are chasing more “Sea of Clouds” or looking for side trips around the Tanay transport hub, check out these curated guides from LakbayPinas to complete your Rizal itinerary.
For the “Sea of Clouds” Chasers
If you loved the foggy grassland of Mt. Sembrano, these destinations offer similar breathtaking views with varying difficulty levels.
Top Picks: 10 Must-Visit Sea of Clouds in Tanay, Rizal (2025 Guide)
The “No-Hike” Alternative: Ultimate Guide to Treasure Mountain in Tanay, Rizal – Perfect if your legs are too sore from Sembrano but you still want the view.
Plan Your Side Trips (Tanay & Pililla)
Since the jump-off point for Mt. Sembrano is accessible via Tanay, maximize your gas money by visiting these nearby attractions before or after your hike.
The Full List: 14 Must-Visit Tanay, Rizal Tourist Spots (2025 Guide)
For Relaxation: Ultimate Guide to Regina Rica, Tanay – A peaceful pilgrimage site ideal for cooling down after a strenuous climb.
More Beginner-Friendly Climbs
Ready to graduate from Mt. Sembrano? Or looking for something easier?
Hike List: Beginner-Friendly Hikes: Top Minor Climb Mountains
Province-Wide Guide: 17 Must-Visit Rizal Tourist Spots: The Ultimate Guide