Beginner Friendly Hikes | Difficulty Level 1-4

Facebook
Instagram
Pinterest
Mt. Daraitan

Best Beginner Friendly Hikes in the Philippines (Minor Climb Guide) 2026

Start Your Journey Here

There is a specific kind of magic that happens when you reach your first summit. It isn’t just about the view; it’s the feeling of overcoming the fear of the unknown, the burn in your legs turning into pride, and the realization that you are stronger than you thought. But let’s be real: not everyone is ready for a multi-day expedition just yet.

If you are looking for beginner friendly hikes in the Philippines, you don’t need to start with Mt. Apo or the jagged ridges of Mt. Guiting-Guiting. The Philippines is blessed with hundreds of “Minor Climbs”—accessible mountains that offer breathtaking rewards without requiring technical skills or heavy camping gear.

Whether you are chasing the famous sea of clouds in Tanay, the rolling pine forests of the Cordilleras, or the volcanic landscapes of Central Luzon, this guide focuses strictly on Minor Climbs (Difficulty 1-4/9). These trails are perfect for weekends, requiring only basic fitness and a sense of adventure. Let’s get you to the top—safely.

Batolusong tanay rizal tourist spot

What is a “Beginner Friendly” Hike? (Definitions)

If you are new to the hiking community, the terminology can sometimes feel intimidating. You might hear terms like “assault,” “technical,” or “traverse” and wonder if you are signing up for a fun weekend or a survival test.

Before you pick a mountain, it is crucial to understand two things: the Difficulty Rating (how tiring it is) and the Trail Class (how rough the path is). Let’s demystify these terms so you can choose a hike that matches your comfort level.

A. “Minor Climb” vs. “Major Climb”: What’s the Difference?

In the Philippines, most mountaineering groups use the Pinoy Mountaineer Difficulty Scale, which rates mountains from 1/9 (Easiest) to 9/9 (Extremely Difficult).

  • Minor Climb (1/9 to 4/9): These are mountains that can usually be climbed in a single day (Day Hike). The trails are manageable, and you don’t need technical skills like roping.

  • Major Climb (5/9 to 9/9): These often require multi-day camping, heavy packs, and involve very steep or technical terrain (e.g., Mt. Apo, Mt. Guiting-Guiting).

Quick Definition: Minor Climb

A Minor Climb in the Philippines is a mountain with a difficulty rating of 1/9 to 4/9.2 These trails are generally non-technical, require minimal equipment, and can be completed in 2–6 hours, making them perfect for beginner friendly hikes and weekend warriors.

B. Understanding Trail Classes (Do I need to use my hands?)

While “Difficulty” tells you how hard you will breathe (cardio), Trail Class tells you how much you will need to use your body and hands to move forward.

  • Difficulty = Endurance (Leg power)

  • Trail Class = Technicality (Hand-eye coordination)

Here is a simple guide to what the ground under your feet will look like:

Trail Class Description What to Expect
Class 1 The Walk in the Park Paved roads or very wide, flat paths. These are often accessible even by vehicle or bike. (e.g., Treasure Mountain)
Class 2 The Established Path Clear dirt paths with gentle slopes. You can walk upright without using your hands. (e.g., Mt. Gulugod Baboy)
Class 3 The Rugged Trail Uneven terrain with rocks and exposed roots. You might need to hold onto a branch or rock occasionally for balance. (e.g., Mt. Ulap)
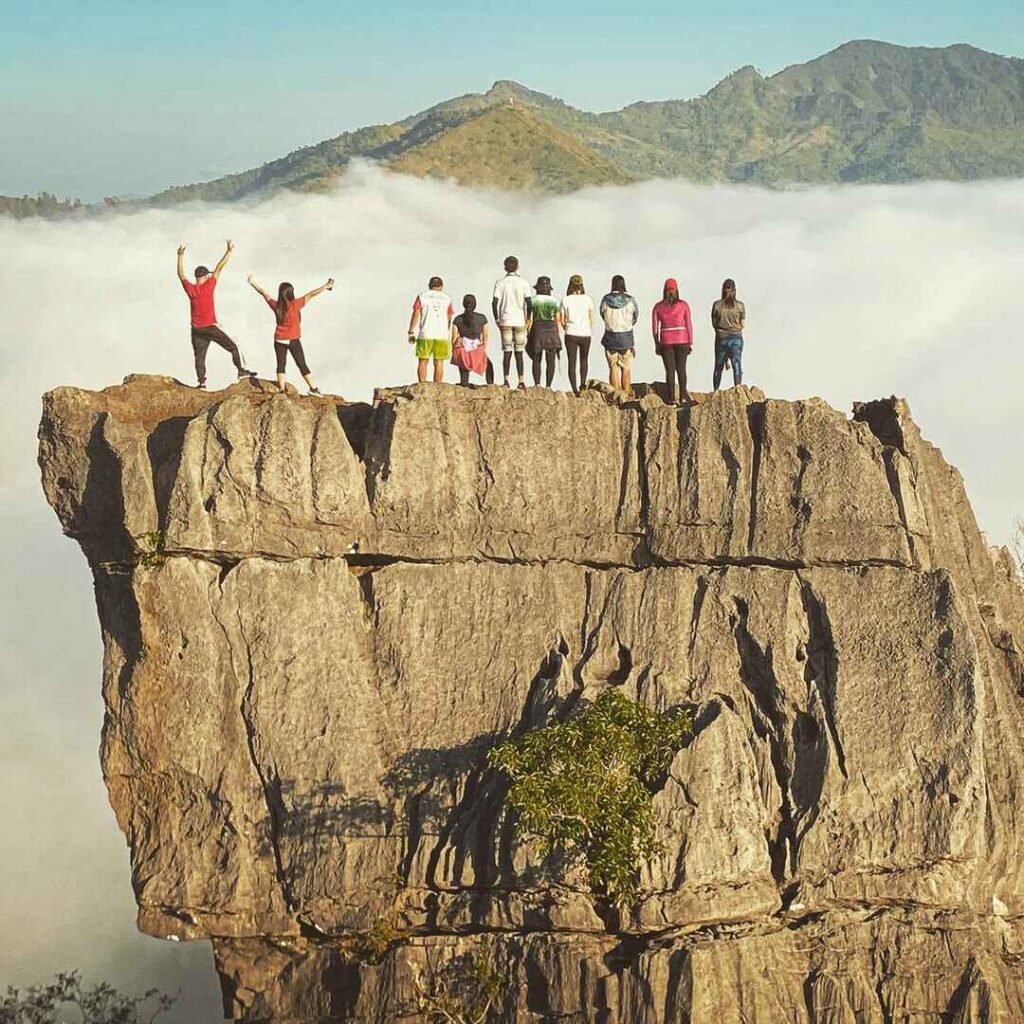
Class 4 The Scramble Steep sections involving large rocks or roots. You will need to use your hands to pull yourself up (“three points of contact”). (e.g., Mt. Daraitan)

📝 Editor’s Note: Do not be scared of a Class 4 trail! Mountains like Mt. Daraitan or Mt. Batulao have Class 4 sections (rock scrambling), but they are still considered Beginner Friendly Hikes because the guides are helpful and the scary parts are short. However, you should be physically fit and okay with getting your hands (and clothes) a little dirty!

beginner friendly hikes in the Philippines

Beginner Friendly Hikes in Rizal & Tanay (The “Sea of Clouds” Capital)

If you only have a single day or even just a morning to spare, Tanay and Rizal are your best bet. Located just 1.5 to 2 hours away from Metro Manila, this area has earned the title of the “Sea of Clouds Capital” because of its unique geography.

These mountains are perfect for impulsive weekend trips—accessible, affordable, and packed with scenic rewards.

Treasure Mountain (Tanay)

  • Tagline: “The No-Hike Hike”

  • Difficulty: 1/9 (Walk in the Park)

  • Best For: Families, seniors, and non-hikers who want the view without the sweat.

True to its reputation, Treasure Mountain allows you to witness a majestic sea of clouds without actually climbing a mountain. You can drive a private vehicle or take a tricycle all the way up to the campsite. The “hike” is literally just walking from the parking lot to the viewing deck. It offers an unobstructed view of the Sierra Madre ranges.

treasure mountain

Mt. Kulis & Noah’s Ark (Tanay)

  • Tagline: “The Instagram Favorite”

  • Difficulty: 2/9 (Minor Climb)

  • Best For: “Awra” hikes and camping.

Mt. Kulis is arguably the most photographed mountain in Tanay. It is designed for the modern adventurer, featuring built-in photo spots like the “Spider Web,” the hanging bridge, and the famous “Noah’s Ark” limestone formation (which is actually a separate peak but part of the circuit). The trail is open and grassy, making it very manageable even if you haven’t exercised in months.

mt. kulis tanay rizal

Mt. Batolusong & Kay-Ibon Falls (Tanay)

  • Tagline: “Rolling Hills & Grasslands”

  • Difficulty: 3/9 (Minor Climb)

  • Best For: Those who love “Batanes-like” scenery.

Before Mt. Kulis became famous, Mt. Batolusong was the go-to for beginners. The trail cuts through rice fields before ascending to “Duhatan Ridge,” where you are greeted by endless rolling green hills. It is breezy, open, and offers a stunning view of Laguna de Bay. After the summit, you can take a side trip to Kay-Ibon Falls to wash off the dust.

mt. Batolusong

Nagpatong Rock Formation (Tanay)

  • Tagline: “The Limestone Adventure”

  • Difficulty: 4/9 (Technical but Short)

  • Best For: Thrill-seekers who want a cool profile picture.

Unlike the rolling hills of Batolusong, Nagpatong is all about vertical limestone cliffs. It is not a traditional mountain summit but two towering rock structures facing each other. While rated 4/9, the difficult part is short—you will climb bamboo ladders and scramble up rocks to get to the top of the formation. It’s an adrenaline rush that is totally safe with a guide

nagpatong rock formation

Masungi Georeserve (Baras)

  • Tagline: “The Premium Ecotourism Experience”

  • Difficulty: Managed Trail (Discovery Trail)

  • Best For: Groups who want a structured, safe, and educational adventure.

Masungi Georeserve is in a league of its own. It is a conservation area that strictly limits visitors. You won’t be hiking on mud; instead, you will traverse hanging bridges, rope courses (like the famous “Sapot” or spider web), and scenic walkways built above the limestone karsts. Important: You cannot walk in here. You must book weeks or months in advance via their website.

masungi georeserve photos

Mt. Daraitan & Tinipak River (Tanay)

  • Tagline: “The Challenging Favorite”

  • Difficulty: 4/9 (Steep Assault)

  • Best For: Beginners who are physically fit and want a full-body workout.

Let’s be honest: Mt. Daraitan will test you. It is often called the “Unli-Assault” because the trail goes straight up. However, it remains a favorite for beginners because the reward is twofold: a dramatic limestone summit view and a refreshing swim in the pristine white rocks of Tinipak River afterwards. If you choose this as your first hike, prepare for a leg day!

More Options: The Best Views in Tanay

Can’t get enough of the clouds? Tanay has over a dozen peaks that offer this view. We have compiled a specific list for cloud chasers.

mount daraitan hike tanay rizal tourist spot

Beginner Friendly Hikes in South of Manila (Batangas & Laguna)

If you prefer riding a bus over driving a car, head South. Batangas and Laguna are home to some of the most “classic” hiking destinations in the country. These mountains have been training grounds for Filipino mountaineers for decades, offering accessible jump-off points and distinct landscapes that differ from the jungle vibes of Rizal.

treasure mountain

Mt. Batulao (Nasugbu, Batangas)

  • Tagline: “The Jagged Peaks & Rolling Slopes”

  • Difficulty: 4/9 (Minor Climb)

  • Best For: Hikers who love open ridges and dramatic scenery.

Mt. Batulao is famous for a reason: it is undeniably beautiful. The mountain is shaped like a saw-tooth, with a series of jagged peaks that look intimidating but are quite accessible.

  • The Trails: You have two options here. The “New Trail” is easier and mostly involves walking on open, grassy ridges. The “Old Trail” is more adventurous, featuring rope segments and rock scrambling. For beginners, we recommend taking the New Trail up and down, or doing a “Traverse” (Old to New) if you have a guide.

  • The Challenge: It is an “open trail,” meaning there is zero tree cover. It gets extremely hot by midday, and the trail becomes very dusty during summer.

mt kalisungan photo

Mt. Kalisungan & Bunga Falls (Calauan, Laguna)

  • Tagline: “The Historic Mountain”

  • Difficulty: 3/9 (Minor Climb)

  • Best For: History buffs and those who want a waterfall side trip.

Less crowded than Batulao, Mt. Kalisungan in Laguna offers a quieter escape. It is historically significant as it was a final stronghold for retreating Japanese soldiers during WWII.

The trail passes through fruit plantations (expect to see rambutan and lanzones in season) before opening up to tall grasslands. The summit offers a unique vantage point: you can see the 7 Lakes of San Pablo and the towering Mt. Banahaw.

  • The Reward: After the sweaty hike, the trail leads you down to Bunga Falls, a twin waterfall where you can swim and cool off before heading back to Manila.

Beginner Friendly Hikes in Central Luzon (Zambales, Bataan, Nueva Ecija)

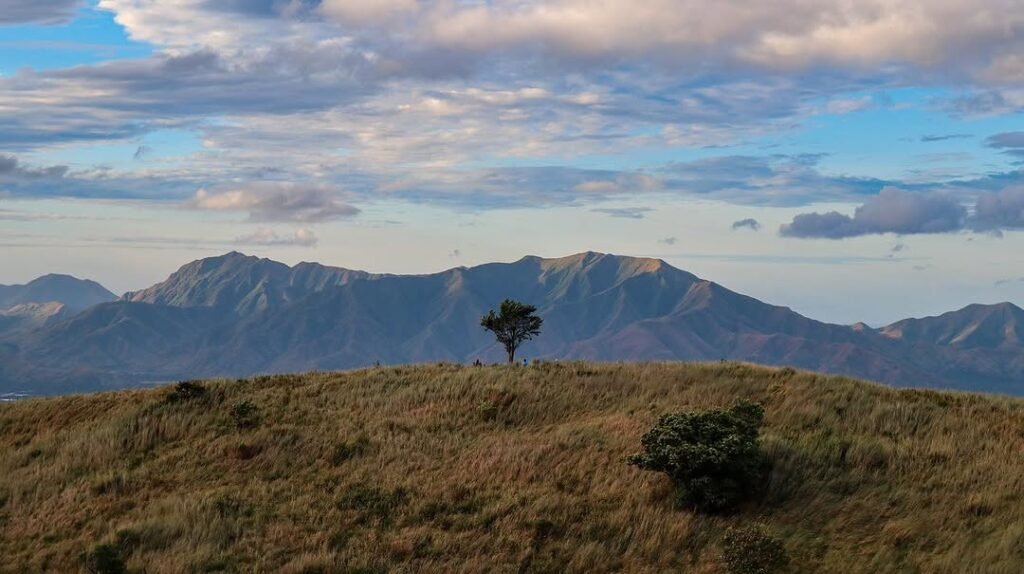
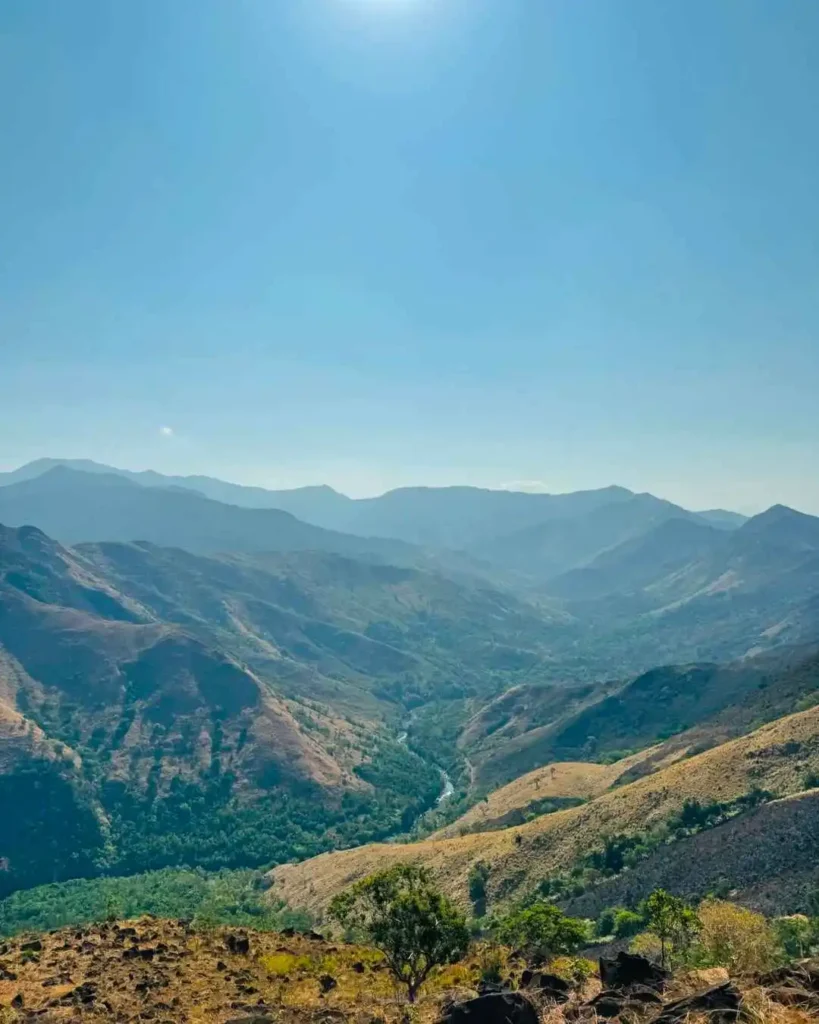
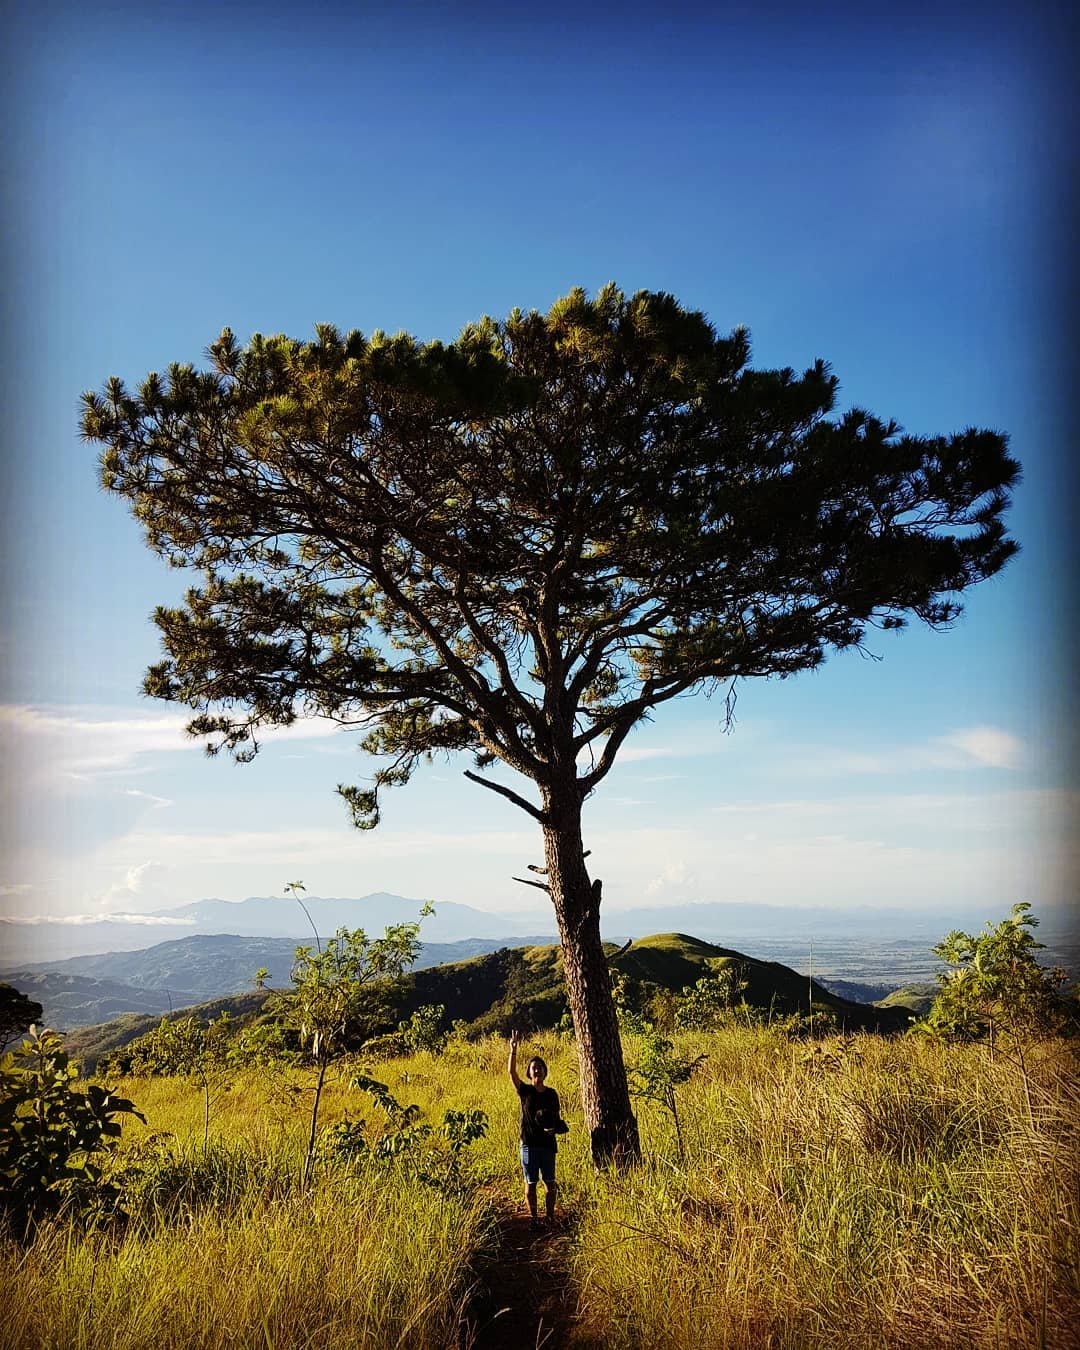
If you are looking for scenery that is vastly different from the tropical rainforests of the South, head North to Central Luzon. This region is defined by its volcanic history—expect wide open trails, lahar landscapes, and pine trees.

⚠️ Pro Tip: Most mountains in Zambales and Nueva Ecija are “open trails” with very little shade. These hikes are best done very early in the morning (start trekking by 5:00 AM) to avoid the scorching midday sun.

Mt. Kapigpiglatan (Zambales)

  • Tagline: “The Rising Star of Zambales”

  • Difficulty: 3/9 (Minor Climb)

  • Best For: Hikers looking for “Mindanao vibes” near Manila.

Mt. Kapigpiglatan has quickly become a favorite because its landscape looks surprisingly like the famous ridges of Bukidnon in Mindanao. The trail features gentle, rolling slopes covered in vibrant green cogon grass. It’s a very relaxing hike visually, although the lack of trees means you are fully exposed to the sun.

mt. kapigpiglatan summit

Mt. Mariglem (Zambales)

  • Tagline: “The Hot Challenge”

  • Difficulty: 3/9 (Minor Climb)

  • Best For: Hikers who want a raw, less commercialized experience.

Located in Iba, Zambales, Mt. Mariglem is a test of heat tolerance. The trail is relatively short, but the “assault” is steep and dusty. The charm of this mountain lies in its rustic campsite, which features a distinct bamboo hut (kubo) often used as a resting spot or photo background. It offers a commanding view of the West Philippine Sea.

mt. mariglem summit

Mt. Pinatubo (Zambales/Tarlac)

  • Tagline: “The Beautiful Disaster”

  • Difficulty: 2/9 (Long Walk)

  • Best For: Adventure seekers who want a mix of off-road driving and hiking.

Mt. Pinatubo is world-famous for its crater lake, which changes color from turquoise to deep blue depending on the season. This isn’t just a hike; it’s a full tour.

  • The Experience: The adventure starts with a thrilling 1-hour 4×4 jeep ride across the vast lahar desert (crow valley).

  • The Hike: After the ride, it’s a roughly 2-hour trek to the crater. The trail is mostly flat and follows a riverbed, making it technically easy, though walking on sand and rocks can be tiring for your calves.

interesting facts about mount pinatubo

Mt. 387 & Aloha Falls (Nueva Ecija)

  • Tagline: “The Chocolate Hills of the North”

  • Difficulty: 2/9 (Minor Climb)

  • Best For: Eco-conscious travelers and groups.

Also known as “Batong Amat,” Mt. 387 got its nickname because the surrounding hills resemble the Chocolate Hills of Bohol during the dry season.

  • The “LNT” Twist: This is one of the few mountains that actively encourages tree planting. You might be asked to bring a seedling up!

  • The Fun Part: You don’t have to walk down! There is an option to ride a “Kuliglig” (monster truck/tractor) back to the jump-off point, which is an adventure in itself. Afterward, you can cool down at the nearby Aloha Falls.

Nueva Ecija Tourist Spot mt 387 lover tree photo

Beginner Friendly Hikes in Cordilleras (Cool Weather Hikes)

If you hate the heat and humidity of lowland hiking, the Cordillera Administrative Region (CAR) is your sanctuary. Here, the trails are lined with fragrant pine trees, the air is crisp (often dropping to 10-15°C), and you are literally walking above the clouds.

⚠️ Travel Note: These hikes require a longer travel time (5–6 hours to Benguet, 10–12 hours to Mt. Province) from Manila, but the cool weather makes every hour of the bus ride worth it.

mt. ulap Gungal rock

Mt. Ulap (Itogon, Benguet)

  • Tagline: “The Perfect Day Hike”

  • Difficulty: 3/9 (Minor Climb)

  • Best For: Everyone. It is arguably the most popular day hike in Luzon.

Mt. Ulap is the gold standard for beginner hikes in the North. It offers the perfect mix of manageable terrain and world-class scenery. You will walk along a 9-kilometer ridge filled with cows, rolling hills, and pine forests.

  • The Highlight: Gungal Rock, a magnificent slab of rock jutting out from the mountainside. It creates a stunning optical illusion of being on a cliff edge.

  • The Reality Check: Because it is so popular, expect lines. It is not uncommon to wait 30 minutes to 1 hour just to take a photo at Gungal Rock on weekends.

Mt. Kupapey and Mt. Fato

Mt. Kupapey & Mt. Fato (Bontoc, Mt. Province)

  • Tagline: “The Maligcong Twin Hike”

  • Difficulty: 3/9 (Combined)

  • Best For: Weekend warriors willing to travel further for culture and rice terraces.

Located in Maligcong, Bontoc, this is a “two-for-one” deal. Since the travel time is long, hikers usually do both peaks to maximize the trip.

  • Mt. Fato (Sunset): Usually hiked in the afternoon on Day 1. It’s a short trek through a rockier pine forest leading to a rock formation perfect for watching the sunset.

  • Mt. Kupapey (Sunrise): Hiked early morning on Day 2. The summit offers the best front-row seat to the Maligcong Rice Terraces. Seeing the sun rise over the golden-green paddies is a core memory you won’t forget.

Mt Camisong Forest Park

Mt. Camisong Forest Park (Benguet)

  • Tagline: “The Relaxed Pine Forest”

  • Difficulty: 1/9 (Walk in the Park)

  • Best For: A chill side trip after visiting Baguio City.

If Mt. Ulap feels too long (it takes 4-6 hours), Mt. Camisong is the “lite” version. Located near the Ambuklao Dam, this trail is incredibly gentle.

  • The Vibe: Parts of the trail are paved, and the incline is very gradual. It feels more like a Sunday morning stroll through a European forest than a tropical hike. It is perfect for testing your layering system (jackets/windbreakers) without breaking a sweat.

How to Prepare for Beginner Friendly Hikes

Don’t let the term “Beginner Friendly Hikes” fool you. In the Philippines, even a 2/9 difficulty mountain usually involves heat, humidity, and steep assaults. You don’t need to be a marathon runner, but you shouldn’t walk straight off the couch and onto the trail, either.

Here is how to condition your body and mind at least two weeks before your trip.

Quick Answer: How to Prepare To prepare for a beginner hike, focus on cardio and leg strength at least 2 weeks prior. Do 30 minutes of jogging or brisk walking 3x a week. Incorporate squats and lunges to strengthen your quads for the assault. Most importantly, cut your toenails short to avoid injury on the descent and hydrate well (2-3 Liters daily) for 3 days leading up to the hike.

A. Physical Conditioning (The “Leg Day” Rule)

You don’t need a gym membership. You just need to mimic the movement of hiking.

  • Cardio is King: The air gets thinner (slightly) and the effort gets harder.

    • Action: Jog or brisk walk for 30 minutes, 3 times a week.

  • Stair Climbing: This is the best specific training for Philippine mountains, which are often steep.

    • Action: Skip the elevator. Take the stairs at work or in the MRT/LRT stations.

  • Leg Strength: Your quads will carry you up; your knees will support you down.

    • Action: Do 3 sets of 15 Squats and Lunges every other day.

B. The “Shakeout” (Gear Check)

Never use new gear for the first time on the actual mountain. This is the #1 cause of blisters and misery.

  • Break in your Shoes: Wear your hiking sandals or shoes around the house or on errands for a week. Let your feet adjust to the friction points.

  • Test your Bag: Pack your backpack with the actual weight (water, clothes) and wear it for 30 minutes to check if the straps dig into your shoulders.

C. Essential Body Care

These are the small details veteran hikers know that beginners often miss:

  • The “Toenail” Rule: Cut your toenails short two days before the hike. On the descent (going down), your toes will jam against the front of your shoes. Long nails will turn black and fall off.

  • Pre-Hydration: Do not wait until the hike to drink water. “Super-hydrate” by drinking 2-3 Liters of water daily for 3 days before the trip. This prevents cramps and heat exhaustion.

  • Sleep: No amount of coffee can replace a good night’s sleep. Try to get 6-8 hours of rest before your call time.

mt. 387 lover tree photo


The “Beginner Friendly Hikes” Gear Checklist

One of the biggest mistakes beginners make is overpacking. You are climbing a mountain, not moving into a condo! For a day hike (Minor Climb), you want to be as light as possible.

Here is the “Goldilocks” list—not too much, not too little.

The “Must-Haves” (Do not leave home without these)

Footwear:

  • Option A: Hiking Sandals (Brands like Sandugo, Tribu, or Lagalag). Best for river crossings and easy trails.
  • Option B: Trail Running Shoes (with good lug traction). Best for rocky terrain like Mt. Batulao.
  • Avoid: Converse, Vans, or smooth-soled sneakers. You will slip.

Clothing:

  • Dri-Fit Shirt: Cotton is the enemy. It absorbs sweat and gets heavy.
  • Leggings/Trekking Pants: Protects your legs from talahib (grass) cuts and insects.

Hydration:

  • Water: Minimum 2 Liters. (Tip: Freeze one bottle so you have cold water for the summit).
  • Electrolytes: Gatorade or Pocari Sweat (500ml) to prevent cramps.

Protection:

  • Sun Protection: Cap/Hat, Arm Sleeves, and Sunblock.
  • Rain Gear: A lightweight poncho or a foldable umbrella (Yes, payong is very common and useful in PH hiking!).

Emergency Kit:

  • Whistle: The universal distress signal.
  • Headlamp/Flashlight: Even for a day hike. If you get delayed, the trail gets dark fast at 6:00 PM.
  • First Aid: Alcohol, Band-aids, and personal meds (Antihistamine/Painkillers).

Nutrition:

  • Trail Food: Jelly Ace, chocolates, nuts, or hard-boiled eggs for quick energy.
  • Packed Lunch: Something that won’t spoil easily (e.g., Adobo, Fried Chicken).
mount daraitan Difficulty

FAQ

We know you have questions. Here are the answers to the most common worries we hear from first-timers.

What is the absolute easiest mountain on this list? 

If you want zero effort, go to Treasure Mountain (Class 1). If you want a “real” hike that is still very easy, choose Mt. Camisong in Benguet or Mt. Gulugod Baboy in Batangas.

DIY or Joiner Tour: Which is better for beginners? 

For your first time, we highly recommend booking a “Joiner Tour.”

  • Why: Transportation (Van) is arranged, fees are prepaid, and a coordinator handles the logistics. You just need to show up.

  • Cost: Usually PHP 1,300 – PHP 1,800 (All-in).

  • DIY: Better if you have a private car or are comfortable navigating public provincial buses.

Is it safe to hike alone? 

“Solo joiner” is fine (joining a group tour alone). But hiking completely alone on the trail is not recommended for beginners. Always hire a local guide. Not only does it support the local economy, but they are also your safety net in case of injury.

Are there toilets on the mountain? 

Generally, No. There are restrooms at the Jump-off point (start) and sometimes at the campsite. But on the trail itself? Nature is your toilet. (This is why you “do your business” before you start trekking!).

How much pocket money should I bring? 

If you have already paid for your tour/transpo, bring an extra PHP 1,000 – PHP 2,000 in cash.

  • Breakdown: Trail food/merienda at the jump-off, shower fees (usually PHP 20-50), and tipping your local guide (highly encouraged!).

Conclusion

The mountains are calling, and now you are ready to answer.

Hiking is more than just a workout or an Instagram post. It is a way to disconnect from the noise of the city and reconnect with nature—and yourself. The mountains listed here are the perfect training ground. They are safe, beautiful, and waiting for you.

A Final Reminder on LNT (Leave No Trace): Please, be a responsible guest.

  1. Bring your trash down. (Candy wrappers, wet wipes, bottles).

  2. Respect the locals. Smile and say “Good Morning.”

  3. Keep the noise down. Nature is not a karaoke bar.

The hardest part of the climb is usually waking up at 2:00 AM to catch the van. Once you are on the trail, one foot in front of the other, you’ll realize why we do it.

Ready for the next level? Once you’ve conquered a few of these, you might be ready for the big leagues. Check out our [Ultimate Guide to Major Climbs in the Philippines] when you are ready to upgrade your adventure.

Kita-kits sa trails! (See you on the trails!)

Stay Connected:

Subscribe to our newsletter for exclusive travel insights, deals, and updates. Join our community of travel enthusiasts and stay connected with the latest from our blog.

Follow us on social media for daily inspiration and updates on mountain climbing in the Philippines:

Contact Information:

  • Email: travel.ph@lakbaypinas.com
  • Phone: 09260******
  • Address: Marikina
Scroll to Top