Mt. Lantik is a 552 MASL beginner-friendly peak in Nasugbu, Batangas rated Difficulty 3/9 — close enough to Manila for a comfortable day trip and rewarding enough to stand on its own as a primary destination. The summit delivers a genuine 360-degree view of Southern Tagalog including Taal Volcano, Mt. Batulao, and the Batangas coastline, all reachable in 45 minutes to 1.5 hours on the trail. I climbed it in May 2026 and left with a clearer appreciation for why it’s quietly becoming the most underrated peak in the Nasugbu range.
Mt. Lantik Quick Guide
| Detail | Information |
|---|---|
| Mountain | Mt. Lantik |
| Location | Sitio Kayrilaw, Barangay Aga, Nasugbu |
| Province | Batangas |
| Elevation | 552 MASL |
| Difficulty | 3/9 — Minor Climb |
| Jump-off Point | Sitio Kayrilaw, Brgy. Aga, Nasugbu |
| Best Season | November to May (dry season) |
| Summit Trek Time | 45 minutes to 1.5 hours (one way) |
| Registration | On-site at Sitio Kayrilaw jump-off (₱40/head) |
| Campsite | Small nipa hut at summit; basic rest stop only |
Table of Contents

Where Is Mt. Lantik Located?
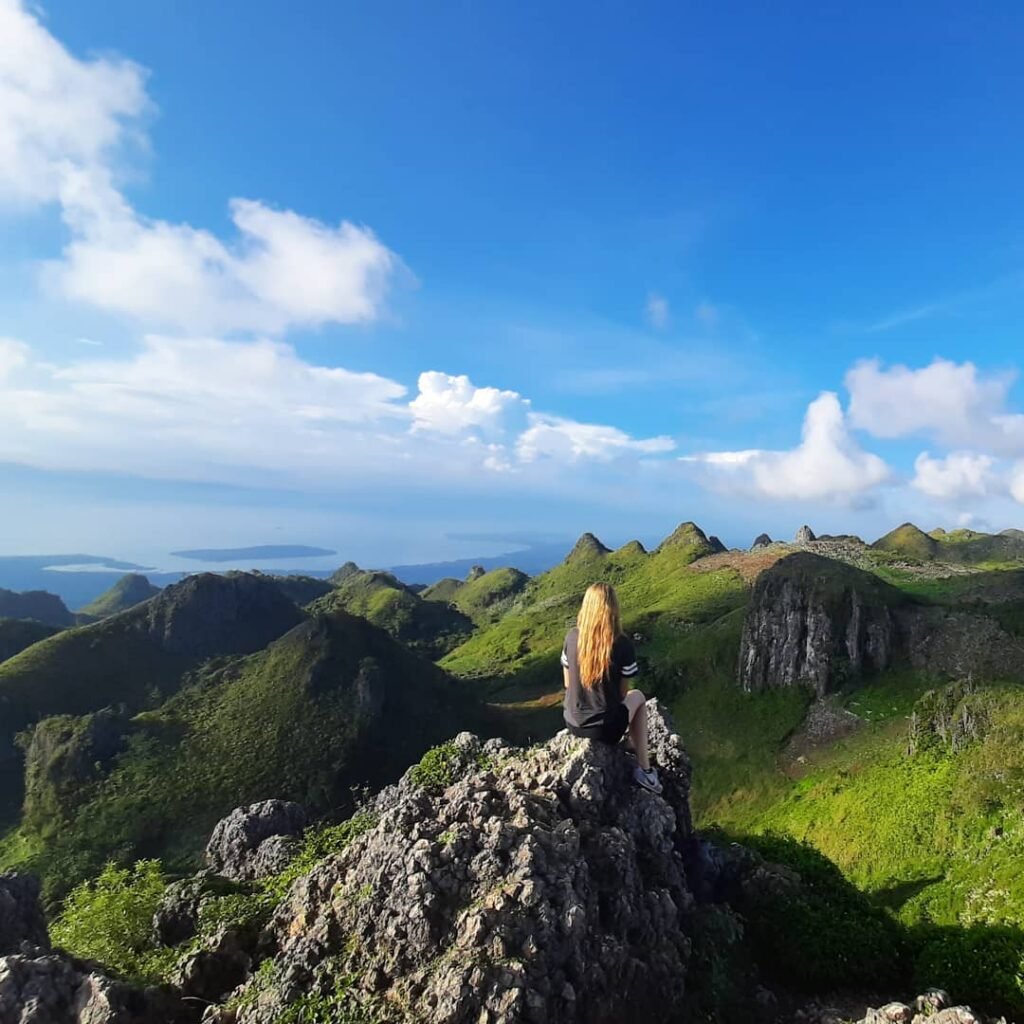
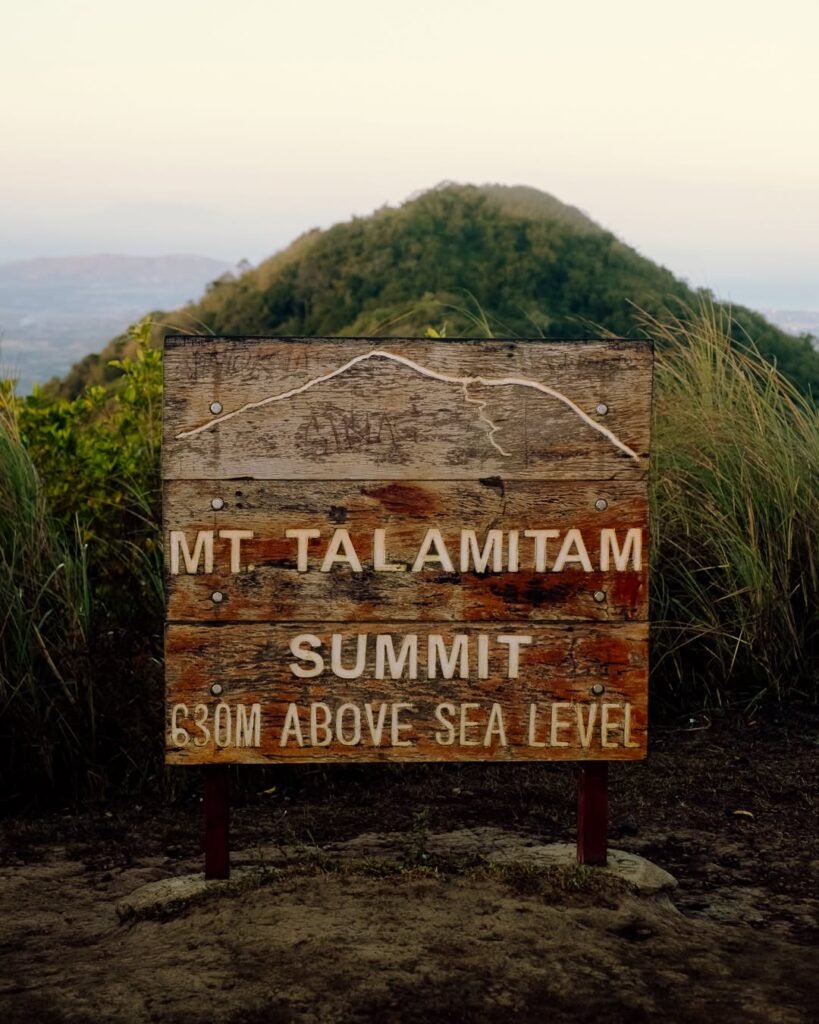
Mt. Lantik is rated Difficulty 3/9 (Minor Climb) standing at 552 MASL, located in Barangay Aga, Nasugbu, Batangas. It sits within the Talamitam Range alongside its two trail partners — Mt. Talamitam at 630 MASL and Mt. Apayang at 662 MASL — forming the three-peak circuit popularly known as the Nasugbu Trilogy.
The Nasugbu Trilogy Hike covers three stunning peaks: Mt. Lantik, Mt. Talamitam, and Mt. Apayang, all in Nasugbu, Batangas. Mt. Lantik is the first and lowest of the three, making it the natural starting point and the most sheltered leg of the circuit. If you want a standalone day hike rather than the full trilogy, Lantik is the one to pick — it’s the only peak where the trail winds through actual forest for most of the ascent.
Mt. Lantik in Nasugbu, Batangas offers a short but refreshing mountain hike, with mild ascents and nice views of nearby peaks, making it ideal for beginners or people looking to get back into hiking. The mountain is roughly 2 to 2.5 hours by road from Manila, making it one of the most practical weekend hike options in the entire Southern Tagalog region. For more options across the province, see our Batangas tourist spots travel guide.
How to Get to the Mt. Lantik Jump-off Point
The jump-off for the Mt. Lantik hike is Sitio Kayrilaw in Barangay Aga, Nasugbu, Batangas — not the older Bayabasan entry point you’ll find in outdated blog posts.
The most critical failure point in recent itineraries is confusion regarding the Jump-Off Point. While older data points to Sitio Bayabasan, the correct primary entry point is now Sitio Kayrilaw. Using the wrong one adds unnecessary distance and wastes energy before you even start climbing. Commit Sitio Kayrilaw to memory.
By public commute from Manila:
Head to the DLTB Co. Terminal at LRT Buendia (Gil Puyat) or the PITX (Parañaque Integrated Terminal Exchange). Board a bus explicitly marked “Nasugbu via Tagaytay/Aguinaldo Highway.” Do not take buses marked “Lemery” or “Batangas City via STAR Tollway” — these routes diverge significantly from the Nasugbu ridge.
The bus fare sits between ₱180 and ₱260 depending on the carrier.
Alight at the intersection of Brgy. Aga (“Kanto Kayrilaw”), typically near Bayabasan Elementary School. From there, flag a tricycle to the Sitio Kayrilaw jump-off — the tricycle ride covers roughly 2.9 km to the Lantik/Talamitam jump-off.
By private vehicle:
Parking space at Sitio Kayrilaw is finite, accommodating only about 20–30 vehicles in converted residential yards. If you are driving, text your guide the night before to reserve a slot — otherwise you might be forced to park precariously along the narrow barangay road.
The travel time from Metro Manila to Nasugbu, Batangas is approximately 2.5 to 3 hours if you depart between 03:00 AM – 04:00 AM. Plan your departure accordingly to beat both traffic and the midday heat on the trail.

Permits, Fees, and Guide Requirements at Mt. Lantik
Registration at Sitio Kayrilaw is mandatory, walk-in guides are available on-site, and the “No Guide, No Hike” rule is strictly enforced — there is no way around it in 2026.
For the 2026 hiking season, advance permits are not required for small groups at Mt. Lantik. However, on-site registration at Sitio Kayrilaw is mandatory before starting the trek. Guides are strictly required by Barangay Aga ordinance to ensure safety and support local livelihoods.
The registration fee is ₱40 per head and the guide fee is ₱500 per mountain. If you plan to do the twin hike (Lantik + Talamitam), that’s ₱1,000 per group for the guide, with an additional ₱500 per mountain for each additional peak. If hiking all three mountains of the Nasugbu Trilogy, expect to pay ₱1,500 in total guide fees.
Medical certificates are generally not required for day hikes, but hikers must sign a waiver of liability at the registration area.
Local guide contacts include Kuya Noel: 0926 318 6335 (recommended for the Lantik-Talamitam Twin Hike loop) and Ronnie B. Tabuzo Jr.: 0967 296 3538 (active in the online community for fee updates).
Always clarify the scope of the guide fee before starting the trek. The Layong Bilog River traverse is sometimes treated as an “add-on” service requiring an extra ₱200–300 tip. Establish the full itinerary at the registration desk to avoid friction later.
For a full breakdown of the Nasugbu Trilogy logistics, see our dedicated Nasugbu Trilogy guide.

What Is the Mt. Lantik Trail Like?
While the trail is technically easy (Class 1–2), the open grassland terrain creates high heat exposure, making hydration critical for this Batangas day hike. The Mt. Lantik trail is one of those climbs where the difficulty rating is slightly misleading — it’s not hard, but it will punish you if you show up dehydrated and under-prepared for heat.
Stage 1: Jump-off to Forest Zone (0–300 MASL)
If you follow the Lantik-first itinerary via Brgy. Kayrilaw, the hike initiates in a surprisingly cool microclimate. The trail to Mt. Lantik winds through compact loam shaded by extensive bamboo stands and fruit-bearing trees — lansones and guava orchards line the path. This is the “easy” start, offering a rhythmic warm-up before the real work begins.
The path starts on a paved barangay road flanked by residential houses, then transitions quickly into soil trail as the tree canopy closes in above you. The shade here is the real gift — use it. Once you leave this zone, direct sunlight takes over.
The trail starts on loamy volcanic soil in the agro-forestry zones but shifts to loose igneous rock and compacted clay near the peak. Watch your footing in the upper third, especially after rain — this section becomes noticeably slippery on the way down.
Stage 2: Open Cogon Grasslands (300 MASL to Summit)
Once you break past the tree line at the 300 MASL mark, you enter a zone of Imperata cylindrica (cogon grass) with zero canopy cover. The heat index on these ridges often hits 40°C by mid-morning.
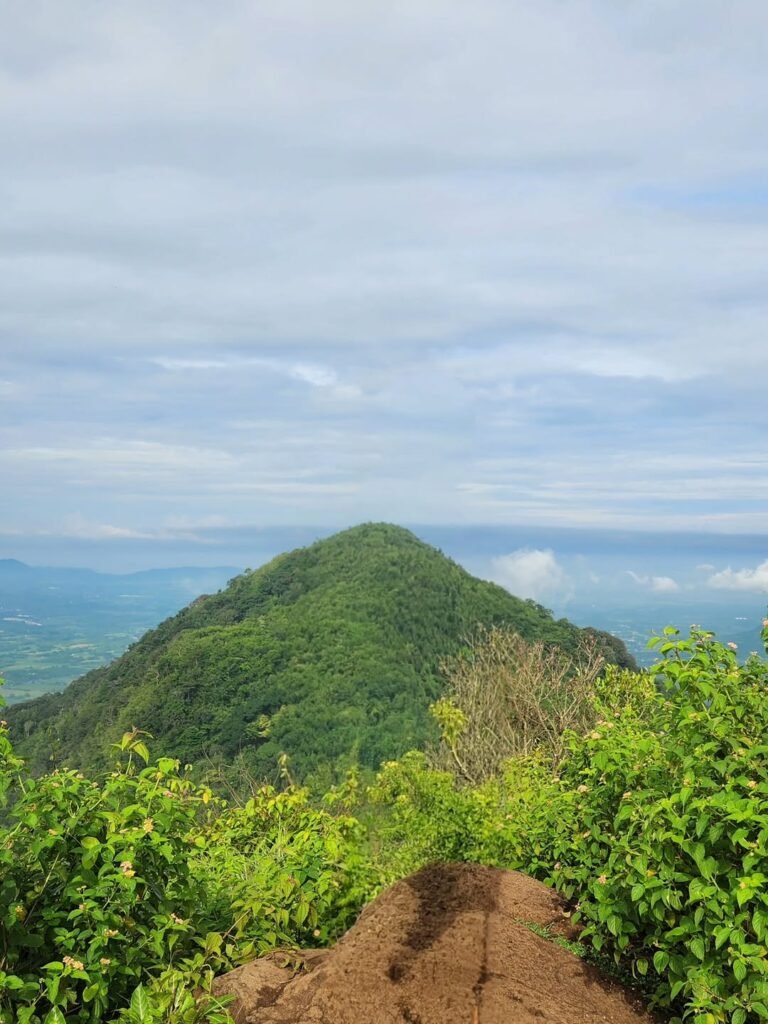
The mountain presents a sharper, more conical profile than the neighboring plateau of Mt. Talamitam. This conical shape means the final push to the top feels steeper than expected — not technical, but your legs will feel every meter of it in the heat.
The Summit
At the summit of Mt. Lantik, there’s a hut where you can rest and some spots perfect for taking pictures. The beautiful view makes all the effort worthwhile.
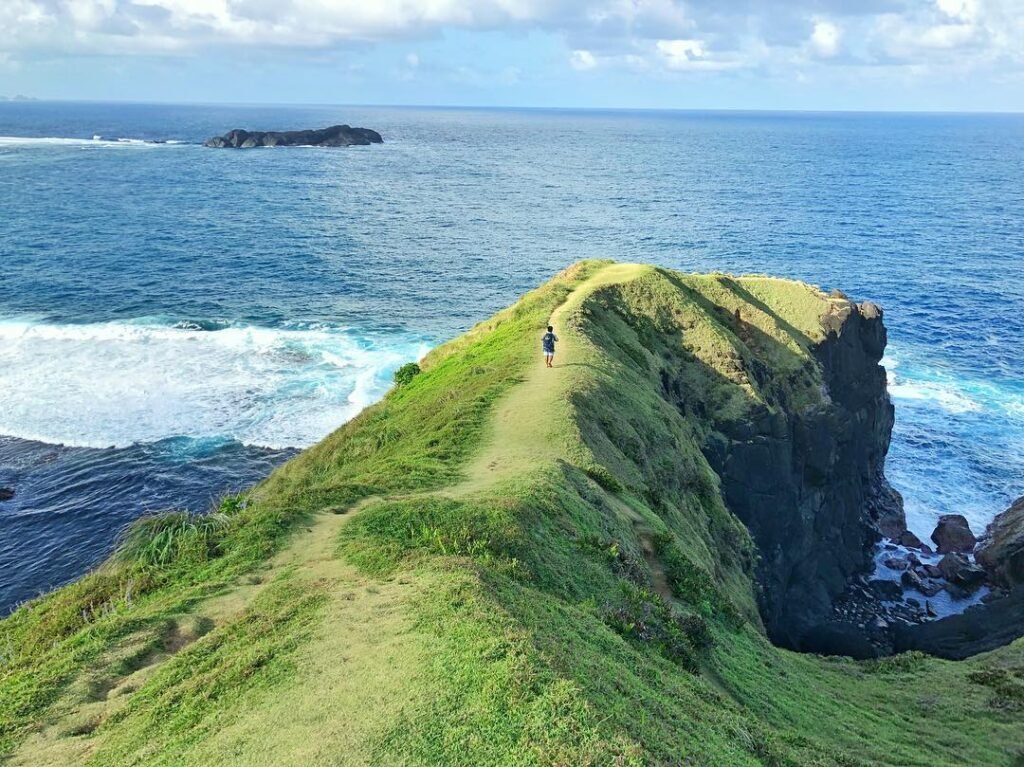
Standing at the summit, you’re surrounded by a true 360-degree theater of the Southern Tagalog region. To the west lies the glimmering coastline of the South China Sea; to the south, the serrated ridges of Mt. Batulao dominate the skyline; and to the east, the dramatic caldera of Taal Volcano provides the backdrop.
A few meters from the summit, it’s not uncommon to encounter cattle wandering up the open slopes — I was accompanied by two cows all the way to the top. The sun is already well up by the time most hikers summit, and the wind at the peak can be unexpectedly strong and cold.
The summit hut has wide bamboo benches — enough for a small group to sit, eat, and properly take in the view before heading back down or pressing on to Talamitam.
Post-Hike: Layong Bilog River
Beginners or photography enthusiasts should opt for the “Lantik Day Hike + River” itinerary, which prioritizes a relaxed summit breakfast and a refreshing dip at Layong Bilog by noon.
Layong Bilog River is a quiet, natural stream surrounded by lush greenery and known for its small, cascading waterfall. The cool, clear waters offer a perfect spot to relax and unwind after the hike. Entrance fee is ₱50 per person, with cottage rental at ₱300 (open cottage) / ₱100 (table). Rustic concrete shower stalls are available for ₱20–40.

Is Mt. Lantik Good for Beginners?
Mt. Lantik is one of the most beginner-appropriate peaks near Manila — the answer is yes, with one caveat: respect the heat.
Mt. Lantik is the smallest of the three Nasugbu peaks, and the trail is moderate, making it suitable for beginners. You can reach the summit in about 30 to 45 minutes, where a view of lush forests and distant coastlines rewards your effort.
It is a manageable hike for children as young as 8 years old, provided they are heat-acclimatized and you start before 06:00 AM. For adult beginners, the trail poses no technical challenge — there are no river crossings, no rope sections, and the path is well-worn enough that you will not get lost with a guide.
The one thing beginners consistently underestimate is the sun exposure on the upper grassland section. Bring significantly more water than you think you need, wear a wide-brimmed hat, and start early. Do those three things, and Mt. Lantik is a completely accessible first climb. For more beginner options, browse our beginner-friendly hikes guide]() and our curated mountains in the Philippines guide.
Budget Breakdown for Climbing Mt. Lantik
| Expense | Cost (PHP) |
|---|---|
| Bus fare (Manila to Nasugbu, one way) | ₱180 – ₱260 |
| Tricycle to Sitio Kayrilaw jump-off | ₱50 – ₱100 (per head) |
| Registration/environmental fee | ₱40 per head |
| Guide fee (Mt. Lantik only) | ₱500 per group |
| Guide fee (Lantik + Talamitam) | ₱1,000 per group |
| Guide fee (Full Nasugbu Trilogy) | ₱1,500 per group |
| Parking (private vehicle) | ₱50 – ₱100 (estimate) |
| Layong Bilog River entrance | ₱50 per head |
| Layong Bilog cottage | ₱100 – ₱300 |
| Post-hike meal (lomi, etc.) | ₱100 – ₱200 |
| Bus fare back to Manila | ₱180 – ₱260 |
| Estimated Total (solo, day hike only) | ₱1,100 – ₱1,500 |
Guide fees are per group, not per person, which makes Mt. Lantik significantly more economical when you go with friends. A group of four splitting the ₱500 guide fee pays just ₱125 each — making this one of the most budget-efficient climbs in Southern Tagalog.
What to Pack for Mt. Lantik
| Item | Essential? |
|---|---|
| 2–3 liters of water | ✅ Yes — non-negotiable |
| Trail runners or hiking shoes | ✅ Yes — avoid sandals or flat rubber shoes |
| Wide-brimmed hat or cap | ✅ Yes |
| Sunscreen (SPF 50+) | ✅ Yes |
| Arm sleeves | ✅ Yes — for open grassland section |
| Light rain jacket or poncho | ✅ Yes — especially wet season |
| Snacks and trail food | ✅ Yes |
| Trekking poles | ⬜ Optional — helpful on descent |
| Headlamp or flashlight | ✅ Yes — for pre-dawn starts |
| First aid kit basics | ✅ Yes |
| Change of clothes | ✅ Yes — especially if visiting Layong Bilog |
| Waterproof bag or dry bag | ⬜ Optional — useful in wet season |
| High socks | ✅ Yes — for leech prevention in rainy months |
| Cash (small bills) | ✅ Yes — fees paid on-site |
Bring a wide-brimmed hat, arm sleeves, and at least 2–3 liters of water as the trail is 90% exposed. Trail runners are recommended over heavy hiking boots for agility on the grassy slopes and river trekking sections.
There are no resupply points along the Mt. Lantik trail itself — no stores, no water sources you can safely drink. Pack everything you need from the jump-off.
Safety Tips for Climbing Mt. Lantik
- Start before 5:00 AM. The heat index on the ridge can exceed 40°C by 10:00 AM, making proper heat management and early departure times non-negotiable for a safe ascent.
- Never skip the guide. The local government of Nasugbu strictly enforces a “No Guide, No Hike” policy. Hikers attempting to bypass the registration desk at Sitio Kayrilaw are routinely turned back by barangay tanods or fined.
- Watch your footing on descent. Going down is quicker but requires extra care, as the trail becomes significantly muddier after rain.
- Monitor the river carefully. If the Layong Bilog River changes from clear green to brown or chocolate-colored, evacuate to higher ground immediately — this signals a flash flood from rain events in the highlands, even if it isn’t raining where you are.
- Don’t drink from the river. The Layong Bilog water is NOT potable — avoid ingesting it to prevent gastrointestinal issues from upstream agricultural runoff.
- Sign the waiver; carry meds. While a formal Fit-to-Climb certificate is not typically enforced for day hikers, you will be required to sign a standard waiver of liability. If you have pre-existing conditions like hypertension or asthma, carry your own clearance or medications, as the heat on the ridge is unforgiving.
- Clarify signal coverage expectations. Once you descend into the forest for the Mt. Lantik section or the Layong Bilog depression, signal degrades rapidly to “No Service.” Inform someone of your itinerary before you lose connectivity.
Frequently Asked Questions About Mt. Lantik
1. What is the Mt. Lantik MASL and difficulty rating?
Mt. Lantik stands at 552 MASL and is rated Difficulty 3/9, officially classified as a Minor Climb. It is the lowest and most beginner-accessible of the three peaks in the Nasugbu Trilogy.
2. How long does it take to hike Mt. Lantik?
Hiking to the summit takes 45 minutes to 1.5 hours, through an enjoyable forest filled with fruit trees. The descent is faster but requires careful footing, particularly after rain. Budget a full half-day if you plan to add Layong Bilog River as a post-hike stop.
3. Can I do the Mt. Lantik hike without a guide?
No. As of 2026, the “No Guide, No Hike” policy is strictly enforced by the Barangay Aga and Kayrilaw LGUs. Walk-in guides are readily available on-site at the Sitio Kayrilaw registration area, so no advance booking is strictly necessary — though contacting a guide beforehand is recommended for weekend hikes to guarantee availability.
4. Is Mt. Lantik part of the Nasugbu Trilogy, and should I do all three peaks?
The Nasugbu Trilogy covers three stunning peaks — Mt. Lantik, Mt. Talamitam, and Mt. Apayang — offering a variety of terrains, breathtaking views, and a challenging yet rewarding experience. For absolute beginners, doing Mt. Lantik alone or as a twin hike with Mt. Talamitam is the smarter option. The full trilogy adds significant heat exposure and distance that can overwhelm unprepared first-timers. See our Mt. Apayang guide for tips on the third peak specifically.
5. What is Layong Bilog, and is it worth visiting after the Mt. Lantik hike?
Layong Bilog is a river segment near the Nasugbu jump-off area that features a “Blue Lagoon” aesthetic during the dry months when the silt settles. The entrance fee is ₱50 per person. It is absolutely worth the detour — after sweating through the open grasslands under a Batangas sun, a cold river swim is one of the most satisfying post-hike rewards in the entire region.

Final Verdict: Should You Climb Mt. Lantik?
4.5 out of 5 for beginner hikers and day-trip seekers. Mt. Lantik at 552 MASL is a high-reward Minor Climb in Batangas offering superior views of the Nasugbu Trilogy when summited at sunrise — and unlike many beginner peaks, it genuinely earns that description rather than just tolerating newcomers.
The one thing keeping it from a perfect score is the brutal heat exposure on the upper trail, which demands an early start and serious hydration discipline. Pair it with Layong Bilog River after and you have one of the best-value full-day outdoor itineraries within two to three hours of Manila. For a twin-peak extension, our Mt. Marami guide covers another excellent nearby option at a similar difficulty level.