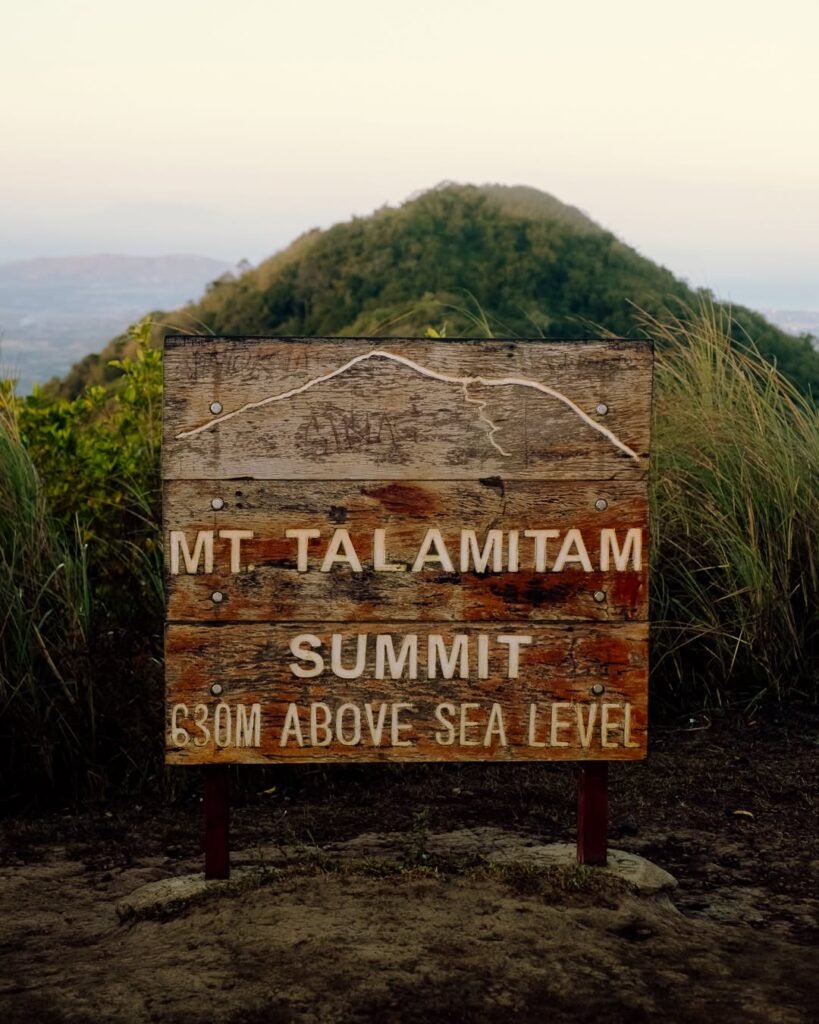
Mt. Talamitam is a 630 MASL beginner-friendly mountain in Nasugbu, Batangas that can be done as a day hike from Manila in a single weekend. The trail takes 1.5 to 2.5 hours to the summit, costs roughly ₱1,500–₱1,800 for a solo DIY hiker, and rewards you with one of the most jaw-dropping open-ridge views in Southern Luzon — if you beat the heat.
Mt. Talamitam Quick Guide
| Detail | Info |
|---|---|
| Mountain | Mt. Talamitam |
| Location | Sitio Bayabasan / Brgy. Aga, Nasugbu, Batangas |
| Province | Batangas |
| Elevation | 630 MASL (2,067 ft) |
| Difficulty | 3/9 — Minor Climb, Trail Class 1–3 |
| Jump-off | Sitio Bayabasan, Brgy. Aga (KM 83, Tagaytay–Nasugbu Hwy) |
| Best Season | November to April (dry season) |
| Trek Time | 1.5–2.5 hrs ascent; 1–1.5 hrs descent |
| Registration | Mandatory at Sitio Bayabasan registration area |
| Campsite | Wide open grassland at the foot of the summit |
Table of Contents

Where Is Mt. Talamitam Located?
Mt. Talamitam is located in Nasugbu, Batangas, and it offers a wonderful view of both Batangas and Cavite. More specifically, its main jump-off point is in Sitio Bayabasan, Barangay Aga.
Mt. Talamitam is considered the “younger sister” of Mt. Batulao, partly due to their close proximity and because both can be hiked in tandem in a single itinerary as a twin dayhike. The mountain sits along the Tagaytay–Nasugbu Highway at around KM 83, making it easy to locate even without a GPS.
The name of the mountain came from Talamitam trees that were once abundant in the area; however, those trees are largely absent today. What remains is an almost completely bald ridge — known locally as the “Bald Mountain” due to the scarcity of the Talamitam trees that once covered its slopes, with zero canopy cover for 70% of the trail.
For more mountains in the region, check out our full guide to mountains in the Philippines and the complete Batangas tourist spots travel guide.
How to Get to the Mt. Talamitam Jump-off Point
The fastest, most reliable way to get to Mt. Talamitam from Manila on public transport is via DLTB or BSC Bus from Buendia.
By Public Bus (Recommended for DIY hikers):
- Take a DLTB or BSC Bus bound for Nasugbu from the LRT Buendia (Gil Puyat) terminal. Tell the conductor specifically to drop you off at KM 83, Sitio Bayabasan (landmark: Bayabasan Elementary School).
- Travel time is 2.5–3 hours. Do not go all the way to Nasugbu town proper, or you will have to backtrack 20km.
- For an alpine start (hiking before sunrise), the DLTB Bus Terminal at LRT Buendia is the best tactical choice. While PITX is a modern alternative, the “waiting for full capacity” protocol there can delay departure significantly. DLTB Buendia has a higher turnover of passengers, ensuring you leave on time.
- The first trip usually departs between 2:00 AM and 3:00 AM.
By Private Car:
From Manila, drive through CAVITEX (Manila–Cavite Expressway) then proceed to Emilio Aguinaldo Highway. From there, you will reach Tagaytay City, then continue driving through the Tagaytay–Nasugbu Highway until you reach Sitio Bayabasan. Alternatively, take SLEX via Sta. Rosa exit and follow the same Tagaytay–Nasugbu Highway southbound.
By Organized Tour (Groups and Solo Joiners):
For convenience, organized package tours are available that include roundtrip van transportation from Manila, registration fee, tour coordinator fee, guide fee, environmental fee, and parking fee. These are widely advertised in Philippine hiking Facebook groups and are a smart option if you want zero logistics stress.
There are no stores or cafeterias near the area, so buy food and water before heading out. Once you alight at Sitio Bayabasan, you can ride a tricycle to the jump-off point for PHP 60–100

Permits, Fees, and Guide Requirements at Mt. Talamitam
Registration at Sitio Bayabasan is mandatory before you set foot on the trail — no exceptions.
In the early 2010s, this mountain was often cited as a “DIY-friendly” trek where you could hike solo. However, the operational landscape in Nasugbu has shifted. Local checkpoints now strongly enforce the guide policy. This isn’t just about revenue — it’s about liability. The trail crosses multiple private properties used for cattle grazing, and in the past, unaccompanied hikers frequently got lost in branching cow paths or accidentally damaged fences.
The local government of Nasugbu now strictly enforces a “No Guide, No Hike” policy. Hikers attempting to bypass the registration desk are routinely turned back by barangay tanods or fined.
2026 Fee Breakdown:
- Registration / Environmental Fee: ₱50 per person at Sitio Bayabasan
- Guide Fee: ₱500–₱800 per group (usually capped at 5 hikers)
- Camping Fee (if overnight): ₱100–₱150 per tent
- Twin Hike Surcharge (to Mt. Apayang): Additional ₱30 if crossing over to Mt. Apayang
- Layong Bilog River Side Trip: ₱40 per head entrance fee
If you are hiking solo, do not pay the full ₱800 alone. Wait at the registration area near KM 83 and politely ask other small groups if you can join them to split the cost.
What Is the Mt. Talamitam Trail Like?
Mt. Talamitam has a relatively flat and wide trail that is well marked. That said, the terrain shifts character across three distinct phases, and that final push to the summit will test your legs regardless of how fit you are.
Phase 1: The Lowland Approach (Woodland and River Crossing)
The first part of the trail is a river crossing through woodland and fields. You’ll walk through small settlements and cross a bamboo bridge — the trail starts with a walk through the village, then you cross the river using a bamboo bridge. This section is shaded and flat, making it the most comfortable part of the hike.
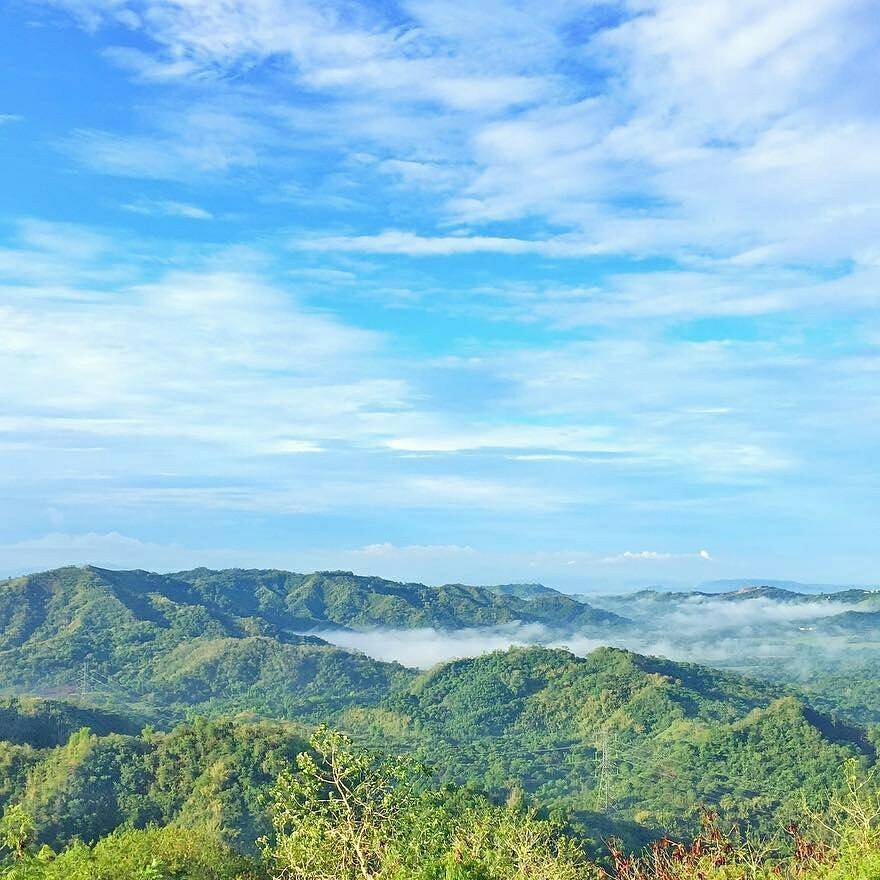
Phase 2: The Grassland Middle Section
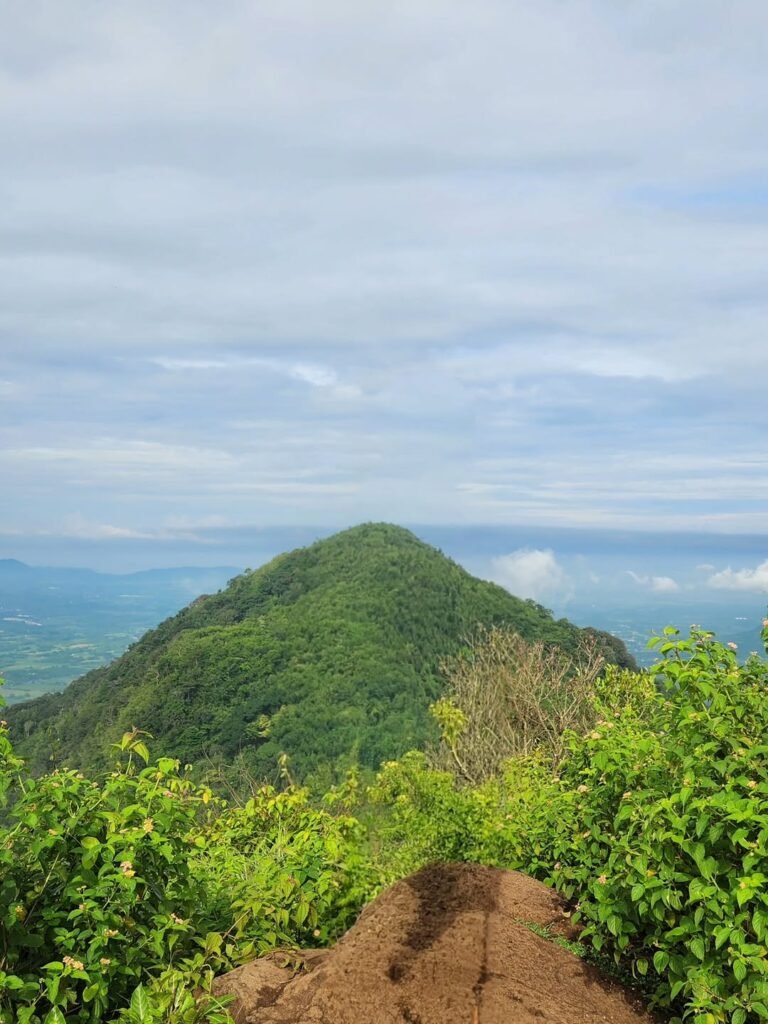
The second part is a vast grassland, and the third part is rolling hills composed of tall cogon grass all the way to the peak. This is where the heat becomes your primary enemy. Though the trail is simple, it can be a very tiresome hike once the sun is high because there are few trees to offer shade for most of the trail. Hikers call this section “Teletubbyland” — a sweeping, rolling green landscape that looks deceptively gentle from a distance.
Phase 3: The Summit Assault
The hike has a demanding 70-degree assault before you reach the summit. There is a short roped assault trail leading to the summit, but it’s generally easy to pass through. Gloves are useful here if the rocks are wet. Once you crest that final slope, the views open up completely and the effort disappears.
Total round-trip distance: approximately 3.5 kilometers from the highway to the summit with an elevation gain of 436 meters.

Is Mt. Talamitam Good for Beginners?
Yes — Mt. Talamitam is one of the best starter climbs near Manila, and here’s why it earns that reputation honestly.
Mt. Talamitam is a beginner-friendly mountain, perfect for both first-timers and seasoned hikers because of its easy trails. The path is wide, well-marked, and never technically demanding — no ropes, no scrambles, no exposure to dangerous drop-offs. For beginner hikers, Mt. Talamitam provides an excellent introduction to mountaineering. The manageable trail allows you to build confidence without being overwhelmed by extreme difficulty, and it’s a great way to test your endurance, learn basic hiking skills, and discover the joy of reaching a summit.
The one caveat every beginner must hear: while the elevation of 630 MASL suggests an easy climb, the “savanna” terrain creates a double-oven effect, reflecting heat from the clay soil while the sun strikes from above. Start early, and this mountain is a joy. Start late, and even experienced hikers will struggle.
Day Hike vs. Overnight at Mt. Talamitam
Both options are fully viable, but they deliver completely different experiences.
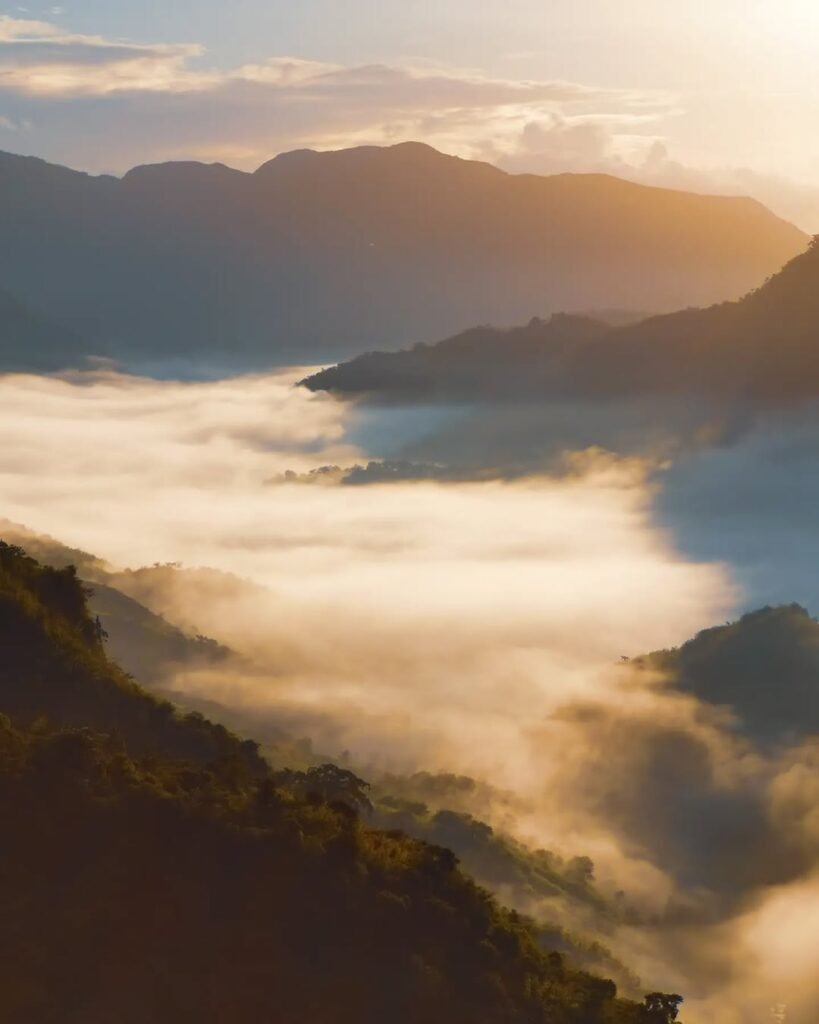
Day Hike: A day hike is possible, with the hike to and from the summit lasting 4 hours at most. The ideal structure is an alpine start: depart Manila by 3:00 AM, begin trekking by 5:30 AM, summit before 9:00 AM, cool down with a river dip at Layong Bilog, and head home by early afternoon. You avoid the worst heat and still catch the golden morning light on the grasslands.
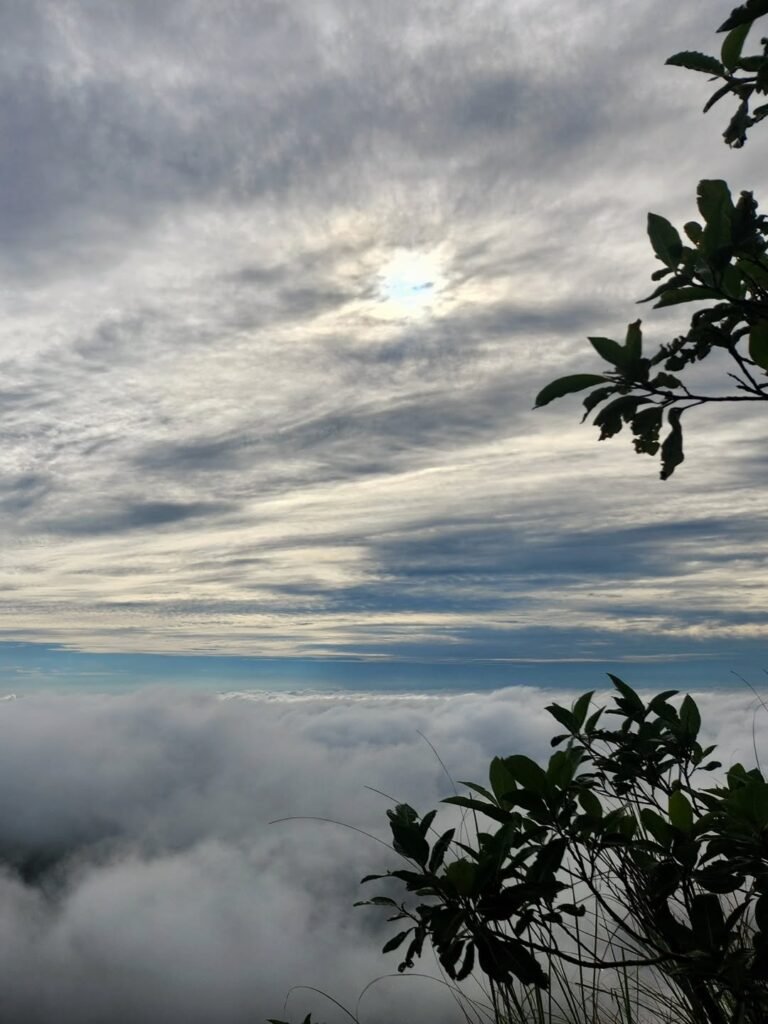
Overnight: An alternative to a day hike is trekking in the afternoon and spending a night under the stars. There’s an area at the foot of the summit where you can pitch your tent, and the area is big enough that you don’t have to worry about space or privacy. With a wide green grassland campsite and summit, one can do overnight camping and witness the stunning sunrise, magical sunset, and the majestic view of the Milky Way galaxy on a clear night.
The overnight experience is genuinely spectacular — but there is one critical thing I learned firsthand in May 2026 that no other guide will tell you.
Camping at Mt. Talamitam
The Mt. Talamitam campsite sits in the wide open grassland just below the summit, and it is one of the most scenic camping spots in Batangas. There’s an area at the foot of the summit where you can pitch your tent, and the area is big so you don’t have to worry about space.
What no guide adequately warns you about is the wind. When I camped overnight at the summit in May 2026, the wind was not a gentle mountain breeze — it was relentless, powerful, and sustained. I personally witnessed three beach tents collapse and break over the course of one night. The hikers who set them up were experienced enough to have proper gear otherwise, but the beach tent’s low-profile, flexible poles simply cannot handle the wind velocity at that exposed summit elevation.
My single most important insider tip for anyone camping at Mt. Talamitam: never bring a beach tent to the summit. Bring a proper dome or tunnel tent with sturdy aluminum or carbon poles. Stake it down completely and use all guy lines. The campsite rewards you in every way — the stargazing is phenomenal, the sunrise view over the Batangas lowlands is unforgettable — but only if your shelter holds through the night.
The camping fee is ₱100–₱150 per tent, collected at registration. Pack everything in, and pack everything out.
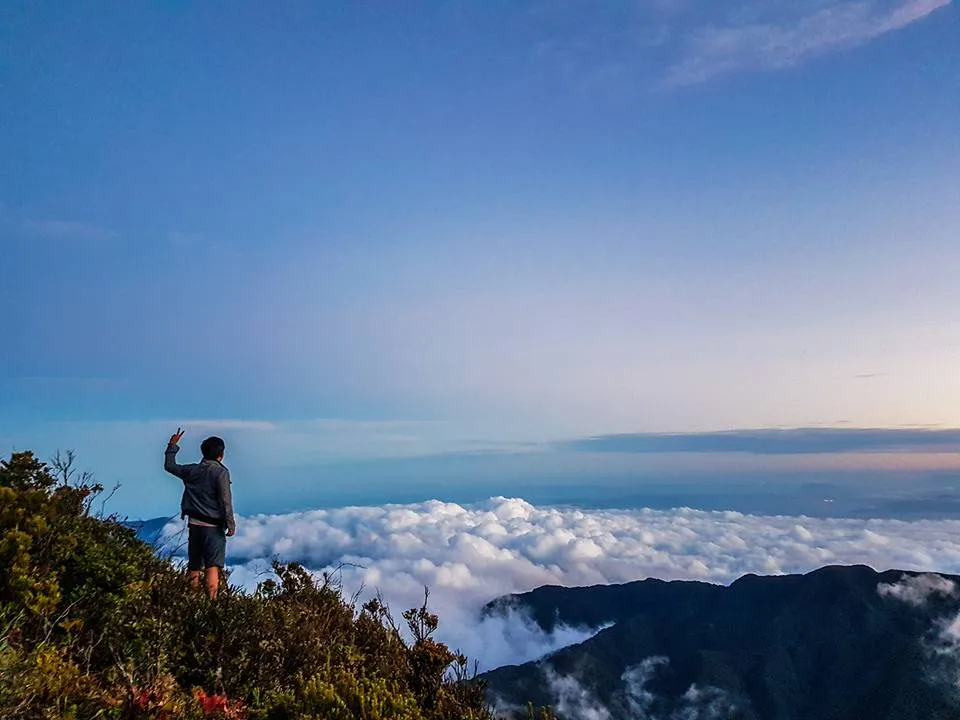
The Summit Experience at Mt. Talamitam
The summit of Mt. Talamitam is the reason people come back.
I stood at the top on a May morning, hot and sweaty from the final assault, and the moment the view broke open — everything else stopped mattering. The wind hit immediately, strong and continuous, which on the way up felt punishing but at the peak felt like a reward. Visibility was exceptional. The landscape felt enormous.
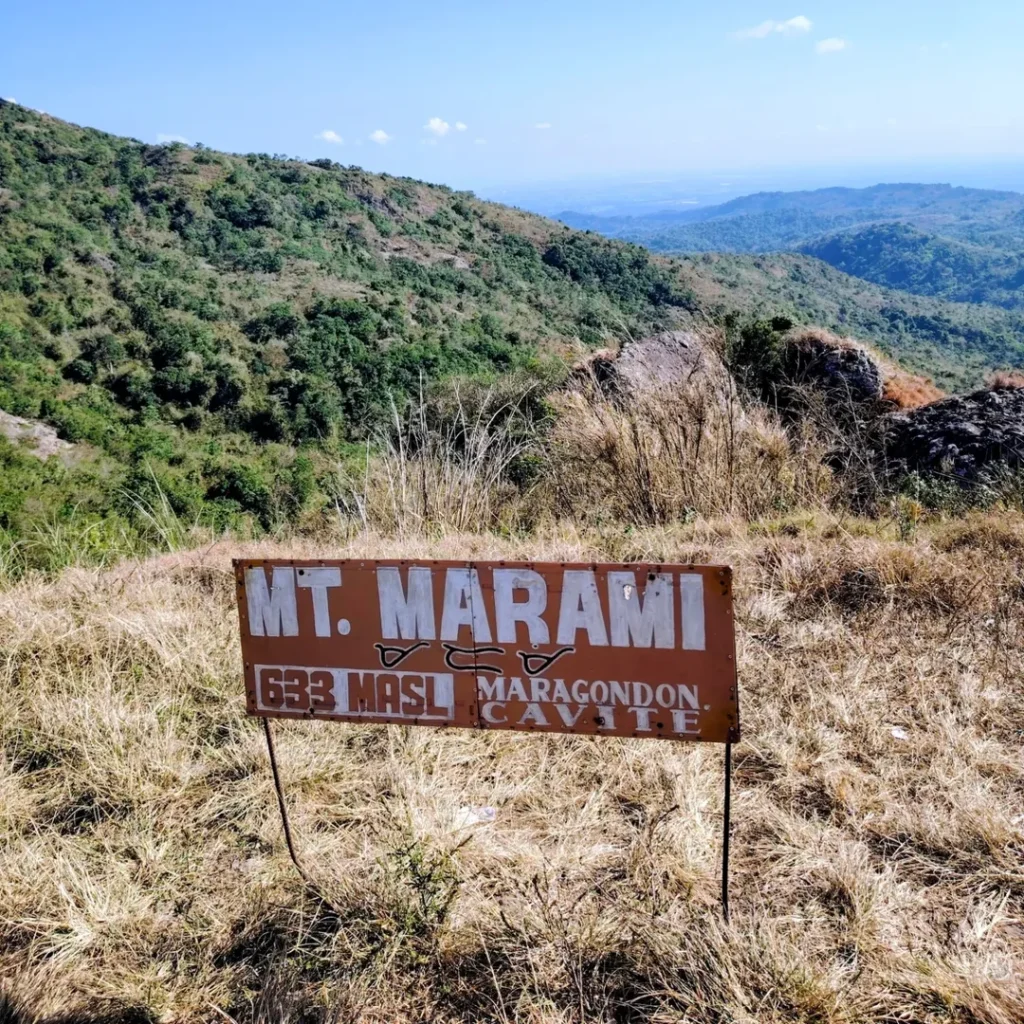
From the summit, a distinct view of Batangas province can be seen. You can see Mt. Batulao, Mt. Makiling, and Mt. Marami. To the west, the famous Mt. Pico de Loro is visible. To the southwest, Ambil Island and Lubang Island of Occidental Mindoro, as well as Nasugbu Bay, stretch across the horizon.
Additionally, one gets nice views of the surrounding towns of Batangas such as Balayan, Tuy, Lian, and Calatagan, as well as the mountains of Maragondon in Cavite.
On weekends, stalls at the summit sell cold water, Gatorade, soft drinks, and halo-halo. On the day I was there, a vendor had set up just below the summit marker — cold drinks after that final assault felt absolutely worth whatever he was charging.
The wind strength I experienced in May was notably intense. It was hot in the valley but the summit gusts were powerful enough to make standing near the edge uncomfortable. That wind is the defining physical characteristic of this mountain — and it’s exactly why you need the right tent if you’re staying overnight.
Best Time to Climb Mt. Talamitam
The dry season, typically November to May, is the best time to climb. You’ll have clearer skies, less chance of rain, and more comfortable hiking conditions. Avoid the rainy season (June to October) if possible, as trails can get muddy and slippery, making the hike more challenging and potentially dangerous.
The best months to climb Mt. Talamitam are January to April — cool mornings, clear summit views, and stable weather. My May 2026 climb was right at the tail end of the dry season. The heat in the valley was intense by midday, though the summit wind partially compensated.
The most strategic start time is the “Alpine Start” — departing Manila by 3:00 AM to begin trekking by 5:30 AM and summit before the heat peaks at 10:00 AM. This cannot be stressed enough: your itinerary should revolve around avoiding the 10:00 AM to 2:00 PM window on the summit. The “Bald Mountain” terrain reflects heat, making these hours physically punishing.
Budget Breakdown for Climbing Mt. Talamitam
A safe baseline budget for a solo DIY hiker in 2026 is ₱1,500–₱1,800.
| Expense | Cost (PHP) |
|---|---|
| Bus fare from Manila (DLTB/BSC) — one way | ₱130–₱214 |
| Bus fare return | ₱130–₱214 |
| Tricycle to/from jump-off | ₱60–₱100 |
| Registration / Environmental fee | ₱50 |
| Guide fee (shared among group of 5) | ₱100–₱160 per person |
| Camping fee (if overnight) | ₱100–₱150 per tent |
| Layong Bilog River entrance | ₱40 |
| Food and water (pre-packed from Manila) | ₱200–₱400 |
| Summit refreshments (optional) | ₱50–₱100 |
| Estimated Total (Day Hike, solo) | ₱760–₱1,200 |
| Estimated Total (Overnight, solo) | ₱1,200–₱1,800 |
Costs are lowest when you share the guide fee across a full group of five. The single biggest variable in your budget is the guide fee — paying the ₱500–₱800 guide fee also acts as your “fast pass” through the micro-political boundaries of the cattle-grazing private properties along the trail.

What to Pack for Mt. Talamitam
| Item | Essential? |
|---|---|
| Hiking shoes or trail runners (NOT sandals) | ✅ Yes |
| At least 2–3 liters of water | ✅ Yes |
| Sunscreen (SPF 50+) | ✅ Yes |
| Cap or hat | ✅ Yes |
| Arm sleeves | ✅ Yes |
| Trail food / energy snacks | ✅ Yes |
| Trekking poles | Recommended |
| Gloves (for summit assault rocks) | Recommended |
| Rain jacket (wet season) | Situational |
| Headlamp (alpine start) | ✅ Yes |
| First aid kit | ✅ Yes |
| Proper dome tent with aluminum poles | ✅ Yes (overnight only) |
| Beach tent | ❌ Never |
| Extra dry bag / plastic bags | ✅ Yes |
| Swimwear (Layong Bilog) | Optional |
Make sure to bring a lot of water as it gets really dry, especially if you hike during the daytime because of the fewer trees along the trail. There is no water source on the upper trail — carry everything from the jump-off. During weekends, however, there are makeshift stores selling snacks and refreshments at the summit and rest areas in the grassland.
Footwear matters on this mountain. The lower woodland section can be muddy after rain, and the bamboo bridge crossings require grip. The summit assault involves loose rock. Proper trail runners or hiking shoes with ankle support are non-negotiable. Sandals and rubber shoes will get you up the mountain but will make the descent genuinely risky.
Safety Tips for Climbing Mt. Talamitam
- Start before sunrise. Between 10:00 AM and 2:00 PM, the heat index on the Talamitam ridges can easily spike above 38°C. This is not an exaggeration — heat exhaustion is the #1 reason hikers turn back.
- Never use a beach tent for overnight camping. The summit wind is relentless. Use a structural dome tent with full staking and all guy lines deployed. I watched three beach tents break in one night.
- Register without fail. The local government strictly enforces the “No Guide, No Hike” policy. Hikers attempting to bypass the registration desk are routinely turned back by barangay tanods.
- Watch for livestock on the trail. Mt. Talamitam is a haven for cows and horses. Along the way, you will come across horses of different colors and cows that can be unpredictable. Give them a wide berth and move calmly.
- Be alert for snakes. There are some instances when hikers encounter snakes in the trail according to local guides. Stay on the path and watch where you step, especially in the lower woodland section.
- Carry all your trash out. The open grassland has no waste collection. Pack a small garbage bag and bring everything back to the registration area.
- No dogs allowed. Dogs are not permitted on this trail.

Frequently Asked Questions About Mt. Talamitam
1. Where exactly is Mt. Talamitam located?
Mt. Talamitam is located in Nasugbu, Batangas, with its main jump-off point in Sitio Bayabasan, Barangay Aga. It sits at KM 83 along the Tagaytay–Nasugbu Highway, roughly 85 kilometers south of Manila. GPS coordinates for the jump-off are 14.088533° N, 120.775418° E.
2. How hard is the Mt. Talamitam hike, and can a total beginner do it?
Mt. Talamitam is generally considered a minor climb with a difficulty rating of 3/9 and a trail length of about 14 km roundtrip. The ascent is mostly gradual, with some steeper sections near the top, but nothing too extreme. The trail is well-defined and relatively easy to navigate, which is why it’s a favorite for beginners. The real challenge is heat management, not technical difficulty.
3. Is a guide required at Mt. Talamitam, and how much does it cost?
Yes, hiring a local guide is mandatory under current local ordinances. The standard rate is ₱500–₱800 per group, usually capped at 5 hikers. On top of that, a ₱50 registration fee is collected per person at the Sitio Bayabasan monitoring station. The trail crosses multiple private properties used for cattle grazing, and unaccompanied hikers frequently got lost in branching cow paths or accidentally damaged fences. The guide fee is genuinely worth it.
4. What is the Nasugbu Trilogy, and how does Mt. Talamitam fit into it?
The Nasugbu Trilogy is a popular hiking adventure that covers three stunning peaks: Mt. Lantik, Mt. Talamitam, and Mt. Apayang, offering a variety of terrains, breathtaking views, and a challenging yet rewarding experience. Mt. Talamitam is the central peak and the most accessible entry point. The full circuit takes 5 to 7 hours to complete. It’s recommended for hikers who have already done a basic Talamitam day hike and want more. Check out our [Nasugbu Trilogy guide](https://lakbaypinas.com/nasugbu-trilogy-itinerary-expenses-difficulty-diy/) for the full breakdown.
5. Can I swim after the hike, and what is Layong Bilog?
A hike to Mt. Talamitam feels incomplete without washing off at Layong Bilog River. This isn’t just a stream — it’s a designated “cooling station” featuring rock formations and clean swimming pools. The detour takes about 1 to 1.5 hours from the summit. Entrance fee is ₱40 per head. It is the perfect post-hike reward, especially after the searing heat on the upper trail. Bring swimwear and sandals for the river section.
Final Verdict: Should You Climb Mt. Talamitam?
4.5 out of 5 for first-time and beginner hikers. Mt. Talamitam delivers everything a new hiker needs — an achievable challenge, a genuinely spectacular summit view, a well-marked trail, and easy access from Manila — all at a budget that won’t hurt your wallet. The only thing that holds it back from a perfect score is the heat, which demands respect and an early start, and the overnight camping experience, which requires a proper tent or risks becoming a miserable night rather than a magical one. If you start before sunrise, bring real shelter, and pair it with the Layong Bilog River dip on the way down, Mt. Talamitam will absolutely earn a permanent spot on your hiking highlight reel.
Planning your hike further? Read our Mt. Marami trail guide for Maragondon, Cavite, explore the Mt. Lantik DIY guide with Layong Bilog details, check out the Mt. Apayang hiking guide, or browse our full list of beginner-friendly minor climbs in the Philippines.