

Mt. Daraitan is a 739 MASL minor climb in Tanay, Rizal that pairs a real summit push with a post-hike swim at Tinipak River. The trail takes 2–4 hours to the summit depending on pace and weather. It is one of the most rewarding day hikes near Metro Manila — but the June rainy-season version I climbed was a completely different animal from the dry-season photos you see online.
Mt. Daraitan and Tinipak River Quick Guide
| Detail | Info |
|---|---|
| Mountain | Mt. Daraitan (Heart Peak) |
| Location | Brgy. Daraitan, Tanay, Rizal |
| Province | Rizal, CALABARZON |
| Elevation | 739 MASL |
| Difficulty | Minor climb, 4/9 |
| Jump-off | Barangay Daraitan Barangay Hall |
| Best Season | November to April (dry season) |
| Trek Time | 2–4 hours to summit; full day with Tinipak |
| Registration | On-site, Barangay Hall; opens 3:00 AM |
| Campsite | Near summit area and along Tinipak River |
Table of Contents
Where Is Mt. Daraitan and Tinipak River Located?
Mt. Daraitan is in Brgy. Daraitan, Tanay, Rizal — and that location is a big part of why it stays high on so many weekend hiking lists. It is located in the eastern part of Tanay, Rizal, almost at the boundary of General Nakar, Quezon.
The mountain stands at around 739 meters above sea level and forms part of the vast Sierra Madre mountain range. Primary attractions include the heart-shaped peak and the adjacent Tinipak Gorge, where visitors engage in trekking, river tubing, and exploration of limestone karst formations.
The barangay itself has deep roots. Brgy. Daraitan is home to some of the Indigenous Peoples known as the Dumagat-Remontado. The Daraitan Chapel was constructed in 1662, which tells you this community has been here for centuries before tourism arrived. The barangay is rich in agricultural products like kalamansi, rambutan, lansones, coconut, local durian, kamansi, gabi, and sweet potato — mostly grown for personal consumption and for selling to acquire other necessities.
Local government and community efforts focus on sustainable development to mitigate environmental impacts while boosting livelihoods, including community-based homestay programs in Daraitan. The fees you pay at the barangay hall don’t just fund trail access — they fund the livelihood of a farming-and-guiding community. That context changed how I felt about every peso I handed over.
If you’re exploring more mountains in this province, check out this complete guide to mountains in the Philippines for context on what Rizal has to offer.
How to Get to the Mt. Daraitan and Tinipak River Jump-off Point
The most practical route from Metro Manila is: Metro Manila → Tanay → Sampaloc → Daraitan → river crossing → Barangay Hall. It reads cleanly on paper. In practice, it takes patience.
By Public Transport (DIY):
This is doable as a Mt. Daraitan DIY trip, but public transport involves multiple transfers, so this is one of those hikes where a simple route on paper can still eat up time if you miss the right connection. The biggest delay usually happens after Tanay, when you start relying on local transport schedules and availability.
- From Cubao or Kamuning, take a UV Express or bus toward Tanay, Rizal.
- From Tanay town proper, hire a habal-habal or tricycle toward Sampaloc, then onward to Barangay Daraitan.
- From the registration point, you have the option to take a tricycle to the start of the river walk (around 45 minutes on foot).
- At the river, you may need to cross by bamboo raft or the vehicle bridge, depending on water level.
By Private Car or Joiner Van:
A private car or joiner transport is simpler for early starts. Most joiner vans from Metro Manila have a 12:00 AM pickup time from Makati, BGC, or Cubao. Budget a little extra because 2026 transport fares are no longer aligned with the older low anchor rates found in older blog posts.
I drove with friends. We left Quezon City at 12:00 AM to be at the barangay hall by registration opening at 3:00 AM. The road into Barangay Daraitan is mostly paved but gets rough closer to the river crossing. A sedan can make it in dry conditions, though high-clearance vehicles handle the final stretch more comfortably.

Permits, Fees, and Guide Requirements at Mt. Daraitan and Tinipak River
Registration and fees are processed on-site at the Barangay Hall — there is no advance online booking. Treat the Barangay Hall guide assignment as the safest and most reliable standard for current trail access.
My insider tip: Registration opens at 3:00 AM. Arrive before then if you’re climbing on a weekend or long holiday, because they allow only 300 climbers a day. In excess, you will have the option to go to Tinipak River or try Mt. Mamara — only a half climb compared to Mt. Daraitan. If you miss the cap, you lose the summit.
Current Fee Breakdown (as of June 2026 update):
- Bridge crossing fee (four-wheeled vehicle): ₱100
- Environmental/entrance fee: ₱100 per person
- Day hike guide fee (per 5 persons): ₱750
- Overnight guide fee: ₱1,500
- Parking fee (day hike): ₱100
- Tinipak River entrance fee (traverse): ₱30
- Cave spelunking fee: ₱70
- Tricycle fare to Tinipak swimming area: ₱30
A local guide is mandatory, not optional. The guide-to-climber ratio is 1:5. This isn’t just a formality. The guides know where the trail markers disappear in the mud, which limestone steps are unstable, and exactly where the safe swimming zones are at Tinipak. Our guide pointed out a section of the trail I would have slipped badly on without the warning.
DENR official website for national conservation regulations that apply to Sierra Madre trails.
What Is the Mt. Daraitan and Tinipak River Trail Like?
Mt. Daraitan is widely cited at 739 MASL. That puts it in minor-climb territory on paper, but the trail still feels demanding enough to deserve respect. The mountain is commonly described as 4/9 difficulty.
Trail Stage Breakdown with Difficulty Scores
Here are per-stage difficulty scores from my June 2026 rainy-season climb, rated 1–5:
- Stage 1 — Barangay Hall to forest entry (30–40 min): 2/5. Mostly flat with some light incline; the mud starts here but is still manageable.
- Stage 2 — Forest ascent (45–60 min): 4/5. The trail narrows and steepens sharply. After rain, this section turns to ankle-deep mud. Every step needs intention.
- Stage 3 — Limestone rock scramble (30–45 min): 4/5. Exposed sharp limestone faces. This is where gloves matter — the edges are jagged. I cut my palm slightly on a handhold I grabbed too fast.
- Stage 4 — Summit push and Heart Peak (20–30 min): 3/5. Steep but shorter. The view hits you fast when the trees open up.
- Stage 5 — Descent back to Tinipak River (1.5–2.5 hrs): 5/5 in wet conditions. Downhill on wet limestone is the most dangerous stage. More hikers fall going down than going up. Use every root and handhold you can find.
During the wet season (June to October), Mt. Daraitan transforms into a demanding, slippery trail. The dry trail turns into a viscous clay that clings to your boots. The jagged rocks become slick with mud and wet moss, turning a simple scramble into a high-stakes balancing act. Traverse times often double during the wet months.
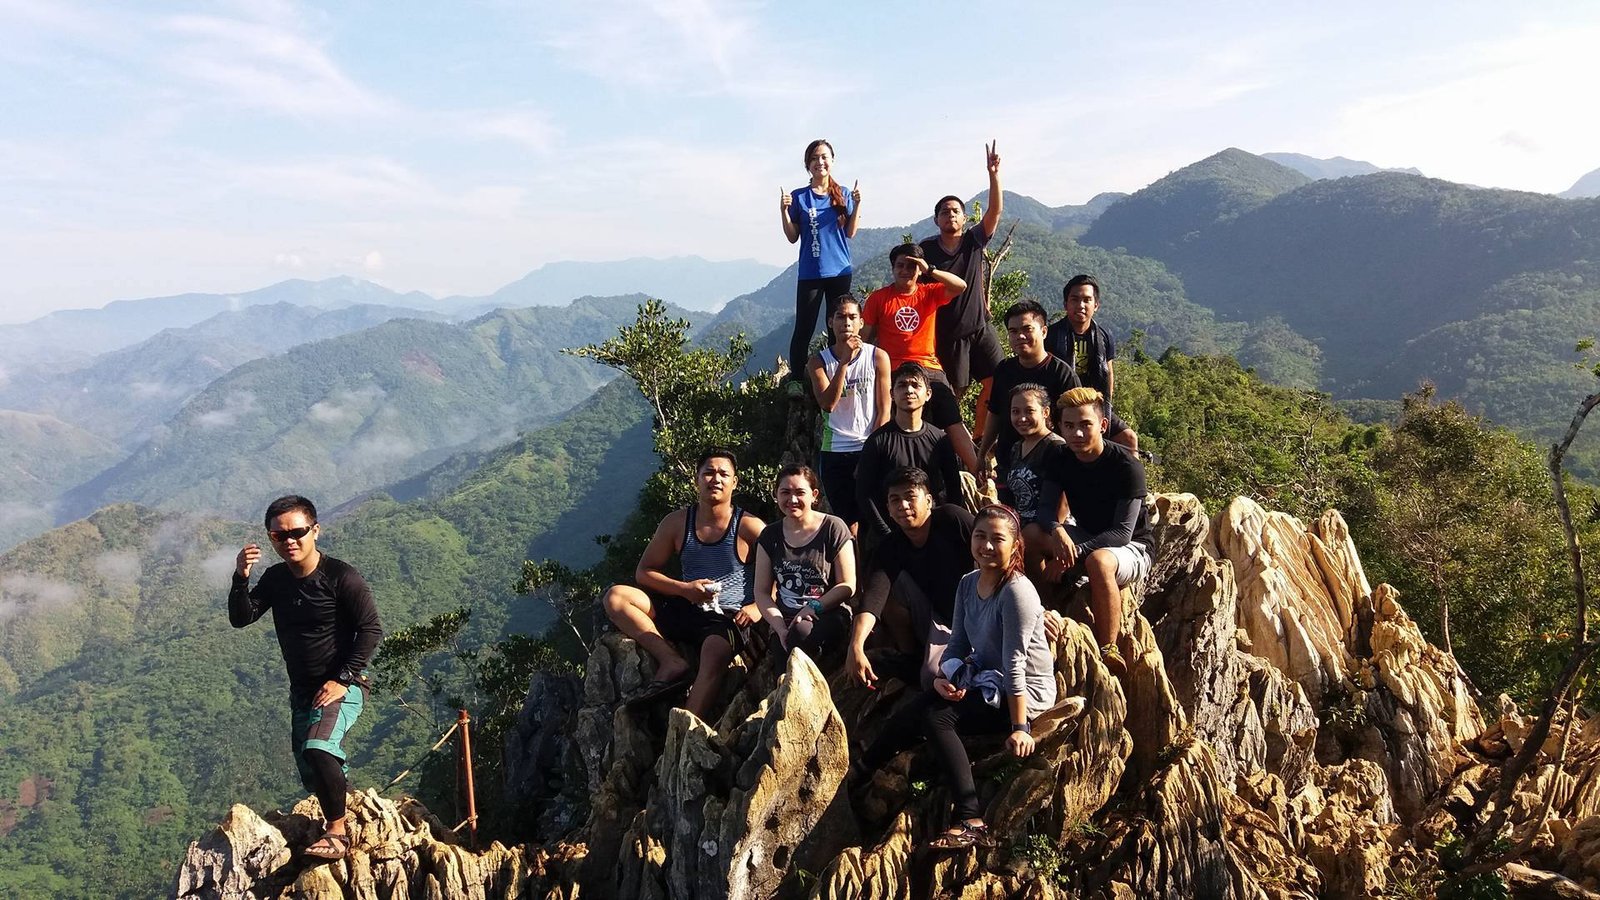
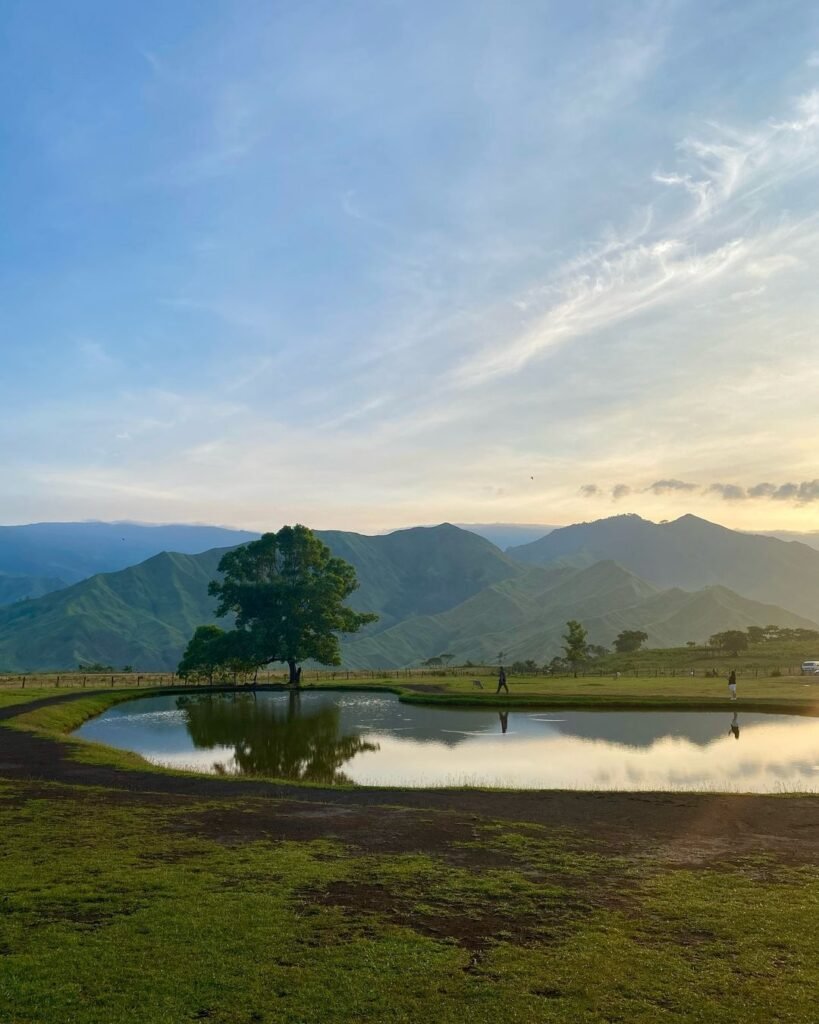
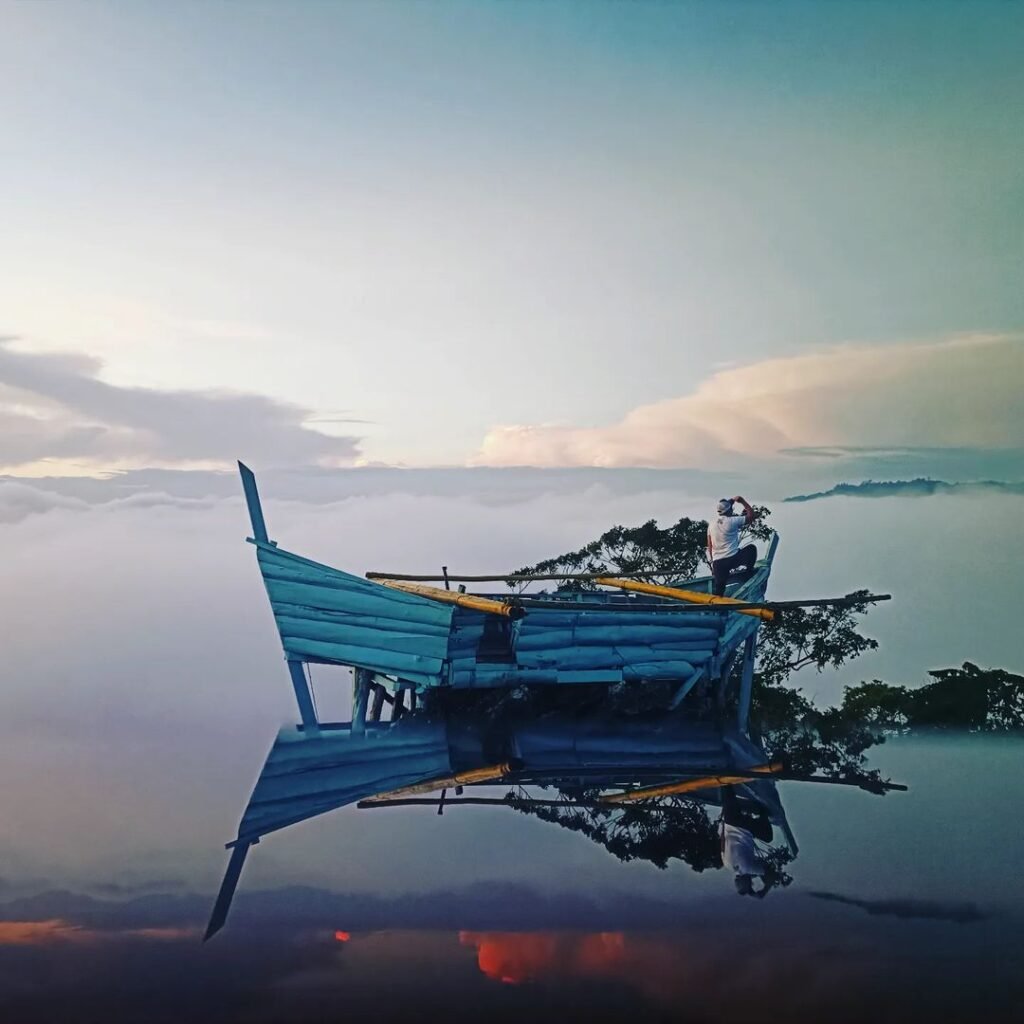
The Summit and Sea of Clouds
I reached the summit 6:30am just as the sun cleared the ridgeline. The sea of clouds sat thick below us, covering the valley in a white layer. The Sierra Madre range poked through in the distance. I’ve hiked several mountains in Rizal, but this view at this elevation — for a sub-2,000-meter peak — felt genuinely outsized. Your chances of seeing the Mt. Daraitan sea of clouds improve with an early summit or an overnight plan, since cloud conditions are usually better earlier in the day. Even then, sea of clouds is never guaranteed.
For more sunrise spots in the area, see the 10 Must-Visit Sea of Clouds in Tanay, Rizal.
Tinipak River
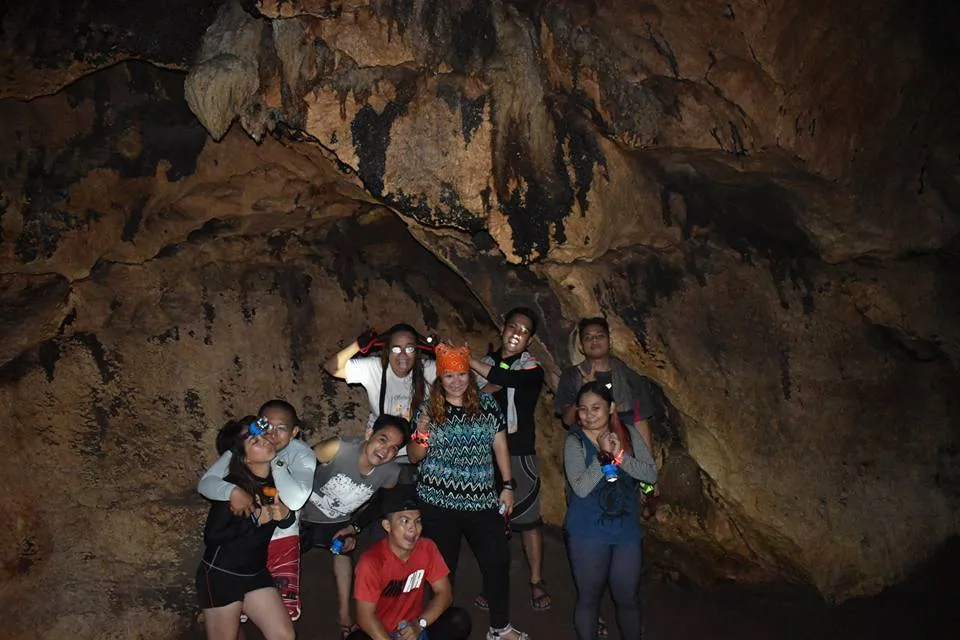
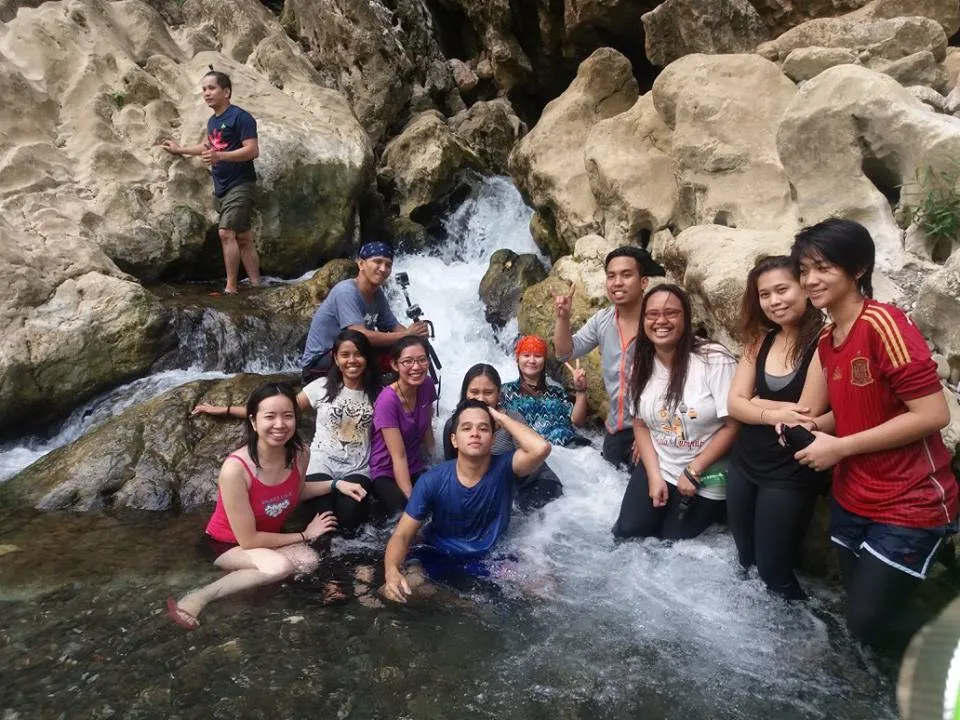
Tinipak River, with its enormous white marble rocks and crystal-clear water, has become an iconic natural attraction in Rizal Province. After the descent, it feels earned. The river flows through a gorge flanked by boulders the size of small houses, bleached bright white against the green water.
Only certain areas of Tinipak River are designated and allowed for swimming. Stay within those zones. Your guide will make this clear. The cave section at the end of the river walk adds extra time but is worth it — the cave is a pleasant surprise, with clean, refreshing water and impressive stalactites and stalagmites.
What Other Guides Get Wrong About Mt. Daraitan and Tinipak River
1. “It’s just a minor climb” — the label is incomplete. This Tanay mountain is still a muddy minor climb, especially after rain or on crowded weekends. The trail can feel steeper, slower, and more tiring than the “minor climb” label suggests. In the rain, it earns a major classification in everything but name.
2. Guides say “arrive early” but don’t explain how early. Registration opens at 3:00 AM. Not 5 AM, not 6 AM. Being at the gate before 3 AM on a holiday weekend is the actual strategy.
3. Tinipak River is treated as a given bonus. Most guides mention it as a casual afterthought. If you’ve done a full summit climb in June mud, your legs will have a very different opinion of the hour-plus walk to the river. Budget your energy for both legs of the day — not just the summit.
4. Gloves are listed as optional in most packing lists. They are not. The limestone near the summit has edges that will open skin. I saw at least three people in my group with cut or scraped hands by the time we reached the top.
Is Mt. Daraitan and Tinipak River Good for Beginners?
It is beginner-possible, not beginner-effortless — especially when the trail is muddy, rocky, and slippery. Mt. Daraitan is doable for beginners, but it is highly recommended that they are physically fit.
If your group has never hiked before and is coming on a June or July weekend, reconsider the timing. During the rainy season, the trail becomes difficult and becomes a major climb that will require more hours to finish. A better entry point for complete beginners is a dry-season visit in November–February or a trail like Nagpatong Rock Formation first.
For hikers with one or two hikes under their belts who are reasonably fit — yes, this is a solid next step. See our guide to beginner-friendly hikes if you want to compare options before committing.
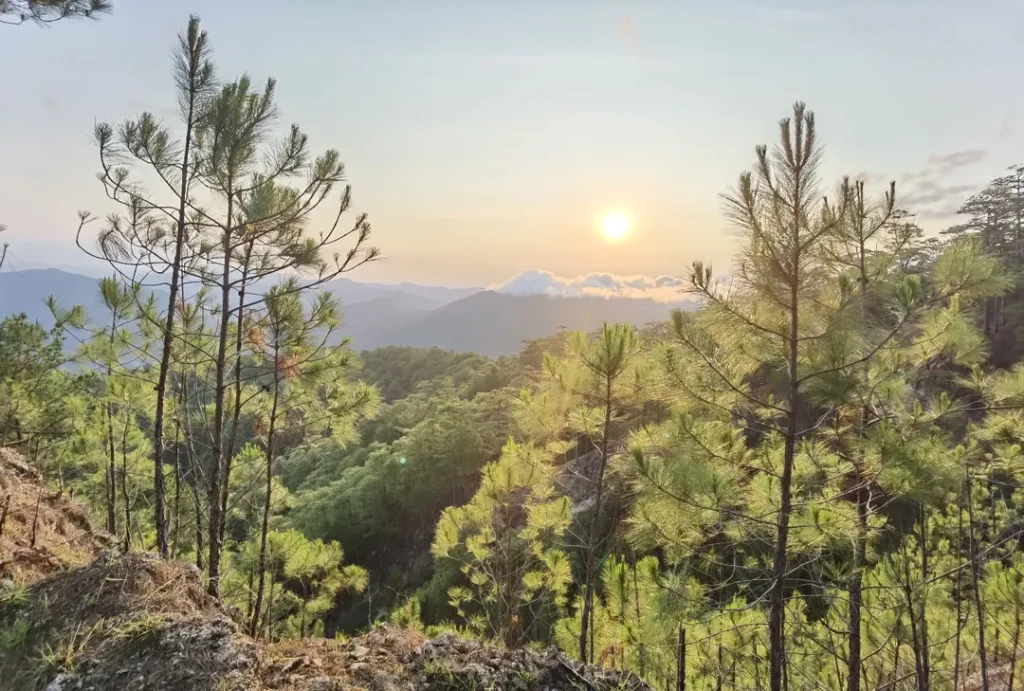
Best Time to Climb Mt. Daraitan and Tinipak River
The dry season, from November to April, is generally the ideal time for hiking Mt. Daraitan. The trails are less slippery and the weather is more favorable.
The best time of the year would be from December to February, during the dry season, which ensures more favorable weather conditions for outdoor activities such as hiking and camping.
Based on my experience, the best time to witness the sea of clouds at Mt. Daraitan is from June to October. I’ve climbed the mountain four times, and I was able to catch the sea of clouds in both June 2026 and September 2025. Because these months fall during the rainy season, a downpour right before your climb gives you a very high chance of seeing the clouds roll in.
I climbed in June 2026 — solidly rainy season. The trail was exactly what you’d expect: thick mud, slick rocks, limatik, and double the normal effort. The reward was real, but the difficulty was also real. If you’re coming during rainy season, pack gaiters, expect to move slowly, and add at least an hour to your summit estimate. Rainy periods bring rainy-season mud, slick rocks, and more complicated river access.
For crowd management: Weekday climbs in dry season are the best combination. If a long weekend is your only option, be at the gate before 3:00 AM to secure your slot within the 300-climber daily cap. Groups who arrive at 5 AM on a holiday weekend have been turned away from the summit and redirected to Tinipak only.
Budget Breakdown for Climbing Mt. Daraitan and Tinipak River
| Expense | Cost (PHP) |
|---|---|
| Environmental / entrance fee | ₱100 per person |
| Guide fee (day hike, per group of 5) | ₱750 |
| Bridge crossing fee (car) | ₱100 |
| Parking fee | ₱100 |
| Tinipak River entrance (traverse) | ₱30 per person |
| Cave spelunking fee | ₱70 per person |
| Tricycle to Tinipak swimming area | ₱30 per person |
| Breakfast at jump-off (hotsilog, etc.) | ₱80–₱120 |
| Transport (habal-habal, tricycle, local) | ₱100–₱300 |
| Estimated DIY total per person | ₱700–₱1,100 |
I started my morning with hotsilog at a small eatery near the Barangay Hall. It cost around ₱120 and it was exactly what I needed before a 4-hour slog through mud. There are several cafeterias in the area where you can buy breakfast, trail food, and packed lunch. Bring cash — there are no card terminals here.

What to Pack for Mt. Daraitan and Tinipak River
| Item | Essential? |
|---|---|
| Trail shoes or trekking sandals (grippy soles) | Yes |
| Gloves (for limestone scramble) | Yes |
| Trekking poles | Strongly recommended |
| Extra clothes + swimwear | Yes |
| Waterproof bag or dry bag | Yes |
| 2–3 liters of water | Yes |
| Packed snacks and lunch | Yes |
| Rain jacket or poncho | Yes (rainy season) |
| Headlamp (for 3 AM start) | Yes |
| First aid kit | Yes |
| Gaiters | Recommended (rainy season) |
| Insect repellent | Yes |
| Sandals or flip-flops (for Tinipak) | Recommended |
Wear grippy trail shoes, not casual sneakers, because mud and rocky downhill sections are where many hikers struggle. Gloves are not optional if you’re taking the limestone scramble section seriously — you can also rent headlights and buy gloves in the area near the Barangay Hall, but bring your own pair to be sure.
Safety Tips for Climbing Mt. Daraitan and Tinipak River
River safety and leptospirosis deserve more attention than most guides give them. “The risk of infection is higher in freshwater, floods, or rivers, especially if there are cuts or wounds on the skin.” Tinipak River looks pristine, but it is still a freshwater system in a rural watershed. Refrain from swimming in areas where water quality is questionable, especially during and after heavy rainfall. The Leptospira bacteria can survive in water and moist soil for weeks or months. Early symptoms typically include sudden onset of fever, severe headache, muscle aches, chills, and red eyes.
Practical steps: swim only in the designated zones at Tinipak. Cover open wounds before entering the water. Wash exposed skin thoroughly with soap and clean water after any water contact. If you develop fever or muscle pain within two weeks of your visit, see a doctor and mention the river exposure immediately.
Other trail safety points:
- Do not start the summit climb late in the day — afternoon starts risk a dark and dangerous descent.
- Descending is harder than ascending on this trail. Slow down on the way down.
- Inform your guide if anyone in your group has a knee condition before you start.
- Reviews emphasize the importance of proper gear such as knee pads, trekking poles, and gloves to navigate the rocky and slippery paths.
Rizal tourism office page for any trail closure updates before your visit.

Frequently Asked Questions About Mt. Daraitan and Tinipak River
1. Do I need to book a permit in advance?
No advance booking is required. All registration happens on-site at the Barangay Daraitan Barangay Hall. Registration opens at 3:00 AM. On peak weekends and long holidays, arrive before opening time because the 300-climber daily cap fills fast.
2. What is the Mt. Daraitan difficulty level?
The mountain is in minor-climb territory on paper, but the trail still feels demanding enough to deserve respect. It is commonly described as 4/9 difficulty. For fit beginners, that is manageable, but the trail can feel much tougher in wet conditions.
3. Can I do the Mt. Daraitan traverse to Tinipak River?
Yes. The Mt. Daraitan traverse follows the trail from the summit down the other side to Tinipak River, which sits near the Quezon boundary. There is a separate ₱30 Tinipak River entrance fee for the traverse portion, since that section of the trek is in General Nakar, Quezon. Your local guide handles the logistics.
4. Is camping allowed at Mt. Daraitan?
Yes, camping is permitted in designated areas near Tinipak River. Overnight guide fees run ₱1,200–₱1,500 for a group of up to 5 persons. There are basic facilities in the barangay. Bring your own tent, food, and water.
5. Is the Mt. Daraitan sea of clouds guaranteed?
Your chances improve with an early summit or an overnight plan, since cloud conditions are usually better earlier in the day. Even then, sea of clouds is never guaranteed. Overnight hikers who summit at dawn have the best odds. Day hikers who start registration at 3 AM and summit by 6–7 AM are in the next best window.
Final Verdict: Should You Climb Mt. Daraitan and Tinipak River?
4.5 out of 5 for intermediate hikers; 3.5 out of 5 for first-timers attempting it in the rainy season. Mt. Daraitan delivers a summit that feels earned, a river that rewards the effort, and a community worth supporting. Mt. Daraitan is one of the most popular hikes in Tanay for good reason: you get a real summit push, a classic river add-on, and views that feel bigger than what most first-timers expect from a mountain this close to Metro Manila. Come prepared for the trail difficulty, respect the 300-climber cap, and give the Tinipak River the same caution you’d give any freshwater system — and this climb will be one of your best Rizal day hikes.
For more Tanay adventures, see the complete tourist spot guide to Tanay, Rizal and the Ultimate Guide to Treasure Mountain for a less intense option with similar Sierra Madre views.
Hi, thanks a lot for the tips here since they were helpful. Just to let you and the other readers know, the fees have already increased as follows (based on what I can remember from our day hike last 23 March 2025):
– Bridge crossing fee for vehicles (if the river is not swollen and thus no need to do bamboo raft crossing to reach the barangay hall for registration): ₱100 for four-wheeled vehicles; I think ₱80 for three-wheeled vehicles and ₱50 for 2-wheeled vehicles.
– Mt Daraitan entrance fee = Environmental fee to support conservation efforts = ₱100 per person
– Day Hike Guide Fee (for every 5 persons): ₱750
– Overnight Hike Guide Fee: ₱1500
– Parking fee for day hike visitors: ₱100
– Tinipak river entrance fee (when doing a traverse hike since that part of the trek is already located in the boundary of Quezon): ₱30; doing spelunking in the nearby cave: ₱70
– Tricycle fare from Barangay Hall to portion of river reserved for swimming for hikers (after hike): ₱30
Hi! Thanks so much for sharing these updated rates and your recent experience from your day hike on March 23, 2025! 😊 This information is super valuable and will definitely help future hikers plan their trip more accurately. It’s great to have firsthand insights from someone who recently visited Mt. Daraitan.
It seems like the fees have indeed increased a bit, especially for the guide services and parking. Good to know about the bridge crossing fee details, too. I’ll update the information accordingly to make sure everyone has the latest details.
Thanks again for sharing and happy hiking on your future adventures!
I’ll add to that.. the trike fare is 100/3 persons.. it was also a fun adventure but you really got to have great stamina and patience! Love your site btw!
Hi there, thanks for the informative post! Would you know if a guide/booking of some sort is needed for a trip to Tinipak River only? Trying to organize a trip to the river but not so sure where to start or who to contact (if any). Any help would be much appreciated! Thank you!