The Nasugbu Trilogy is a single-day circuit hike in Nasugbu, Batangas covering three interconnected peaks — Mt. Lantik (552 MASL), Mt. Talamitam (630 MASL), and Mt. Apayang (662 MASL). The full circuit carries a 4/9 difficulty rating and takes 5 to 7 hours to complete. The biggest challenge is not the elevation — it’s the brutal sun exposure on the open cogon ridgelines, and April makes that painfully clear.
Nasugbu Trilogy Quick Guide
| Detail | Mt. Lantik | Mt. Talamitam | Mt. Apayang |
|---|---|---|---|
| Location | Brgy. Aga, Nasugbu | Brgy. Aga, Nasugbu | Brgy. Aga / Mataas na Pulo, Nasugbu |
| Province | Batangas | Batangas | Batangas |
| Elevation | 552 MASL | 630 MASL | 662 MASL |
| Difficulty | 3/9 Minor Climb | 2–3/9 Minor Climb | 4/9 Minor Climb |
| Jump-off | Sitio Kayrilaw | Sitio Bayabasan (KM 83) | Sitio Bayabasan (KM 83) |
| Best Season | Nov–May (Dry) | Nov–May (Dry) | Nov–May (Dry) |
| Trek Time | 1.5–2 hrs to summit | 1.5–2.5 hrs to summit | +1–1.5 hrs from Talamitam |
| Registration | Sitio Kayrilaw / Barangay Outpost | Sitio Bayabasan (KM 83) | Sitio Bayabasan (KM 83) |
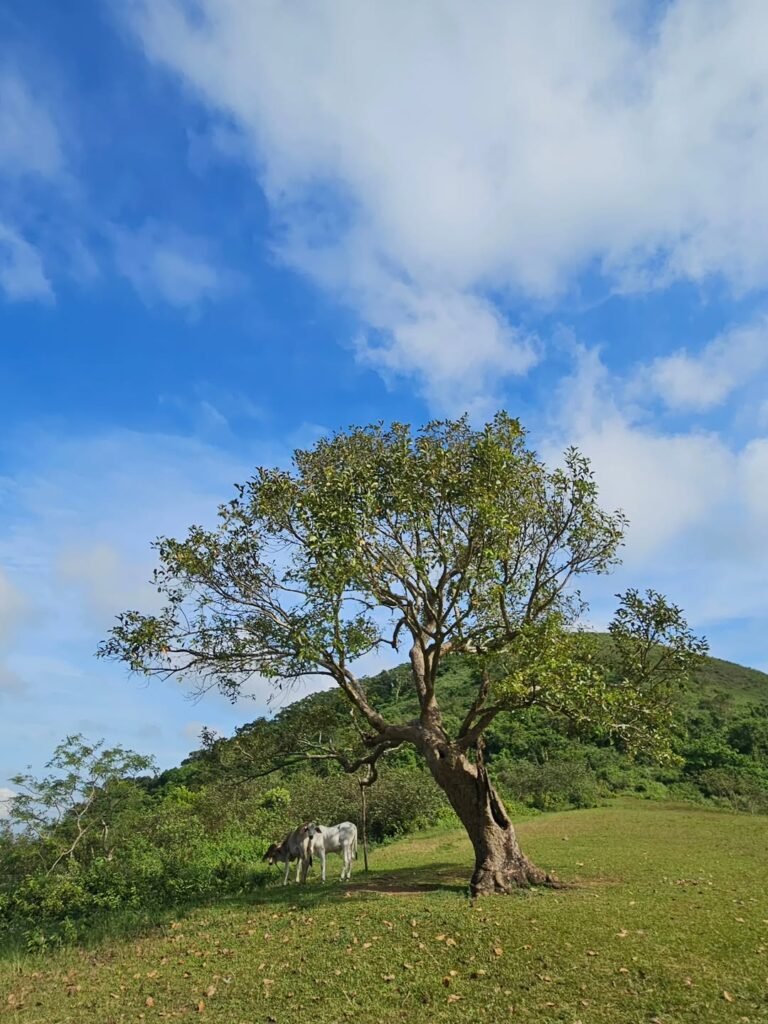
| Campsite | Near summit (limited) | Wide grassland below summit | Exposed summit, no recommended overnight |
Table of Contents
Where Is Nasugbu Trilogy Located?
Mount Lantik, Mount Talamitam, and Mount Apayang in Nasugbu, Batangas are interconnected mountains that form a natural ridge circuit in the western uplands of Batangas province, roughly 83 kilometers south of Manila along the Tagaytay–Nasugbu Highway.
Situated in the rolling terrains of western Batangas, this circuit has evolved from the classic “Talamitam Day Hike” into a more physically demanding expedition. The three peaks sit within the administrative territory of Barangay Aga and Sitio Kayrilaw — with the final descent from Mt. Apayang exiting at Barangay Mataas na Pulo.
The ridge faces the West Philippine Sea to the west, which means you get coastline views on clear days and absolutely no shade on the windward side of the trail. Standing on the ridgeline with Taal Volcano behind you and the Lubang Islands floating on the horizon is one of the most cinematic moments Batangas hiking has to offer — but you earn every bit of it.
How to Get to the Nasugbu Trilogy Jump-off Point
The primary jump-off for the Nasugbu Trilogy is Sitio Bayabasan at KM 83, Barangay Aga — but if you’re executing the recommended Lantik-first strategy, your first stop is Sitio Kayrilaw.
By public bus (recommended):
To get to the Nasugbu Trilogy via commute, board a DLTB or BSC Bus from Buendia (Gil Puyat) or PITX bound for “Nasugbu via Tagaytay.” Ask the conductor to drop you off at KM 83 or Sitio Bayabasan. From there, take a tricycle to the registration area or the Lantik jump-off (Brgy. Kayrilaw) if you are following the recommended loop.
Board a bus marked “via Tagaytay.” Do not board buses marked “via Ternate” or “Kaybiang Tunnel,” as the latter takes the coastal road and completely bypasses the Talamitam jump-off.
The bus fare ranges from ₱212 to ₱260, and travel time is 3 to 4 hours depending on traffic. I departed Manila at 3:00 AM on an April morning and hit the jump-off by just past 6:00 AM — perfect timing to start under cooler air before the sun climbed.
Last-mile tricycle:
The tricycle fare from the highway junction is standard at ₱150–200 per trip (good for 3–4 passengers) for the 2.9 km ride to the registration area. Tricycles rarely idle at the remote Sitio Kayrilaw jump-off — get your driver’s mobile number before you start the hike so they can pick you up afterward.
By private vehicle:
If you are driving, navigate via the Cavite–Laguna Expressway (CALAX) and Tagaytay–Nasugbu Highway. Set your Waze or Google Maps to “Mt. Talamitam Jump-off” or “Bayabasan Elementary School.” Do not simply pin “Mt. Apayang,” as that generic pin might route you through unpaved interior roads in Mataas na Pulo that are difficult for sedans. Stick to the highway entry at KM 83. Designated parking is available near the registration area for ₱100 (cars) or ₱50 (motorcycles).
Before I left the jump-off on my April 2026 climb, I had a bowl of Batangas Lomi from a roadside stall near Bayabasan Elementary School — thick, eggy, and loaded with pork. Consider it mandatory carbo-loading before you face a full day on the ridge.

Permits, Fees, and Guide Requirements at Nasugbu Trilogy
As of 2026, the “No Guide, No Hike” policy is strictly enforced by the Barangay Aga and Kayrilaw LGUs. This is the single most important logistical fact to know before you show up at the jump-off.
Medical certificates are generally not required for day hikes, but hikers must sign a waiver of liability at the registration area. Walk-ins are allowed, but securing a guide in advance is highly recommended for weekends to ensure availability.
Fee breakdown:
Registration fee is ₱50 per head, paid upon arrival, with an additional ₱30 surcharge if crossing over to Mt. Apayang. Camping fee is ₱100–₱150 per tent if staying overnight.
The guide fee is the most significant variable in your budget. Unlike simple day hikes, the Nasugbu Trilogy commands a premium rate because it covers three peaks and a longer duration of 5–7 hours. The standard rate for the full circuit is approximately ₱1,500 to ₱2,100 per group.
A safe total budget for a DIY Nasugbu Trilogy day hike is ₱1,200–₱1,500 per person for a group of 5, covering the mandatory guide fee, bus fares, environmental fees, and food. Solo joiners may find organized tours at approximately ₱1,400 all-in more economical, since the guide fee is fixed regardless of group size.
The local guides here genuinely know every branching cow path and land boundary crossing on the ridge. The trail crosses multiple private grazing properties, and without a guide, you will either trespass or end up on a dead-end cow track — a frustrating situation I’ve heard about from other hikers. Pay the guide fee, bring small bills, and treat it as part of the experience.
For more context on how guide requirements and difficulty ratings work for Batangas mountains, see our complete guide to mountains in the Philippines and our guide to Major Climb mountain difficulty levels 5–8.

What Is the Nasugbu Trilogy Trail Like?
The Nasugbu Trilogy trail is a deceptively demanding, mostly exposed circuit that strings together three different terrain personalities in one continuous push. The official difficulty is 4/9 (Minor Climb), but the physiological load — especially in dry season — punches above that rating by mid-morning.
Leg 1: Mt. Lantik (552 MASL) — The Shaded Opener
Mt. Lantik serves as the ecological counterweight to the open ridges. It is the lowest peak but arguably the most pleasant, winding through dense secondary forests, bamboo groves, and fruit orchards (guava and coconut).
The mountain presents a sharper, more conical profile than the neighboring plateau of Mt. Talamitam (630 MASL). The trail starts on loamy volcanic soil in the agro-forestry zones but shifts to loose igneous rock and compacted clay near the peak. Summit time from Sitio Kayrilaw is 1.5 to 2 hours.
Standing at the summit, you are surrounded by a true 360-degree theater of the Southern Tagalog region. To your west lies the glimmering coastline of the South China Sea; to the south, the serrated ridges of Mt. Batulao dominate the skyline; and to the east, the dramatic caldera of Taal Volcano provides the backdrop.
The key strategic reason to do Lantik first: getting the shaded leg done early allows you to save energy for the exposed assault on the Apayang ridge later in the morning.
Stage breakdown (Leg 1):
- Paved barangay path → pure soil trail through agro-forestry zone
- Tree line breaks at approximately 300 MASL
- Loose igneous rock and clay on the final push to the conical peak
- Summit: 552 MASL
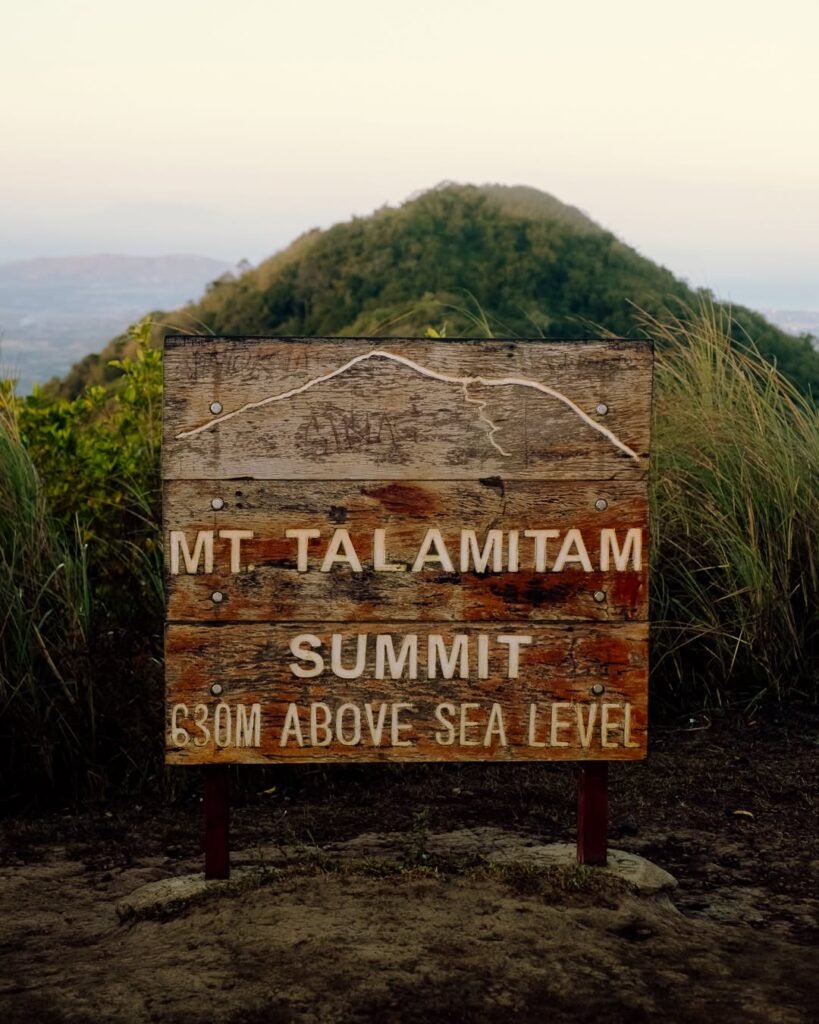
Leg 2: Mt. Talamitam (630 MASL) — The Grassland Grinder
Mt. Talamitam (630 MASL), often called the “Bald Mountain,” and its taller neighbor Mt. Apayang (662 MASL), are characterized by vast cogon grasslands (Imperata cylindrica) that offer zero shade. Between 10:00 AM and 2:00 PM, the heat index on these ridges can easily spike above 38°C.
The connector trail from Lantik to Talamitam transitions abruptly from canopy forest to open cogon. On my April 2026 climb, by the time I hit this section around 8:30 AM, the sun was already punishing. The trail is wide and well-worn enough that route-finding is straightforward on a clear day, but the heat makes every step feel heavier than the gradient warrants.
From the summit, a distinct view of Batangas province is visible — Mt. Batulao, Mt. Makiling, and Mt. Marami are prominent landmarks. To the west, the famous Mt. Pico de Loro stands out. To the southwest, Ambil Island and Lubang Island of Occidental Mindoro are visible, along with Nasugbu Bay.
There is a short roped assault trail leading to the summit, but it is generally easy to pass through. Gloves help on this section.
Stage breakdown (Leg 2):
- Transition from forest to open cogon grassland after descending Lantik
- Bamboo bridge river crossing at the base
- Steep 45-minute assault through open grass to the plateau
- Final roped section to the summit marker
- Summit: 630 MASL
Leg 3: Mt. Apayang (662 MASL) — The Technical Closer
Mt. Apayang forces you to deal with elements that the standard Talamitam route spares you from: razor-sharp cogon grass, steeper rock scrambling, and a more complex logistical loop involving two barangays.
The final assault involves Class 3 scrambling over igneous rock, and the descent to Barangay Mataas na Pulo is a steep, dusty slide that tests your traction. This is the section where the trilogy earns its claim on your legs. By Apayang, you’ve already climbed two peaks in the sun — the rock scramble at the top requires focus and good grip.
Standing on the summit of Mt. Apayang (662 MASL), you are rewarded with a panoramic 360-degree theater: the vast expanse of the West Philippine Sea to the west, the faint outline of the Lubang Islands on the horizon, and the towering caldera rim of Tagaytay to the east.
Keep ₱20 and ₱50 bills handy — the tricycle drivers at the Mataas na Pulo exit rarely have change for ₱500 bills.
Stage breakdown (Leg 3):
- Short descent from Talamitam summit → saddle connector
- Open cogon with razor-sharp blades on both sides of the trail
- Class 3 rock scramble to Apayang summit marker
- Steep dusty descent to Brgy. Mataas na Pulo
- Summit: 662 MASL
For detailed individual guides, see our full profiles of Mt. Lantik, Mt. Talamitam, and Mt. Apayang
Is Nasugbu Trilogy Good for Beginners?
The Nasugbu Trilogy is accessible to fit beginners but is not recommended for complete couch-to-summit novices.
It is suitable for “active” beginners — those who jog or hit the gym regularly. However, for a complete novice, the full circuit is often too exhausting due to the 38°C heat index on the open ridges. If you have zero hiking experience, start with the Mt. Talamitam day hike first (2–3 hours) before attempting the full trilogy loop.
The specific benchmark that exposes unfit hikers is not the gradient — it is sustained heat exposure across 5–7 continuous hours on a trail with almost no shade on the Talamitam–Apayang section. Hikers with cardiovascular conditions should exercise serious caution.
Multiple Trails at Nasugbu Trilogy: Which One?
The Nasugbu Trilogy can be approached from two entry points, and the choice of start point defines the character of your day.
The Lantik-First (Sitio Kayrilaw) Loop is the strongly recommended approach in 2026. This strategy advocates for starting at Brgy. Kayrilaw to tackle the forested ascent first, allowing you to gain elevation under the protection of the canopy before the sun fully exposes the Talamitam–Apayang ridgeline.
The Talamitam-First (KM 83 / Sitio Bayabasan) approach is the older, more traditional route. It puts you on the exposed grassland immediately and leaves the easier, shadier Lantik descent for when you’re most fatigued — a strategic disadvantage on a hot day.
The most critical failure point in many itineraries is the confusion regarding the jump-off point. While older data points to Sitio Bayabasan, Sitio Kayrilaw is now the primary, most efficient entry point for the full trilogy.

Best Time to Climb Nasugbu Trilogy
November to May (dry season) is the best time to climb the Nasugbu Trilogy. In the dry season, the risk of trail hazards is negligible — the trails are dusty and hot, but stable and clearly defined.
The tradeoff in dry season is heat: April and May produce the highest heat index readings on the ridge. An alpine start departing Manila by 3:00 AM and beginning the hike by 5:30 AM is the best defense against midday temperatures. My April 2026 climb was a relentlessly sunny day — beautiful for views, but the heat was a genuine physical adversary by 9:00 AM.
During the wet season (June–October), limatiks (blood leeches) appear in the damp leaf litter of the Mt. Lantik forest and the bamboo groves connecting to Mt. Apayang. If you hike during these months, bring alcohol spray or wear high socks.
Avoid hiking on Sunday afternoons. The traffic bottleneck at the Mendez Crossing and Tagaytay Rotunda becomes unbearable after sunset, often turning a 3-hour trip into a 5-hour ordeal.
Budget Breakdown for Climbing Nasugbu Trilogy
A safe budget for a DIY Nasugbu Trilogy day hike is ₱1,200–₱1,500 per person for a group of 5, covering the mandatory guide fee, bus fares, environmental fees, and food.
| Expense | Estimated Cost (PHP) |
|---|---|
| Bus fare (Manila–Nasugbu, one way) | ₱212–₱350 |
| Bus fare (return to Manila) | ₱212–₱350 |
| Tricycle to Sitio Kayrilaw jump-off | ₱150–₱200 per trip (shared) |
| Tricycle from Mataas na Pulo (exit) | ₱100–₱150 per trip (shared) |
| Registration fee (Lantik entry) | ₱50 per head |
| Registration fee (Talamitam / Apayang) | ₱50 per head |
| Twin/trilogy surcharge (Apayang crossing) | ₱30 per head |
| Guide fee (full trilogy, per group) | ₱1,500–₱2,100 |
| Parking (private vehicle) | ₱50–₱100 |
| Pre-hike meal at jump-off (lomi, etc.) | ₱80–₱150 |
| Water and trail snacks | ₱150–₱300 |
| Estimated total (per person, group of 5) | ₱1400–₱1800 |
Trail vendors sell drinks like Mountain Dew or Buko Juice for ₱50–₱70 per bottle. If you are on a tight budget, buy your supplies at the 7-Eleven in Nasugbu town or bring them from Manila.
What to Pack for Nasugbu Trilogy
The packing list for the Nasugbu Trilogy is a heat management kit as much as a hiking kit.
| Item | Essential? |
|---|---|
| 3 liters of water minimum | Yes |
| Trekking shoes or trail runners | Yes |
| High-SPF sunscreen (reapply every 2 hrs) | Yes |
| Arm sleeves (sun and cogon protection) | Yes |
| Lightweight hiking umbrella | Yes |
| Trekking pants (not shorts) | Yes |
| Gloves (for rock scramble on Apayang) | Yes |
| Hat or buff | Yes |
| Electrolyte drinks or powders | Yes |
| Energy snacks (gels, nuts, fruit) | Yes |
| First-aid kit (blister care, antiseptic) | Yes |
| Headlamp (for pre-dawn start) | Yes |
| Trekking poles | Recommended |
| Rain jacket (wet season only) | Seasonal |
| Tent and sleeping bag | Overnight only |
| Alcohol spray (wet season, for leeches) | Seasonal |
Due to the razor-sharp cogon grass and unrelenting solar exposure on the ridge, wearing arm sleeves and long trekking pants is mandatory for Mt. Apayang. Hikers must pack a silver-coated hiking umbrella for active cooling and carry at least 2.5 liters of water, and bring gloves for the Class 3 rock scrambling near the summit.
There is no reliable water source on the trail after the jump-off. Aside from being hot, there is no water source on the trail itself — carry a minimum of 3 liters to avoid dehydration.

Safety Tips for Climbing Nasugbu Trilogy
The Nasugbu Trilogy’s primary safety threat is heat exhaustion, not technical hazard.
- Start before 5:30 AM. If you reach the Mt. Lantik summit after 08:00 AM, proceed to Talamitam with caution. The heat index in the cogon grasslands peaks rapidly, and there is absolutely no shade on the connector trail.
- Hydrate actively. Drink before you feel thirsty. Sipping every 15–20 minutes on the exposed ridge is more effective than chugging at summits.
- Never hike guiding-free. The Barangay Aga ordinance strictly enforces a “No Guide, No Hike” policy to ensure safety. Hikers attempting to bypass registration are routinely intercepted by barangay tanods.
- Carry small bills. Multiple informal toll points and tricycle pickups at the Mataas na Pulo exit require ₱20–₱50 denominations.
- Know your turnaround signal. If any member of your group shows signs of dizziness, nausea, or confusion on the open ridge — stop, find whatever shade exists, hydrate, and rest. Do not push for the next summit in that condition.
- Pack everything out. If you brought a Gatorade bottle up from Sitio Bayabasan, you must bring it down. The open grassland leaves trash completely visible — Leave No Trace is easily enforceable here.
- Signal coverage is present along most of the trail, which means you can contact your guide, tricycle driver, or emergency contacts if needed.
The nearest medical facility is in Nasugbu town proper. For serious emergencies, the MDRRMO Rescue Nasugbu mobile number is a critical contact to save before you depart.
Frequently Asked Questions About Nasugbu Trilogy
1. How long is the Nasugbu Trilogy from start to finish?
The Nasugbu Trilogy comprises Mt. Lantik, Mt. Talamitam, and Mt. Apayang — a Minor Climb with a 4/9 difficulty rating. The full circuit takes 5 to 7 hours to complete. This includes summiting all three peaks, transit time between them, rest stops, and photography time. Factor in an additional 30–45 minutes at each summit if conditions are clear and views are extraordinary.
2. What is the highest point of the Nasugbu Trilogy, and what is the total MASL?
Mt. Apayang is the rugged northern anchor of the Nasugbu Trilogy, standing at 662+ MASL — making it the highest of the three peaks. The circuit ascends progressively: Mt. Lantik at 552 MASL, Mt. Talamitam at 630 MASL, and Mt. Apayang at 662 MASL, creating a natural ascending rhythm across the day.
3. Is a guide mandatory for the Nasugbu Trilogy in 2026?
Yes — as of 2026, the “No Guide, No Hike” policy is strictly enforced by the Barangay Aga and Kayrilaw LGUs. This is not optional or negotiable. The guide fee is the most significant budget variable and covers three peaks over a longer duration. The standard rate for the full circuit is approximately ₱1,500–₱2,100 per group.
4. Is there water available on the Nasugbu Trilogy trail?
There is no reliable water source on the trail after the jump-off. The only drawback is that there is no water source on the trail and it is very hot due to sun exposure. Bring a minimum of 3 liters per person from the start. Small vendor stalls occasionally operate near the Talamitam grassland campsite area, but supply is inconsistent and prices are marked up due to transport costs.
5. What is the best itinerary for the Nasugbu Trilogy?
The optimized Nasugbu Trilogy itinerary for 2026 begins with an alpine start from Manila at 3:00 AM, arriving at the KM 83 junction by 6:00–6:30 AM. Take a tricycle to Sitio Kayrilaw and start the trek by 6:30–7:00 AM to begin Mt. Lantik under canopy cover. By negotiating a transfer to Brgy. Kayrilaw and tackling the forested ascent first, you gain elevation under the protection of the canopy before the sun fully exposes the Talamitam–Apayang ridgeline. Target completion at the Mataas na Pulo exit by 1:00–2:00 PM to catch a bus home before the Sunday traffic sets in.
Final Verdict: Should You Climb Nasugbu Trilogy?
4.2 out of 5 for fit intermediate hikers who can manage a 3:00 AM wake-up, five-plus hours of sustained movement, and relentless sun. The Nasugbu Trilogy delivers genuine three-summit achievement, stunning panoramic views of the West Philippine Sea, Taal Volcano, and the Batangas ridgeline — all within a single, manageable day hike from Manila.
Whether you’re an experienced hiker or a newcomer looking for a challenge, the Nasugbu Trilogy promises a memorable adventure. The heat is the one variable that will determine whether this is an epic day or a miserable one — start early, hydrate aggressively, and that summit high from Apayang will stay with you long after the lomi on the way home.