Quick Facts: Mt. Kapigpiglatan
- Elevation: 678 MASL
- Difficulty: 3/9 (Minor Climb)
- Trail Class: 1-3 (Rolling hills + River crossing)
- Hours to Summit: 2–3.5 Hours
- Jump-off Point: Brgy. Omaya, San Narciso, Zambales
- Features: Open grassland, 360-degree views, Veto Falls
- Nearby Spots: Liwliwa Beach, Mt. Mariglem
Introduction
Mt. Kapigpiglatan in San Narciso, Zambales is the province’s rising star, offering a beginner-friendly 3/9 difficulty hike characterized by rolling green ridges and zero canopy cover. Standing at 678 MASL, it requires a 2 to 3.5-hour trek to the summit and is best known for its “Bukidnon-like” aesthetic and the refreshing Veto Falls side trip.
When you think of hiking in Zambales, you likely picture the grey, alien landscapes of Mt. Pinatubo or the punishing, rocky heat of the Cawag Hexa. But Mt. Kapigpiglatan breaks that mold entirely.
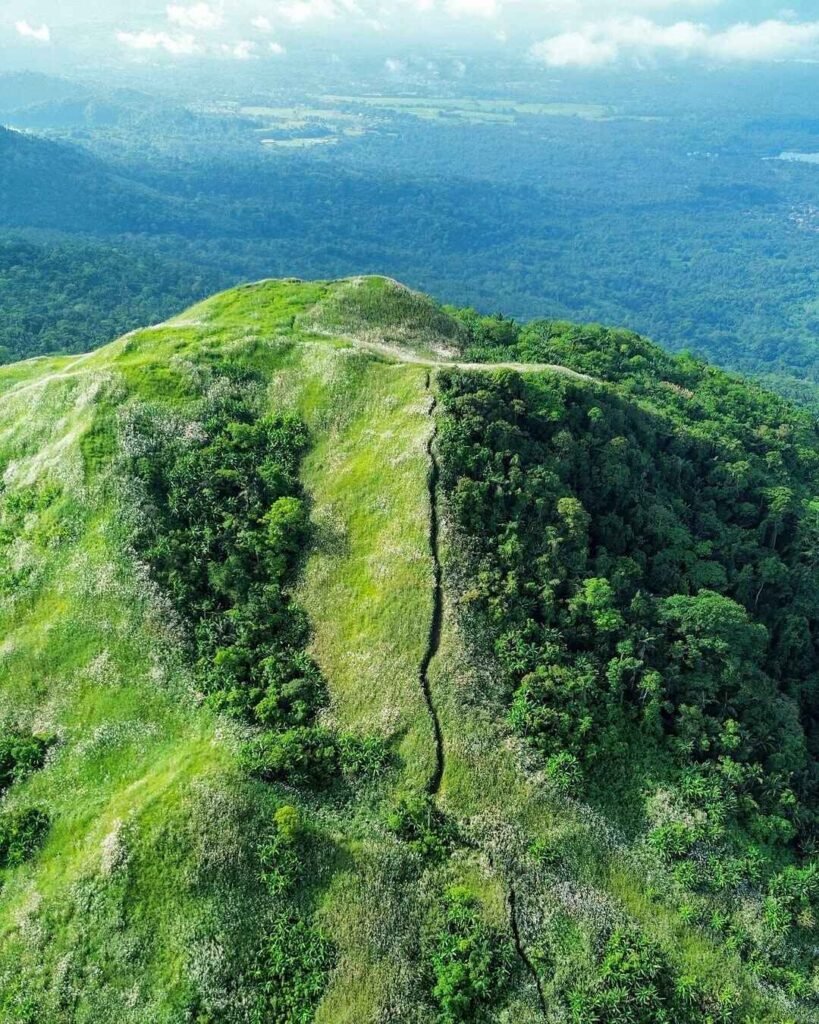
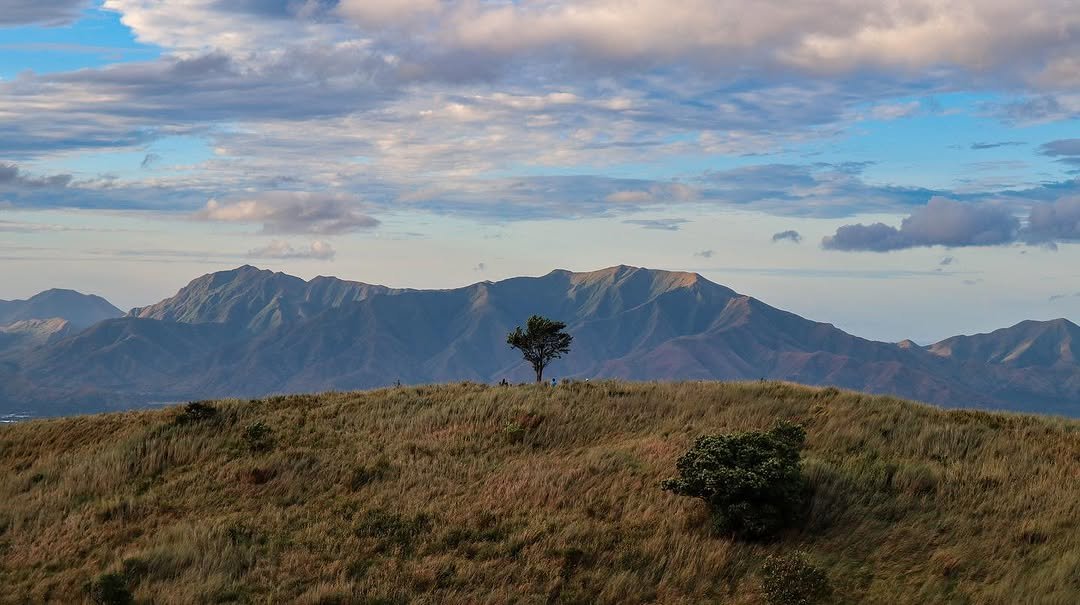
Instead of volcanic lahar and jagged peaks, we were greeted by endless waves of verdant cogon grass and rolling hills that look more like the pastoral landscapes of Bukidnon or even a tropical New Zealand than Central Luzon. Located in the interior village of Brgy. Omaya in San Narciso, this mountain has quickly become the go-to destination for hikers seeking high visual rewards without the technical peril of major climbs.
However, don’t let the “rolling hills” fool you. The name itself carries a rugged history. In the local Ilocano dialect, the root word “piglat” translates to “scar.”
Locals told us that decades ago, these slopes weren’t for leisure—they were working pasturelands. The “scars” were the mud tracks and wallows carved into the earth by grazing carabaos and wild boars. Today, those agricultural scars have healed into one of the most scenic trails in the Philippines, transforming a rural pasture into a thriving eco-tourism hub.
While the trek is rated a manageable 3/9 difficulty, I have to warn you: the “Heat Factor” is real. The beauty of Mt. Kapigpiglatan comes from its open ridges, which means you are exposed to the sun from the moment you leave the jump-off point until you hit the summit.
If you are looking for a hike that combines an intense sweat session with a relaxing dip at Veto Falls—and maybe a post-hike surf at Liwliwa Beach—this is the guide for you.
Table of Contents
How to Get There (Manila to San Narciso)
To reach Mt. Kapigpiglatan from Manila, board a Victory Liner bus bound for Iba or Santa Cruz, Zambales (Fare: ₱375–₱450). Ask to be dropped off at the San Narciso Municipal Hall. From the town proper, hire a tricycle directly to the Brgy. Omaya Jump-off point (₱100–₱300 per way). The total travel time is approximately 4–5 hours.
Public Transport (DIY Strategy)
For backpackers, the most reliable option is Victory Liner. We usually depart from their Cubao or Pasay terminals between 11:00 PM and 1:00 AM to arrive in Zambales before sunrise.
You must board a bus with the signage “Iba” or “Santa Cruz.” Do not make the mistake of boarding a bus marked “Olongapo City.” If you do, you will be stuck at the Olongapo terminal and will need to wait for another transfer bus to take you the remaining hour north to San Narciso.
Tell the conductor strictly that your drop-off is San Narciso Municipal Hall (landmarks: San Narciso Church or the 7-Eleven). The fare for a regular aircon bus plays around ₱375 to ₱450, while the First Class/Express option (via SCTEX) can go up to ₱600+.
The “Last Mile”: Tricycle Logistics
Once you get off at the town proper, you will find a line of tricycles near the Municipal Hall or the market area. You need to hire one to take you inland to Brgy. Omaya.
The price here can be tricky. Drivers often quote ₱300 for a “special trip” (one way), but if you are a group of 3-4, you can split this cost effectively. If you are solo, try to negotiate, but expect to pay at least ₱100–₱150 if you are willing to wait for other passengers.
Trusted Tip: Mobile signal is weak at the jump-off point. Get your tricycle driver’s mobile number before they leave so you can text them for pickup once you descend.
Private Vehicle Route
If you are driving, set your Waze or Google Maps to “Brgy. Omaya Hall” or “Mt. Kapigpiglatan Jump-off.”
Drive via NLEX and exit at SCTEX bound for Subic/Tipo. Enter the Subic Bay Freeport Zone and exit at the Kalaklan Gate, then follow the National Highway passing through Castillejos and San Marcelino before reaching San Narciso.
Secure parking is available near the Barangay Hall for a fee of ₱50 to ₱100, depending on the caretaker.
Summary of Fares (One Way)
| Mode of Transport | Route | Estimated Cost |
| Bus (Regular AC) | Cubao to San Narciso | ₱375 – ₱450 |
| Bus (First Class) | Cubao to San Narciso | ₱600 – ₱745 |
| Tricycle | Town to Brgy. Omaya | ₱100 – ₱300 |
| Parking Fee | Brgy. Omaya Jump-off | ₱50 – ₱100 |
The Trail Overview: What to Expect
The Mt. Kapigpiglatan trail is defined by vast, open cogon grasslands and rolling terrain with zero canopy cover, making solar exposure the biggest challenge. The 12.6 km trek begins with a riverine section requiring stream crossings, followed by a gradual ascent to 678 MASL. Expect muddy paths during the wet season (Habagat) and intense heat year-round.
Phase 1: The Riverine Start
The hike begins at the Brgy. Omaya jump-off, cutting through flat agricultural lands. We immediately faced multiple stream crossings within the first 30 minutes.
The water levels here can range from ankle-deep to knee-deep depending on recent rainfall. I highly recommend wearing hiking sandals like Sandugo or Tribu instead of shoes, as keeping your feet dry this early is impossible.
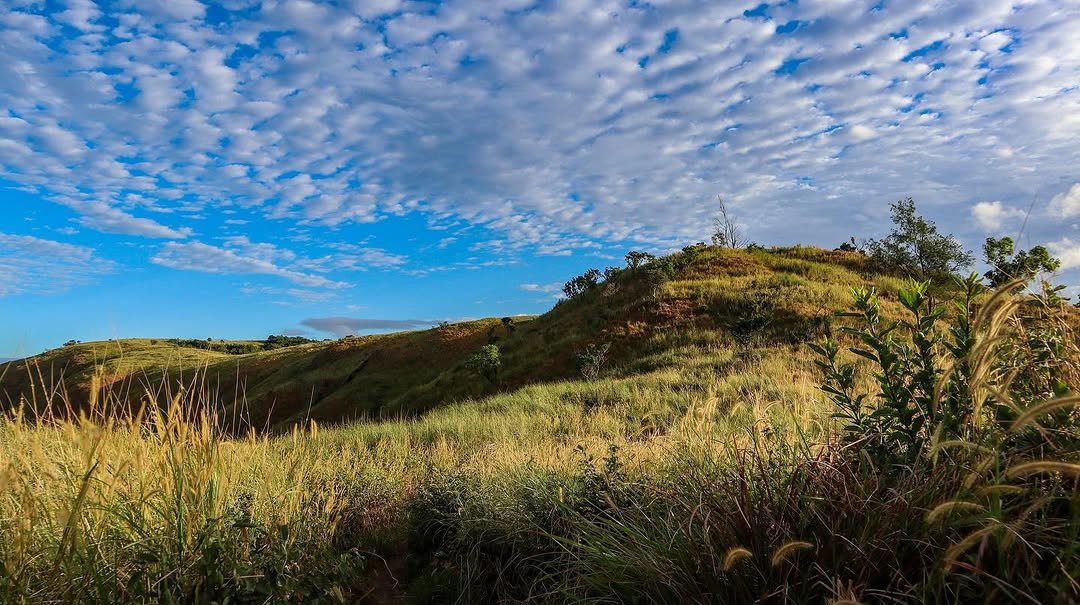
Phase 2: The “Bukidnon” Ridges
After the river, the trail ascends into the “Grassland Zone,” which makes up about 80% of the hike. This section is why people compare it to Bukidnon—endless waves of green cogon grass covering rolling hills.
If you start your trek at 5:30 AM, you catch the “Golden Hour” where the low light hits the grass perfectly. However, there are almost no large trees here. By 8:00 AM, the sun strikes directly, and the heat index can easily feel like 35°C+.
-
Pain Point: The cogon grass can be sharp. I regretted wearing shorts without gaiters because the grass blades left small, paper-cut-like scratches on my legs.
Phase 3: The Summit (678 MASL)
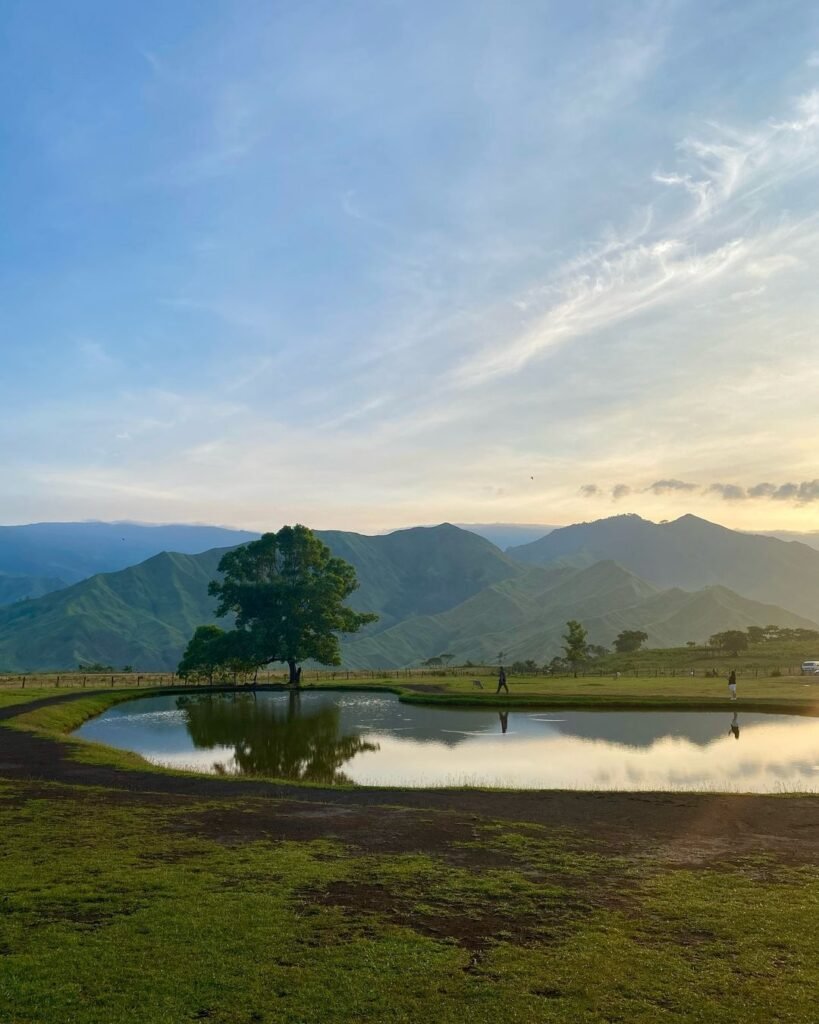
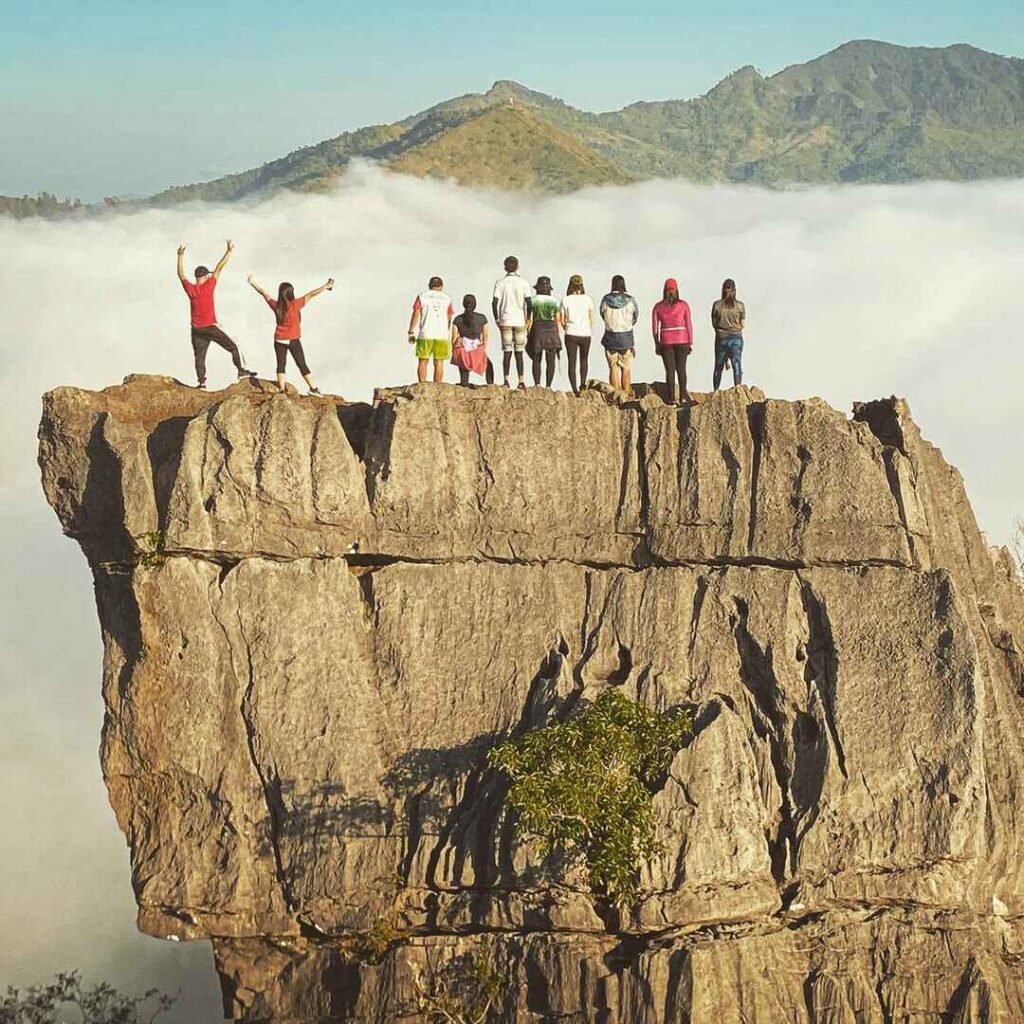
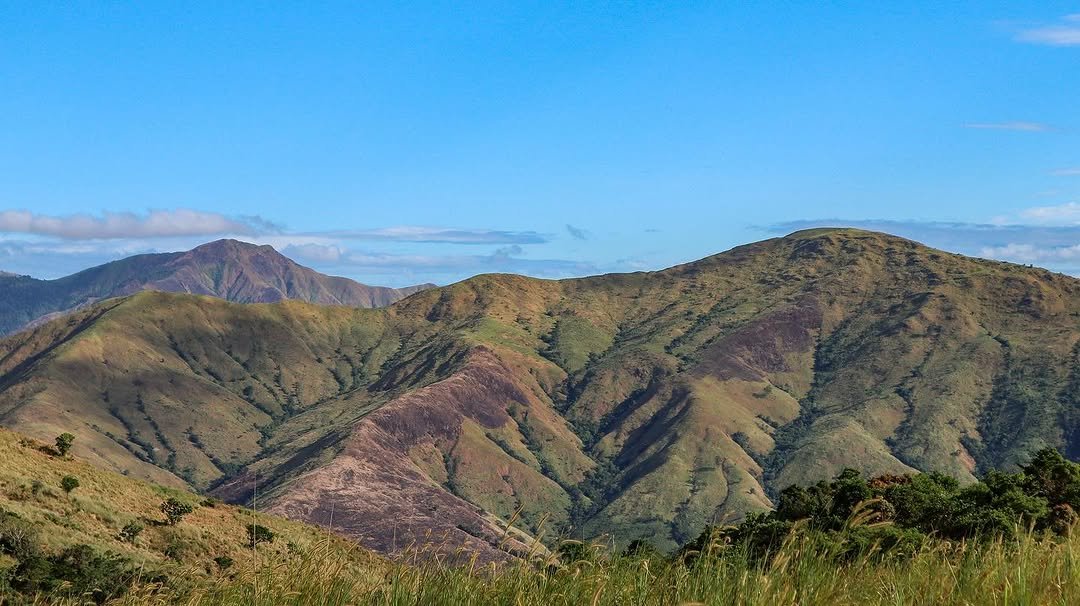
The final assault involves a Class 3 scramble, but it is relatively short. At the summit, you are rewarded with a stunning 360-degree view.
To the west, you can see the coastline of San Narciso and the West Philippine Sea. To the east, the jagged, intimidating profile of the Cawag Hexa reminds you how gentle Kapigpiglatan is by comparison.
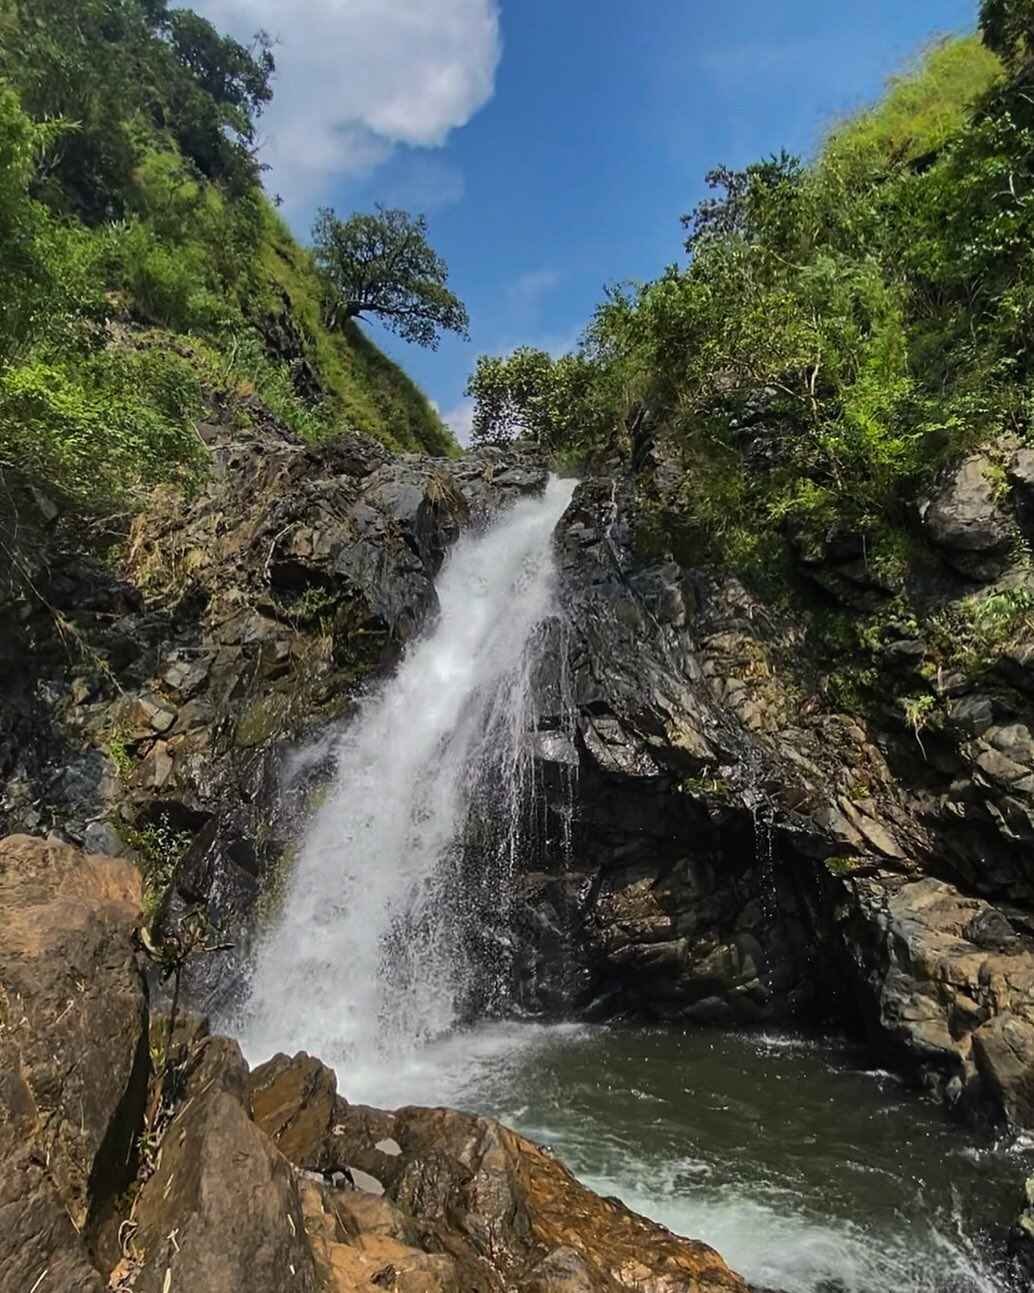
The Reward: Veto Falls
Most itineraries loop down to Veto Falls after the summit. This is a small, three-tiered cascade that feeds into a rocky basin.
The water is refreshingly cold—a necessary hydro-therapy session after baking on the exposed ridges. The basin is shallow enough to sit in, but be careful on the slippery rocks.
-
Warning: Do not drink the water here, even if it looks clear. We saw carabaos grazing upstream in the watershed, which means the water likely contains biological contaminants. Bring your own filtration system or stick to your bottled water.
Itinerary: Summit to Surf
A standard Mt. Kapigpiglatan itinerary begins with a 11:00 PM – 1:00 AM bus departure from Manila to ensure a sunrise start at 06:00 AM. Most hikers complete the 12.6km loop, including the Veto Falls side trip, by 2:00 PM. For the best experience, we recommend extending the trip to Liwliwa Beach in San Narciso for a “Surf and Summit” weekend.
Option A: The Standard Day Hike
This schedule is optimized to beat the Zambales heat. We aim to be descending from the exposed ridges before the sun hits its peak intensity at 12:00 PM.
| Time | Activity | Notes |
| 00:00 | Depart Cubao/Pasay (Victory Liner) | Sleep on the bus |
| 04:30 | Arrive San Narciso / Early Breakfast | Buy packed lunch at 7-Eleven |
| 05:00 | Tricycle to Brgy. Omaya Jump-off | Coordinate return pickup |
| 05:30 | Registration & Briefing | Last restroom stop |
| 06:00 | Start Trek | Enjoy the cool morning air |
| 09:00 | Summit Arrival (678 MASL) | Photo ops with Cawag Hexa view |
| 09:45 | Descent to Veto Falls | Trail can be slippery |
| 11:00 | Lunch & Swim at Veto Falls | Refreshing cold water dip |
| 14:00 | Back at Jump-off / Wash up | Shower fee: ₱20-₱50 |
| 16:00 | Bus back to Manila OR proceed to Beach | Wait at highway for Victory Liner |
Option B: The “Surf & Summit” Weekend (Highly Recommended)
Honestly, heading straight home after a 6-hour hike is exhausting. Since San Narciso is the gateway to Liwliwa Beach, we almost always opt for an overnight stay.
15:00 – Transition: Instead of the bus, take a tricycle from the town proper to Liwliwa Beach (approx. 10-15 mins, ₱150 per trike).
15:30 – Check-in: Secure a spot at a hostel or glamping hut (rates start at ₱1,000/night).
16:30 – Sunset Surf: Rent a board for ₱400/hour or just watch the sunset with a cold beer at the local food parks.
Day 2: Enjoy a slow morning surf, grab artisanal coffee, and check out by 11:00 AM to catch the bus back to Manila fully recharged.
Budget Breakdown (2026 Estimates)
The estimated budget for a DIY Mt. Kapigpiglatan hike ranges from ₱1,750 to ₱2,400 per person. The bulk of this goes to the Victory Liner roundtrip fare (approx. ₱900) and the mandatory Guide Fee (₱1,500 per group of 5). If you are solo, costs can skyrocket to ~₱2,800, so finding a group or joining an organized tour (₱1,499–₱1,600) is significantly cheaper.
Comparative Cost Table
To help you plan, I’ve broken down the expenses based on a standard Day Hike scenario.
| Expense Item | Cost (PHP) | Notes |
| Bus (RT Manila) | ₱900 | Victory Liner (Cubao to San Narciso) |
| Tricycle (RT) | ₱200 – ₱300 | Shareable (Town to Jump-off) |
| Guide Fee | ₱1,500 | Good for 1-5 pax (Mandatory) |
| Envi/Reg Fee | ₱100 | Per head (Brgy. Omaya) |
| Food/Shower | ₱350 | 7-Eleven breakfast + Local shower |
| TOTAL (Solo) | ~₱2,800 | Painfully expensive alone |
| TOTAL (Group of 5) | ~₱1,750 | Best value for DIY |
The “Solo Penalty” (Real Talk)
Here is the honest truth about hiking in Zambales post-pandemic: it is not solo-friendly. The ₱1,500 Guide Fee is a flat rate regardless if you are one person or a group of five.
When I hiked this alone, I had to pay the full guide fee myself, pushing my total spend to nearly ₱3,000. If you are a solo backpacker, I highly recommend waiting at the Brgy. Omaya registration area to see if other small groups are willing to let you “hitch” on their guide permit to split the cost.
Organized Tours vs. DIY
If you can’t find a group, booking a “Joiner Tour” is actually mathematically cheaper. most travel agencies offer an all-in package for ₱1,499 to ₱1,600 which includes van transfer and fees.
However, you lose the flexibility of time. We prefer DIY because we can leave Manila at 11:00 PM and start hiking early, whereas joiner vans often spend time picking up participants around the metro, sometimes arriving in San Narciso later than planned.
Important Requirements & Contacts
A strict “No Guide, No Hike” policy is enforced by the Barangay Omaya LGU to ensure hiker safety on the confusing pasture trails. Walk-ins are generally accepted, but large groups should coordinate via the “Barangay Omaya” Facebook page. In case of emergencies, contact the San Narciso MDRRMO at 0950-856-2297 or the PNP at 0998-598-5508.
The “No Guide, No Hike” Policy
Do not attempt to bypass the registration area. The local ordinance is strictly enforced not just for revenue, but because the terrain is an active grazing area filled with crisscrossing cow paths that make navigation confusing.
We learned this the hard way: without a guide, it is incredibly easy to follow a fresh carabao track straight into a dead-end ravine. Furthermore, only the registered guides carry two-way radios connected directly to the Barangay Hall for immediate rescue coordination.
-
Pain Point: If you arrive extremely early (before 4:00 AM) as a walk-in, you might have to wait until the registration officer arrives to assign a guide.
Booking & Registration
While walk-ins are the norm for DIY hikers, we highly recommend checking the Barangay Omaya Facebook Page for announcements, especially during storm signals.
-
Operation Hours: Registration typically opens at 4:00 AM.
-
Requirements: Valid ID (presented at the desk) and the ₱100 Registration Fee.
-
Waiver: You will be required to sign a liability waiver before the briefing.
Emergency Contact List
Save these numbers on your phone before you lose signal on the ascent. Note that signal is intermittent on the trail but reliable at the Summit (678 MASL).
-
MDRRMO San Narciso: 0950-856-2297
-
PNP San Narciso: 0998-598-5508
-
San Narciso Ambulance: 0947-330-2300
Conclusion: Is Mt. Kapigpiglatan Worth the Hype?
Mt. Kapigpiglatan is a triumphant addition to the Luzon hiking circuit, perfectly filling the niche for a visually stunning, non-technical hike. While the ₱1,500 guide fee is steep for solo travelers, the “New Zealand-like” scenery justifies the cost if you split it among a group of 5. For the best value, we highly recommend pairing this hike with a surfing trip to Liwliwa Beach.
Final Verdict: Visuals vs. Difficulty
After hiking extensively across Zambales, I can confidently say that Mt. Kapigpiglatan offers the best “Visual ROI” (Return on Investment) for the effort required.
Unlike the grueling Cawag Hexa or the endless rocky road of Mt. Tapulao, this trail rewards you with world-class imagery—rolling green ridges and the West Philippine Sea backdrop—without requiring technical climbing skills. It is the perfect training ground for heat tolerance, serving as a stepping stone before you attempt major climbs.
The “Surf & Summit” Value Proposition
The only real downside is the logistics. Traveling 4-5 hours from Manila to San Narciso just for a 6-hour hike can feel unbalanced.
That is why we insist on the “Surf and Summit” itinerary. By combining the mountain trek in Brgy. Omaya with an overnight stay in Liwliwa Beach (just 8km away), you transform a tiring day trip into a high-value weekend adventure.
For Solo Hikers: The ₱2,800+ expense is a heavy blow. Try to join organized tour groups on Facebook to bring the cost down to ₱1,600.
For Barkadas: Form a strict group of 5. This maximizes the tricycle capacity and splits the ₱1,500 Guide Fee to a very manageable ₱300 per person.
If you are looking for more adventures nearby, check out our Zambales Ultimate Travel Guide (2025) or explore other camping spots like Anawangin Cove and Nagsasa Cove.
Ready to pack your bags? Don’t forget your umbrella, your hydration salts, and your sense of adventure. See you on the trail!
FAQ: Mt. Kapigpiglatan
Mt. Kapigpiglatan is a beginner-friendly hike (3/9 difficulty) with absolutely no Limatik (leeches) due to its dry, open terrain. However, there are no potable water sources on the ridge, so you must carry at least 2–3 liters. Mobile signal is intermittent along the trail but generally strong at the summit for both Smart and Globe users.
Are there Limatik (Leeches) on the trail?
No. Unlike the mossy forests of Mt. Makiling or Mt. Halcon, the ecosystem here is dry, open grassland.
I hiked during the tail end of the rainy season, and we did not encounter a single leech. The trail is 80% sun-exposed cogon grass, which is not a suitable habitat for bloodsuckers. Your main enemy here is the sun, not the wildlife.
Is there a water source?
There is no potable water source along the ridge or at the summit. While you will pass rivers and Veto Falls, the water is unsafe to drink without heavy-duty filtration because the upstream area is a grazing ground for cattle and carabaos.
Recommendation: Bring at least 2 to 3 Liters of water per person.
Pain Point: I ran out of water on the descent because I underestimated the 12.6km total distance. There are no sari-sari stores until you get back to Brgy. Omaya.
Is there mobile signal?
Signal is spotty to non-existent during the river crossings and lower slopes. However, once you reach the ridge and the Summit (678 MASL), 4G/LTE signal is surprisingly strong for both Smart and Globe.
We were able to video call and upload Instagram stories directly from the peak because it has a direct line of sight to the San Narciso town proper.
Can beginners hike Mt. Kapigpiglatan?
Yes, but with a caveat. It is an endurance test, not a technical climbing test.
While you won’t need ropes or helmet skills, the 12.6km distance (out and back + falls) is long for a first-timer. The “rolling” terrain means you are constantly going up and down, and the heat index often hits 35°C–38°C. If you have zero cardio preparation, you will struggle with heat exhaustion.
Compare with a Major Climb: Mt. Tapulao Guide (36km Challenge)
When is the best time to hike?
November to February (Amihan Season): This is the best window. The grass is vibrant green, and the cool Northeast Monsoon winds help mitigate the heat.
March to May (Summer): The grass turns golden brown (giving it that “California” look), but the heat is brutal. We only recommend this if you start walking by 5:00 AM.
June to October (Habagat): The trail becomes muddy, and the river crossings at Brgy. Omaya can become dangerous flash flood zones.