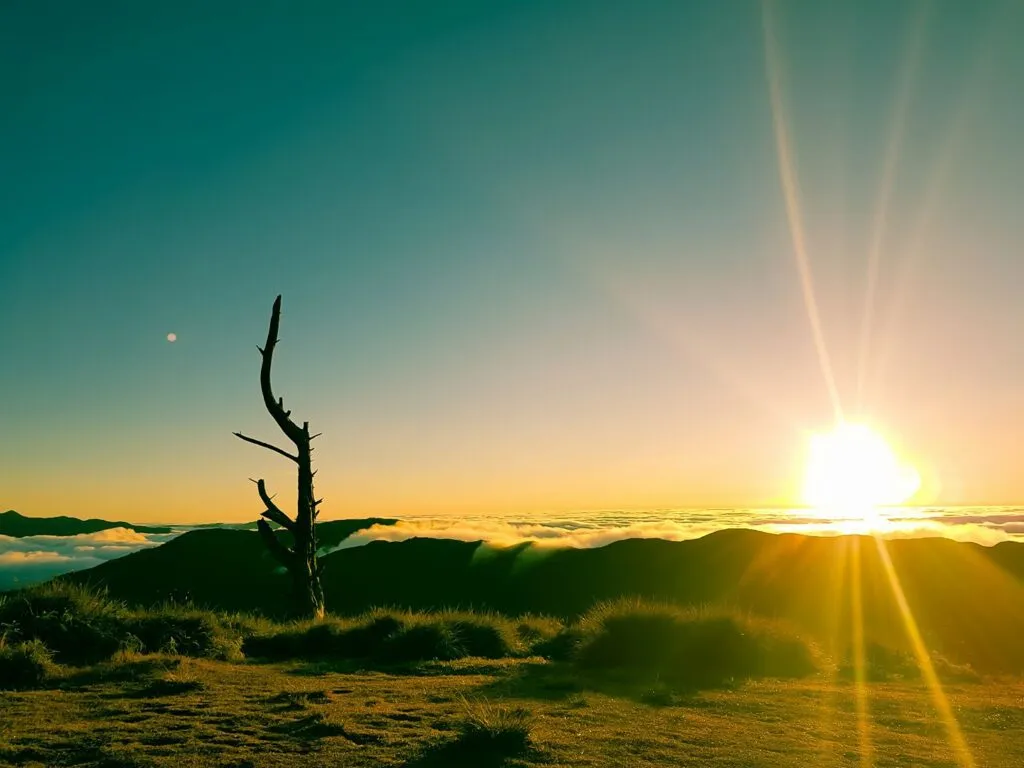
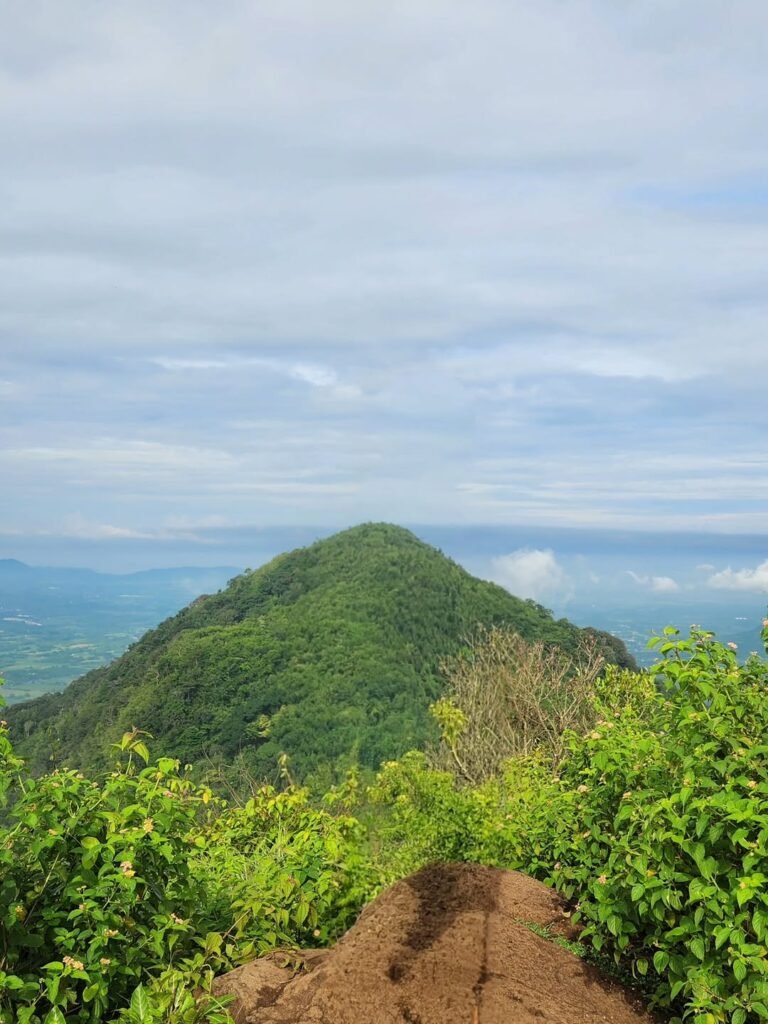
The Bald Mountain
Mt. Talamitam in Nasugbu, Batangas is a deceptive beauty. While it is famous for its beginner-friendly 2/9 difficulty rating, it also serves as the gateway to a much grittier endurance test: the Nasugbu Trilogy. This comprehensive 2026 guide breaks down the essential logistics for the standalone summit, the twin-hike connection to Mt. Apayang, and the full-loop challenge including the rugged Mt. Lantik.
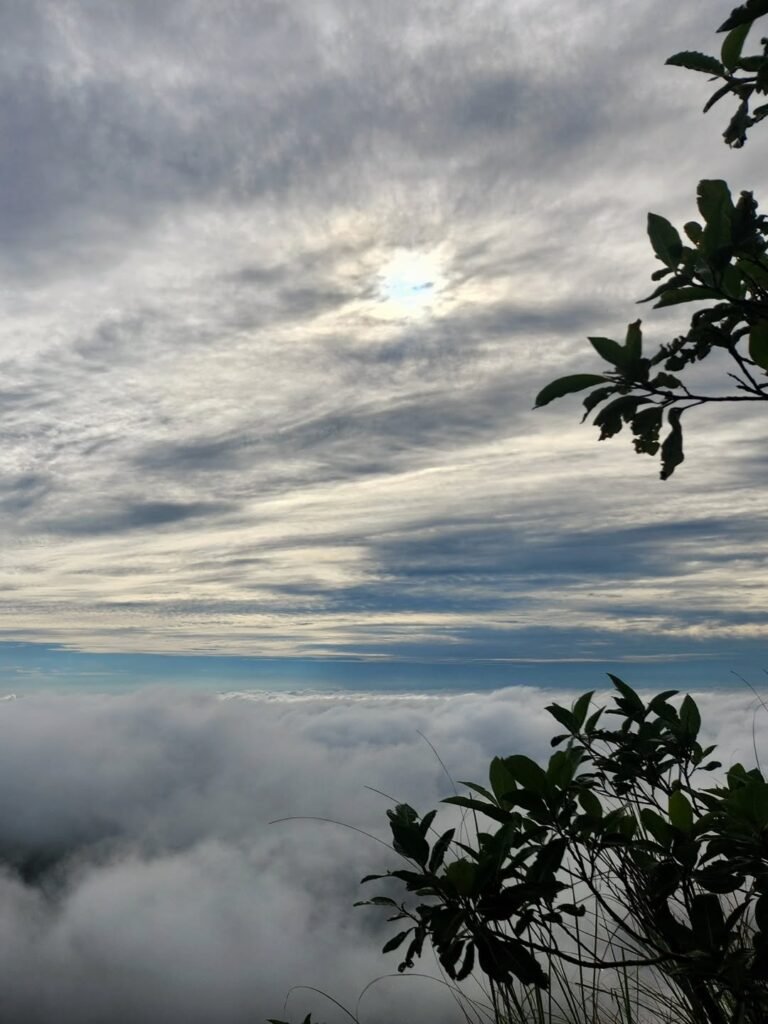
Standing at the summit of Mt. Talamitam, you are rewarded with a visual payload that rivals the country’s highest peaks: the serrated ridges of Mt. Batulao to the west and the vast caldera of Taal Volcano to the southeast. But don’t let the scenery fool you. As you plan your trip using this Mt. Talamitam hiking guide, understand that the real challenge in Nasugbu isn’t just the steepness—it’s the sun.
Known locally as the “Bald Mountain” due to the scarcity of the Talamitam trees that once covered its slopes, this mountain offers zero canopy cover for 70% of the trail. While the elevation of 630 MASL suggests an easy climb, the “savanna” terrain creates a double-oven effect, reflecting heat from the clay soil while the sun strikes from above. This heat factor becomes exponentially harder if you attempt to connect the ridge to Mt. Apayang or push for the Mt. Lantik loop.
I’ve seen too many hikers arrive at Sitio Bayabasan unprepared, lured by the “Minor Climb” tag, only to struggle with heat exhaustion by 10:00 AM. That’s why this guide is different. We aren’t just giving you a list of expenses; we are giving you a strategic plan. From navigating the mandatory guide fees implemented in 2026 to executing the “Alpine Start” needed to survive the heat, we’ve calibrated this itinerary for your safety.
Whether you are here for a relaxed day hike to the river or attempting to conquer the full Nasugbu Trilogy, this is how you handle the trails without getting burned.
Table of Contents
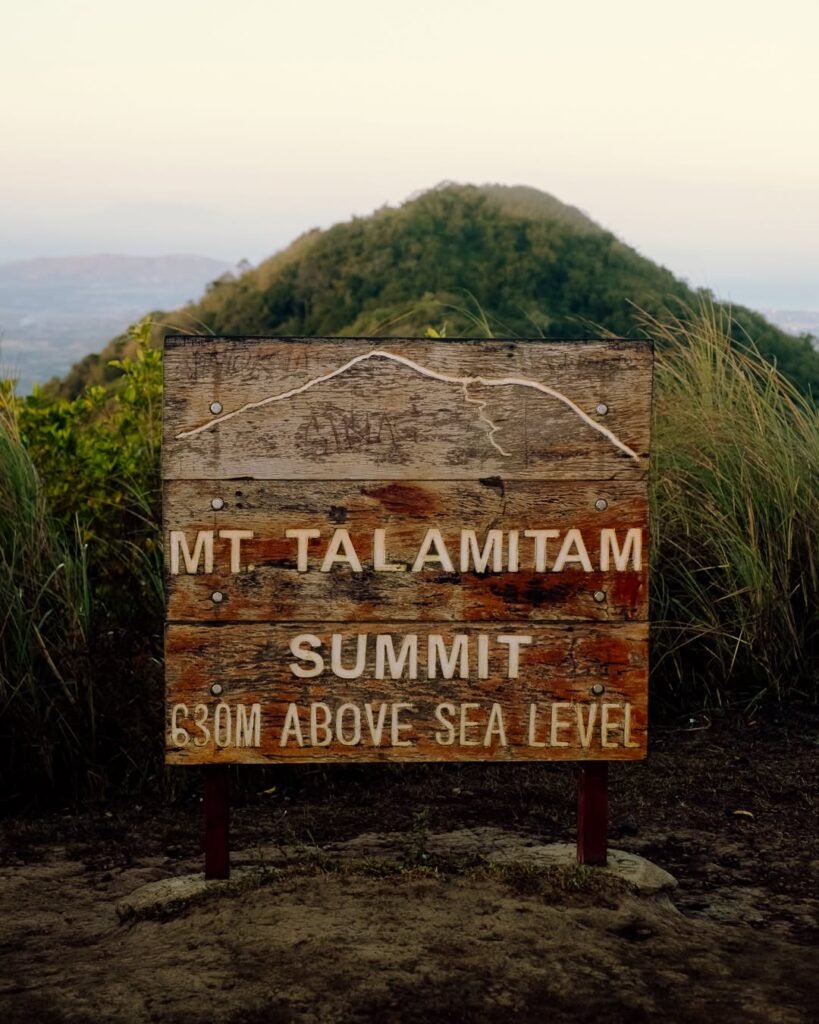
Mt. Talamitam Profile & Quick Stats
How hard is the hike to Mt. Talamitam? Mt. Talamitam is rated as a 2/9 Difficulty (Minor Climb), making it technically accessible for novices. However, the lack of canopy cover creates a high heat index (approaching 4/9 physiological strain) if hiked between 10:00 AM and 2:00 PM. Situated in Sitio Bayabasan, Nasugbu, Batangas, the peak stands at 630 MASL, requiring a 1.5 to 2.5-hour trek to the summit.
Quick Specs: Mt. Talamitam Hiking Guide Data
| Feature | Specification |
| Location | Sitio Bayabasan, Brgy. Aga, Nasugbu, Batangas |
| Elevation | 630 MASL (Meters Above Sea Level) |
| Difficulty Level | 2/9 (Beginner / Novice Class) |
| Trail Class | 1-3 (Rough Road to Grassland / Clay Slopes) |
| Trek Duration | 1.5 – 2.5 Hours (Ascent) / 1 Hour (Descent) |
| Jump-off Point | KM 83, Tagaytay-Nasugbu Highway |
| Key Features | 360° Views, Open Grassland, Layong Bilog River |
Understanding the Mountain Identity
In the Philippine mountaineering community, we define Mt. Talamitam as a “Minor Climb,” but don’t let the 2/9 difficulty score make you complacent. The rating refers to technical skills—you won’t need ropes or harnesses here. However, the mountain’s etymology tells a warning story: it was named after the Talamitam trees that once grew here, but today, the slopes are largely denuded.
This “Bald Mountain” topography means you are exposed to direct solar radiation for about 70% of the trail. In my experience leading groups here, the 630 MASL elevation feels significantly harder at noon because the heat reflects off the dry clay soil. Unlike the mossy forests of Mt. Makiling that offer shade, Talamitam is a high-heat environment.
Terrain & Visual Payload
The trail starts at Sitio Bayabasan (approx. KM 83) with a gentle walk on concrete and rough roads through the community. It quickly transitions into agricultural grazing lands—expect to share the path with cows. The final assault is a class 3 trail on grassy slopes.
Insider Observation: Be wary of optical illusions on the ridge. From the lower slopes, the summit often looks closer than it is because the lack of trees removes depth perception cues. Many first-timers burn their energy sprinting to what they think is the peak, only to realize they have another 30 minutes of ascending to do.

Pre-Climb Requirements (2026 Protocols)
Do you strictly need a guide for Mt. Talamitam? Yes. As of the 2026 hiking season, hiring a local guide is de facto mandatory (₱500 – ₱800 per group of 1-5 pax) to ensure safety and avoid trespassing on private grazing lands. Walk-ins are fully accepted at the Sitio Bayabasan registration area. While no medical certificate is required for day hikes, hikers with hypertension or asthma must exercise extreme caution due to the intense heat exposure.
Registration & Bureaucracy
The administrative entry point for this hike is straightforward. You do not need to book weeks in advance like you would for Mt. Pulag. The command center is the Barangay Aga Hall or the satellite registration desk at Sitio Bayabasan, right at the jump-off point along the highway.
Registration Fee: ₱50.00 per head (Paid upon arrival).
Twin Hike Surcharge: Additional ₱30.00 if crossing over to Mt. Apayang.
Camping Fee: ₱100 – ₱150 per tent (if staying overnight).
The “Guide Fee” Reality (2026 Update)
In the early 2010s, this mountain was often cited as a “DIY-friendly” trek where you could hike solo. However, the operational landscape in Nasugbu has shifted. Based on my recent visits, local checkpoints now strongly enforce the guide policy.
This isn’t just about revenue; it’s about liability. The trail crosses multiple private properties used for cattle grazing. In the past, unaccompanied hikers frequently got lost in the branching cow paths or accidentally damaged fences, causing friction with local landowners. Paying the ₱500 – ₱800 guide fee acts as your “Fast Pass” through these micro-political boundaries.
Insider Tip: If you are a solo joiner looking to save costs, wait at the registration area. I often see solo hikers team up on the spot to split the guide fee, bringing the cost down to ₱100 – ₱160 per person for a group of five.
Medical & Safety Protocols
Unlike major climbs, the LGU of Nasugbu does not currently demand a medical certificate for casual Mt. Talamitam day hikes. However, do not mistake “no certificate” for “no risk.”
The primary medical hazard here is Heat Stroke. The 2/9 difficulty rating is deceptive because it only measures technical terrain, not thermal stress. If you have a history of high blood pressure, the combination of the 10:00 AM sun and the uphill assault can be dangerous. Carry personal medication and ensure your guide knows your condition before leaving the Sitio Bayabasan jump-off.

How to Go to Mt. Talamitam (DIY Logistics)
How to commute to Mt. Talamitam from Manila? Take a DLTB or BSC Bus bound for Nasugbu from the LRT Buendia (Gil Puyat) terminal. Tell the conductor specifically to drop you off at KM 83, Sitio Bayabasan (landmark: Bayabasan Elementary School). The travel time is 2.5 – 3 hours. Do not go all the way to Nasugbu town proper, or you will have to backtrack 20km.
Step 1: The Departure (Manila to Batangas)
To successfully execute the “Alpine Start” (hiking before sunrise), your best tactical choice is the DLTB Bus Terminal at LRT Buendia (Gil Puyat). While the PITX (Parañaque Integrated Terminal Exchange) is a modern alternative, I personally avoid it for early morning hikes (2:00 AM – 4:00 AM) because the “waiting for full capacity” protocol can delay departure significantly. DLTB Buendia has a higher turnover of passengers, ensuring you leave on time.
Board a bus with the signboard “Nasugbu” or “Lian/Nasugbu”. The first trip usually departs between 2:00 AM and 3:00 AM. If you are targeting the “Sunset Hike” instead, buses run frequently throughout the day, so a 10:00 AM or 12:00 PM departure works perfectly.
Step 2: The “KM 83” Drop-off
This is the single most common failure point for beginners. Sitio Bayabasan is not a major bus station; it is a waypoint along the Tagaytay-Nasugbu Highway.
When the conductor collects your fare (approx. ₱260 – ₱390 depending on fuel prices), say: “Sitio Bayabasan po, KM 83. Yung babaan pa-Talamitam.” The conductor will usually recognize the mountain name.
Insider Tip: The aircon on these buses is freezing. If you plan to sleep during the 2.5-hour ride, bring a jacket. Set an alarm for 2 hours into the trip. Once you pass the Tagaytay Rotunda and start descending into Batangas, keep your eyes on the right side of the road. You are looking for the Bayabasan Elementary School.
Private Vehicle Navigation
For those driving, simply pin “Sitio Bayabasan Jump-off” or “Mt. Talamitam Registration” on Waze or Google Maps. The route takes you through SLEX, CALAX, and into the Tagaytay-Nasugbu Highway.
Parking is safe and readily available. Local residents have converted their front yards into secured parking slots. The standard fee is ₱50 – ₱100 for the whole day. I usually park at the house right beside the registration area to easily offload gear.
Return Trip (Back to Manila)
Going home is easier. Just stand on the opposite side of the highway from where you were dropped off. Flag down any bus (DLTB, BSC, or Batman Starexpress) with a “Buendia” or “Pasay” signboard. Note that on Sunday afternoons (4:00 PM onwards), buses coming from Nasugbu beaches are often full, so be prepared for “standing room” until passengers alight in Tagaytay.

The Trail & Terrain Analysis
What is the trail like in Mt. Talamitam? The trail is 70% open grassland (“Savanna” style) with zero shade, exposing hikers to direct sun and ground heat reflection. The terrain shifts from concrete barrio roads to rough dirt paths and finally to steep clay slopes. During rain, the clay becomes extremely slippery (“skating rink” effect), making trekking poles essential for stability.
The “Savanna” Heat Factor
The defining characteristic of the Mt. Talamitam trail is its lack of canopy. Unlike the mossy trails of Mt. Makiling, this is a “Bald Mountain.” From the moment you leave the woodland buffer at Station 1, you are walking on exposed ridges.
This creates a unique hazard: Solar Radiation. The sun hits you from above, and the dry clay soil reflects the heat from below. On my last hike in April 2025, the temperature at 600 MASL felt 5 degrees hotter than the jump-off point. There are no trees to hide under for the last 1.5 hours of the ascent. You must rely on your gear (umbrellas and hats) for shade.
Trail Surface & Livestock Hazards
The path is technically a Class 1-3 trail, transitioning from a rough road to a narrow dirt track. Because Sitio Bayabasan uses the mountain as active grazing land, you will share the trail with cows and occasional horses.
Cow Dung: It is everywhere. Keep your eyes on the ground to avoid stepping in fresh “landmines.”
The Animals: Generally docile, but give them a wide berth. I once saw a hiker try to take a selfie too close to a calf, and the mother cow became defensive.
Talahib Grass: The upper slopes are dominated by tall Cogon and Talahib grass. Wear leggings or trekking pants; the blades are sharp and can leave nasty “paper cuts” on exposed legs.
Water & Connectivity Status
Do not expect to refill your bottles on the mountain. There are NO potable water sources past the jump-off sari-sari stores. The streams you might see are runoff from the grazing lands and are unsafe for consumption. I strictly advise bringing 2-3 Liters of water per person before leaving the registration area.
For digital nomads or content creators, signal strength is surprisingly robust.
Smart: Strong 5G/4G signal at the summit and along the ridges, perfect for uploading stories.
Globe: Good for calls and texts, but data speeds can drop in the river valleys near Layong Bilog.
Limatik vs. Sunburn
A common question I get is about Limatik (blood leeches). Good news: Mt. Talamitam is Limatik-free. The dry, grassy environment is hostile to them. The real enemy here is UV exposure. If you don’t apply sunscreen or wear arm sleeves, you will come down with severe sunburn, even on a cloudy day.
Recommended Itinerary Options
What is the best time to start the Mt. Talamitam hike?The most strategic time is the “Alpine Start” (departing Manila by 3:00 AM) to begin trekking by 5:30 AM and summit before the heat peaks at 10:00 AM. Alternatively, photographers should opt for the “Sunset Hike” (start trekking by 3:00 PM), which avoids the midday sun and offers cooler temperatures and golden hour views over the West Philippine Sea.
Understanding the “Heat Window”
I cannot stress this enough: your itinerary should revolve around avoiding the 10:00 AM to 2:00 PM window on the summit. The “Bald Mountain” terrain reflects heat, making these hours physically punishing. I designed these itineraries to keep you in the shade or in the water during those peak thermal hours.
Option A: The “Sunrise & River” Day Hike (Best for Beginners)
This is the standard Mt. Talamitam itinerary for first-timers. It prioritizes a cool ascent and rewards you with a swim in the Layong Bilog River just as the day gets hot.
| Time | Activity | Notes |
| 03:00 AM | Depart DLTB Buendia | Board bus to Nasugbu. Sleep during transit. |
| 05:30 AM | Arrival at KM 83 | Register at Sitio Bayabasan & secure guide. |
| 06:00 AM | Start Trek | Use headlamps for the first 20 mins. |
| 08:00 AM | Summit Assault | Enjoy 360° views of Mt. Batulao & Taal. |
| 09:30 AM | Descent to Layong Bilog | Ask guide for the river trail diversion. |
| 10:30 AM | River Swim | Cool down. Early lunch (packed meal). |
| 01:00 PM | Return to Jump-off | Wash up at local houses (₱20 fee). |
| 02:00 PM | Post-Hike Meal | Bulalo at Kuya Paul’s or Tagaytay. |
| 03:00 PM | Bus to Manila | Wait at the highway (Northbound side). |
Insider Tip: When descending to Layong Bilog, be careful on the river crossing. The old bamboo bridge is often rickety or washed out after heavy rains. You might need to wade through thigh-deep water, so waterproof your electronics.
Option B: The “Sunset” Hike (Photographer’s Choice)
If you are not a morning person or want to capture the golden hour, this afternoon itinerary is superior. The heat is manageable as the sun lowers, and the summit sunset is spectacular.
| Time | Activity | Notes |
| 11:00 AM | Depart DLTB Buendia | Have a heavy brunch before leaving. |
| 02:00 PM | Arrival at KM 83 | Register. Hydrate heavily before starting. |
| 03:00 PM | Start Trek | Bring Umbrella. It will still be hot. |
| 05:00 PM | Summit Arrival | Wait for Golden Hour / Sunset. |
| 06:30 PM | Start Descent | Headlamps Required. Trail is pitch black. |
| 07:30 PM | Return to Jump-off | Quick wash-up. |
| 08:00 PM | Dinner | Late dinner in Tagaytay (Mahogany Market). |
| 09:30 PM | Bus to Manila | Expect lighter traffic entering the city. |
Safety Note: For the Sunset Hike, ensure your headlamp has fresh batteries. The trail through the grazing lands is full of cow paths, and it is very easy to get disoriented in the dark without a strong light source.
Budget Breakdown (2026 Estimates)
How much is the budget for a DIY hike to Mt. Talamitam?A safe baseline budget for a solo DIY hiker in 2026 is ₱1,500 – ₱1,800. This amount covers the roundtrip bus fare via DLTB Buendia (approx. ₱520 – ₱780 total), the mandatory ₱500 – ₱800 guide fee (ideally shared among 5 pax), and the ₱50 registration fee at Sitio Bayabasan. Always bring extra cash for the optional Layong Bilog side trip and post-hike meals.
Mt. Talamitam Expense Matrix (Per Person)
The following breakdown assumes you are traveling from Manila and sharing the guide fee with at least 3 other people.
| Expense Item | Estimated Cost (PHP) | Notes |
| Bus Fare (One Way) | ₱260 – ₱390 | DLTB/BSC (Buendia to KM 83). Varies by fuel prices. |
| Registration Fee | ₱50.00 | Paid at Brgy. Aga Hall / Jump-off. |
| Guide Fee (Share) | ₱100 – ₱200 | Based on ₱500-₱800 rate divided by 4-5 pax. |
| Shower Fee | ₱20 – ₱40 | Unlimited water usage at local houses. |
| Tricycle (Optional) | ₱50 – ₱100 | From Highway to Jump-off (Walkable: 10 mins). |
| River Entrance | ₱40.00 | Layong Bilog access fee (Optional). |
| Food Budget | ₱300 – ₱500 | Packed lunch + Post-hike Bulalo. |
| TOTAL SAFE BUDGET | ~₱1,500 – ₱1,800 | Cash Basis Only. No ATMs at the jump-off. |
The “Guide Fee” Economy
The single biggest variable in your hiking expenses 2026 is the guide fee. The standard rate at Sitio Bayabasan is ₱500 to ₱800 per group (usually capped at 5 hikers).
Insider Tip: If you are hiking solo, do not pay the full ₱800 alone. Wait at the registration area near KM 83 and politely ask other small groups if you can join them to split the cost. In my experience, most groups are happy to absorb a solo hiker to lower their individual share.
Hidden Costs & Cash Logistics
While the Mt. Talamitam budget looks low, “micro-transactions” can add up.
Small Bills Rule: The sari-sari stores at the jump-off rarely have change for a ₱1,000 bill. Break your large bills at the DLTB Buendia terminal before boarding. You will need ₱20 and ₱50 bills for shower fees and buying buko juice (coconut water) if available.
The “Kuya Paul” Meal: If you plan to eat at the local households (like the famous Kuya Paul’s near the trail start), pre-order your meal before you hike. A serving of Goto Batangas or Lomi is significantly cheaper (₱100 – ₱150) than dining at the commercial restaurants in Tagaytay.

What to Bring: The “Anti-Heat” Gear List
What should you pack for a Mt. Talamitam hike? The gear strategy for Mt. Talamitam focuses entirely on heat management. Your mandatory items are a Silver-coated Umbrella (the most effective shade on the ridge) and a minimum of 2-3 Liters of water. Wear leggings or trekking pants to protect your legs from sharp Talahib grass cuts, and bring a headlamp if opting for the sunset itinerary.
Hydration & Heat Defense
I cannot emphasize this enough: Mt. Talamitam is a dry, thermal endurance test. There are NO water sources on the trail.
Water Load: Bring 2 Liters for a standard cool-weather hike (Dec-Feb). If hiking during the Philippine summer (March-May), upgrade this to 3 Liters. The heat reflection from the clay soil at 600 MASL accelerates dehydration.
The Umbrella Strategy: Unlike mossy mountains where umbrellas get snagged on branches, an umbrella is your best friend here. It provides your own portable shade on the open grassland. I personally use a trekking umbrella with UV coating to drop the “felt temperature” by a few degrees.
Sun Protection: Wide-brimmed hats and arm sleeves are non-negotiable. You are fully exposed to the sun for about 1.5 hours of the ascent.
Clothing & Footwear Specs
The terrain at Sitio Bayabasan dictates your wardrobe. It’s not just about looking good; it’s about skin protection.
Leggings / Trekking Pants: The upper 30% of the trail is dominated by Cogon and Talahib grass. These plants have serrated edges that can slice through skin like paper. I strongly advise against wearing shorts unless you pair them with high compression socks or gaiters.
Footwear: Trail runners or hiking sandals (like Sandugo or Lamina) are ideal. Heavy boots can feel too hot in this environment. However, ensure your shoes have deep lugs. The clay soil turns into a “skating rink” after a sudden rain shower.
Tech & Safety Essentials
Headlamp: Even if you plan a day hike, bring one. If you enjoy the summit view too much and descend past 6:00 PM, the trail through the grazing lands becomes pitch black.
First Aid: Aside from the usual kit, pack Oral Rehydration Salts (ORS). I’ve had to administer this to hikers suffering from heat exhaustion near the summit more times than I can count.
Powerbank: Signal is strong for uploading Mt. Talamitam stories, which drains battery fast.

Post-Hike Food & Side Trips
Where to eat after hiking Mt. Talamitam? For an authentic and budget-friendly meal, pre-order Batangas Bulalo or Goto from local households like “Kuya Paul’s” at the Sitio Bayabasan jump-off (₱150 – ₱200 per serving). Alternatively, take a bus to Tagaytay’s Mahogany Market for the classic beef marrow soup experience. The essential side trip is the Layong Bilog River, a refreshing thermal counter-balance to the hot summit trek.
The “Kuya Paul” Hack: Eat Like a Local
While most tourists rush back to Tagaytay, seasoned hikers know the best value is right at the jump-off. I highly recommend finding the house of “Kuya Paul” (or similar local carinderias near the registration area) before you start your hike.
Insider Tip: Place your order for Bulalo or Lomi before you ascend. By the time you return to Sitio Bayabasan around 1:00 PM, a hot, protein-rich meal is waiting for you. This supports the local micro-economy directly and costs about 40% less than commercial restaurants. Expect to pay around ₱100 – ₱200 for a generous serving that rivals any high-end spot.
Side Trip: Layong Bilog River
A hike to Mt. Talamitam feels incomplete without washing off the dust at Layong Bilog River. This isn’t just a stream; it’s a designated “cooling station” featuring rock formations and clean swimming pools.
Logistics: The detour takes about 1 to 1.5 hours from the summit.
Entrance Fee: ₱40.00 per head.
Cottage Rental: ₱300 (Optional, if you plan to stay long).
Trail Warning: Be prepared for the crossings. On my last visit, we had to navigate a rustic bamboo bridge that looked sketchy but held firm. In some sections, you might encounter makeshift concrete paths that get slippery when wet. If the water level is high, you will get your shoes wet—accept it as part of the adventure.
The Tagaytay Stopover (Mahogany Market)
If you crave the bustling market vibe, hop on any bus bound for Manila and alight at Mahogany Market in Tagaytay. This is the “Bulalo Capital” for mountaineers.
The second floor is lined with competing stalls serving Senyorita (small bananas) and massive bowls of Beef Bulalo (₱350 – ₱500 good for 2-3 pax). It’s a ritualistic end to Batangas hikes, but be warned: on weekends, the place is packed by 12:00 PM.

Frequently Asked Questions (FAQ)
Common questions for first-time hikers: Are there toilets on the Mt. Talamitam summit? No. Restrooms and wash-up areas are only available at the Sitio Bayabasan jump-off (₱20 – ₱40 usage fee). Can beginners hike solo? Yes, you can travel alone, but you are strictly required to hire a local guide (₱500 – ₱800) upon registration for safety. Is parking safe? Yes, local residents offer secure parking slots in their front yards (₱50 – ₱100).
Is a tour guide strictly required for a Day Hike in 2026?
Officially and Practically, Yes. While policies can fluctuate, the Sitio Bayabasan community now enforces a de facto mandatory guide policy. Plan to pay the ₱500 – ₱800 fee. This supports the livelihood of Brgy. Aga residents and prevents friction at checkpoints, as the trail crosses private grazing lands where owners can be strict about trespassing.
Can I hike Mt. Talamitam in the afternoon (Sunset Hike)?
Absolutely. In fact, starting your trek at 2:00 PM or 3:00 PM is a brilliant strategy to avoid the notorious heat. You will reach the summit during the “Golden Hour,” witnessing the sun dip over the West Philippine Sea with much cooler temperatures. Just ensure you bring a headlamp for the pitch-black descent through the cow pastures.
Is it safe to park a private car at the jump-off?
Yes. There are no large commercial parking lots, but residents near KM 83 have converted their front yards into designated parking slots. The fee is typically ₱50 to ₱100 per vehicle. It is relatively secure as the community watches over the area, but standard safety protocol applies: do not leave valuables visible on your dashboard.
Why is it called “Bald Mountain”?
The name “Talamitam” actually comes from the Talamitam trees that once grew abundantly on its slopes. Sadly, due to historical deforestation and conversion into grazing land for cattle, these trees are now scarce. The result is the current “bald” landscape—a cogon-filled savanna that offers great views but zero protection from the sun.
How much budget should a solo DIY hiker bring?
To be safe, bring ₱1,500 – ₱2,000 in small denominations.
Bus (Round Trip): ~₱600 – ₱800
Fees (Reg + Shower + River): ~₱150
Guide (Solo absorption): ₱500 – ₱800 (Tip: Wait at the registration to join other groups and split this cost).
Food: ~₱300

Conclusion
Final thoughts on the Mt. Talamitam hike: Mt. Talamitam is a test of preparation, not technical skill. The “easy” 2/9 difficulty rating disappears the moment the sun hits the 630 MASL ridge at noon. Success here requires respecting the heat, budgeting for the 2026 guide fees, and navigating the KM 83 logistics with precision.
Final Verdict: The Heat Check
The hiker who respects the heat, brings an umbrella, and starts their trek at Sitio Bayabasan before 6:00 AM will find Talamitam a rewarding, high-value adventure. The hiker who underestimates the “Bald Mountain,” arrives at 10:00 AM, and forgets their water will find it an exhausting, expensive, and parched experience.
This mountain teaches you that difficulty is relative. The terrain is beginner-friendly, but the environment is unforgiving. Treat the sun as the hazard, not the slope.
LNT Reminder: Keep Batangas Clean
As visitors to Brgy. Aga, we must strictly adhere to Leave No Trace (LNT) principles. The open grassland makes trash highly visible.
Pack it out: There are no trash bins on the trail. Carry your empty plastic bottles back to the jump-off.
Respect the Livestock: Do not feed the cows or leave food wrappers that they might ingest.
Ready to brave the heat? Share this Mt. Talamitam hiking guide with your adventure buddy, book that DLTB bus, and plan your trip to Nasugbu this weekend!

Read Next: Explore Batangas & Beyond
If you conquered the heat of Mt. Talamitam, you are just scratching the surface of what the Cavite-Batangas corridor has to offer. Since you are already in Nasugbu, why not extend your adventure? Whether you want a harder climb or a beach to cool down in, check out these detailed guides:
⛰️ More Hiking Adventures
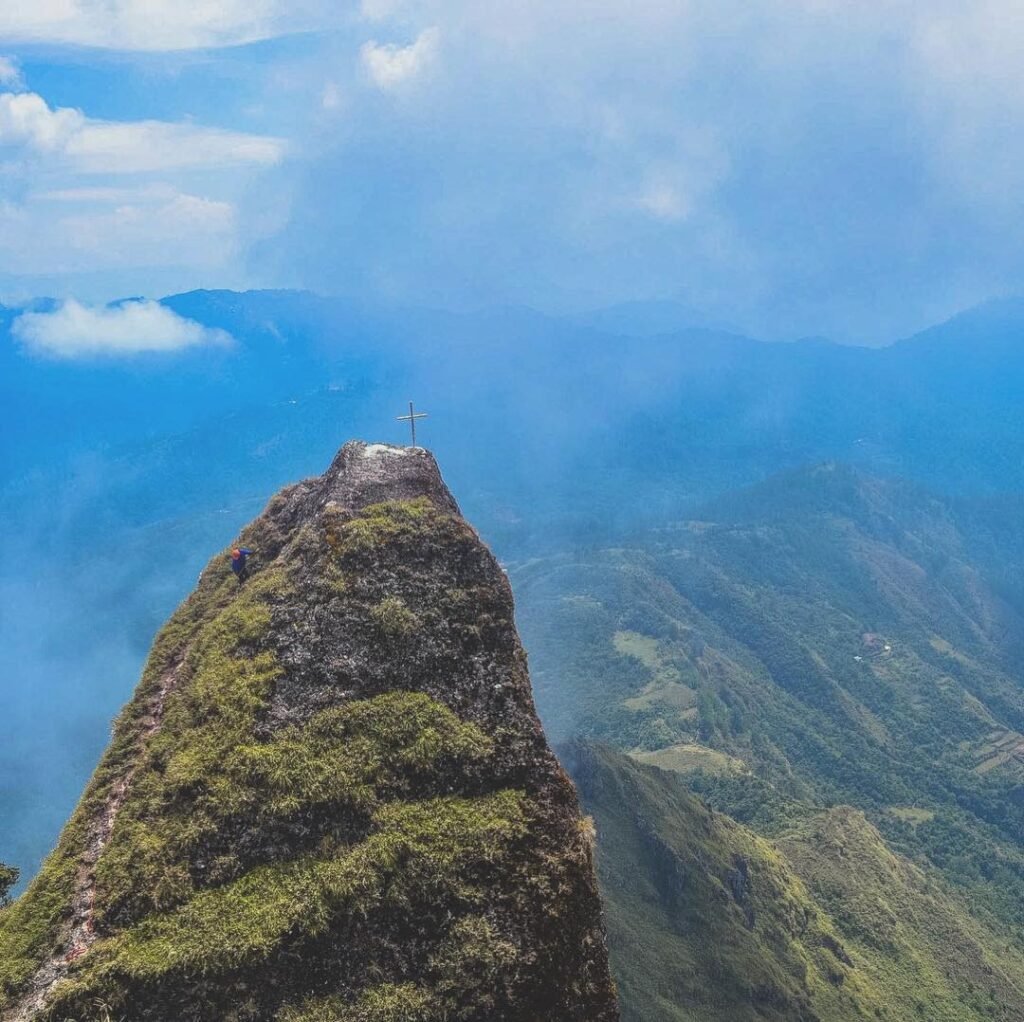
Mt. Pico de Loro Day Hike Guide (New Trail) – Ready for a bigger challenge? Just nearby in Nasugbu, tackle the iconic Monolith and navigate the new eco-trail protocols of this legendary mountain.
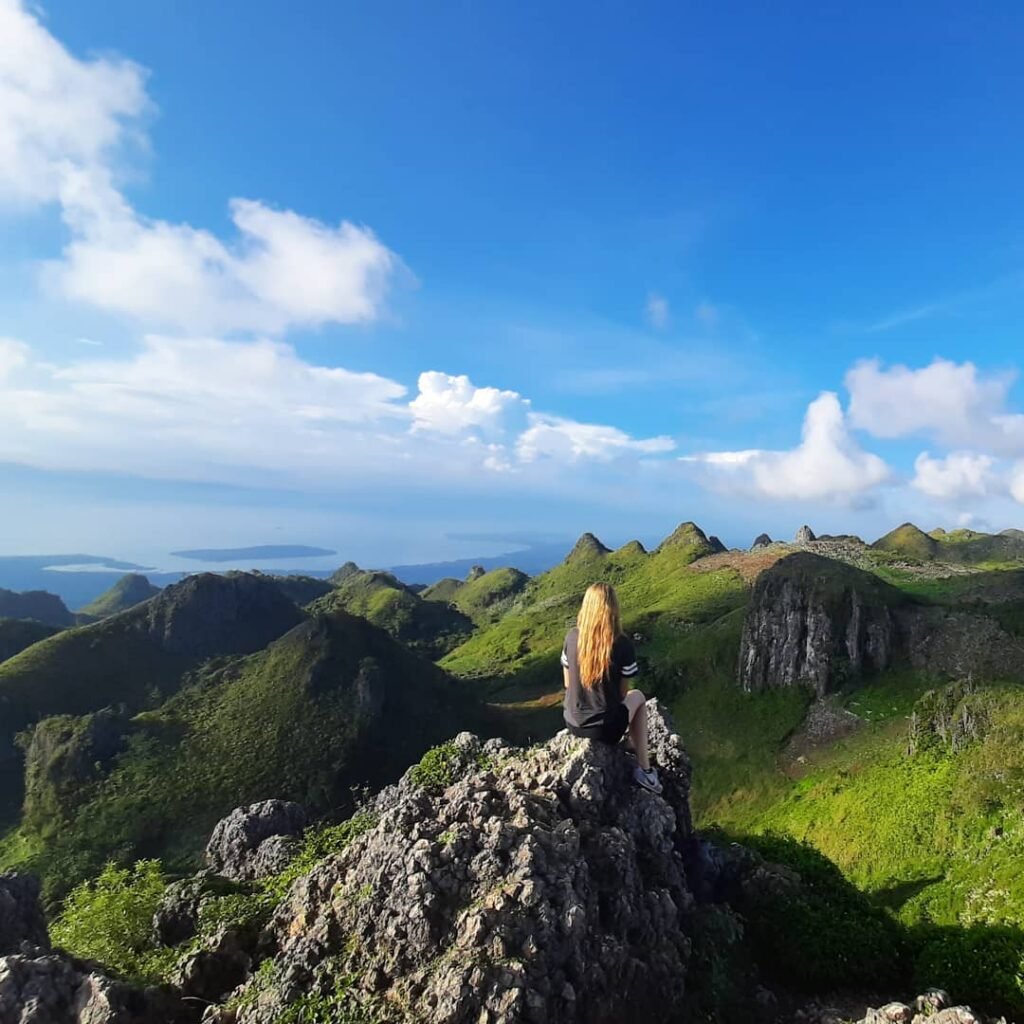
Travel Guide to Mt. Gulugod Baboy (2025) – If you loved the open grassland of Talamitam, this hike in Anilao offers similar rolling green hills but with a stunning “sea-to-summit” panorama of Balayan Bay.
🏖️ Best Beach Side Trips (Post-Hike Recovery)
Ultimate Guide to Fortune Island – Just a boat ride from Nasugbu, explore the abandoned Grecian ruins and cliff diving spots.
Little Boracay (Calatagan) Guide – Prefer relaxing on a floating cottage? This sandbar paradise is the perfect place to rest your legs.
Masasa Beach DIY Itinerary – Head to Tingloy Island for pristine, crystal-clear waters away from the mainland crowd.
Guide to Anilao Diving (2025) – Swap your hiking boots for fins and explore the world-class coral reefs of Mabini.
📸 Sightseeing & Landmarks
36 Must-Visit Batangas Tourist Spots – The complete bucket list for exploring the province.
Monte Maria Shrine & Glass Walk – Visit the towering Mother of All Asia monument and test your nerves on the glass walkway.